SENRAN KAGURA Peach Beach Splash

SENRAN KAGURA Peach Beach Splash

45 ratings
Capy's Survival Guide to Survival
By 3therwinG
For those who want zeni and medals, but are bored of playing the Venus Cup Finals for the nth time.
3
   
Award
Favorite
Favorited
Unfavorite
The Name of the Game
=====In PBS, card level and rarity is king. Without properly leveled cards, you can be sure to struggle in the game's more difficult stages, and Survival Mode is one of the fastest ways of grinding the game for zeni, card packs, and the coveted Memorial Medals

=====Grinding the V-Road Venus Cup Finals will definitely give you more zeni and a 5-star pack every time, but Survival Mode is the only method of grinding for memorial medals, and you're gonna want those when you're down to that last handful of undiscovered cards.
Stages and the Lobby
Switching to Global Matchmaking (really?)
For some reason, some people still don't know how to switch to Global Matchmaking from Regional.
The button prompt to switch is located on the bottom of the screen, "V" for keyboard. I don't use controller, but at least you now know where to look.


SP and Its Benefits
Looking at the lobby, you may notice a value called SP. Survival Points help to determine the rarity of card packs you get after each round. You earn 25 SP after each round(5 waves), and you lose 60 SP whenever you lose.

The top right of the lobby screen tells you how much SP is needed to increase the rarity of the reward card pack. The yellow stars are the rarity of the reward pack regardless of your SP, while the shiny stars add up to the rarity of the reward packs, if you have enough SP.

Assuming you never dip below the SP reward threshold, you can earn as much as four 2-star packs, four 4-star packs, and two 5-star packs in a single run of Survival.


Picking a Stage
Each stage has three specific points where the platforms are placed. This tends make the stage more or less difficult to clear. I'll be going by personal opinion, so don't freak when I say one stage is easier or more difficult than you think.

Pirate Base
Case in point. While the terrain in Pirate Base is already pretty uneven, Point B and C is placed at the worst possible places i.e. right next to the pirate ship. This already makes it pretty difficult to dodge and target enemies. If you try to defend one of the side points first, enemies who spawn near A can easily drop down next to the side points. Arguably the hardest stage to clear.

Sakura Fields
On the other side of the spectrum, Sakura Fields is probably one of, if not the easiest stage to clear. Enemies rarely spawn next to the side points, which are also protected by walls, allowing very few ways for enemies to reach them.

Toad Springs
Not as difficult as Pirate, but you'll be fighting in close-quarters for the most part. Chances are enemies will almost always spawn close by, sometimes between points

Tropical Athletics
A fairly open stage with the platforms far apart. It might be worth defending just one point here. Some waves also have enemies spawning on the elevated terrain near the side points.

Shinobi Estate
The platforms don't get any closer to each other than in this stage. Their close proximity makes it easy to defend or lose multiple platforms quickly. Enemies also sometimes spawn on the rooftops above the side points.

Snow World
A pretty spacious map with a few obstacles. The side points are surrounded by small ruins that can block your shots. Also make sure not to fall into the holes between the points.

Splash Stadium
Probably one of the easier maps thanks to the wide open spaces, allowing no cover for enemies to hide behind other than the barriers surrounding the stage area.

Pinball World
A personal favorite, this stage is pretty wide open, with a few pillars here and there.


The Bad Girls
This section will describe the kinds of grunts you'll be facing.
Because I feel like it, I'll be giving these guys their own names.
  • Gropers

    Typical cannon-fodder enemies that aren't difficult to avoid. They can do finger-guns and attack you from range if they're far enough

    Granted, this attack is fairly inaccurate and not very damaging, but might as well know that they're capable of doing it.

  • Pool Noodles

    These enemies come in two flavors: Pink and Blue. Pink Pool Noodles aren't too bad, but their attacks can knock you off your feet.

    Blue Pool Noodles are the much more dangerous variety. They appear in the later waves, and have been the bane of many platforms and players. Their notorious attack involves riding their thick rods right into their enemies, hitting them repeatedly. They can loosely turn as they slide forward, too.

    In the unfortunate event that you get caught in such an attack, you can try to repeatedly dash sideways away from it. It doesn't work all the time, but you might escape and save yourself from being KO'ed or knocked down.

    They pose a real threat since they will use their sliding attack on you and your platforms if they're not in melee range.

  • Donuts

    Probably one of, if not the most annoying enemy you'll be dealing with. Their first attack throws bouncing water balloons forward, while their second throws balloons all around them. Both attacks will knock you back if you get hit by them.
    Despite this, they don't deal a lot of damage to the platforms, assuming their attack hits in the first place. So don't approach them even if they're attacking your platforms. The last thing you want is to get blown away while your platform is getting hit.

  • Pink Drone

    One of two variants of the Puppet Drone. This one simply squirts shots of water at unfortunate bystanders.

  • Blue Drone

    The more threatening version of the two Puppet Drones. Its mounted weapon fires a slow-moving projectile that can knock you back.

  • Detonators/Bombs

    Flying bombs that like to blow up in your face. They're small, deceptively nimble, and can take a beating in later waves.

    If they get close enough, they start their self-destruct sequence. You can hear their distinctive dinging sound when they reach critical mass, so typically all you have to do is jump or dash away from the noise.

    In later stages, Bombs can be difficult to pop en masse without using a strong AoE card. this isn't good considering they can two-shot platforms at that point, so one thrilling method is to bait them into trying to attack you instead of the platform by getting closer to them first. as long as you dont get surrounded, you should be fine, but don't start whining when you get caught in a blast.

  • Blimps/Blowfish

    The big brother of the regular bomb. Blimps are exceptionally tough, even for a minigun in firepower mode. They are much slower, but that doesn't make them any less threatening.

    The damage from their blast is enough to KO you in one hit, even at 300 HP.

    Like bombs, these can also be baited into wasting their suicidal attacks, but you know the risks involved in doing so.
Turrets
These stationary threats will occasionally pop up in some of the later waves.


Sprinklers spray bullets around themselves when enemies close in. These bullets are similar to the Showergun's direct stream, except they're sprayed everywhere. These shouldn't be a problem, unless you accidentally land next to one.


Grenade Launcher Turrets are self-explanatory: they fire the same bouncing shells that your Grenade Launchers fire, except the turrets fire more slowly.


Missile Turrets fire 3 rockets that function similarly to the Rocket Launcher's homing missiles, but the turret fires more slowly, the three rockets fire at the same time, and home in on you more loosely.


Pilebunker Turrets are no threat from range, but do not go anywhere near them. They can slam the immediate area, dealing enough damage to trigger your auto-barrier from full health.


Sniper Turrets are just as dangerous as they can poke you pretty bad, and from a considerable range to boot. They don't lead their targets, so you should be fine if you keep moving, preferably from a distance.
Warming Up Your Body
This section will touch up on some techniques that you're probably already familiar with. If not, then you should take you time to read them.

Movement
There is a bit of recovery after certain actions where you can't move, shoot, or use skill cards. This is usually after a dash, landing from a jet jump, or after a melee attack.
  • Landing from any jet jump will usually cause a small recovery animation. While this animation is fairly negligible, you can cancel it by reloading as you land. I've had cases where I didn't get recovery animations while landing from a jet jump, but as a general rule: Landing from a jet jump has a recovery animation, normal jumps don't.

  • Cancelling a dash's recovery by jumping (or melee-ing) will keep you from being a stationary target. While you're in the air, you'll be free to do all sorts of actions, from shooting, reloading and doing a jet jump.

    While it may seem that a short dash has a fixed water cost, you can perform one so long as you have at least 1 water (each tank equates to 250; total of 1000 water). And because you're always passively regenerating water (very slowly), this means that you can always do a short dash. Use this knowledge to get away from a situation when you find yourself empty.

Combat
  • Melee Attacks
    We don't need to talk about the lengthy recovery animations of melee attacks. Melee attacks on the ground can be cancelled by jumping. When you land, you'll be ready to do another melee attack. There is no known way of cancelling melee air attacks.

    Notice that your character automatically approaches targets when you do a melee attack. This tracking only happens if your character is facing the enemy, not your camera.

    You usually can't do an air melee right after doing a ground melee. Yūyaki is an exception to this. Note that I haven't tested this for Bashō, Sonico, Neptune, the DoA and Ikki Tōsen characters.

  • Quick Reloading by Jump-Cancelling
    A simple technique that is a must when you want to keep shooting. Weapons have a recovery animation after firing. This is most noticeable for the Sniper and the Gatling Gun. You can't reload during this recovery, but you can jump after firing, allowing you to immediately start reloading.

  • Dash-Attack
    =====A maneuver that fits well with weapons capable of sustained fire (AR, Dualies) and those that need some extra mobility (Sniper, Minigun). It is performed by shooting during a short or long dash. Once executed, your character will slide stylishly along the direction of the dash. You're still free to shoot while sliding, making it an ideal strafing maneuver. However, you won't be able to reload or use skill cards until you're done sliding. The later you shoot after a short dash, the shorter the slide will be. You can cancel the slide early by jumping.

    =====You don't need to keep firing to sustain the slide; all you need is one shot to perform it. This allows slow weapons like Miniguns and Snipers to move quickly without having to use up a lot of water in long dashes.

  • Wake-Ups
    As previously mentioned, Donuts and Blue Drones are notorious for being able to knock you back with their attacks. If you find yourself knocked off your feet, you can quickly recover by dashing. The opportunity to do this usually comes up soon after you character says her voice line after being knocked back.

    ==Since you recover by dashing, you can counter-attack by doing a dash-attack.
    ==This technique also works for when you get staggered (i.e. getting hit by the Pool Noodle slide)
Decks and Tactics
You'll notice that enemies have a tendency to spawn right next to the platforms. Obviously we can't solve this with water guns alone: there's just too many enemies, and as the waves progress, they only get tougher and stronger. That's where our cards come in.

Now, people have their own preferences in terms of what cards they use for Survival, but the most common practice is to:

  • include highly damaging AoE cards (i.e. Miyabi, Leo, Yozakura, etc).

  • use Miniguns combined with Kafuru/Harucards

As for me, I recommend two cards that I feel is vital to success: Katsuragi and/or Yomi cards.
  • I choose these two cards not because of their damage, but rather their ability to push back enemies and knock them off-balance. If you know how long it takes to wait for your character to get back up, then you know how powerful these can be. I tend to prefer Kat cards more because of their 1 Cost.

  • The idea is to use these cards whenever enemies get too close to the platforms, pushing them back and delaying them long enough for you to gun them down. And because Kat cards have 1 Cost, you would almost always have one ready. These damage cards will take 2-3 slots.

  • The other 3 skill cards can be used for buffs that best suits your weapon.
    Feel free to add a solo Haruka buff if you think being Soaked will benefit your weapon, but I don't recommend having any more than 2.

  • As for pet cards, Kid Kagura will give you the shield that you'll need to take hits without being knocked back or staggered. You can go for Destructors like Amano and Baby Bat if you want to focus more on your skill cards, or you can go for the Puppet Ball or Luka if you want some extra DPS.
General Survival Tips
  • Turrets tend to spawn around the center point. This is one reason we prioritize defending the side points. The other is that, being in the center, you're likely to get surrounded by enemies. Better to pick point B or C and fight enemies coming from one general direction.

  • Shields and healing, I feel, is not needed for Survival, especially the latter. The focus here is your platforms; glass cannon decks are proven in this mode. Any allies that are down when you clear a wave will be revived, so don't worry.

  • Speaking of which, once you've cleared the area around your defended platform, you can still take the time to revive fallen teammates for the Rescue Bonus that increases the rate by which your cards charge up. This is beneficial especially for players who have high-cost cards, and solo players will have many opportunities to revive fallen CPUs.
Co-op Survival Tips
  • There's one big problem that tends to affect having other players in Survival with you. Namely dodgy connections and desyncing which tend to lead to platforms getting hit by enemies that shouldn't be alive anymore.

    You'll see how good or bad the latency is judging by how your teammates move around and whether or not they're rubber-banding.

  • Do bear in mind that your teammates can block your shots that are supposed to be for the enemy: Be careful not to block allied shots.

    to ensure the safety of your platforms, make sure everyone stays on one point. With this, you should be able to stay safe and eliminate spawning enemies on everyone's ends.

  • Of course, having more human players means not being limited to the premade CPU decks. You'll be free to be more liberal with your card picks, like Ryoki team cards, as long as someone, or everyone, has the means to push back enemies from the platforms.

  • It is commonplace to soak up teammates at the start of a round. Any moment you're not shooting the enemy, you can spend soaking your allies. Just don't do it right before a wave starts. Wouldn't want the Soak-up animation to stop you or your allies from shooting.
Decks and Tactics II: Solo Boogaloo
It's no secret for any senran game that player count is quite low, so finding random people to play with you isn't something that tends to happen. In such cases, you'll have to learn to finish runs of Survival going solo.

Picking Your CPU partners
CPUs are better than nothing. While all of them work well as distractions to keep enemies from focusing the platforms, some of them are better than others.
==What we look for in a CPU are:
  • The kinds of cards they have
    And/Or
  • The kinds of weapons they use

==And no, we're not looking for Minigun users; all CPU weapons perform poorly after the 10th wave anyway. We're looking for support or explosive weapons, those that can easily soak you up.
==As for cards, we're looking for Kat and Yomi cards as well as Haruka team cards. All CPU cards are level 1, so damage is not what we're after, but utility.

==some characters are listed here, but feel free to look at each character's deck in-game
  • Katsuragi uses a Kat card and a Yomi card
  • Haruka uses a Showergun and has a Haruka team card
  • Homura uses a Rocket Launcher and has a Miyabi card
  • Ayame uses a Grenade Launcher, and has a Kat card and a Yomi card
  • Yūyaki uses a Spraygun and has a Haruka team card
==You don't have to limit your picks to these four. Any character that can easily soak you and/or has any disruptive cards will do.
==A team of explosive/support weapon users usually gets you Soaked when a round starts. Even if they don't, they always give you a significant amount.

Choosing Your Weapon
The Minigun has been proven as the go-to weapon when it comes to easily clearing Survival Mode, but I don't think it'd be very fun if that's all you're gonna use. There must be ways to clear Survival solo using the other weapons, for variety's sake. And so, they will all be listed below.

Minigun
Starting with the A-lister, the Minigun's sheer firepower clears out waves of enemies in record time, offset by its low maneuverability and terrible reload speed
  • The Minigun deck's buffs consists of Kafuru cards. You won't be Soaked all the time, so they can be used as substitute. It refills your water so quickly, you can keep firing, even in firepower mode. Kafuru buffs tend to last longer than most buffs, so you can go with 2 instead of 3. The extra card can be used for a second Haruka solo card.

  • It's worth noting that the Minigun, along with some other weapons, has damage falloff; stay reasonably close to enemies for maximum damage.

Assault Rifle
  • The AR is, as far as I'm concerned, the most reliable solo survival weapon to use, especially if you plan to do Survival at the start of the game.
    The weapon's three-shot burst mode not only deals more damage per shot but also makes many enemies, like pool noodles, flinch on hit. This allows you to stunlock small groups of enemies and can save you and your platforms several times over.
  • The Assault Rifle is also one of the weapons affected by damage falloff.

Showergun
  • One of my favorites. It deals just as much damage per bullet as a Minigun in firepower mode, but consumes a lot of water. Naturally, Kafuru cards are recommended.

  • The ranged mode has bullets that home in on enemies, but still fall from gravity. Aim upwards to make sure the bullets home in properly.

    It's best not to use aim assist for this, since this will aim the Showergun directly at your target. The bullets will probably fall in front of them if they're fired this way.

Dual Pistols
  • A rapid-fire weapon that incentivizes close-range fighting because of its damage falloff in firepower mode, which is near-melee range

  • Because of such a short range for damage falloff, I recommend either Ryōbi cards or Sōji range cards. Range buffs increase your total range, including your falloff range.

Handgun
  • A moderately powerful weapon with considerable range. Its full-burst mode can clear even the final waves, with the help of Ryōbi cards.

    "But full-burst empties out all my water. How can it clear waves when I have to reload after every burst?"
  • Except you don't have to reload after every burst. Full-burst mode is less of a mode that fires many shots quickly than it is a mode that shoots once, but fires many projectiles quickly. After you fire once in full-burst, you can do other actions while projectiles are still firing off of you.
  • The number of shots per burst depends on the amount of water you have i.e. 9 shots on full water, ~4 shots on half water, etc.
TL;DR: I just started the game and I want to do Survival right now
  • Your first order of business is to get some new cards.
    The cards we're looking for are:
    ----Kid Kagura, Luka and/or Hanzō, as well as any destructors
    from Paradise Episodes (Paradise Pack)
    ----Sōji and Yūyaki cards
    from V-Road Challenges (Queen Pack)
    ----Katsuragi cards
    from Hanzō Story missions

    and optionally:
    ----Ryōbi cards
    from Hebijō Story missions
    ----Harucards
    from Crimson Squad Story missions

    NOTE: Some of these cards are unlockable from other packs as well.

    Queen Packs are unlocked in the shop by finishing the V-Road School Cup and Paradise Packs are unlocked by finishing any of the Paradise Episodes (around five missions).
    • for Paradise Episodes, I recommend finishing Ayame's Business since you'll have a CPU team to help you out.

    Once you start your Survival lobby your cards would look roughly like this:
    if your first run of Survival doesn't go well, your runs will get easier as you upgrade or replace your cards with stronger ones.

  • the Assault Rifle will be your best friend when starting out, thanks to its stunlocking ability mentioned in the last section.
  • the idea is to use your Kat/Yūyaki cards to push enemies back when they get too close to your platforms and use ONE damaging AoE card (like Leo) to clean up the remaining mobs faster.
    • Destructor pets are there to be used ASAP to cycle cards faster.
    • the Sōji speed cards will push the AR's DPS a bit higher, make stunlocking easier and, being a buff card, can be used before a wave to free up space for the next card
      with all of these cards, it is possible to solo Survival mode with a level 6 or even a level 5 AR
3 Comments
karasmorrigu 19 Jan, 2022 @ 1:14pm 
Well done!
Miuna 11 Nov, 2020 @ 1:30pm 
I might be late to the game but this guide is very informative, just finished all of story and V-challenges and tried some survival, it's pretty tough solo after wave 25-30 (though i have been running with Rocket on Minori so that might be why). Really helps, especially when picking CPU to help, as they always feel useless.
LandoCalrisian 21 Jan, 2019 @ 9:04pm 
As a CPU teammate, Murasaki always starts each match by soaking you, as long as you don't move.

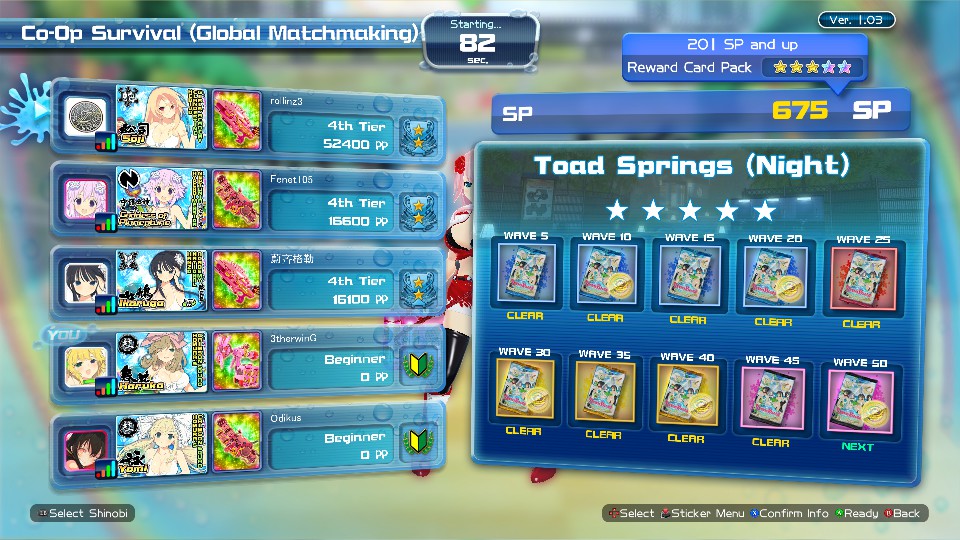
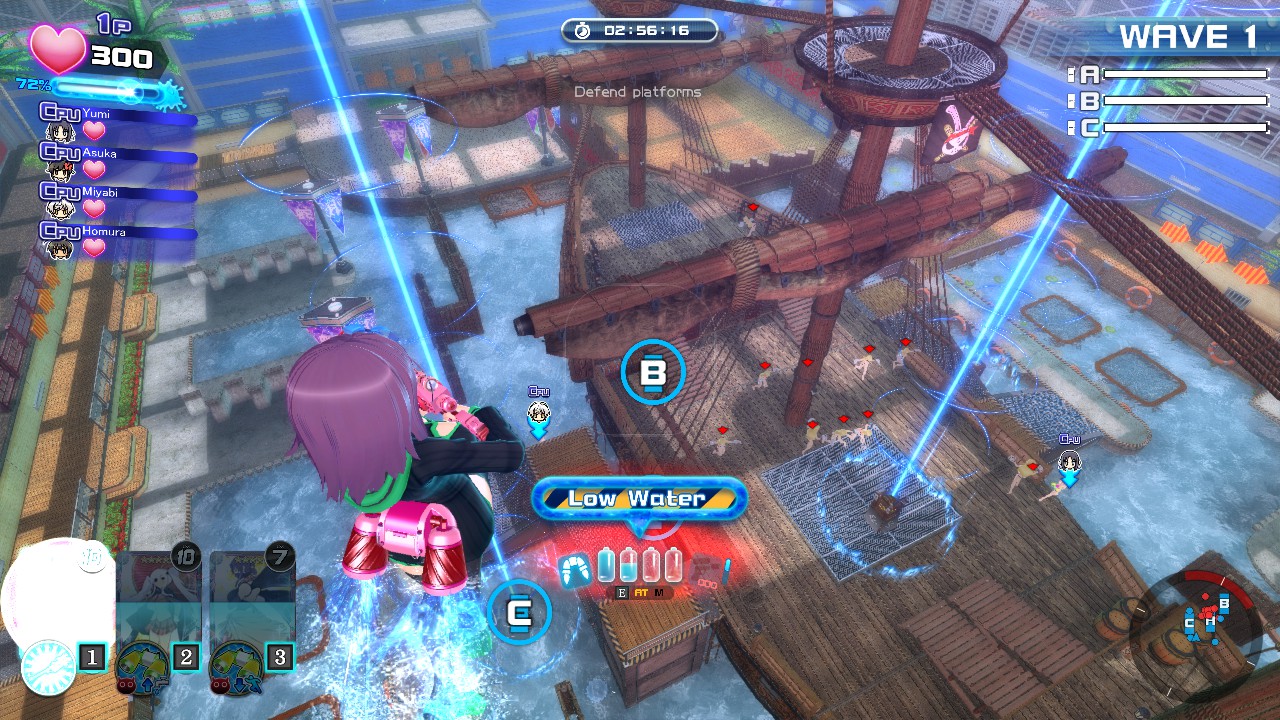
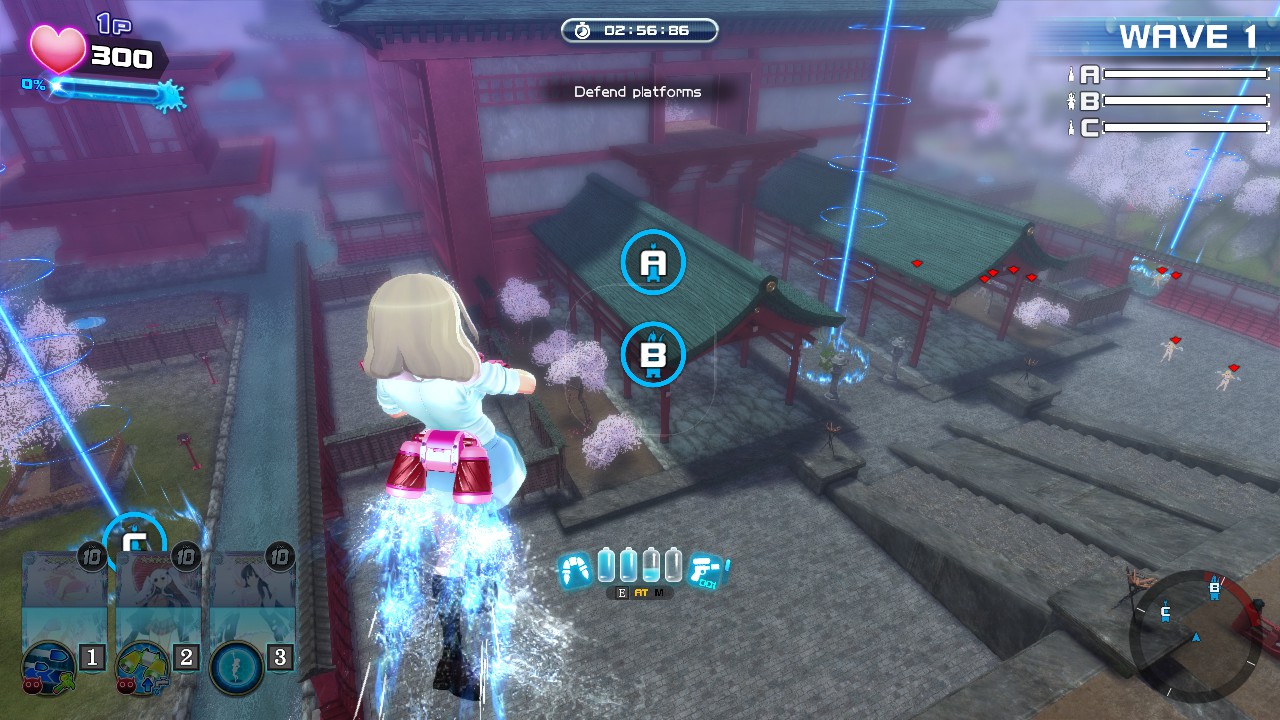
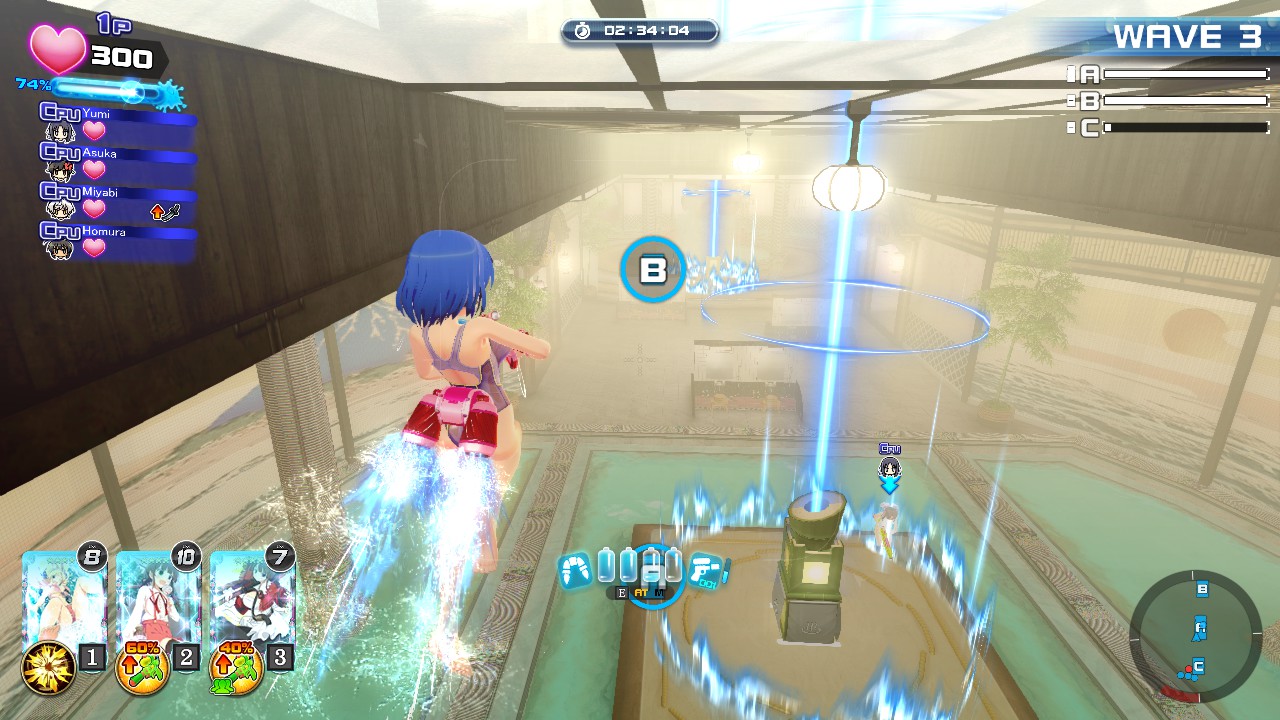
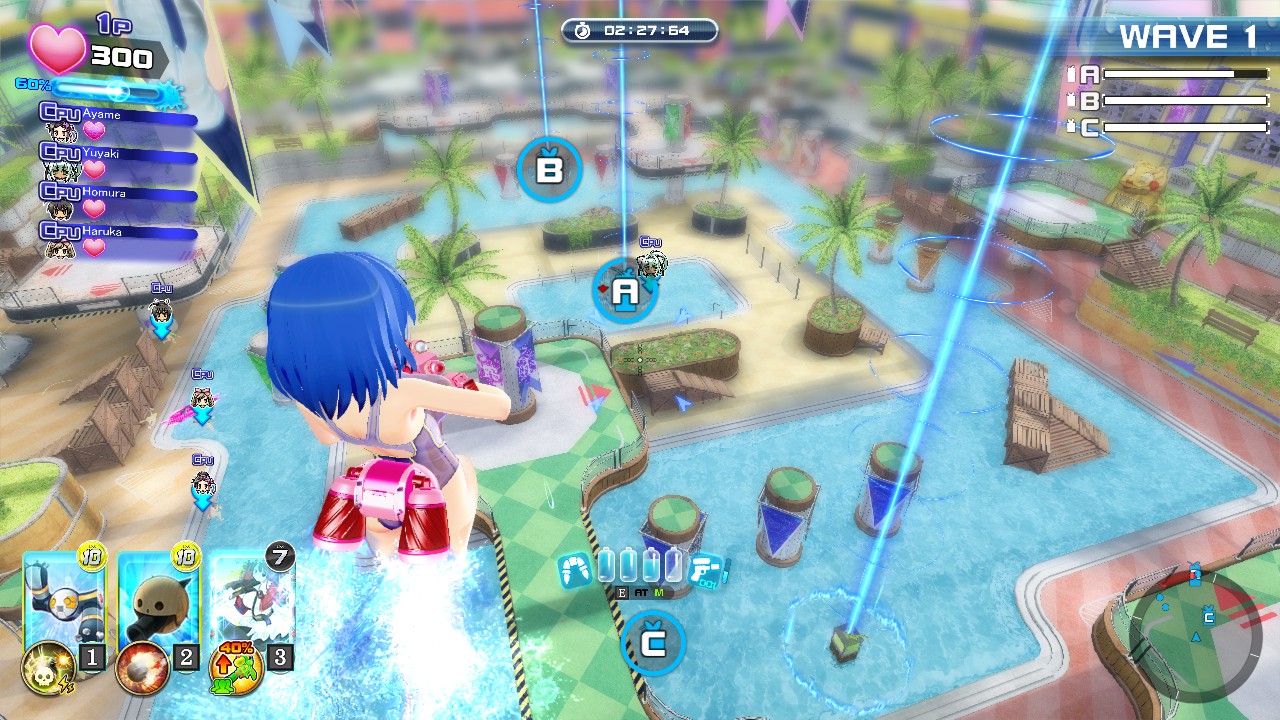
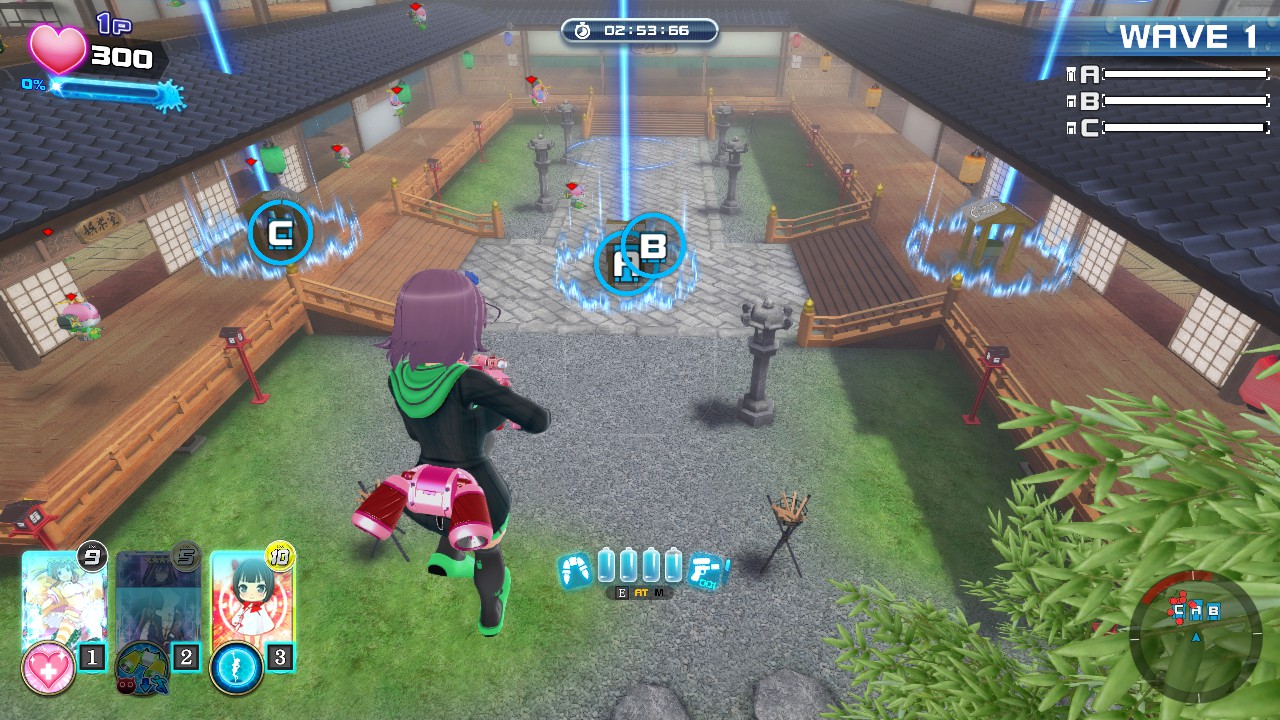
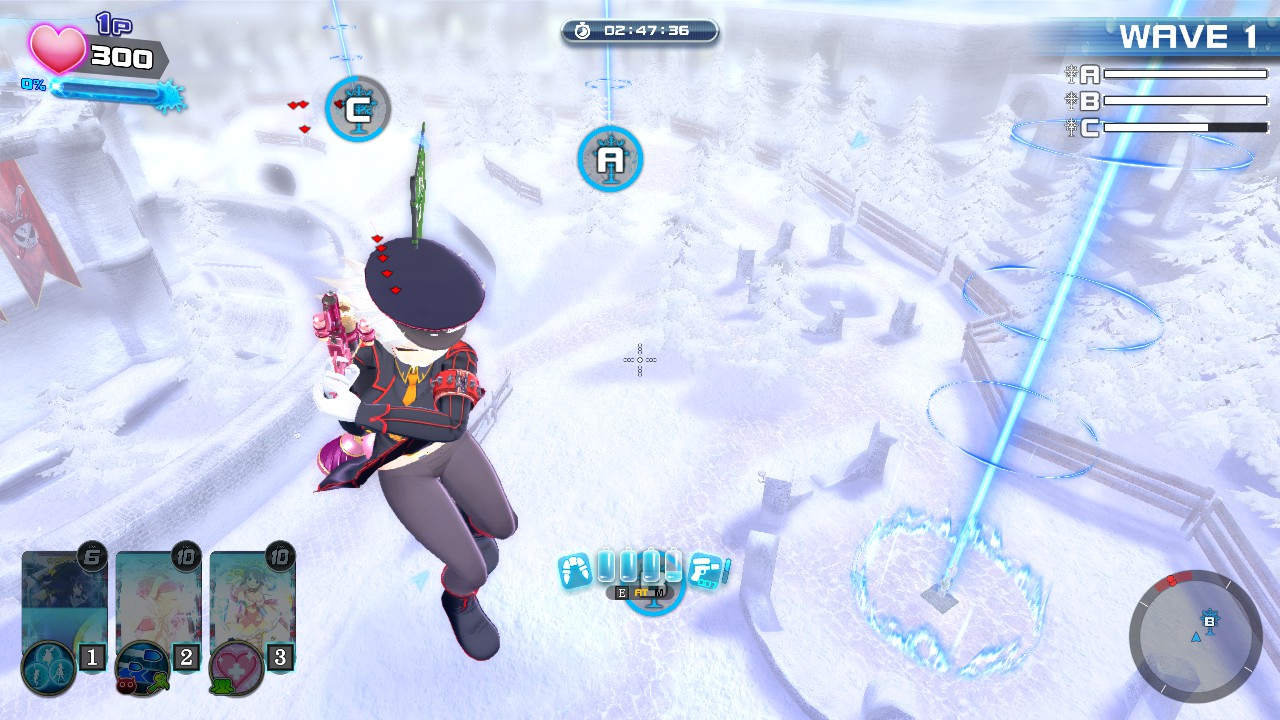
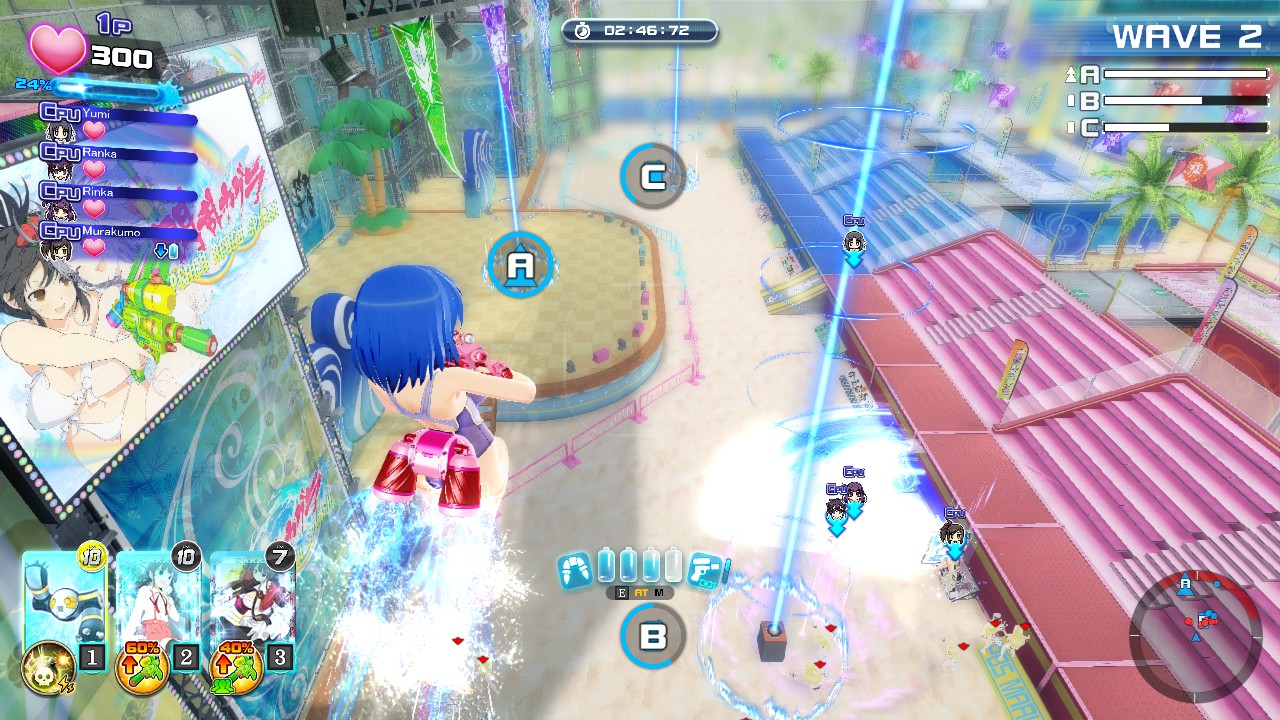
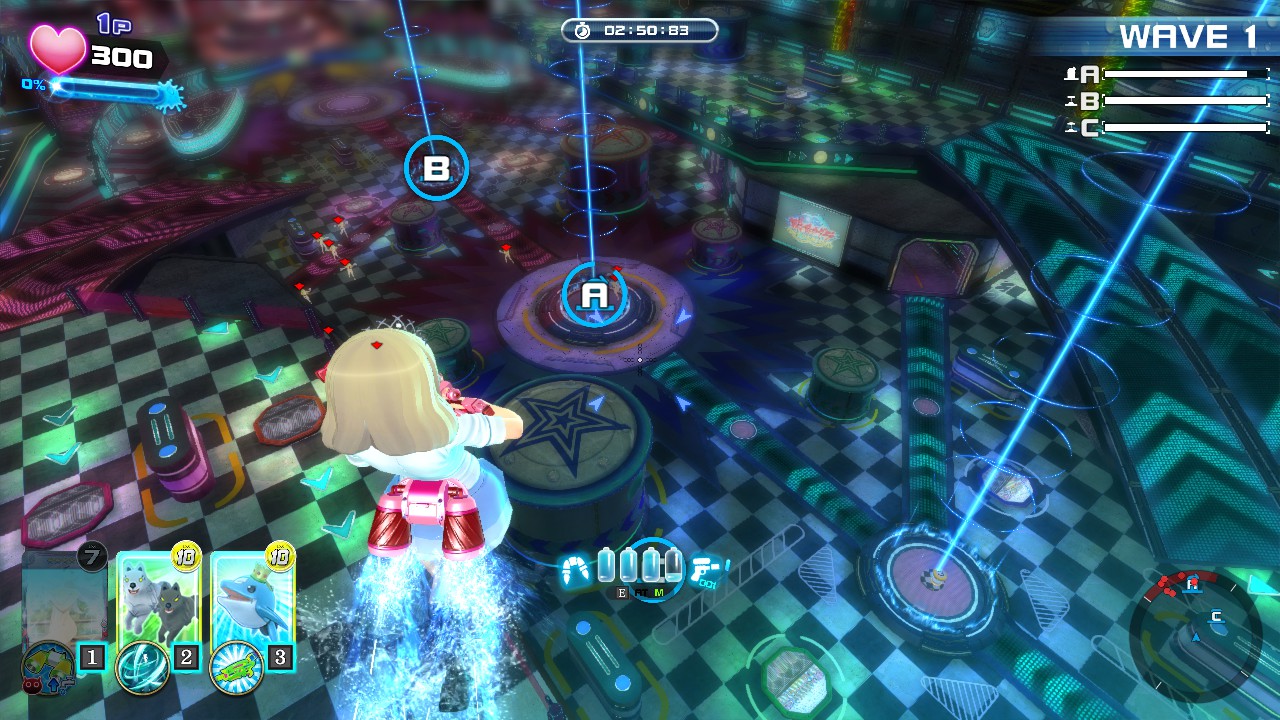
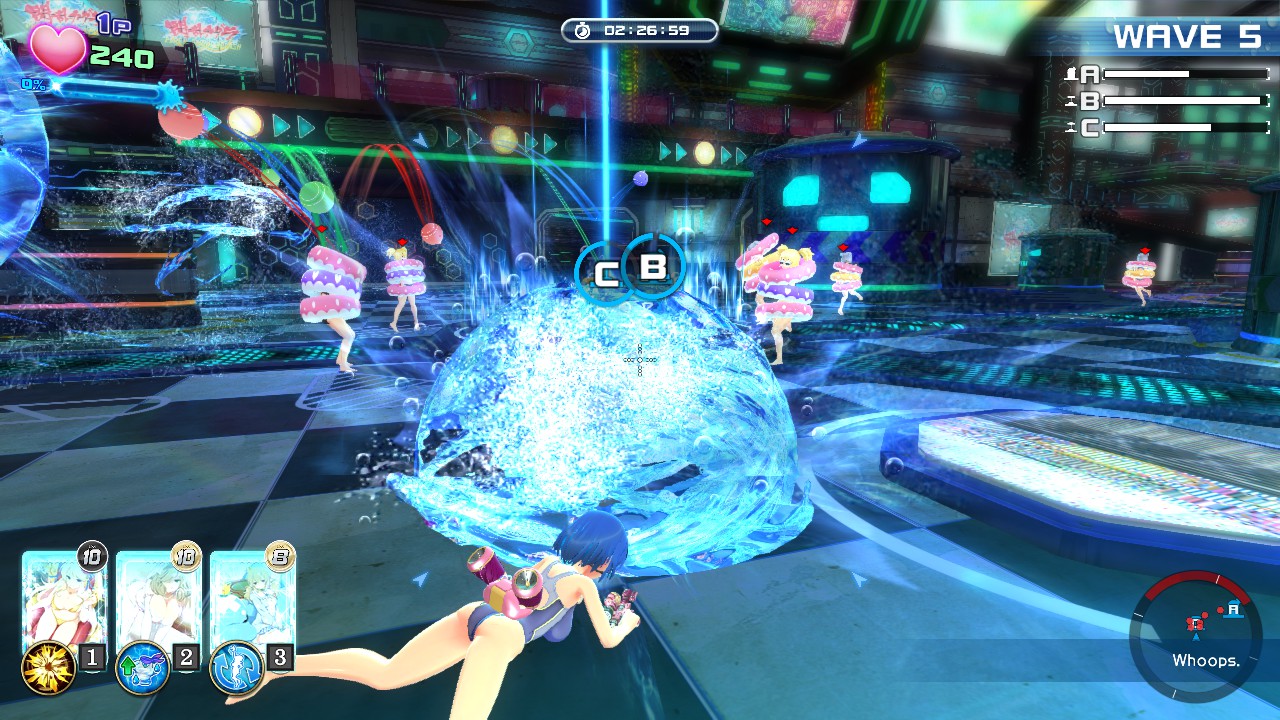
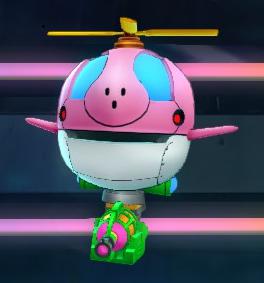
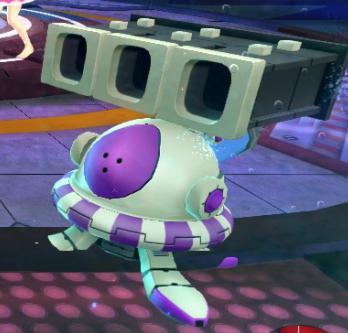
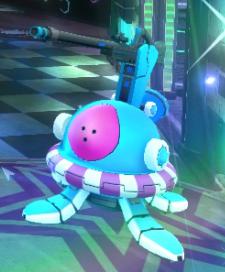
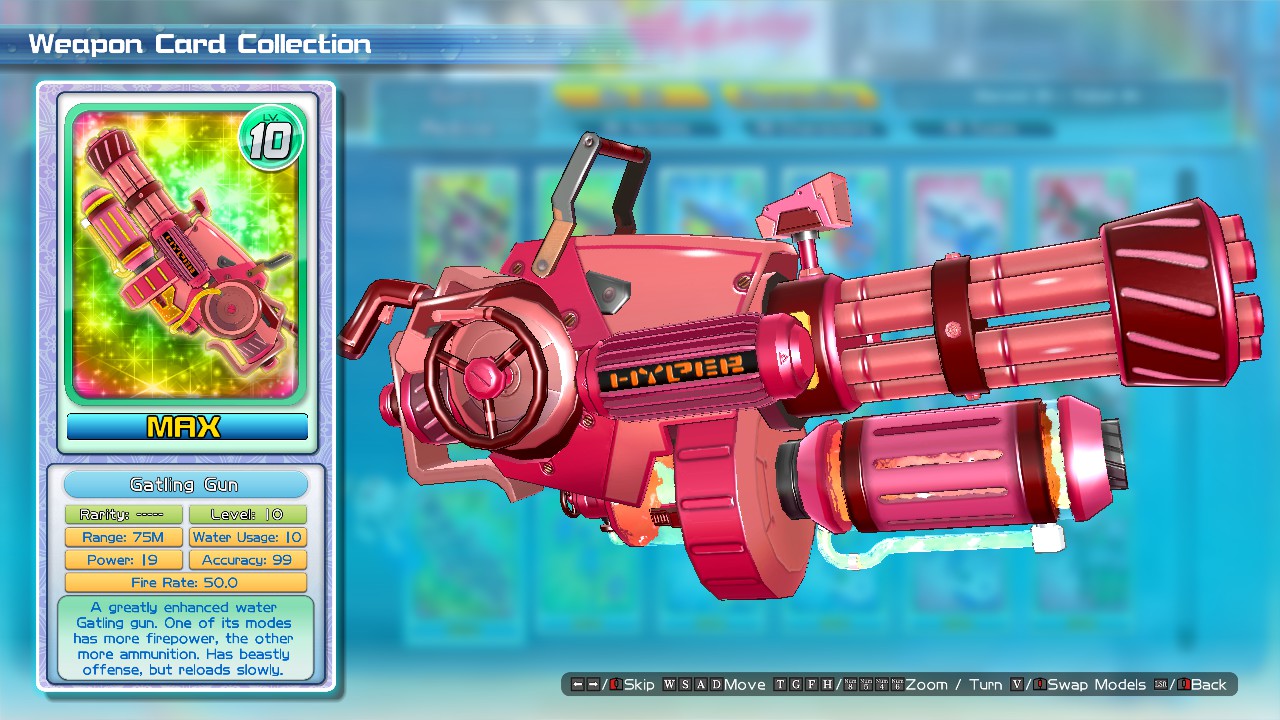
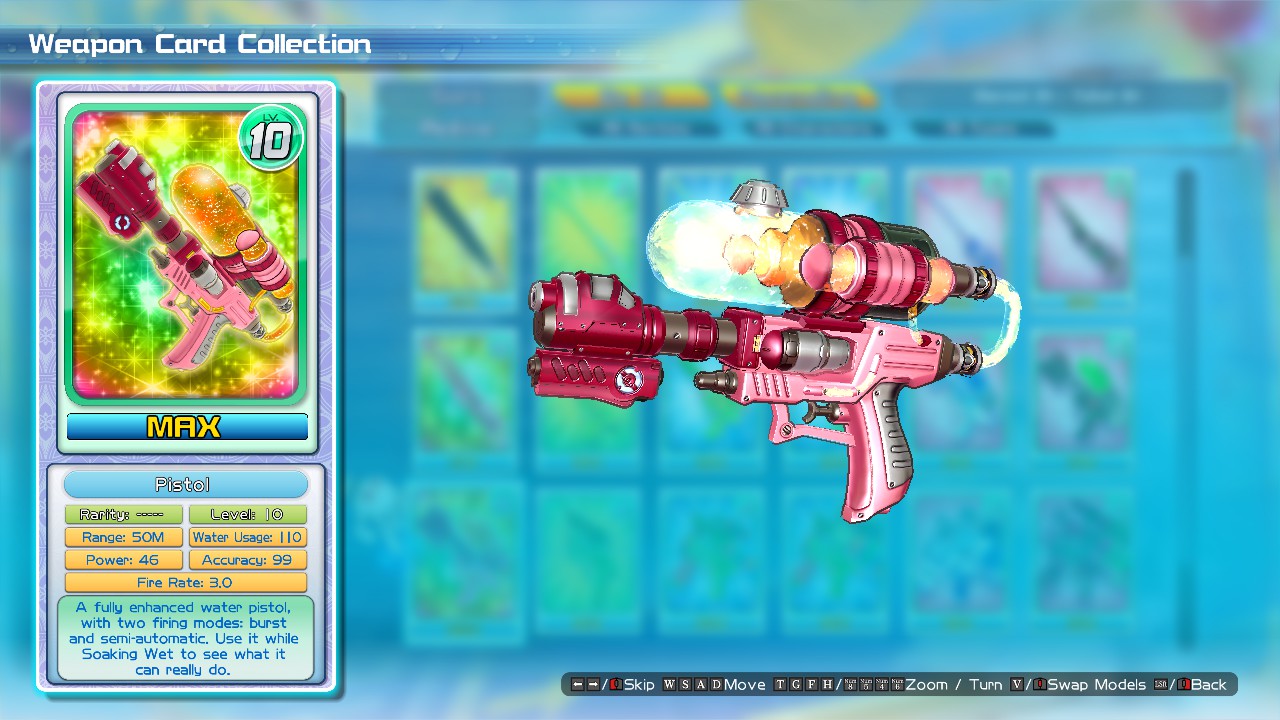
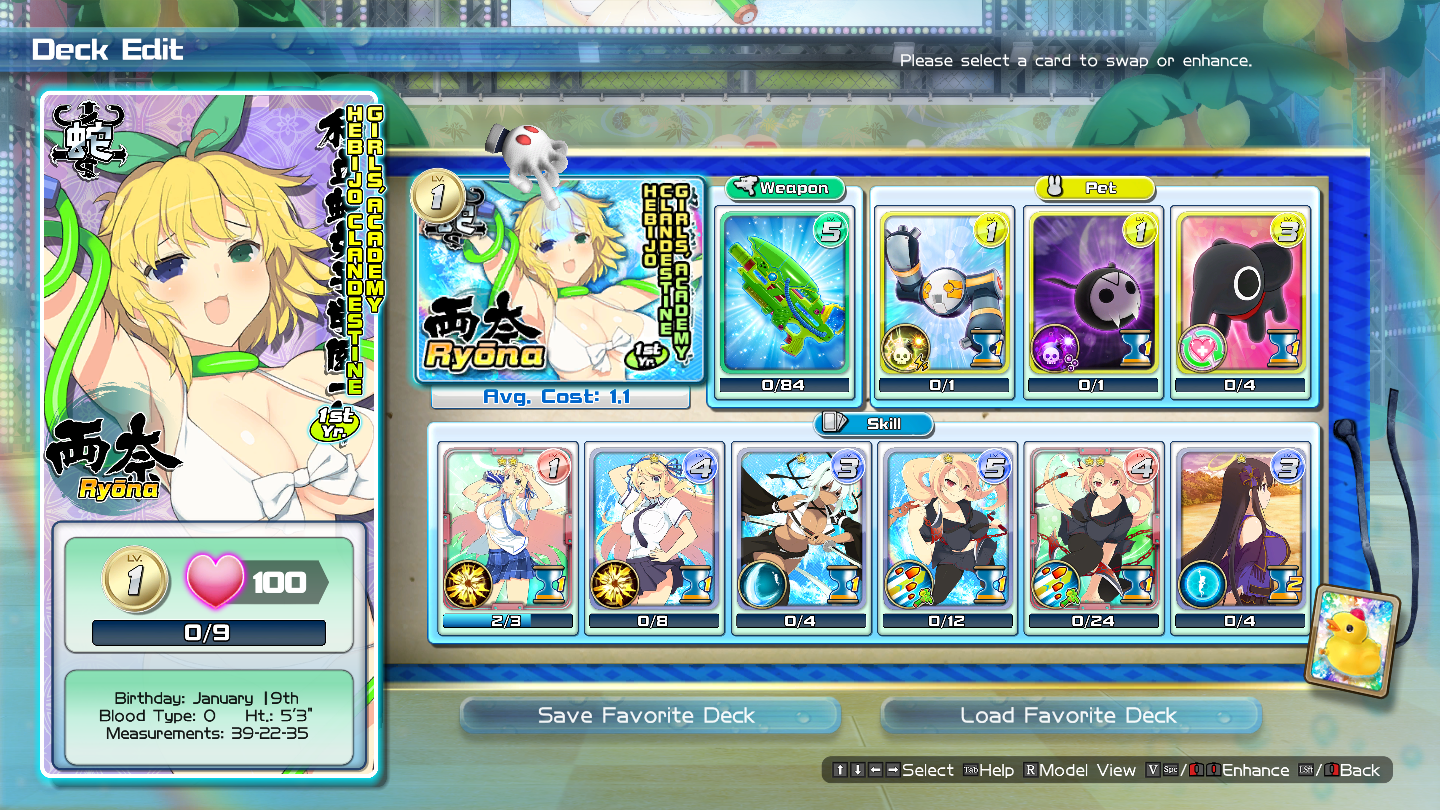
Using a character with the minigun and a deck of all self-soak cards, plus 4 x Murasaki and pet cards with fast or no cooldowns (dogs, poison bombs and flying shock thingy), you can basically have max soak gauge up the entire time, which you can combine with "firepower mode" on the minigun for the best and fastest firepower in the game.

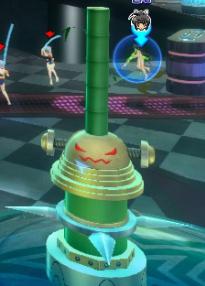
That makes the first 40 rounds on Pinball or Stadium pretty much trivial. For the last 10 rounds you just have to have a mental note of where enemies spawn, so you can be facing the right direction before they destroy one of the platforms.

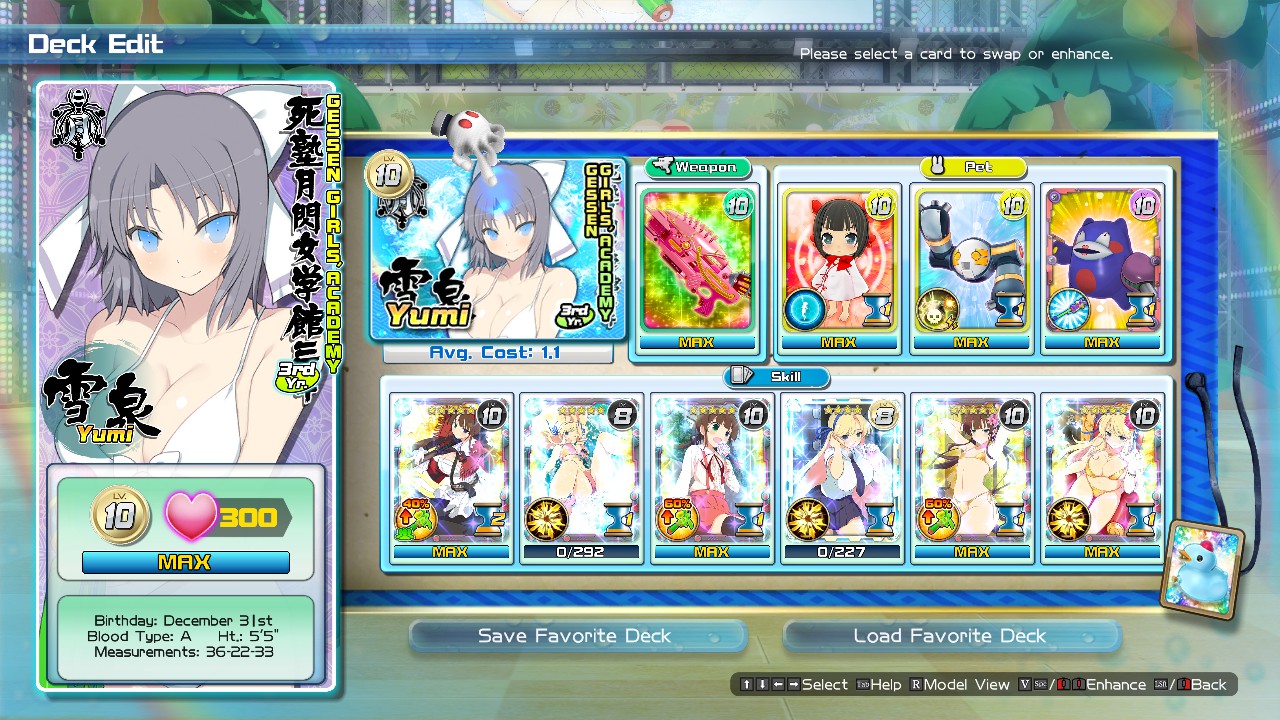
Once you're down to about 15-20 cards left to collect, unique cards drop so infrequently in card packs that it's probably faster just to farm medals by repeating rounds 1-20 on survival ad nauseum. Takes about 5-8 minutes per 2 medals that way including menu screens and not worry so much about zeni.