Spooky's Jump Scare Mansion: HD Renovation

Spooky's Jump Scare Mansion: HD Renovation

100 ratings
Specimen Tier List
By SaikouTM
A tier list of the effectiveness of all Specimen in Endless Mode.
2
3
3
2
   
Award
Favorite
Favorited
Unfavorite
Introduction
There are a lot of Specimen in this game. Be it in the original mansion, the Karamari Hospital or the Endless Mansion. But obviously, not all Specimen are created equal, so some will be more of a threat than others. Let's put them in a tier list then, shall we?

This is a "port" of the same thing I did on the Wiki, except updated to fit the new update and with some fixed stats on stuff I just got plainly wrong. This will be in two parts, one describing each Specimen's stats and a short description of their abilities and another containing the actual tier list.

I'll also be mainly covering their stats in Endless Mode, so no DLC-specific things for the Monsters or Dolls.
Specimen Stats (Part 1)
First off, here have a run down of the stats.

Stats

Attack

Mostly borrowed from another blog related to tiers of the monsters. This determines how hard a can specimen hit.

5: Capable of killing the player in a single hit.

4: Can deal an immense amount of damage to the player, enough to kill them in two shot.

3: Can deal a large amount of damage to the player, enough to kill them in three shot and leaving them heavily crippled in two hits.

2: Can deal a decent amount of damage. Usually able to deal with the player in 4 shots.

1: Deal a small amount of damage. Requires more than 4 shots in order to kill the player.

N/A: Specimen does not deal damage in a traditional way.

Speed

How fast the specimen can move.

5: Moves at an extremely fast speed, most often faster than the player can react, let alone outrun.

4: Moves at speed comparable to the player's running speed, if not higher.

3: Moves at a speed equal or superior to the player's walk speed, yet inferior to their running speed. Might outrun the player in the long run, outside of specific weaknesses.

2: Moves at a medium pace. Below the player's walk speed but still capable of putting pressure on the player in cramped spaces.

1: Moves at a slow pace. Unable to keep up with the player.

0: Moves at an extremely slow pace, requiring the player to wait for the specimen in order for it to be able to hit the player.

N/A: Specimen does not physically move as its method of movement.

Mobility

The mobility options of a monster.

3: The monster is incorporeal and can go through walls and above gaps.

2: The monster can fly over most gaps.

1: The monster is grounded and physical.

Durability

How the specimen reacts to being hit by the axe/sword.

4: The specimen is immune to attacks from the player.

3: The specimen will be briefly stunned or incapacitated when hit, but it will be able to resume chase after a few moments.

2: The specimen will be "knocked out" when hit by the player, causing it to be incapacitated for the duration of the current room.

1: The specimen will be "killed" by repeated strikes from the player, ending its chase prematurely.

Support

The value the monster has as a "support" to other monsters. Sheer strength or speed is usually not counted as "support" unless they have a special property that limits the player's options due to said strength and speed.

3: High. The sheer presence of this monster can make relatively easy monsters difficult. Several monsters of this level can be almost impossible to win.

2: Medium. Their abilities can turn the tides if lucky, but it is generally not enough to secure a kill on their own.

1: Low. Their abilities range from minor to nonexistent.

Stealth

A relatively minor stat that can nonetheless put a dent in the player if not taken care of. Relates to how hard it is for the player to know if the specimen has joined the chase.

4: The monster shows almost no signs of its presence under normal circumstances outside of universal signs such as lag during the loading of the room or the "No Escape" menu message.

3: The monster can hide its presence relatively easily for a limited amount of time. However, they possess obvious signs of their presence, such as idle sounds.

2: The monster has difficulties hiding, due to having an effect on the room or screen.

1: It is impossible for this monster to hide, it has either has a 100% chance to play its music when appearing or possesses an obvious effect that will activate immediately.

Profiles

Specimen 1

Attack: N/A

Speed: N/A

Mobility: 2

Durability: 1

Support: 1. While it can potentially frighten or block the player, it is easily prevented by sidestepping or attacking it.

Stealth: 4. Notably the only Specimen to NOT trigger the "No Escape" message. The only way to detect it before its (only) attack is the slight lag included in the loading of the room, which is not always accurate.

Specimen 1 will pop out of the walls (and rarely, ceiling) at random, creating a small barrier and producing a loud noise. Can be cut off with a single hit. Does not attack.

Specimen 2

Attack: 3

Speed: 3

Mobility: 2

Durability: 3, 2 in specific situations (It can be knocked out when attacked over a gap)

Support: 2. The puddles it creates can slow down the player and disturb their general pacing.

Stealth: 2

The first true enemy encountered by the player. It can fly and deals a decent amount of damage despite being encountered early in the game. Its main ability is the ability to produce puddles of ink, which can slow down the player when they walk on it. It can also come out of said puddle instead of the door if the player went by a puddle before its appearance. It will temporarily transform into one when attacked, before resuming the chase. Attacking it while it's floating over a gap or over a pool of acid will knock it out until the next room.

It is also one of the only monster to not attack automatically on contact, as it needs to execute a swipe animation before dealing damage.

Specimen 3

Attack: 2

Speed: 3

Mobility: 1

Durability: 3

Support: 1

Stealth: 2

Specimen 3 is one of the fastest Specimen, especially when only considering base speed. It is grounded, although it can produce holes in the ceiling of some rooms. It will automatically come out of said hole when the player passes below it, but won't come out at all otherwise. In rooms with no holes, it will come out of the door as usual. It has the same reaction to both being hit by the player or hitting the player: it will enter a retreat phase (in which it cannot do any damage) for a few seconds, before resuming the chase. It will look directly at the player normally but look straight ahead in "retreat phase".

Specimen 4

Attack: 3

Speed: 2

Mobility: 3

Durability: 4

Support: 1

Stealth: 1

Specimen 4 is the first incorporeal specimen faced by the player. However, outside of this ability and its sheer stats, it has no special ability. It will produce a ring of darkness around itself, giving a sign to the player when it is about to come out of a wall.

Specimen 4 (Endless Mode)

Attack: 3

Speed: 2, 3 when unobserved

Mobility: 3

Durability: 4

Support: 3

Stealth: 1

Most of the base characteristics of Specimen 4's Endless Mode form are the same as its base form, outside of cosmetic changes such as a different (and changing) appearance and a new chase track. However, it does possesses its own distinct and different Introduction Room (which is still based on its base form's). But its main change is the addition of a new support ability. When Specimen 4 is present, the usual black fog will be replaced by a heavy layer of TV Static. This static will periodically close down on the player, blinding them for a few seconds before snapping back to its previous state. In its normal state, the static actually allows the player to see further than regular fog, including Specimen 4 itself.

Specimen 5

Attack: 4

Speed: 2

Mobility: 1

Durability: 4

Support: 1. Its ability can occasionally make it too dark to navigate, but this is temporary and can be bypassed by a number of ways.

Stealth: 2

Specimen 5 possesses the highest attack strength out of all the base specimen, being able to cripple the player in a single hit. It trades this immense power for a quite limited speed. Its ability consists of replacing the texture of the walls with various images, which will scroll rapidly across the surface. The texture used for this is random. This ability is intermittent, appearing and disappearing at a semi-regular pace.
Specimen Stats (Part 2)
Specimen 6

Attack: 3

Speed: N/A

Mobility: 1

Durability: 1/2

Support: 2. Its characteristics force the player to move through the room looking back, although this can be bypassed by hitting it or running in the case of shorter rooms.

Stealth: 2

Specimen 6 is the first specimen with a truly unorthodox chase system. Specimen 6 won't move at all when observed, other than facing the player and damaging them if they enter in contact with it. However, when unobserved for around a second (or observing it for an extended period of time), it will teleport behind the player and attack them, before going back to its passive state unless unobserved again. It is usually impossible to outrun it when unobserved, as it will always manage to get a hit in if the player doesn't turn around. The specimen can, however, be knocked out by the axe, causing it to become helpless for the duration of the room and reduce its chase counter by 1. When it appears in a room, it will wait until the player has moved out of in front of the door before landing there, unless the player waits for too long, in which case it will just appear on top of them. This countdown also keeps going when the game is paused, meaning you can get shanked almost immediately upon unpausing if you waited long enough.

Specimen 7

Attack: 5

Speed: 0

Mobility: 3

Durability: 4

Support: 1/N/A

Stealth: 1

The first specimen which appears with its Introduction Room in Endless Mode without being able to re-chase the player later on. It is limited to its scripted rooms. It has also a relatively unorthodox chasing style. Instead of being a single, solid entity, it is a slowly advancing wall of flesh that spans the entire room. It will start behind the entrance of the room and then make its way to the end. Entering in contact with it will immediately kill the player, making it the strongest regular Specimen.

Specimen 8

Attack: 2

Speed: 2, 5 when going through walls

Mobility: 2/3 (It acts like a 2 in most cases, but if enough walls separates it and the player, it will dash through the walls at high speed)

Durability: 4

Support: 2. Its ability to blind the player is somewhat useful when it lands, but its tendency to dash at high speed towards the player makes it dangerous when going through turn-filled rooms.

Stealth: 1

Specimen 8 is special incorporeal Specimen, being able to fly but while usually following the walls of the map. It will passively cover the player's screen with light static, alongside causing images to flash on the player's vision when damaging them, blinding them for a bit. It also produces a black ring of darkness around it, allowing the player to see it coming more easily. While it will take small turns to reach the player, if too much physical objects are between it and the player (including tables, chairs or Specimen 1) will cause it to move at high speeds until it reaches open air the closest to the player. It can easily surprise attack the player if they do not pay attention to it.

Specimen 9

Attack: 5

Speed: 5

Mobility: 3

Durability: 4

Support: 1

Stealth: 1

Another quite unorthodox specimen, mostly by how it appears, as it will only appear in specific situations: when the player has been idle without pausing for over a minute, or when the player goes deep enough in its infinite corridor. When it does appear, however, it possesses extremely fast speed and a one-shot attack, alongside being able to go through walls and being immune to the player's weapons. Its appearance in the infinite corridor will also paralyze the player in place.

Specimen 10

Base

Attack: 3

Speed: 1

Mobility: 1

Durability: 4

Support: 3

Stealth: 2

Leech

Attack: 3

Speed: 4

Mobility: 1

Durability: 4

Support: 1

Stealth: 2

Replacing the previous Specimen 10, this new one appears like an extremely slow regular chaser, but it hides a few tricks up its sleeve. When it gets close to the player, it will assume another (possessing no new characteristics outside of a different appearance) form, causing an image to flash on the player's screen, which will also happen when it hits the player. It will also cover the player's with a goo, with the thickness of it increasing with the damage the player took. But the most important ability is its second form. When the player gets far enough from the specimen (before it disappears in the fog), it will take another form (with a similar effect to its previously mentioned), which is far faster. This form is equally as fast as the player's running speed and as a result, they will be quickly outrun by the specimen. This form will persist until either the chase ends or Specimen 10 reaches the player, in which case it will take a moment to go back to its base form. This forces the player to remain close to Specimen 10 in order to avoid triggering its second form.

Specimen 11

Attack: 3

Speed: 2

Mobility: 3

Durability: 3

Support: 2

Stealth: 2

Specimen 11 was the former "final boss" of the game, being the last specimen that can be encountered in the first version of the game. As a result, it packs a number of abilities. Not only is it incorporeal, but it will passively make the door periodically become invisible to the player. While they can still be used in this state, they cannot be seen unless the player is close enough to use them. It will periodically flashes the player's vision with hallucinations. Specimen 11 is also one of the few incorporeal specimens which can be damaged by the player, but unlike most cases of monsters being damaged, it is not always beneficial to the player. Specimen 11 will temporarily disappear when hit, before re-appearing in another random spot. This spot can place it in an advantageous position over the player if the latter is unlucky. Specimen 11 also has a bright light on itself, making it visible through walls when up close.

Specimen 12

Outside

Attack: 3

Speed: 1, 4 when running

Mobility: 1

Durability: 4

Support: 1

Stealth: 2

Inside

Attack: 5

Speed: 0

Mobility: 1

Durability: 4

Support: 1

Stealth: 1

Specimen 12 is a relatively standard grounded chaser. Its one special ability consists of its Sprint. Periodically, a scream will be heard and Specimen 12 will run towards the player at speeds higher than even their running speed before slowing back down. While it can one-shot the player when inside, it loses a significant amount of strength when outside while gaining some speed and the ability to sprint.

Specimen 13

Attack: 3

Speed: 3, 1 when wandering

Mobility: 1

Durability: 4

Support: 2

Stealth: 1

Specimen 13's chase is quite unique, as she can only chase the player in special rooms flooded with water and covered in crates for the player to stand on. The water will slow the player down a lot when walked in. Specimen 13 will lurk in the water when the player isn't in the water, going around a mostly scripted path. This path can be changed if she has been distracted by the player. Once the player steps into the water, she will swim directly at them until the player gets on land again. Her rooms have some grates door that only she can take, allowing her to reach the player even when far away. Her rooms also occasionally have Water Pumps that must be activated to lower the water level to be passable. Notably, she is the only Specimen who is incompatible with other Specimen. She can only appear alongside Specimen 2, Specimen 5 and Specimen 12. The latter two are slowed down by the water and 12 cannot sprint while in water. The very first rooms of her re-chase will be regular rooms using the texture of her rooms, before moving on to the rooms she appears in.
Monster Stats
Monster 2

Attack: 3

Speed: 3

Mobility: 2

Durability: 4

Support: 1

Stealth: 1

The first of the Karamari Hospital monsters in term of number. Its abilities from its original version were mostly removed, leaving it as a relatively straightforward speedster. It is by far the fastest regular specimen, outside of Specimen 10's leech form or Lisa's speed when unobserved. Even a running player will be unable to outrun it for long and it will quickly catch up to them. Like many Specimen though, it slows down when taking turns. When it does get a hit in, it will blind the player for a second with flashes before teleporting back to the entrance of the room.

Monster 3

Attack: 1

Speed: 1

Mobility: 3

Durability: 1

Support: 2

Stealth: 3

Imported from its Karamari Hospital self, Monster 3 has a quite unusual chase style. Instead of chasing the player from the entrance, it will instead appear randomly in the room and will slowly make its way to the player, with the intent of ambushing them if it had a lucky starting position. When hit by the axe, it will instantly teleport to a random position in the room, most often far away from the player. Hitting it will reduce the number of rooms it can chase the player in by one, until it reaches 0, in which case the chase will stop. Notably, unlike most specimen, Monster 3 cannot take turns naturally, as it needs to be stationary in order to turn towards the player, before being able to move towards them. It also completely lacks a chase theme, making its idle noises the only reliable way to tell if it is here.

Monster 4

Attack: 2

Speed: N/A, although in practice its speed is closer to 1 via its short-range teleportation

Mobility: 1

Durability: 1/2

Support: 2. It possesses the same characteristics as Specimen 6.

Stealth: 4

Monster 4 acts as the Karamari Hospital variant of Specimen, sharing most of its characteristics, with some variants. Much like Specimen 6, Monster 4's mobility is limited by sight. But unlike it, it can still teleport short distances when observed. The rate and distance of these teleportations increase with how long it has been observed, culminating with it teleporting right next to the player in order to damage them. The time it takes to teleport when unobserved is also shorter than Specimen 6's, at the cost of reduced attack. Unlike Specimen 6, it does not require the player to be away from the door in order to appear; it will teleport right inside the player if the latter is in the way. The only exception is its initial appearance, where it will appear right in front of the player. Much like Specimen 6, it can be hit in order to knock it out, and hitting it will reduce the length of its chase, potentially ending it completely if it had only one room left. Notably, it lacks any idle noises, making it one of the stealthiest monsters as long as its track does not play.

Monster 5

Attack: 1

Speed: 3

Mobility: 2

Durability: 1

Support: 1. The increased fog density can help, but the ability to see through walls negate this advantage in most situations.

Stealth: 1

The final enemy in Karamari Hospital. Much like its original role, it acts as a straightforward chaser with some minor support abilities. Its existence will cause a red ring to appear around the player's vision, alongside increasing the fog's density around them. It will also turn the walls of the rooms into bars in its second room of chase onward, allowing the player to see through walls to an extent. When hit, Monster 5 will warp back to the entrance of the room. Hitting it will reduce the number of rooms it has left by one unless it has only one room, in which case the chase will end.

Monster 6

Attack: 2

Speed: 1

Mobility: 3

Durability: 4

Support: 3

Stealth: 1

The bonus enemy of Karamari Hospital and the hospital's variant of Specimen 9. Unlike it, it is available as a normal chaser in the game. It is yet another unorthodox enemy, as it does not appear from the entrance but the exit. When the exit is approached, there is a 50% chance that Monster 6 will appear out of the door and chase the player for a few seconds before fading, leaving the door usable. This effect applies to any exit door, even the ones normally unreachable by the player, such as the ones locked or caged. However, Monster 6 will only appear in one door maximum in a room, many exits won't cause it to appear multiple times unless multiple copies of the Specimen are in play.
Unknown Specimen Stats
Unknown Specimen 1

Base

Attack: 2

Speed: Varies from 0 to 3

Mobility: 3

Durability: 4

Support: 2

Stealth: 1

Second Chase

Attack: 5

Speed: 2

Mobility: 2

Durability: 4

Support: 1

Stealth: 1

Straight from Imscared, Unknown Specimen 1 brings in its unorthodox chase style. Much like Monster 3, it will randomly appear in the room (with a delay, however) instead of appearing from the door. Again, like Monster 3, it will float towards the player from there, but its speed will actually increase with time, with its maximum speed being faster than the player's walking speed. When it hits the player, it will teleport to another random location again. After a set amount of time, Unknown Specimen 1 will teleport to a random place again regardless of whether or not it has hit the player, resetting its speed to default. Do note that teleportation caused by hitting the player does NOT reset the speed and does not count as a "natural" teleportation. On top of this, its appearance will cover the screen in a light static, change the walls to a more pixelated style, and the layout of the rooms will change into long, straight corridors about halfway through the chase. However, there will be a slight delay between its first appearance and when it actually starts attacking. When Unknown Specimen 1 kills the player, it will cut the death animation to instead force them into a screen with their own body hanged over a chair. If the player writes "OPEN" in its query, a "Second Chance" chase will start. The player will be kept at 1 HP and forced into several fleshy rooms, with Unknown Specimen 1 chasing them meanwhile. The latter will have lost their ability to teleport, their incorporeal nature and most of their abilities, being now limited to a straightforward chase. Escaping will drop the player back to the normal mansion, with the ability to regenerate given back to them immediately afterwards.

Unknown Specimen 2

Attack: 1

Speed: 1

Mobility: 1

Durability: 4

Support: 1

Stealth: 2

Unknown Specimen 2 is the most straightforward of the Unknown Specimen. It lacks any ability other than producing a bright light and will just walk towards the player. While it may appear to lack a chase theme at first, it does have one, but it is simply silent, causing it to cut the music half of the time when appearing.

Unknown Specimen 3

Attack: N/A

Speed: N/A

Mobility: 3

Durability: 4

Support: 3

Stealth: 1

Definitively the most unorthodox Specimen of the game, Unknown Specimen 3 cannot attack in a traditional way. It will first appear under its normal form, block all the exit doors of a room, requiring the player to attack it. It will do so around 7 times, getting more and more damaged each time, before the chase truly begins. The second room onward after the beginning of the true chase, the walls will be changed to a much more realistic and rusty texture. But as soon as its final appearance is destroyed, its damaging effects will begin. The player will start slowly losing life, and their regeneration will be disabled. The rate of this effect is slow enough to allow the player to escape relatively easily, but can still result in half the health bar being gone by the end of it. There is also a chance in the latter rooms of the player stopping to puke blood if no other Specimen are present, damaging them even further and slowing their movements for a second afterward. During the entire chase, harmless hallucinations will haunt the player, including a floating fleshy creature. The player will regain their ability to regenerate after the end of the chase.

Unknown Specimen 4

Attack: 3

Speed: 2

Mobility: 3

Durability: 4

Support: 2

Stealth: 1

Despite being the least scary specimen by far, Unknown Specimen 4 has quite a lot of abilities. Apart from the incorporeal status she has, her appearance covers the rooms in a blue fog. She will also make giant shadows of animals block the path of the player, requiring one hit of the axe in order to go down.

Unknown Specimen 5

Attack: 1

Speed: 0 when observed, 5 when unobserved

Mobility: 1

Durability: 4

Support: 3

Stealth: 1

Unknown Specimen 5 is the final Unknwon Specimen, and it possesses a number of abilities to match this status. First, it has a significant delay between its first appearance and the chase proper. The "prelude" of the chase consists of the music stopping, then on the second room onward, the screen getting covered by a red tint of varying intensities. Through the whole thing, the layout of the rooms will be streamlined into a specific set, including fenced rooms, branched corridors and short turns. Faded out versions of Specimen 1 with threatening notes will appear too. About halfway through this prelude, the music will switch to ambiance sounds including distant coughing sounds. After 15 rooms, the chase itself will begin. Unknown Specimen 5 acts similar to Specimen 6 and Monster 4, with a few notable differences. When observed, it will be limited to extremely slowly moving towards the player. It will also turn invisible quickly in these conditions. Unlike her predecessors, Unknown Specimen 5 does not teleport when unobserved, it will simply increase its speed to immense levels until observed again. While it does start moving the fastest out of all the specimen of its kind, it lacks the ability to attack when observed for too long. It is somewhat compensated by its inability to be knocked out. Early on in the chase, Unknown Specimen 5 will start looping the room number, "trapping" the player away from the elevator and making it more likely for other specimens to appear. The room number will continue on after the chase has ended.
Doll Stats
Husk Swarm

Attack: 1

Speed: 1

Mobility: 1

Durability: 1

Support: 3

Stealth: 3/4 (Husks can either be already active, complete with idle sounds, or appear in inactive forms that will automatically jump the player upon passing them)

The Husk Swarm is the only Specimen that appears in group all the time. They're composed out of around a dozen Husks. They can appear in 3 different states when entering a room. They will appear randomly in the room as opposed to always at the start. In their "Inactive" state, they will take the form of blobs on the floor. Those blobs can block the player but will go down in 1 to 2 hits, allowing the player to pass. A blob destroyed this way will count as a Husk killed. In their "Semi-Active" state, they will appear in their blob form, but will activate and turn into an active Husk when approached. A newly spawned Husk can be immediately threatening. Active Husks can be destroyed in around 4 axe swings. In their "Active" state, the Husks will already be active and going after the player. All Husks currently chasing the player won't always appear in a room, the number depends on the size of the room. A Husk that is killed off won't re-appear for the chase, and the chase in general will end if all Husks are killed. No music plays in their chase, and they only make idle noises in their active state. They can occasionally appear right in front of the door, dealing free damage to the player.

Woormy Charles

Attack: 1

Speed: 4, 1 when wandering

Mobility: 1

Durability: 4, 1 when its head is lowered

Support: 2

Stealth: 3

While conceptually a mere grounded chaser, Woormy Charles is more complicated than that in execution. Charles will spawn randomly in the room (although it does appear to spawn at the start of the room in a lot of areas), taking about a second or two to get up before starting to wander. A wandering Charles will slowly move back in forth until the player enters its line of sight, in which case it will start chasing the player at very high speeds. Charles will only exit this chase mode on the next room. Charles does not deal contact damage, instead needing to wind up before attacking. This means that simply by walking away from it, the player can avoid all damage it does. When Charles' head is lowered after an attack, it can be attacked, reducing its chase count by 1. When reduced to 0, Charles will be defeated and the chase will end. The timing is rather precise, and it's possible to be stuck in a loop where Charles manages to hit the player each time they take a step back. Charles also has a hurtbox that cannot be passed through, meaning he can stop the player in tight corridors. This is usually not enough to completely block the player, however.

Hooked Doll

Attack: 1

Speed: N/A, 1 to 3 when observed

Mobility: 3

Durability: 4 (While it reacts to the axe, this only slightly moves it back and doesn't stuns it at all)

Support: 3

Stealth: 1

The opposite of Specimen 6, Monster 4, Unknown Specimen 5 and the Clown. The Hooked Doll will spawn randomly in the room, including out of bounds. It produces a constant, soft metallic sound when near the player. If the player is close enough to Hooked Doll and has her somewhere near the center of their field of view, Hooked Doll will fly towards the player. This speed is slow if the Doll is near the outside of the player's view, but it increases if the player stares directly at her. Once she hits the player, she will teleport away. She will also teleport away after some time. When in contact with the player, but not triggered into chasing them due to being observed, Hooked Doll will deal small, constant damage to them. The Hooked Doll can be hit by the axe, but this only pushes them slightly away from the player.

The Clown

Attack: N/A

Speed: N/A, 3 when unobserved

Mobility: 1

Durability: 4

Support: 1 (Its presence might block the player, but it is rather rare)

Stealth: 4

The only optional Specimen in the game. It only appears in a side room in Otto's spawning room if you press the CLOWN button enough times. The Clown works like a harmless version of Specimen 6, Monster 4 and Unknown Specimen 5. It won't appear out of the starting door if it is observed. Once it appears, it will stay still when observed. And when off-screen, it will move towards and take different poses, often laughing when doing so. It will stop when reaching a certain distance from the player, not approaching closer by itself. The Clown deals no damage when in contact with the player, although it is considered a solid object and might block the player. But as it appears behind the player, this is unlikely.
Tier List (Intro, S Tier & A Tier)
Now for the actual tier list. Here, I only include the 25 "normal" Specimen found in Endless Mode, those that can re-chase the player under normal circumstances. Those are Specimen 2, Specimen 3, Specimen 4, Specimen 4 (Endless Mode), Specimen 5, Specimen 6, Specimen 8, Specimen 10, Specimen 11, Specimen 12, Specimen 13, Monster 2, Monster 3, Monster 4, Monster 5, Monster 6, Unknown Specimen 1, Unknown Specimen 2, Unknown Specimen 3, Unknown Specimen 4, Unknown Specimen 5, Husk Swarm, Woormy Charles, Hooked Doll and the Clown.

I'm only including the Endless Specimen here, given that this is the only environment where they can be judged in equal fashion since they do not include scripted elements. I'm judging these not only on their individual stats but also how well they can play off the other specimen (mostly support ones).

Obviously this is all opinion-based and not meant to be objective, but it can be considered a rough guide for less experienced players.

S Tier

Specimen 4 (Endless Mode)

The undeniable queen of Endless Mode. All praise Ringu-sama. Despite the nature of blinding the player being purely visual and shared by a couple of other Specimens, its execution with Specimen 4's Endless Mode version makes it a devastating tool. Unlike nearly all other examples, Specimen 4 does not need to hit or even be anywhere near the player in order to inflict its blindness, as it activates regularly with its sheer presence. It also doubles as a way to reduce the player's field of vision when it is in the process of closing on the player.

This ability, combined with base Specimen 4's great attack stat and good speed, makes this version of Specimen 4 the deadliest enemy of the game. The fact that it can go through walls means that getting paralyzed even for a few seconds can allow it to catch up to the player and make full of use of its high attack. The only tradeoff it got from its original form is the loss of stealth, which wasn't Specimen 4's highest stat either way.

It is also wonderful in the role of a support for faster specimens. Given that a modest C Tier specimen became S Tier just with this ability, stronger specimens may become even deadlier.

Unknown Specimen 3

Regeneration is the player's greatest tool in the game, even beyond their axe. The deceptively simple idea of taking it away is all it took in order to make one of the most dangerous specimens in the game. This support-only specimen can make any hit in the game a crippling blow that can quickly lead to death, especially so with some of the strongest specimens.

While it is its weakest ability, Unknown Specimen 3's poison ability can also help lower the player's health into OHKO range for other specimens, considering that it can sap almost half of the player's health by the end of the chase, meaning that any outside damage beyond that threshold will spell doom on the player.

All of its excellent support abilities, combined with its immense longevity, make it a top-tier specimen, by far.

A Tier

Monster 6

What makes this monster is its odd attack angle, which is the opposite of most specimens. And doing the opposite of an ally often means complementarity.

On its own, Monster 6 is no threat at all. It can be easily dodged when summoned and any damage can be regenerated from before the next rooms. But the presence of a more active specimen means that one cannot waste their time dodging it. This forces the player to either take a hit from the active specimen in order to avoid Monster 6 or take a chance and charge into the door. A string of bad luck can easily put the player into an impossible situation.

This is also one of the only monsters who thrives in short rooms, as they leave no rooms for the player to dodge and forces several succession of damage from it in a row. However, when faced with large rooms and/or a lack of active specimen, Monster 6 can easily become useless.

Unknown Specimen 5

The basic idea behind Specimen 6 and Monster 4 was to force the player to look at the specimen (aka behind them) while traversing the room. It worked...until the invention of the axe, which completely ruined these two specimens.

So the only way to have this rather overpowered support effect was to make a specimen like that, but unable to be hit by the axe. This is probably how Unknown Specimen 5 was born. Being unable to be knocked out means that in its presence, the player is forced to look behind them constantly. This specimen's higher reaction speed also means that very little margin is allowed when looking away. Its ability to loop the rooms is just icing on the cake, giving more chances for other specimens to make use of this support in order to land a hit.

However, Unknown Specimen 5 is crippled by an extremely low attack (lowest of the game, in fact) and the inability to attack when observed for too long. Long gone are the days of its original version, as it is reduced to a purely support role, given that the punishment for looking away only serves as a way to prevent regeneration. This also makes it very easy to deal with when alone, but combining it with a fellow specimen can certainly make the situation deadly and almost unwinnable in some situations.

Specimen 10

Another in the "weak normally, but can force an unwinnable situation when things are right" category, Specimen 10, and the highest rated original Specimen.

Its base form possesses high attack, but nonexistent speed and no other support abilities. The actual threat comes from the pressure of its second form. Abusing of its low speed in order to leave it in the dust will cause it to enter its second form. This form is much faster, and will not stop chasing the player until they are hit or the chase end, essentially making a hit impossible to avoid.

While the obvious solution is to stay close to the monster, it is not possible to do in the presence of a second active specimen. The player is thus stuck in a dilemma between fleeing and risking to be caught by Specimen 10, or staying around and risking being hit by this new Specimen. This can create especially unwinnable scenarios when several large rooms are encountered in a row, causing the player to take a lot of damage.

However, conditions in order to set up such scenario are hard to get, meaning that Specimen 10 will be a medium threat only most of the time, causing it to be only low A Tier.

Unknown Specimen 4

The anime specimen, while not as strong as it used to be, is still a large threat when it appears. With attack as high as Specimen 4's Endless Mode version and slightly lower speed, it holds a decent offensive presence on its own, but it also packs a rather strong support game.

The shadows summoned by it forces the player to use up their precious stamina and time, sometimes several times in a room, while being pressured by Tirsiak's incorporeal mobility. This is even truer against faster specimen, where time and stamina are even more needed, potentially trapping the player. Tirsiak, however, suffers from the shortest natural duration of all Specimen, causing the timing for her effectiveness to be strict. The shadows might also not be a large issue when the player can focus their entire attention on them.
Tier List (B Tier)
B Tier

Specimen 8

While previously just a diet Specimen 4, recent buffs have made it one of the most powerful original game Specimen. All non-corporeal Specimen punish the player for taking turns too fast, Specimen 8 takes it to a whole new level, nearly immediately punishing the player for even the slightest corner. Reacting to it is very difficult and forces the player to stay close to it.

Despite this, its damage output is lower than most Specimen of its class, and it is made relatively harmless in most straightforward rooms, leaving it at the top of B Tier.

Monster 2

This monster incarnates the idea of "raw stats" the most out of all high tier monsters. It possesses very little abilities, one of them even hindering it, but its sheer stats make up for it. It has top speed, top durability, and high attack, alongside decent mobility.

It also has the slight advantage of temporarily blinding the player when hitting them, but its high speed and secondary ability means that neither itself or any ally specimen may benefit much from this.

The only thing preventing it from being overpowered is said ability. When hitting the player, it will automatically teleport back to the entrance. This prevents it from trapping the player into a corner and pretty much incapacitates it in longer rooms, despite its high speed.

Specimen 13

Finally allowed to play the game, Specimen 13 kinda changes how the game works for a chunk of time. You have to go from crates to crates, trying to avoid her attention and even solving minor puzzles. The base chase prevents most Specimen from appearing. Once you've learnt of her pattern, it isn't too difficult.

However, it becomes substantially more difficult when the few Specimens that can show up do show up. Specimen 12 and 5 forces the player to act fast, which is hard to do when Specimen 13 might be placed in a position where you have to wait for her to go away. And considering the high damage potential of everyone involved, you have very little room for error.

Specimen 2 isn't much of a threat with 13 alone, however. It can easily be killed in order to give opportunities to go past 13. However it certainly doesn't help when 12 or 5 are around, slowing the player down at first and forcing them to spend Stamina on it.

Specimen 13 is quite a unique chase. Normally pretty decent and relaxing, it has high potential for shenaniganry. So beware of the mermaid of the sewer water.
Tier List (C Tier)
C Tier

Specimen 11

While no longer the strongest specimen in the game, Specimen 11 remains a decently strong enemy. Its decent speed and high attack already make it a potent threat, but its ability to go through walls and to make doors disappear adds even more pressure to its presence.

While still a mainly physical threat, its ability to hide doors can confuse players, even lead them into dead ends in certain rooms. However, this is easily countered by sheer knowledge of the rooms, except in rooms where the position of the door is variable.

It does suffer from the ability to be a hit despite its 3 in mobility, a characteristic only shared with Monster 3. However, as it can potentially teleport Specimen 11 to a favorable situation, it is only a last resort when being chased by it instead of a hard counter.

Specimen 6

While an immense threat in the main game, Specimen 6 suffers badly from the presence of the axe from the start. Any player can turn around and end the threat that it poses immediately. This also drastically reduces its longevity.

It does have a few saving graces though. Its high attack means that messing up can cripple the player. While this does not come up often, it can be really dangerous when put against specimen too fast to let the player knock out Specimen 6 beforehand, forcing them to stare at it and be pressured by its eventual automatic attack. However, outside of these situations, Specimen 6 is a footnote.

Unknown Specimen 1

One might notice in Unknown Specimen 1's profile, this abysmal attack state. While it is among the lowest, it isn't the reason for this tier placement. In fact, it's damage output is rather high, as its high speed, teleportation and tendencies to come out of the exit door (like a mini Monster 6) means that it is far too easy for it to get hits in, even with a skilled player.

However, this teleportation ability also holds it back a lot, given that it can force it out of very favorable situations and can even make it a non-threat in bigger rooms.

But the biggest issue with White Face is its second chase mechanic. Anyone who knows about the game will know to enter "OPEN" and get a free second chance at escape even if it does get to kill the player. This can even be helpful to do so purposefully in order to escape a dangerous situation. The chase itself is easy, but the chance of other Specimens spawning in and killing the player still makes it a risky play.

Despite this, it's still possible to get put within one-shot range of other Specimens, so it's decently dangerous when it gets to appear.

Husk Swarm

These guys are weird, and very hit or miss. If encoutered alone or with an inactive/axe-vulnerable specimen, you can easily slaughter them all and move on. But if they appear alongside a very active Specimen or, god forbid, Spooper, then you can be as good as dead. Their "surprise" attack, alongside their habit of appearing ahead of the player, can easily land a lot of hits on the player, making them vulnerable to attacks from other monsters.

So these guys can be very unfair in certain situations, but also disappear in one room in other situations. So I think right in the middle is where they belong.

Specimen 4

Specimen 4 is the most straightforward incorporeal enemy, being the first encountered in story mode. While it does lack fancy abilities, it has a high attack and decent speed to make up for it. Like all incorporeal enemies in the game, it puts a large amount of pressure on the player from the start, forcing the player to change its usual tactics in order to avoid being hit.

However, this property doesn't come up as useful in a lot of maps, and Specimen 4's lack of other ability and not that high speed means that it is often left to lag behind in most cases.

Specimen 5

This specimen has the highest attack of the entire cast of Endless Mode. Two of its hits can kill the player, and one of them leaves them in range of being killed by common Attack 3 monsters. However, this Specimen kinda lacks the means to land a hit. It has decent speed and a special ability indeed. But said special ability isn't as strong as it could be. It isn't very hard to keep track of your movements with the wall shift.

Still, Specimen 5 leaves very little room for error when it appears, so it's still a decent threat. It is notably the most dangerous Specimen that can appear alongside Specimen 13, being more damaging and generally faster than Specimen 12, while being immune to the axe compared to Specimen 13.
Tier List (D Tier)
D Tier

Hooked Doll

The opposite SCP-173 sadly isn't as threatening as most of its opposite counterparts. Hooked Doll's weakness comes down to two things: her low damage output and her not aggressive enough teleporting.

The former means that the punishement for seeing her is minimal. The latter means that in a lot of rooms, you don't even have to worry about her, as she will spawn in an out of the way location. Even if she is in the main way, it's very easy to look down when she approaches you, stopping her in her track.

However, she can be more threatening in certain situations. Her heavy fog makes navigating mazes more slow, and her entire gimmick does mean you have to travel more carefully. This can make more dangerous and fast-paced chase situations even worse. And under those circumstances, it's not impossible to be caught in a loop where the Hooked Doll teleports in front of the player multiple times. But still, this girl requires heavy support in order to work, and most of the time she just... doesn't.

Specimen 3

Originally an absolutely mediocre Specimen, Specimen 3 was buffed to respectable levels in the HD version...before being nerfed back to low tier after an update, once again due to the axe.

While nowhere near as bad as it was (especially since most individual specimens were nerfed in the transition to HD), Specimen 3 is still a rather low threat. It possesses low attack and low durability, meaning that its high speed just means that it will be punched back even faster once it reaches the player. Even when it does land a hit, its tendencies to retreat means that it cannot even fully take advantage of its high speed.

It isn't completely trash though, given that its ability to quickly come out of the ceiling and high speed can catch the player off-guard, and it can chip the player's health a bit due to its speed making it harder to hit. But these aren't enough to put it higher.

Woormy Charles

What a weird Specimen. On paper Woormy Charles sounds kinda unstoppable. A Specimen that spawns ahead of the player, outspeeds even their running speed and can block them would be very dangerous. Unfortunately, Woormy Charles needing to wind up attacks kinda ruins that. Even if you run into him directly, you can just sidestep him as he readies an attack. Even the player's walking speed can prevent them from being hit by Charles as he chases them. The player can even completely elminate his chase if he's alone, although that can be hard to do in small rooms.

Still, Charles can potentially block the player in a corner due to his solid body and might still manage to sneak a hit in if they fail to go past it correctly. Woormy's very low damage means this will never be a huge problem, but that's still generally more threatening than a lot of lower tier specimen usually are.

Monster 4

Monster 4 was quite threatening in the original and in Karamari Hospital. But much like Specimen 6, it lost all that prestige against the axe. One hit and Monster 4 is out, no questions asked. But it is even worse than Specimen 6 in this regard.

The basic idea for it was that it is a faster, yet weaker Specimen 6. Thus, it could attack faster than Specimen 6 and react faster to being unobserved. However, as attack cooldowns were drastically increased in the HD version, this leaves Monster 4 only with a faster reaction speed against a large drop in power.

This means that even if the player is forced into a situation where they must take hits from it, the threat from its 2 of attack is too low to pressure them properly, as Monster 4 can just be batted away like a fly once it teleports to the player. Doesn't help that it can also be outsped in the short run, unlike Specimen 6, negating to some degree its higher reaction speed. While its stealth is the best in the game, this is barely enough to get a single hit in before getting knocked out.
Tier List (E Tier & F Tier)
E Tier

Specimen 2

The first specimen encountered, and fittingly, a rather weak one.

It has good attack, decent speed, and those infamous puddles, which can make any chase harder. But it sadly has bad durability. While the axe might only stun it for a few seconds, an attentive player can make this supposedly active Specimen a completely inert one. It takes too long for it to get back up, leaving it open to being knocked out again. This means that alone, it is impossible for it to hurt the player, and in group, it won't be doing much either. The puddles can still be a threat, but usually not enough of ones to cause any death.

Monster 3

Unknown Specimen 1 itself was a rather low tier. Now meet an even weaker version of it. Monster 3 has pitiful speed even when not turning around, lacks good attack and most importantly, has the second weakest durability of the game. Its role as an ambushing specimen is completely ruined by its weakness to being punched in the face.

Not only that but hitting it reduces the number of rooms it has left, even potentially ending its chase in a single room. Its only advantage is the fact that quick succession of rooms can cause a careless player to get damaged by it often, which is made more dangerous when chased by things like Unknown Specimen 3, but this requires a quite blatant lack of attention from the player and help from the strongest Specimen in the game. It has stealth, but that's simply not enough.

Specimen 12

Specimen 12 is kind of a basic specimen. It doesn't float, go through walls, or have any funky abilities. While it is strong and unaffected by the axe, it is also very slow most of the time. However, it does have an occasional sprint ability. This allows it to run at speeds even higher than the player's for around two seconds. This gives the old man a dangerous edge in cramped spaces or in situations where you're forced to backtrack a bit. But sadly, this only works in those specific situations. Outside of Specimen 13's chase, it will never catch up to the player, meaning that outside of the specific backtrack situations, it won't do anything of note. It has its role, but it's a weak one.

F Tier

Monster 5

This poor lad not only got hit by the nerf gun real hard since the original version, but is also a good example of ludonarrative dissonance. It's supposed to be the final enemy of Katamari Hospital but... yeah.

The Cow's attack stat is one of the lowest in the game for no real reasons. But most importantly, it has the terrible durability that most Katamari Hospital monsters have. But since it's a regular chaser with no real abilities other than flight, it makes it basically useless. The few times it'd manage to catch up with the player, it can easily be repelled. And if it's alone, you can incapacitate it entirely very easily.

It does have good enough speed, as well as fog limiting the player's vision. But it transforming the walls of the chase into bars means that non-corporeal specimen can be seen coming a lot more easily, essentially nullfying its advantages.

Really wish this monster was better, but oh well.

Unknown Specimen 2

Yeah. I don't think it's much of a surprise. The Specimen meant to be a joke is, indeed, a joke. The lowest attack of all specimen that can do damage, very low speed, and no special ability other than the bright light making it easier to see. Its only advantage is that its high durability forces the player to be on the move, making certain Specimen a lot more threatening. Buuut this is something a lot of other Specimen do a lot better, and in most circumstances this doesn't matter. But despite all of this, it's not the worst...

The Clown

Look, I love this lad. But the Clown literally does nothing. He cannot deal damage. He just hangs around behind you and take poses when you look away. He has no hitbox at all. One might argue that he's beneficial, as he takes away a spot for another Specimen to appear, and he prevents Spooper's vomit effect from working. However he still hides away the presence of other Specimen by causing "No Escape" to appear, and can very rarely bodyblock the player. So the Clown technically does a little more harm than good. But still, even Otto is 10 times more dangerous than this clown. Unfortunate.
62 Comments
Hyhyd 13 Mar @ 3:59am 
Pretty cool tier list. I'd rank White Face higher but other than that I agree with everything here.
typervader 27 May, 2024 @ 10:34pm 
Man I really hope they do a balance patch. For instance make axe less powerful, like make spec 3 immune after it's hit or require mutiple hits to work.
Ozman 28 Mar, 2024 @ 2:35pm 
The hooked doll fog isn't usually killer, but every once in a while it really fucks you up.
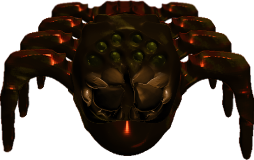
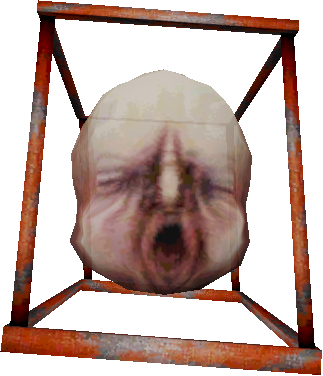
It is a shame the doll itself is practically harmless. Really, the most it is is just a weaker spooper or white face, in the sense that they are effective at preventing healing from rapid damage.
MothCat 26 Mar, 2024 @ 10:12pm 
I got the Hooked Doll and 2 Monster 4's whicdh cornered me in a maze room where the fog made it to where I couldnt see for 1 and for 2 I could look at the doll but this making it to where I couldnt look at the Monster 4's which truly pained me
The King of Airfryers 2 Jan, 2024 @ 11:39am 
specimen 8 not being in s tier makes this irrelevant
SaikouTM  [author] 21 Nov, 2023 @ 6:41pm 
So recent traumatic events involving Specimen 4 Endless and Lisa have revealed to me that Specimens can, in fact, spawn in White Face's second chance chase. This alone makes the threat of White Face killing you at least a little bit more real, since it's no longer a free resurrection. I still think WF is too inconsistent to be an actual consistent threat most of the time, so C Tier it is.

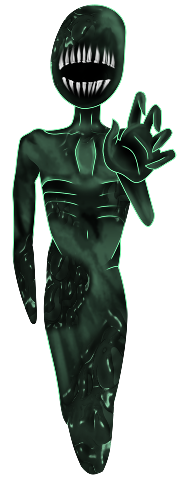
I don't think my mind has changed for the other Specimens though. Specimen 5 can be avoided even in the pump rooms, it's just very stressful. And Specimen 3 is still nowhere near as oppressive as the non-corporeal ones, imo. You're not getting hit by the ambush unless you're backtracking or being very slow. And if you're willing to spend the stamina to hit with the axe, you can quite easily dispel it. It's not an inevitable very strong blow like Monster 2 is. I'd say it's mostly just more demanding of one's attention than truly dangerous.
Ozman 20 Jun, 2023 @ 9:18pm 
I'd say Spooper is definitely countered by simple specimens.
Not sure if it's just me though, but I've noticed (at least late in a run) when specimens start stacking, they start stacking HARD. So maybe no specimen may be better than any more when Spooper's chasing.
PuggleLeDog 20 Jun, 2023 @ 7:50am 
Here's an interesting scenario that happened to me. Endless Ringu showing up during Spooper's Chase was actually a blessing in a terrible disguise, since it saved me from Spooper's annoying vomiting mechanic. Thank you, Ringu-sama.
Hickory (she/it) 13 Apr, 2023 @ 6:07pm 
https://youtu.be/kjoXSNEhbw8?t=1399 Idk what the other guy was on about you can absolutely survive that one water pump room with Specimen 5 chasing.
Hickory (she/it) 12 Apr, 2023 @ 10:32pm 
Specimen 3 should be a lot higher. It's honestly quite comparable to Monster 2. Its attack stat is lower than Monster 2 and it can be knocked back a bit with the axe, but it doesn't teleport back to the start of the room when landing a blow, can ambush the player through holes in the ceiling, and its high speed makes timing your axe swings deceptively difficult, especially when other specimen are in play alongside it. Honestly it's right on par with Monster 2 imo.