Back 4 Blood

Back 4 Blood

233 ratings
The Fundamentals (updated 2025)
By socky
The most useful starter guide you'll find anywhere
2
2
9
4
2
2
   
Award
Favorite
Favorited
Unfavorite
Intro
This guide (originally "15 Tips for New or Struggling Players") was made after noticing common mistakes, including those made by popular B4B streamers. I've played B4B since beta and 4300+ hours of Left 4 Dead 1 & 2 over 12+ years, mostly on Realism Expert, and thought I could share some useful lessons I've learned.

While B4B has changed a lot since this guide was first written in 2021, these tips still hold true as they don't rely on specific deck builds or strategies. I've expanded on some areas and removed some obsolete info.


What's changed since launch:
  • Tons of card, balance, and gameplay changes (mostly power creep)
  • Start with your entire 15 card deck, so order doesn't matter anymore
  • Burn Cards (single use cards at the start of each level and are unlockable after you unlock the core cards and skins)
  • New cards
  • Much more enemy variety
  • Four new Cleaners
  • Jeff the summonable ally with Tala's whistle
  • New DLC Acts and Hive dungeons
  • "Card shrines" (random cards that you can buy which last until the end of that run)
  • Food, which give small perks
  • More accessories (smoke grenades, bait jars, bear traps)
  • Bow and flamethrower
  • Melee & bow attachments
  • Legendary weapons, attachments, accessories, and cards
  • Armor plates
  • More vendor options

Start on Recruit
At least for your very first run. Earn easy supply points to unlock more cards. "Cards" are just skills/perks. This is not a card game. You're just picking 15 skills/perks for your build or "deck".

Veteran can be challenging when you're brand new and have limited cards. It gets much easier once you have better cards, create a sensible deck, develop good habits, and learn from experience. But it does require some initial grind and patience to unlock everything.

The Starter Deck is ass and is not representative of what the game feels like with good builds.
The game really opens up once you've unlocked all the skills, create and optimize your own builds, and play on higher difficulties.

Purge Combat Knife from your decks and learn to bash
  • This frees up a precious card slot. There are many better cards.

  • Without Combat Knife, you gain the invaluable ability to "bash" or knock back multiple ridden with one punch. Bashing is one of the most important ways to prevent damage.
    Bash (press V) every time ridden get too close.
    • Watch your stamina - you can't knock them back if you bash with an empty stamina bar
    • You can't bash Military Ridden if they have their helmets on
    • Don't bother bashing anything that's climbing. They won't fall cause there's no physics or animation for that


  • Combat Knife has a slow attack rate and usually kills one ridden at a time.
    • You'll eat a lot of damage slowly knifing everything one by one when you're surrounded. Knifing everything burns up all the stamina you need to run away instead
    • If you miss, you'll get hit. If you kill a charred or blighted ridden, you'll still get hit
    • On higher difficulties, the fastest ridden (Blitzing) will quickly swarm you after you kill the first one or two with a knife
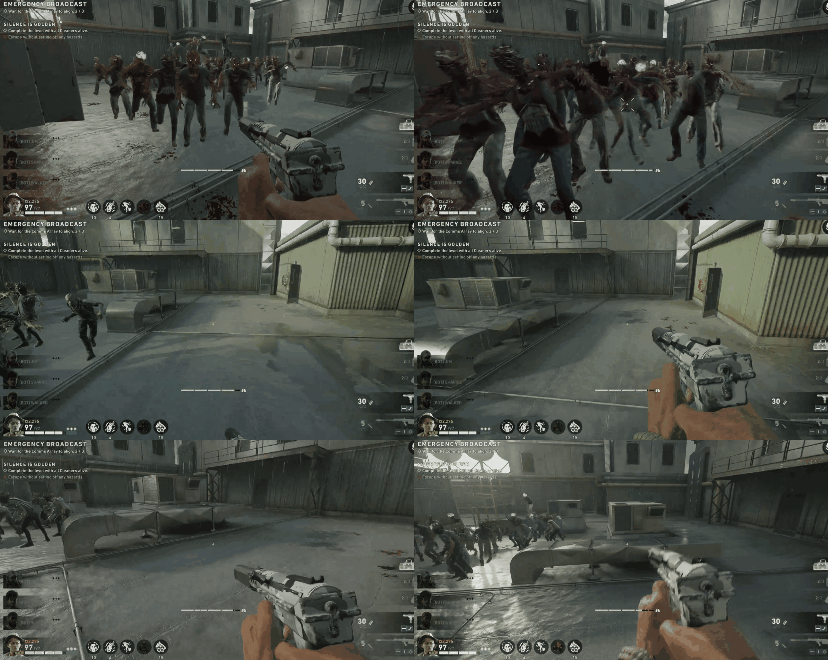
Create space between the enemy. Play as if every hit by melee mutations causes instant death
Don't just stay still or slowly backpedal while shooting enemies. This is one of the worst habits. You'll take a lot of unnecessary damage.** And you might accidentally teamkill.

Staying still in front of a mutation and hoping you kill them before they reach you is still a very common mistake. If you have time and space to sprint back, you shouldn't be eating hits from tallboys or other melee mutations. This sounds like common sense, but unfortunately it's not.

Alternate bashing and shooting the common trash.

Military ridden with helmets cannot be bashed. But you can bash commons into the soldiers to knock them back before shooting their heads.

If you might get overwhelmed: bash, turn 180°, sprint back, and then shoot.
For melee mutations, military ridden, and Rippers: ⬆️ minus the bash.
  • Why turn 180° and run in a straight line? Because you're more likely to get friendly fired if you move in another direction.

To get away faster at the last moment, reload or swap guns immediately after shooting to cancel the slow down effect (one is faster than the other, depends on the gun and your reload/swap speed). This is most beneficial for sniper rifles.

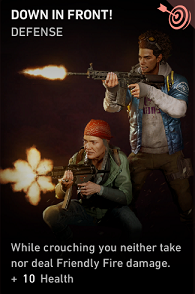
**This is one of the reasons why I dislike Down in Front (more on this card later) - it trains people to stay still or move slowly while shooting, no matter what, rather than using common sense.

Create space between others to reduce friendly fire risk
Move behind people to get around rather than moving right in front of them and into their line of sight.

Stagger your positioning rather than lining up directly behind.

While it's good idea to "stick together", don't take it literally.
  • Avoid cramping together in corners
  • Be patient and move single file through chokepoints like doorways rather than moving through people
  • Don't tailgate - if they suddenly stop or backpedal to shoot, you're gonna get hurt

If there is a player who has bad aim but keeps trying to provide covering fire, play behind them.

To minimize friendly fire with bots, just move forward when you need to shoot.
If you need to stay in the same position, jump and shoot at the top of your jump.

You don't need Down in Front if you understand bot behavior.
Bots never run in front of you when you are running ahead. They only move in front of you if you stay still for too long.

Don't use a melee weapon if you're not playing a (good) melee build
Sorry, but this isn't Left 4 Dead. You can't just drop in to a random game, pick up a melee, and destroy everything in one or two hits.


While melee weapons might be viable on Recruit or Veteran, you'll get hurt badly on higher difficulties without a good melee deck.
Use your pistol to preserve your main gun's ammo
  • Using pistol minimizes friendly fire damage.

  • Don't waste all your primary ammo on common ridden. Too often I see players blow all their rifle, smg, and shotgun ammo within the first few minutes. Use your pistol for all the common ridden littered throughout the level. They die easily.

  • Save your primary ammo for mutations, bosses, and hordes.

  • Don’t spray all of your ammo at something far away. Your damage plummets outside your guns' effective range. Let snipers take care of distant targets.

  • Your weapons should use different ammo types unless you have Ammo Stash card.

  • When your crosshair turns yellow, you've hit the weakspot. When it turns red, your target's dead.

Try to use a different primary gun type than others
This ensures your team doesn't run out of ammo quickly and to complement and balance out your team's strengths and weaknesses.

Assault rifles/LMGs are jack of all trades weapons and tend to be the most popular. But your team doesn't need more than one.

Take advantage of sniper rifles (Barrett, Phoenix) and shotguns (especially Tac14). Bolt-action sniper rifles and Tac14 are ammo efficient for stumbling and killing mutations.

Stumbling = knocking back & stunning = prevents enemy damage

Tac14, Barrett, and to a lesser extent, Phoenix and 870 Express are amazing at stumbling mutations. Having at least one player using these will go a long way in dealing with mutations.

If you're a healer Doc, I recommend you ditch the default MP5 and get a Tac14/870 Express or sniper rifle. They're ammo efficient and you can prevent a lot of damage to the team by stumbling and killing mutations.

Know the Cleaners' unique perks and play to their strengths
Again, this isn't Left 4 Dead. But this isn't a class-based shooter either.
You can run any build with anyone, but certain Cleaners are just more optimal for certain roles/builds.

If you want to be melee, Sharice (best), Heng, Doc, and Holly are your top picks.

Be familiar with the perks of every Cleaner, not just the ones you like to play as.
  • If there's a good healing Doc, give them your healing items as they can heal better.

  • If there's a good melee player, let them kill the trash so they can generate health/stamina (and so you can preserve ammo and focus on the mutations).

  • If there's a Hoffman using an accessory build, share your throwables.

  • Let Tala place razer wires as her perk adds bleed damage to everything she does

  • You don't need to be Tala*, Walker, or Jim if you want to be DPS.
    You can choose a Cleaner for their team perks and still be kicking ass (with good builds).
    • You could be Sharice so that free armor plates spawn (always useful - saves lives and money to buy) and for teamwide Bolstered Health (more on that later)

    • You could be Hoffman so there's a chance to spawn free ammo and offensive accessories whenever you kill

    • You could be Heng for the food spawns that also buff you and counter the dreaded Ravenous corruption card

    • You could be Karlee for her teamwide 50% "Use Speed" buff which is handy and makes it faster to heal, revive, and do objectives. Use her wallhack vision to kill mutations through wooden walls and hedges

*Tala is the most overpowered Cleaner by far. All 3 of her perks are strong but just the Warped Chests alone that'll spawn every level gives access to powerful loot without going to Hives.

Evangelo has the least useful team perk.

It's often better to shoot the legs
Sounds counter-intuitive for any FPS. But if you don't know what's behind a common ridden, it's safer to shoot their legs.

1) Stray bullets penetrate and travel far. You might accidentally cause a game-ending horde (or fail a secondary objective) by shooting birds, an alarmed object, a snitcher, or a hag. Some levels don't have any of these. But you need to be mindful when playing levels that do, especially if visibility's reduced (darkness, fog, or foliage).


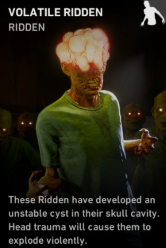
2) These guys cause a lot of trauma damage to people nearby if their heads are popped.

3) Reduces risk of friendly fire.

Monitor horde timers, reposition, and use choke points or elevation

When a level has "timed hordes", a horde timer shows up on the upper right corner.

Look at the horde timer occasionally and reposition and hold out somewhere when a horde is close to spawning.

If you're outnumbered in real life, would you stand out in the open on flat ground and get surrounded?

You wouldn't want to get jumped from behind. But you wouldn't want to have to look over your shoulders constantly. You'd rather just focus on the fight in front of you.

Strong positioning is a force multiplier.
You should always be thinking about your positioning and surroundings and expecting an unexpected horde. Make it hard for enemies to reach you. Limit the amount of angles that you have to cover by limiting the amount of areas enemies can attack you from. You can often achieve this simply by moving back enough to cover more pathways in front of you. This also preserves supplies by improving killing efficiency.

Take advantage of verticality. This can be better than hiding in a small room where you have less time to shoot tanky mutations. Common ridden and melee mutations cannot hurt you if they're too busy climbing.

When a horde is triggered, reposition immediately unless you're in a good spot.

When your holdout place becomes untenable, GTFO. Using pills or an offensive accessory can help a long way to make the escape painless.

It's often better to retreat than to run ahead. This way you won't stumble into more threats like Sleepers, bear traps, or trip wires. But sprint forward if there's better positioning not far ahead.
  • When you are running from a horde, alternate between sprinting, bashing, and shooting nearby ridden. Killing preserves stamina. Sometimes you have to slow down to speed up
  • Some enemies will appear in a previously cleared area and block your retreat. Expect mutations to sometimes spawn from thin air in a cleared room behind you. Don't be surprised - you'll get used to it 🙂

Avoid water as much as possible because it slows you down.

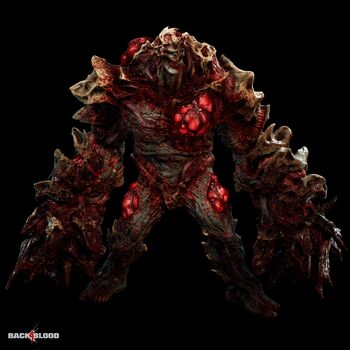
Bosses aren't the main threats - their hordes are
When an ogre or breaker spawns, they will trigger a horde. Hags don't trigger unless they're startled. Oftentimes people will just stand there in the open, shoot the boss, and then get swarmed and die.

Get flashbangs if there is a boss corruption card. You can prevent breakers and hags from calling for backup if you flashbang them properly and kill them in time. Bait jars won't prevent a horde summoning but are also good against bosses. If someone else has a flashbang, get a bait jar.


Hover your cursor over the boss corruption card. If it says it's armored, you know the boss will either be an ogre or a breaker. A hag is never armored.


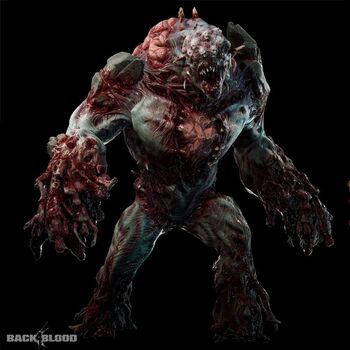
Ogre

A horde periodically spawns as long as the ogre is present. It's the main thing that makes him dangerous. Though his projectiles can insta-kill you if it knocks you out of boundary, you can shoot them down with enough damage and space. He's sluggish. Find cover so he can't grab, trample, or throw at you. You shouldn't be taking any damage from him if you're fighting from cover or distance.

He is the tankiest boss. It's usually better to reposition, find cover, and fend off the horde first. Then burst down his weakspots before another horde spawns. Rinse, repeat.

When he has half of his life remaining, he'll usually retreat and may/may not return (depends on the level). Try to kill him on his first appearance by bursting down his weakspots which stuns him. Rather than throwing all your flashbangs and grenades at the start, save them until it's near half HP so you have a chance to kill him before he escapes.

For most ogre spawns, focus on his horde first. Or depending on the level, you could run past it with your team.

Breaker
The Breaker is more mobile than the ogre as he can enter buildings and leap better than Olympian long jumpers. He'll force you to fight in a shrinking, circular zone demarcated by yellow. If you see a yellow haze, get out of it or you'll die fast. On No Hope, this circle shrinks fast.

After his first or second leap, he'll start roaring and his mouth turns yellow. Flashbang/tase him right after he lands to prevent/delay his horde and haze summoning. Burst down his weakspots, and stun again if needed. He'll fall to his knees temporarily whenever a weakspot is destroyed. The battle is much easier without his horde. But there will be a continuous horde on some levels regardless. Grenade builds also make light work of him. His leap attacks can down multiple players. Armor can save you from being 1-shotted on higher difficulties.

Hag
The hag is the least dangerous boss. It is not an immediate threat and will only attack one target.
I find it better to deal with her sooner rather than later. Control the time and place of battle. Fight from a position of strength. The last thing you want is to accidentally trigger her in the midst of fighting a horde, prolonging the horde and increasing the chance that someone will get gobbled up in the chaos.

Flashbang/stun gun/tase her when she starts "berserking" (turn on captions) and she won't be able to call for backup. This doesn't work if someone's already triggered/damaged her. Throw grenades and flank it to attack its weakpoint for massive damage.

If you don't have a flashbang/stun gun/taser, someone with Breakout ability could act as bait. Bait jars will also stumble. But these options are riskier as she'll call a horde.


When a horde is triggered, trigger every hazard you see (unless Silence is Golden is active)
Use this wonderful opportunity to clear birds, shoot alarmed cars/doors, alert snitchers, and run through trip wires (aka "dusters"). Monitoring the horde timer can prepare you for this.

There's a limit to how many enemies can be present, so triggering multiple hordes in quick succession will only reset and "extend" the current horde timer by a trivial amount.

This is preventative maintenance. The worst thing after fending off a 30 seconds horde is for someone to accidentally trigger another horde 30 seconds later.

Silence is Golden is a secondary objective for not triggering any hazards. Obviously don't trigger anything if it hasn't failed yet.


While we're on hazards, hordes, and Silence is Golden:
  • Police cars are always alarmed. If you ping (Q) and move back far enough (28m), you can shoot out the police car windows to loot them without triggering the alarm. You can also blow up the cars from that distance to prevent them from being accidentally triggered (easy with snipers).

  • On certain levels, you may have an opportunity to clear birds, destroy police cars, and shoot down alarmed doors in advance before leaving spawn. As long as the safe room door hasn't been opened, anything you shoot will not trigger a horde.

  • You can crouch very close to birds without alerting them as long as you don't touch them, stand, or shoot.

  • Trip wires are found in Act 5 and 6 and will fail Silence is Golden and call a horde when triggered. You can destroy them by shooting at the green ends.

  • A horde can deactivate and break down alarmed doors nearby. To maintain Silence is Golden, if the level has timed hordes, you could just wait for a horde to come by to deactivate a door. Or someone could deliberately walk into a sleeper or reeker explosion, which will summon a horde.

Complete the secondary objectives for bonus money
  • These are listed in the top left corner under the main objective for every level. They are team-wide objectives. They should be one of the first things you look at and keep in mind at the start of every level.

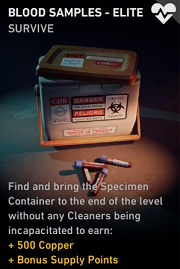
  • Completion gives 500 copper to everyone. It's one of the best ways to gain money. That's enough to buy a team upgrade with some change remaining if people pool their copper.


  • A common mistake I still see is people insisting on carrying the Specimen Container even if someone has already been incapped. The secondary objective is failed if not all of the criteria has been met.


    The key word is "without".


  • On the subject of money, do pick up every copper you find. When someone picks up a copper pile, everyone gets it as well (this doesn’t apply to copper that’s been dropped by someone).

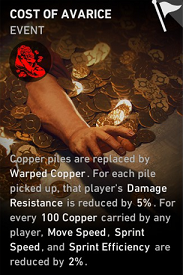
    But be careful if it's Warped Copper and/or if Cost of Avarice corruption card is present.


    Consider the risk-reward of taking a lot of copper and Warped Copper if the secondary objective is related to number of incaps or every Cleaner surviving. Too much copper will make you super slow. Warped Copper lowers your damage resistance.


You can loot more before exiting a level early through Hives.
But don't get greedy - you should lock in the secondary objectives before someone fails it. You won't find 2000 copper looting the rest of the level.

Pool money and invest in team upgrades and tool kits
Your team should always have a tool kit for the supply room that spawns in most levels. It's worth the investment. For some levels, you might want another for the minigun/flamethrower or to activate certain items.

Tool kits can also be used to unlock a free heal at a first aid cabinet.
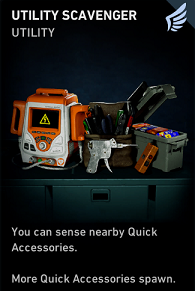
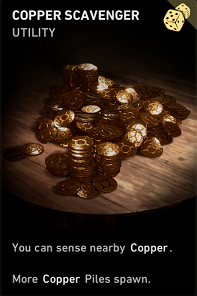
This makes Utility Scavenger a great card to have in a team as you may find tool kits out in the field.


Stash rooms have some combination of:
  • first aid cabinet (which provide 4 free heals for the team on recruit, 2 on veteran, and 1 on nightmare. Each heal is worth 400 copper)
  • copper
  • accessories
  • weapons
  • weapon mods
  • ammo
  • cards
Not bad for 350 copper.

A common mistake is wasting too much money on weapons and attachments. Most of the weapons aren't worth buying unless you really need it. You can easily obtain better weapons with Burn cards or in the Hives. It's a better investment to buy team upgrades instead. It'll pay dividends.

Best upgrades
  • Quick accessory quality
    • upgrade this at least once in preparation for holdout levels for improved razor wires
    • increases reuse chance of tool kits and razor wires
  • Offensive accessory quality
  • Support accessory quality

Generally lower priority
  • Support accessory slots
  • Offensive accessory slots
  • Quick accessory slots

    The other upgrades (stamina, ammo, team health) aren't worth it unless the other upgrades have been purchased and you're swimming in coins.

    Use accessories wisely
    Offensive accessories
    Unlike in Left 4 Dead, zombies come in a longer, steady trickle during horde events. You may want to wait a bit longer before using your offensive accessories to make the most out of them.
    • Grenades are great for tanky mutations, bosses, and closing the mines on the last two levels of Act 1. They are the safest way to get rid of birds. You can also try killing Lobbers with grenades if you're pinned down somewhere without a good line of sight.
      • If you don't have a strong 'nade deck but have many 'nades, rather than using up all your 'nades upfront on an ogre/hag, wait until they're at about half HP and try to finish them off before they escape.
    • Flashbangs stun and increase the damage enemies take. They are versatile. Get them for bosses. You can also use them to free someone from a crusher or hag, to escape from danger, or to buy time to revive someone or to complete an objective. They also clear birds but hit registration is wonky sometimes.
    • Propane tanks can't be bought, but they're just free explosives. Carry and use them. But don't throw them at fiery ridden or it'll blow up in your face.
    • Try not to waste grenades, flashbangs, and propane tanks on common ridden.

    • Pipe bombs are useful for creating breathing space when there's a horde on you out in the open. But don't waste them if you have a strong positional advantage. They can also shut down mines in Act 1.
    • Firecrackers are a poor man's pipe bomb but are still useful to create a little breathing space and drawing snitchers away. They can be better than pipe bombs for endless horde events as they don't kill and cause more ridden to spawn ahead. This trick doesn't work when playing with bots since they'll kill everything.

    • Molotovs are good for killing common ridden. They can clear birds, but it needs be centered on them almost perfectly.

    • Bait jars are versatile. They're kind of like a better version of fire crackers in that they can attract commons to an area. But they can also stumble mutations/Hag with a direct hit. Use bait jars on bosses to get their horde to attack them. Bait jars can safely clear birds on a flat surface.

    • Smoke grenades are used to provide cover (eg. to do an objective, to revive someone) and can stumble a group of enemies.

    Quick Item accessories
    • Razor wires slow down and damage ridden. Great for crowd control in holdout levels. You always want to place it in such way to maximize the surface area. Eg. For narrow choke points, such as single doorways and stairs, place the wire perpendicular. With upgrades, wires can even kill ridden. Overlapping them doesn't increase their effectiveness. You don't need to go overboard - a handful of upgraded wires placed well is more than enough for any level. For holdouts like T5, let Tala place wires as she adds bleed damage.
    • Stun guns can be used to free yourself from Hags, Bruisers, and Hockers. You can also free others from Hags and Bruisers.
    • Defibrillators can be used to quickly pick up a downed player (not just dead). If you're on your last life, you should drop your defib.

    • Cursed Keys are legendary tool kits (found in Warped Chests) with high reuse chance. They can restore a lot of trauma and lives for free. When it fails, the user dies unless they have at least one piece of armor, and all Keys on the user breaks.
      • If you don't have an armor plate, give the Key to someone that does
      • If you have multiple Keys, drop all but one before using it
      • If it's the only tool kit on the team, it's not a good idea to gamble it on something like Tala's Warped Chest when there's still a stash room ahead.

    Support accessories
    Know when to bring first aid kits, bandages, or pills. First aid kits heal the most and can heal trauma - but they take the longest time to use. With Medical Professional card, you can restore a missing life using a first aid kit. For levels where there are non-stop horde events, I prefer having pills or bandages as I can use them a lot faster in an emergency.

    Manage your trauma
    A portion of damage caused by the enemy gets converted into trauma damage, which constricts your max HP. This is the dark purple section of the health bars. Friendly fire and environmental hazards don't cause trauma unless they down you.

    The more you die --> the more trauma you accumulate --> the less max HP you have --> the easier you die. It's a vicious cycle.

    • You'll suffer the most trauma from being downed or dying.

    • The best way to avoid trauma is to avoid taking damage. That's why bashing and repositioning are so important.

    • First Aid Cabinets are the main way of healing trauma
      • heals 30 trauma and restores 1 missing life per use
      • upgraded tool kits and the Cursed Key can unlock a lot of free heals

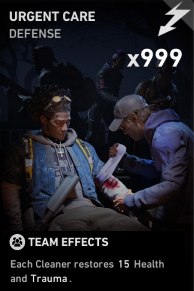
    • Urgent Care is also a common and effective way. The effects stack with more Urgent Cares used. It's one of the most useful Burn Cards


    • You'll also heal some trauma at the start of each level, but this is reduced on higher difficulties

    • Nurse Purses (legendary first aid kits) fully heal, but they can only be found in Warped Chests
      • Warped Chests are booby-trapped and incur a risk of adding trauma to the team. Using tool kits to open them will prevent any side effects

    • Doc gives +20% Team Trauma Resistance

    • Heng is a great character for survivability and saving money on heals. He heals trauma whenever he eats food. 10 trauma heal per Peach (he gets double the buff for every food he eats)


    You can gain Temporary Health over unhealed damage and trauma using pain meds and certain cards. Temporary Health also protects against trauma from accumulating if you take damage.

    Bolstered Health is increased Temporary Health capacity. You can only get it if you have Sharice or Fit as a Fiddle card on the team.


    Light blue = Temporary health
    Dark blue = Bolstered health
    White ➕ = amount of lives


    Many inexperienced players with heavy trauma waste money on first aid kits. There's no point buying a first aid kit that heals 50 HP if your max HP is, say, only 40 - 50. You'd have to wait until your health is extremely low before you'd get the most use from them.

    Non-upgraded kits don't heal any trauma. Green/blue/purple kits heal 5/10/15 trauma respectively. Just buy pain meds or bandages to hold you over until the next first aid cabinet unless you have a healer with Medical Professional +/- Field Surgeon to make the kits more cost-effective. If there's a first aid cabinet at spawn, use it if it's free. If not, buy a tool kit to unlock a heal since tool kits are cheaper (and you might get a reuse if it's upgraded).

    Armor is good insurance policy but don't overspend


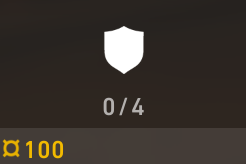
    You can buy up to 4 armor plates for 100 copper each at the vendor. Each armor plate blocks a single heavy damage attack (eg. Breaker, Ogre, tallboy, exploder, stinger, volatile ridden) and then gets used up. Intact armor doesn't carry over to the next level.

    They can be expensive as there are fewer copper spawns on higher difficulties. Unless you have a lot of copper, getting 1 or 2 armor at most is good enough as insurance. They can come in clutch for passing secondary objectives dependent on # of incaps or survival.

    Sharice is one of the top Cleaners because of the free armor spawns.
    If Sharice and/or Cost of Avarice are present, it's unwise to buy a lot of armor.

    The most common cause of death is by common ridden.
    It's not uncommon to see newbs load up on armor and then die to the lowly commons with all armor intact.

    Armor can screw you over too - if you get hit near a cliff or water, it can send you flying into the abyss rather than just getting incapped on the spot.

    The DLCs are pay to win
    As long as someone in the lobby owns DLC 1: Tunnels of Terror, Hives will spawn.
    Hives are pay to win dungeons.

    They're a great opportunity to loot, to bypass a difficult section of a level, and to secure secondary objectives before they're failed. If you're having trouble completing an Act for achievements or whatever, take the extra time to do Hives.

    You can find skull totems which are currency for unlocking certain cards and burn cards.

    Most of the strongest Cleaners are DLC. Tala, as mentioned earlier, is the most overpowered. Sharice is the best for melee and giving free armor spawns. Heng is strong for self-sustain. Dan can give a variety of effects, including copper drops.


    Use pings and act on audiovisual cues
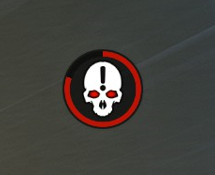
    Ping and pay attention to others' pings. Pay attention to the red skulls and ping icons on your HUD. No idea why people don't or can't. Ping supplies and weapons you find.

    If you hear someone pinging and you don't see anything in front, turn around and check it out.

    Ping every mutation you see.
    • This creates a red skull icon, increasing visibility for everyone. It stays on the HUD even if you're not facing it.
    • If you see skull icons on your HUD, help kill mutations before scavenging for items.
    • Marked For Death is one of the best cards for increasing damage, and it requires pinging.
      • Marked For Death makes a distinct ringing sound. It can only mean a mutation has been spotted. Pay attention to it. You shouldn't be caught off guard by that mutation when things are quiet. I'm surprised how many times people are. Note that all bots have this skill by default.
      • Marked For Death also creates a red highlight and helps to track enemies through walls and under poor visibility.
    • Walker's pings reduce damage of his targets by 10% and also highlights them.

    Pay attention to other characters' voice lines - "out of ammo" means out of ammo. Share ammo before being asked.

    The alarm buzzer means someone is caught by a mutation. Help free them asap if it's safe to do so. It shouldn't take you five seconds to react and free someone near you from a hocker web.

    Pay attention to the timer. On some levels and with some corruption cards, a horde will come every minute or so.

    Hockers and stingers make distinct sounds right before firing their projectiles. As soon as you hear it, dodge behind cover. Then kill them while they're on cooldown.

    Sleepers groan loudly and jump at you from the wall. They act like proximity/motion detectors. They create hordes if they pounce on you (except on Recruit). So make a habit of not getting pounced by one.

    Don't rely on "comms". Rely on common sense
    Not everyone has a mic or wants to talk. Don't assume those that talk know what they're doing. Don't assume those that don't talk don't know what they're doing. Actions speak louder than words.
    • Be clear and concise.
      • Are you creating signal or noise?
        • yelling at your dog and family in the background?
        • panicking and yelling?
        • rambling?
        • spending too much time arguing?
        • talking about stuff no one cares about?
      • Specify what ammo type you need, not just "need ammo"
      • Specify how much money you need, not just "need money" or "not enough"

    Voice chat is great for explaining or changing plans on the fly.
    But voice chat is not a substitute for situational awareness and common sense.

    Too often people with "comms" seem clueless about the threats and free items around them, unless someone is calling out for them. And it's not just in Back 4 Blood. People rely too much on voice chat instead of audiovisual cues and common sense. I've never understood how people wearing headsets are caught off-guard by noisy enemies.

    Use common sense (even if others don't):
    • Stick together and act in good faith.

    • Reposition as needed. Use chokepoints with long runways, or high ground to your advantage

    • If you hear pinging or Marked for Death, and you don't see anything in front, it's behind.

    • When holding out and you're next to a teammate, bash for them. Don't just shoot when enemies are pointblank. Bashing doesn't interrupt reloading nor does it cause friendly fire.

    • When you're opening a crate, reviving someone, or otherwise interacting with an object, move the camera around to look for threats. Sometimes it's worth taking a hit to finish the job, sometimes it's not.

    • Stop trying to revive when there's still a horde around (unless you have a defibrillator or offensive utility). Downed players have a lot of HP. Protect yourself and whoever's still standing first. Don't become another casualty.

    • Share your excess ammo often and use your ammo wisely.

    • Share healing supplies. Don't be selfish - don't cut off your nose to spite your face. One of the dumbest ways to lose and to annoy is not healing others (or yourself) when really needed and asked to (particularly if they're good). You also don't need to wait for your Doc's approval to heal if the situation calls for it.

    • Avoid tunnel vision - check the bottom left/right and top right of your HUD. Be aware of the health status of everyone, not just if you're playing Doc. Know your ammo -- you should never be caught off guard running out of ammo. Know when a horde is coming.

    • Be aware of the items you have, and be prepared to use them in an instant. Forgetting or being slow to use them can be costly.

    • Share accessories with those that can make the most out of them:
      Support --> Doc healer
      Offensive --> Hoffman with Pinata
      Razor wires --> Tala
      Cursed Key --> has Armor and least amount of lives (if Key breaks, less lives are lost)
      First Aid Kits/Defibs --> has Medical Professional
      Tool kits and accessories in general --> has Magician's Apprentice

    • The player(s) with the most trauma should use the free heal(s) at the cabinet, not necessarily the player with the most unhealed damage. If the trauma difference is minimal, the latter should heal.

    • If birds are triggered, quickly clear the rest of the hazards in the area.

    • Don't start events until the team is ready.

    • For holdout levels, transport supplies to your location so you don't have to run out in a continuous horde to resupply.

    • If someone on your team has a tool kit but is unreliable or untrustworthy, buy your own. You'll still be able to open the supply room if they waste it.

    • Don't need to ask whether anyone has a tool kit or whatever item. Just check the bottom left corner.

    • If you have to leave, drop your copper and some accessories to help the team. Keep weapons and ammo so that a new player that takes over won't be empty-handed. Press Tab and left or right-click an item to drop it.

    If you can't handle Nightmare without "comms", you're not ready for No Hope.

    Be careful with Down in Front
    A lot of players recommend using Down in Front which allows you to toggle off friendly fire at will. But I'll be real with you -- it's become a crutch for many. It's like using a cheat code. And it's hard to stop using it once you're used to it.

    Playing a game with friendly fire ON is a lot different than playing with it off. It requires more situational awareness, risk management, movement/trigger discipline, not simply better aim. A game without friendly fire risk enables and rewards brain dead aggressive gameplay that wouldn't otherwise be possible. Whether that's fun is up to the beholder.

    But if you want to improve your skills in team FPS (not just in B4B), I'd suggest pretending Down in Front doesn't exist. Assume friendly fire is always on. Be mindful of everyone's positioning and line of sight (including those using Down in Front), and thinking about risks before pulling the trigger or moving through/in front of others. Sometimes people with DIF forget to crouch before shooting or they might suddenly uncrouch when you're not expecting it. Focus on what you can control.


    An argument can be made that it protects against teamkillers. But trolls use Down in Front too to protect themselves and waste everyone's time. It's better to just find another lobby or to continue the run in another if you're the host.

    On deckbuilding
    There’s no such thing as a perfect deck. If you asked 10 great players, you’d get 10 different opinions on how they’d change it.

    Tailor your decks for your roles, playstyle, who you're playing with, and tweak them depending on the Act and difficulty you’re playing.
    • If you're playing Act 1, having a "Use Speed" card such as Headband Magnifier or Multitool, will help a lot with the finale. But if you have Karlee on the team, you may get by without them.
    • Mobility cards are great in general but especially for Act 3 (Cabins in the Lake, T5, and the last two levels)
    • For Act 4, you don't need scavenger or money cards. Focus on damage and mobility instead.

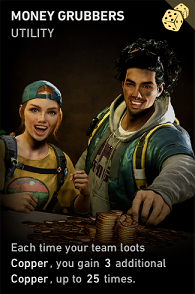
    You can’t go wrong having a money card or two in any deck (Copper Scavenger +/- Money Grubbers), unless you're playing Act 4. Copper is versatile and helps the whole team.


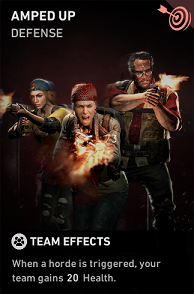
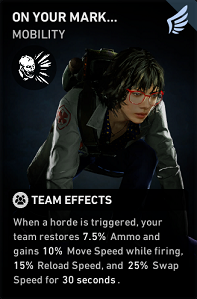
    Amped Up and On Your Mark are great to have on any team. You won't need them if playing with bots since they have it. Watch horde timers and live off of Amped Up before using healing items.

    Every card should have a purpose.
    • What are you trying to do with this build?
    • Are there better cards for that purpose?
    • Does it synergize or complement?
    • Is it filling a missing gap in your team?
    • If you mainly play with strangers, can you sacrifice 1 or 2 card slots for something that will help everyone?
    • Is it an essential card or just a decent card that would be nice to have and potentially bought for 500 copper while playing?

    Copyright
    No permission was given for anyone to copy, or publish this guide on another platform.


    24 Comments
    socky  [author] 29 May @ 5:25pm 
    🥳
    CHSV 29 May @ 12:40am 
    Thanks!:bigfire2020:
    socky  [author] 17 Sep, 2024 @ 12:02am 
    have fun! 👍
    Ita 16 Sep, 2024 @ 11:31pm 
    Thanks for the tips! Looking to get back into the game here and there so this was a nice briefing on what to expect over the past few years.
    socky  [author] 23 Apr, 2024 @ 5:57pm 
    Amped Up does stack, and every bot has one copy.
    When playing with 2-3 bots, that free 40-60 heal to all is very strong since bots have high HP and don't take trauma.

    On higher difficulties, coordinated teams don't run more than 2 copies of Amped Up because of diminishing returns (limited by trauma, and Glass Cannon and Needs of the Many being meta).
    Proxky 23 Apr, 2024 @ 8:02am 
    by "Amped Up is great to have on any team. You won't need it if playing with bots since they have it." does it imply that the teamcards are not stack able and with two in a team wont improve 20health to 40 ?
    socky  [author] 25 May, 2023 @ 7:39pm 
    yes, I meant crushers. thanks for reading
     Dovahbear  24 May, 2023 @ 5:51pm 
    "Stun guns can be used to free yourself from Hags, Bruisers, and Hockers. You can also free others from Hags and Bruisers."

    If you're talking about the Tallboy with a grab attack, I think you meant Crushers
    Ainzelfall 14 Feb, 2023 @ 3:16pm 
    very usefull :1scoreSD:
    rate & fav :wyes:
    socky  [author] 31 Jan, 2023 @ 12:16am 
    Appreciate it - thanks for reading! Stay tuned for my next guide on builds