NEOTOKYO°

NEOTOKYO°

222 ratings
Neotokyo Class and Weapons Guide
By LQuinze
An overview of the various classes in NEOTOKYO, with discussion on weapons and specific tactics. Also a directory compiling other guides - newcomers start here!
   
Award
Favorite
Favorited
Unfavorite
Introduction
The class system in NEOTOKYO° is one of the fundamental concepts that affects the pacing of a firefight and the overall match. This guide will highlight the general differences between the classes and how they function in a team, as well as a brief overview of weapon selection and tactics.

This guide is meant for the beginning to intermediate player who already understands the Capture the Ghost game mode[shameful.steam-censorship.pw] and would like to begin to improve their play. I start with a few general notes about weapon employment, then go through an overview of each class coupled with a detailed review of their available armoury, with special attention paid to how each weapon fits with each class's role and tactics. Simply use the Table of Contents to jump to the relevant section that interests you.

Absolute beginners should start with the official game guide on NEOTOKYOHQ[neotokyohq.com] and their hints page[neotokyohq.com]. Additional information for beginners can be found in these other community guides:
All three of these provide an introduction to basic game concepts.

More advanced players likely will already have grasped many of the tactics suggested in this guide through experience, and should consider reading NT 301: NEOTOKYO and Movement and NT 302: Thermoptic Camouflage Strategies.

Rather than embedding videos directly into this guide, I've chosen to link directly to their respective sources by using hyperlinks in the text (like this). Clicking on the hyperlink will open the video in your default internet browser. None of the videos are required viewing - I try as best as possible to explain the concepts with words and screenshots as much as possible, but they may be helpful in illustrating points that are difficult to visualize.
Fireteam Basics
Organizing Fireteams
-----------------------------------------------------
By default, players are generally not organized into any specific fireteams at game start. Some servers set scripts that automatically assign players to the first available Star (usually Alpha). This icon displays in the top left if you are not part of any Star at the moment.

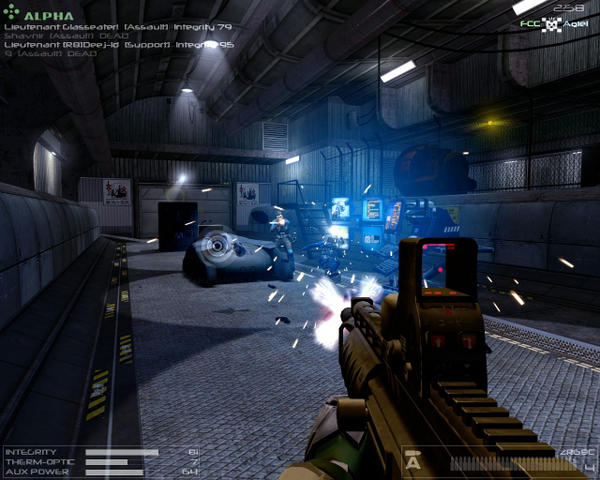
The default keys to join a Star are F5 through F9, corresponding to Alpha, Bravo, Charlie, etc. Members of the same squad have their team icons more prominently visible and can see the names and Integrity level of team-mates at a glance in the upper left.

Organizing into Stars improves overall situational awareness and reduces friendly-fire incidents. Fireteam members can see each other's team icons at any distance and even through walls. A player's team icon dissappears when killed by an enemy, so being part of the same fireteam provides far more visual cues through your HUD on the position of your friends and enemies.

Ghost-calling
-----------------------------------------------------
An operative that has picked up the ghost can select it as a primary weapon (default '1' on the keyboard) to interface with it directly - after a few seconds, the machine will link into your HUD and display enemy positions within 40m on the map, even through walls. Only the carrier possesses this view - communication is vital[shameful.steam-censorship.pw] to taking advantage of this intelligence.

Use the compass located at the bottom of the map along with the distance indicators provided to mark targets for the rest of your squad. Make sure to scan in all directions and be wary - enemies may be out of your immediate view or could be lurking outside of the 40m detection range. Voice communication is ideal, but even a quickly typed message giving direction and distance helps immensely ("E 21m", for example). Communicating via body language is also possible - facing the enemy and moving appropriately can also communicate to nearby teammates. If defending the carrier, keep in mind your orientation relative to the agent carrying the ghost as he calls directions, and watch his body language if he is close proximity.

Stealth and Detection
-----------------------------------------------------
Your cybernetic interface has no directional indicators to show where incoming damage is coming from; such sophisticated ballistic triangulation equipment has yet to be rendered practically wearable. Operatives will need to rely on visual and auditory cues in order to locate enemies, and should in turn take care to minimize their visibility and sound generation. Keep in mind the differences between vision modes and what opponents and team-mates will have difficulty seeing. Footsteps can be quieted by slowing to a walk and aiming your weapon (default right mouse-click).

A more detailed discussion on stealth tactics can be found in Thermoptic Camouflage Strategies.
Weapon Handling Basics
Dropping and Using Weapons
-----------------------------------------------------
All players in NEOTOKYO° can drop weapons with the G key - this is necessary in order to use the ghost (note the dropped weapon on the ground in the screenshot). Players that are killed will drop equipped weapons as well as unused consumables like grenades.

A player can pick up any weapon off the ground and wield it regardless of class or the player's current clearance level. One notable exception to this rule is that Recon class cannot pick up a dropped PZ light machine gun at all (it's just too heavy!). This allows weapons to be "bartered"[shameful.steam-censorship.pw] at the start of the map, and often figures in advanced or competitive play in coordinated groups - giving an SRS sniper rifle to a Recon is very potent for example, as the Recon can often reach vantage points that cannot be accessed by an Assault. Keep in mind that a gun will get "eaten"[shameful.steam-censorship.pw] if thrown to a player that already possesses the same firearm, so be careful with throwing placement.

While the default weapon access for each class often provides a sufficient set of tools for most situations, consider bartering weapons within your fireteam to optimize the firepower of your entire unit. A skilled player at the topmost Lieutenant rank can benefit the entire team by trading high-rank weapons to lower-ranked, thereby giving them a greater chance to score kills and move up to Lieutenant faster.

Dropping and Using Grenades and Detonation Packs
-----------------------------------------------------
Unused consumables dropped by dead players can also be picked up and employed by any class. Supports and Recons can pick up unused fragmentation grenades, and Assaults and Recons can pick up unused smoke grenades. Be careful when selecting your grenade midway through the match, as you may have picked up other variants. This is a minor annoyance if you toss a smoke grenade when you meant to toss your fragmentation grenade; this can become a very costly mistake if you mistakenly throw a fragmentation grenade but expected a smoke grenade! (often resulting in a suicide or teamkill) Pressing your consumable selection button (default 4) will toggle through all grenade types in your inventory. Remember that smoke grenades are visually distinct from frags - they have a small tag attached to the pin.

Dropped unused detonation packs will not be picked up (each has an access code unique to the Recon that carried it), but planted detpacks can have their detonator dropped if a player is killed without triggering it (it's quite small and can often be missed, however). The player picking up the detonator can switch to it and detonate it - but any kills scored will be credited to the original planter, not the player detonating. Use extreme caution when attempting to use a detonator dropped by another player, as there is no way to tell which planted detpack is linked to it! (aside from seeing where the recon originally planted the detpack)

Press the button you've mapped to miscellaneous weapons - default 4 - again to toggle between picked up grenade types. Smoke grenades are always identifiable by the highly visible tag in the viewmodel, and the name of the weapon is always in the bottom right corner. Detpacks must be used or triggered before grenades can be selected.

Sustained Fire Accuracy
-----------------------------------------------------
NEOTOKYO° tends to separate weapon recoil into two distinct components, which are:
  • weapon kickback, which shifts the aiming point of your crosshair as you fire, and
  • bullet dispersion, which refers to the widening dispersal of your shots when firing rapidly.

I try to point out cases where this has a noticeable impact on tactics. Learning the "feel" of a particular weapon - how rapidly you can fire before dispersion fully kicks in - will go a long way towards improving your accuracy and kill ratio.

Choosing a Weapon
-----------------------------------------------------
A common misconception that many new players have is that higher tier weapons should always be taken when available. While it's true that weapons unlocked through higher ranks boast definite advantages, keep in mind every weapon in NEOTOKYO° features a basic tradeoff between damage, ammunition capacity, ability to penetrate cover, and overall ease of detection. Since the game features no hit or directional damage indicators, preserving the element of surprise remains a factor, while the ability to lean around corners makes penetration a likewise valuable category. Certain weapons are just plain more versatile as well (a SRS is very difficult to use in close-range, for example).

Higher ranks are best thought of as providing a greater diversity of choices and playstyle, rather than just outright improvements - a skilled Assault, for example, can do just fine picking the ZRS round after round, but the greater weapon choices available at Corporal and beyond allow some further specialization if the situation warrants it (for example, taking a shotgun if the enemy team is relying on Recon rushes). I try to discuss each weapon's pros and cons relative to the playstyle class in detail, but keep in mind there's no replacement for proficiency gained by experience.

For brevity, I don't go into a detailed discussion of specific weapon damage or breakpoints, but I do try to note a general idea of how much damage a weapon is capable of by comparing against the number of hits it takes to down an Assault player. Detailed damage values determined by in-game testing can be found on Afr0's Weapon Damage guide.
Recon Overview

Overview
-----------------------------------------------------
The recon class is lightly armoured and possesses high strategic speed, due to the fact that running does not exhaust auxilary power - it simply reduces the recharge rate. In a flat-out sprint they are not considerably faster than an Assault, but can keep sprinting for much longer. They are excellent candidates for setting ambushes, flanking maneuvers, and chasing ghost carriers. With the lowest health pool and generally only having access to low-caliber weapons, Recon players will be hard-pressed in a direct firefight, but their mobility and unorthodox weapon selection make them masters of guerilla warfare.

The Recon's higher base movement speed makes them alright ghost carriers, but the movement burden imposed by the ghost makes them very vulnerable - their "super jump" ability cannot be executed while carrying the Ghost, and base movement is only slightly quicker than an Assault. On the other hand, they are often able to move the ghost to less accessible positions, or get behind enemy lines to score a Ghost that has spawned close to a capture point.

Abilities
-----------------------------------------------------


Recons are capable of executing a "super jump" when sprint jumping that consumes 45% AUX power (and is the main use of AUX power for this class). Skilled players can chain this forward momentum into a bunny-hop to reach points on the map with extreme speed, or to make lightning attacks from unexpected directions. Absolute Bunny-hop mastery is certainly not necessary to play effectively, but having the ability to keep up forward momentum for at least two or three more jumps can often make the difference between death and escape from a dangerous situation; it's an important tool in any Recon's kit.

Recon jump height is significantly higher, enough to clear many obstacles and reach many map features that are otherwise out of reach, such as roofs and ventilation shafts. Official maps are designed with an eye towards recon capabilities - keep an eye out for alternate routes to spring an ambush from.

The class also possesses the longest thermoptic camouflage timer - 13 seconds of continuous use (rechargeable with time). Notice that a player using camouflage is not completely invisible and shows a telltale shimmer, and will still show up in various ways on certain vision modes (movement will still be highlighted on Assault motionvision, and a cloaked player will show up in Thermal vision, albeit as a dark figure). A recon has considerably more leeway in when and for how long to deploy their camouflage, however, and can often afford to sit motionless, cloaked in a dark corner - making them very difficult to see in any spectrum!

Recons possess nightvison, which is mostly of use in the dark ventilation shafts they use or in other dark corners. Since nightvision is also monochrome black and white, and brightens everything, some players may toggle it from time to time to try and get a high-contrast view of their surroundings. Generally though this vision mode is highly situational.
Recon Weapon Selection
Recon armament is generally lightweight, featuring low-caliber submachine-guns at early ranks, unlocking detonation packs and sniper rifles as you progress, and eventually gaining access to assault rifles and pump-action shotguns. Coupled with lower recon armour (you take full damage from all attacks, where Assaults and Supports take less), Recon players need to ensure they ambush rather than shoot it out in straight firefights - which you will almost always lose. Conversely, a Recon who is low on health remains very dangerous, as it is mobility that the recon relies on. Remember that all weapons can be dropped and swapped for someone else's dropped weapon; regardless of access level - this is especially key for the recon class, who can scavenge much more powerful weapons from other killed classes. Note that the recon cannot pick up the PZ (the Support heavy machine gun) - it's just too heavy!


Sidearm
-----------------------------------------------------
The Milso has decent accuracy, but isn't really outstanding. Damage is low, but the gun is suppressed, which means there will be no muzzle flash to give away your position (very useful while cloaked).

A weapon of absolute absolute last resort.[shameful.steam-censorship.pw] The knife has a tiny hitbox and usually takes 4 or 5 hits to down a full health assault, depending on hit locations. The knife does have one specific use though - a stab in the back will instantly kill a player regardless of their current integrity level or class: even a Support will go down in one hit. The angle is very small and this technique is nearly impossible to pull off on a turning or maneuvering player, but it can sometimes be useful if you have the drop on your opponent.

Private-tier (0-3 points scored)
-----------------------------------------------------
Vicious kickback and spread makes this gun very, very difficult to use. It is however suppressed, and the only suppressed option at Private rank for Recons. A cloaked recon in a dark corner that is not moving is very hard to detect (barely registering on any vision mode) when using a suppressed weapon, and the MPN is the earliest ambush weapon you can utilize.
Avoid unless you are very sure of yourself; players who select this often do so in conjunction with rush or ambush tactics, aiming to quickly eliminate a player (bursts to the head can be very lethal) and scavenge his (often better) weapon.

30 round magazine, moderate accuracy, solid damage per shot (but still weaker than assault rifles). Good for mid-to-close range combat.

50 round magazine and much worse damage-per-shot make this the bullet-hose of SMGs. The extra 20 rounds can make a big difference in a protracted firefight, but it's imperative to make those shots count - individual damage is very small and you need 5 or 6 hits to down an Assault.

Corporal-tier (4-9 points)
-----------------------------------------------------
A lightweight sniper rifle. Takes 2-3 shots to drop most enemies however, even to the head. Damage value is still quite high so a previously wounded player can often be taken down in one shot. Shooting from long-range while cloaked is the best bet - you want them to be guessing. Don't underestimate the suppression effect that a good sniper has on enemy movements as well. You may not score an amazing number of kills with this weapon, but the ability to funnel enemy movements brings a lot of utility.

A suppressed Jitte. Really overall excellent choice. Not a noticeable reduction in damage compared to the regular Jitte. Penetration does suffer, but will still punch through glass/thin walls.

A suppressed SRM, featuring slightly less damage per shot/penetration, but no muzzle flash and minimal noise.

All suppressed weapons are very useful to Recons since they tend to rely on striking the enemy unaware - any edge that delays enemy reaction time helps immensely.

Every recon gets it. Learn how to use it well - the detonation radius is very big, ~150% - 200% bigger than a frag grenade, and highly lethal to anything in the blast radius. The uses for this are manifold:
  • Kamikaze suicide attacks ("detrushes"[shameful.steam-censorship.pw])
  • hidden traps behind corners or under map objects
  • "obvious" traps, with the detpak in plain sight, to buy time - players will be reluctant to rush through a passage that's obviously trapped. This works well if you're trying to cover a ghost carrier who is attempting to escape.
  • trapping the ghost (and blowing it when you hear/see that an enemy player has picked it up).
Remember though you need to have the detonator out to blow it. This weapon, more than any other, gives the recon class a huge amount of utility.

Sergeant-tier (10-19 points)
-----------------------------------------------------
Standard assault rifle. A double-edged choice - taking this gives you firepower on par with an Assault or Support, but it has no suppressor which makes it difficult to remain concealed while cloaked, and unlike the other classes your health is much lower.

Lieutenant-tier (20+ points)
-----------------------------------------------------
A pump action shotgun. Very devastating - a one shot on most recons, and potentially assaults as well (depending on where the pellets hit). Even deadlier given recon mobility and capability for ambush tactics. It's a long road to get here though, and the other classes get even more lethal toys. Keep in mind shotgun pellets will not reliably punch through glass; and be aware of your latency when selecting this weapon - a spot of lag or packet loss may mess with your hit registration - and if your first shot doesn't register you may not get a second!

You can load slugs as well if you have an empty chamber (press alt-fire instead of reloading), but slugs have a mediocre rate of fire despite their reasonable accuracy since you load them one at a time. You're likely better off using the time to get closer.

A single shot battle rifle, suppressed. Accuracy is good but drops off very quickly if you tap the fire button too fast. The key is to find the right rhythm where you don't lose accuracy. Range is your friend. If you compare this against the ZRL as a sniper weapon, you lose a lot of damage and the scope, but gain suppression, and a bit more ammunition capacity, and while the fire rate is higher your accuracy does drop off faster.

Private Rank Weapon Selection
-----------------------------------------------------
Recon first-round loadouts mostly consist of deciding between the SRM, the Jitte, or the MPN. Generally the SRM really favours the close-range high speed combat style of most recons but experiment to see which you prefer. Recon play really opens up at Corporal with access to the detpak and better suppressed weapons.
Assault Overview


Overview
-----------------------------------------------------
The Assault class is a jack-of-all trades, possessing a standard fragmentation grenade, thermoptic camouflage ability, and the ability to sprint at the cost of auxilary power. They are slightly more durable than Recons, taking about 20% damage less across the board, but the lack of an unlimited sprint means that an Assault will have to be a little more selective about positioning. Overall, this is a well rounded class that has no particular standout strengths but not many weaknesses either, and unlocks a very versatile array of weapons. Assaults are an excellent choice for beginners and veterans alike, and will often form the fighting backbone of the team, with a good combination of firepower and the mobility to bring it to bear.

Abilities
-----------------------------------------------------


Assault mobility and cloaking are average, with the ability to sprint for several seconds before needing to catch their breath, and an 8 second cloak. A five second difference compared to the Recon cloak meter may not sound large on paper, but in an actual firefight five seconds can feel like a lifetime. It's important to conserve your stamina and cloak battery until needed - many a match has been lost because an assault ran out of stamina and wasn't able to catch the ghost carrier, or redeploy to a better position!

Notice that a player using camouflage is not completely invisible and shows a telltale shimmer, and will still show up in various ways on certain vision modes (movement will still be highlighted on Assault motionvision, and a cloaked player will show up in Thermal vision, albeit as a dark figure). With their limited timer, Assault cloaks have a much narrower timeframe for defensive use, but are often long enough to cover hops from cover to cover, and occasional peeks around corners.

Assaults possess motionvision, which is arguably the most useful vision mode. You can play entire matches in motionvision if you get used to the limited colour palette. Still, the film grain effect makes it very difficult to see the telltale shimmer of a cloaked enemy - and motionvision will not pick up on an immobile foe! The lack of colour contrast can be a detriment in spotting detonation packs and grenades. It's important to learn team silhouhettes as well; teamkills are otherwise likely.
Assault Weapon Selection
Assault armament is very versatile, featuring early assault rifle access, unlocking battle rifles and shotguns initially, then gaining access to high-power assault rifles and then sniper rifles or automatic shotguns. Winning a shootout with a Support is a dicey proposition and usally needs superior positioning, frag grenades, ambushes, or some combination of all three, but Assaults generally make mincemeat of fast moving Recons in straight-on fights due to motion-vision, better innate armour, and more powerful weapon access. Still, keep in mind these advantages are rendered moot in an ambush.

Sidearm
-----------------------------------------------------
Don't forget about this sidearm - it may save your life! You can toggle between a regular semi-auto mode and a "magdump" mode with the alt-fire button. To all intents and purposes it becomes a 15-round SMG in the latter mode and will shred anything at close range.

Fragmentation grenades are highly lethal and can be bounced in typical Source engine fashion around corners - and in some very improbable places! The epicentre of the blast radius is a one hit kill on any class, even the mighty Support, and enemies on the edges will be badly wounded if not killed outright as well. Don't waste it; it's a very potent tool.

A weapon of absolute last resort.[shameful.steam-censorship.pw] The knife has a tiny hitbox and usually takes 4-5 hits to down an assault, depending on hit location. However, a stab in the back will instantly kill a player regardless of their current integrity level or class: even a Support will go down in one hit. The angle is very small and this technique is nearly impossible to pull off on a turning or maneuvering player, but it can sometimes be useful if you have the drop on your opponent.

Private-tier (0-3 points scored)
-----------------------------------------------------
Vicious kickback and spread makes this gun very, very difficult to use at anything but close range. Also suppressed, but horrendous individual shot damage and kickback make this a bad idea for sniping.
Assaults get a better suppressed option in the form of the ZR68S assault rifle, meaning that the MPN is often taken only when no other choices are available (often as the result of having a negative score). Use short bursts - aim at the target's body and let the kickback push your aim up into the head.

30 round magazine, moderate accuracy, solid damage per shot (but still weaker than assault rifles). Good for mid-to-close range combat. Not bad, but outclassed by the ZRS in most every category. It is lightweight though and will penalize your movement less.

50 round magazine and much worse damage-per-shot make this the bullet-hose of SMGs. The extra 20 rounds can make a big difference in a protracted firefight, but it's imperative to make those shots count - individual damage is very small and you need 5 or 6 hits to down an Assault.

Standard assault rifle. One is suppressed, the other is not. In a strange twist, the suppressed version does more damage with less penetration and a lower rate of fire, while the unsuppressed version does less damage but makes up for it with higher penetration and fire rate. Many find the ZRS preferable due to the lack of noise/muzzle flash giving you away. The higher base damage is also more generally useful, while the ZRC's fire rate and penetration tend to be far more situational advantages.

Corporal-tier (4-9 points)
-----------------------------------------------------
A single shot, semi-automatic battle rifle. Accuracy is good but drops off very quickly if you tap the fire button too fast. The key is to find the right rhythm where you don't lose accuracy. Range is your friend.

Slightly less damage and penetration than the M41 in exchange for suppression. Having no muzzle flash is very useful in long range firefights, and while cloaked.

A pump action shotgun. Very devastating - a one shot on most recons, and potentially assaults as well (depending on where the pellets hit). An Assault with a shotgun is an excellent "recon-hunter", able to protect a squad from recon ambushes (assuming good use of motionvision and the appropriate reflexes, of course!). Keep in mind shotgun pellets will not reliably punch through glass; and be aware of your latency when selecting this weapon - a spot of lag or packet loss may mess with your hit registration - and if your first shot doesn't register you may not get a second!

You can load slugs as well if you have an empty chamber (press alt-fire instead of reloading), but slugs have a mediocre rate of fire despite their reasonable accuracy since you load them one at a time; don't bother unless you literally have no other options - and even then you may want to consider using the Tachi instead.

Sergeant-tier (10-19 points)
-----------------------------------------------------
A heavy assault rifle with superb penetration and damage. Takes 3 or so shots to drop most enemies. Noisy, and has very visible tracers compared to most weapons. Not very subtle - expect your position to be given away very easily as soon as you fire. Bullet dispersion is considerably worse than the ZR series - tap or burst fire at long range.

The suppressed MX trades a lot of damge for suppression, to the point where it does slightly more per shot than the ZRS, but still retains the considerably worse dispersion. Some people feel it's not worth the tradeoff from the ZRS, but the high damage makes it very lethal in CQB where dispersion is not as big a factor.

Lieutenant-tier (20+ points)
-----------------------------------------------------
An automatic shotgun. Absolutely devastating and will chew through anything close up[shameful.steam-censorship.pw] (damage per round is similar to the Supa), but remember, shotgun pellets do not punch through glass or hard cover.

Neotokyo's top end sniper rifle. Custom-tooled .308 caliber anti-material rounds will drop a recon in one shot, an Assault in one shot to the head (two shots anywhere else), and a Support in two shots anywhere. Very inaccurate if not scoped. Don't miss.[shameful.steam-censorship.pw]

Private Rank Weapon Selection
-----------------------------------------------------
Assault first-round loadouts mostly consist of deciding between the ZRC, the ZRS, or potentially the SRM. Many Assault players swear by the ZRS alone and will continue to use it even when higher tier weapons are available - it's an excellent weapon that suits all situations.
Support Overview


Overview
-----------------------------------------------------
The Support class features the highest health pool out of all the NEOTOKYO° classes, winning via the application of brute force, smoke grenades, and smoke-piercing thermal vision. It is an excellent class for assaulting choke points, but low mobility means a Support player needs to be very mindful of positioning and map awareness - a Support caught far out from a ghost will have no chance of catching a carrier. In urban maps and building interiors where getting into close range isn't an issue the Support is king, but must take care not to get flanked or fall out of position.

Abilities
-----------------------------------------------------


Supports have no sprint or cloak, but trade this for the highest overall survivability among all three classes; taking ~50% less damage from all weapons compared to an Assault.

A Support can often shamble into a hail of gunfire, turn to engage, and kill the attacking player despite taking a number of hits, making them excellent for assaulting a choke point. This advantage is double-edged though, since a Support with low HP is simply a sitting duck, with no cloak or sprint options to improve survivability. Endeavour to try and keep integrity loss to a minimum when attacking, and always be mindful of whether or not you can afford to trade shots given the number of enemy players remaining.

One major advantage that Supports get to help conserve integrity are two smoke grenades that synergize well with thermal vision. Smokes obscure the vision of every other class, but the smoke is not completely impermeable at the edges so take care not to give your silhouhette away- it blocks sight but not bullets. Smoke will not block fragmentation grenades either; be careful not to be too obvious about your position within the smoke. The simple appearance of smoke can sometimes be enough to break the nerve of other players and cause them to scatter in fear, but beware of canny players who will wait out the duration behind cover, throw frag grenades, or attempt to suppress you through the smoke with speculative shots.

The most obvious application for a smoke grenade is to cover yourself and then engage enemies from the relative safety of the smoke, but muzzle flashes will show through it, allowing observant players to take speculative shots at you. Other tactical applications of the smoke are:
  • Deterring a rush by a team of assaults/recons, by "closing" passages - the smoke will not prevent movement through a passage, but a player doing so will risk temporary blindness and runs the risk of being shot as soon as he emerges from the cloud.
  • "Spoofing" your presence to non-supports: tossing the smoke in one direction may create the expectation that you are there behind or in the smoke.
  • Baiting out frag grenades by assaults - patches of smoke are often tempting targets for a blind frag toss in the hopes of scoring a Support kill
  • Tossing onto roofs or other sniper spots to prevent enemy snipers from using them (such as the roofs on nt_tarmac)
  • Tossing in front of team-mates to cover their retreat/advance - this can be useful on long streets or hallways, like the streets on nt_engage or the train platforms on nt_transit (be sure you coordinate this well; the sniper on your team may not appreciate a sudden wall of smoke blocking his view)
  • Tossing it like a frag grenade as a bluff to flush out an enemy (who may believe the projectile is actually a frag)

Support thermal vision can see through smoke, regardless of who threw it, which actually makes Supports very good at countering Supports. This also means that Supports work extremely well in pairs - one Support can cover with a firearm while the other tosses smoke, then switching roles to continue the advance. Non-cloaked players show up brightly, but the surrounding terrain is generally a lot cooler. Cloaked players will also show up, but in the same hues as terrain or darker. With some practice a Support player can get decent at spotting these darker shadows as well. Toggle[shameful.steam-censorship.pw] between the thermal and normal light spectrum as needed to get a better picture.

Players who are uncloaked and not moving will stand out as bright as day to a Support, making this vision mode excellent for long range sniper battles with little movement, or assaulting immobile defenders who may be hiding in dark corners - situations that Assault motionvision can have trouble with. Thermal vision can be considerably affected by the temperature of the map as well - snowy maps like nt_isolation or nt_vtol are much easier to see in with thermal.
Support Weapon Selection
Support armament provides rapid access to high-power but specialized weapons, a trend that continues throughout the tree. Be mindful of the drawbacks of the weapon you've selected. Support weapons generally are noisy and lack supressors; while you have the health pool to survive a protracted firefight, you do not have the speed or ability to escape should the odds turn against you - even smoke grenades provide no protection against a frag. Evaluate carefully and think ahead whether giving away your position by opening fire will be advantageous to you - if you can score a kill it often is, but if you're unsure you can secure it you will simply light yourself up as a target for the whole team.

Sidearm
-----------------------------------------------------
The Kyla is powerful enough to be a main weapon (and if you take the shotgun will probably be your main long range option). Think of it as a pocket-size sniper rifle with ferocious kickback. Full-health Recons drop in two hits, Assaults drop in 3, Supports in 4 hits. Kickback is fierce, but mastery of this weapon is very, very worthwhile. Get good with this if you plan to play Support regularly; it often will help cover your weaknesses in early rounds (raw firepower to complement the M41, or accuracy at range to complement the Supa7).
Remember, as with all weapons, you can pass it on to other players - some Recons particularly appreciate having access to a pocket sniper rifle in early rounds before access to the ZRL is available.

Note that unlike the Recon and Assault, the Support does not begin the round with a knife. They can, however, be scavenged off of dead players as other weapons, and function identically.

Private-tier (0-3 points scored)
-----------------------------------------------------
Vicious kickback and spread makes this gun very, very difficult to use at anything but short range. This is the only suppressed weapon a Support can take until Sergeant rank. Generally not recommended - other Support options pack much greater firepower and Supports lack the mobility to quickly deploy this weapon at close range, but it will not give away your position inside smoke via muzzle flash. If you must use it, aim at the body and fire in short bursts - let the kickback move your crosshair up into the head.

30 round magazine, moderate accuracy, solid damage per shot (but still weaker than assault rifles). Good for mid-to-close range combat. Not bad, but outclassed by the ZR68C in most every category. It is lightweight though and will penalize your movement less. Not really useful for a Support, since your mobility is poor to begin with.

50 round magazine and much worse damage-per-shot make this the bullet-hose of SMGs. An interesting alternative to the ZR68C at Private rank - you get 20 extra rounds at the cost of reduced damage.

Standard assault rifle. The unsuppressed version does less damage than the ZRS but makes up for it with higher penetration and fire rate. The Support only has the unsuppressed assault rifle option - keep in mind that firing this while in smoke will light up your general position due to the muzzle flash.

A single shot, semi-automatic battle rifle. Accuracy is good but drops off very quickly if you tap the fire button too fast. The key is to find the right rhythm where you don't lose accuracy. Range is your friend. Close in, you may prefer the firepower of the Kyla - the M41 is not a great close-quarter weapon. As with all unsuppressed weapons, the muzzle flash may give away your position through smoke.

A pump action shotgun. Very devastating - a one shot on most recons, and potentially assaults as well (depending on where the pellets hit).
Support health means you'll likely be able to get off a second or even third shot in CQB, but, getting into optimum range may be problematic given your lack of speed. This weapon may not be a good idea to take on open maps or routes as a result - try to stick to enclosed spaces where lack of mobility is less of a disadvantage.

You can load slugs as well if you have an empty chamber (press alt-fire instead of reloading), but slugs have a mediocre rate of fire despite their reasonable accuracy since you load them one at a time. Use the Kyla instead if you need to fight at range.

Corporal-tier (4-9 points)
-----------------------------------------------------
A heavy assault rifle with superb penetration and damage. Takes 3 or so shots to drop most enemies. Noisy, and has very visible tracers compared to most weapons. Not very subtle - expect your position to be given away very easily as soon as you fire. Bullet dispersion is considerably worse than the ZR series - tap or burst fire at long range. This gun is the reason many players switch to Support at Corporal - your huge health and high MX damge will make you a terror in a direct fight. The MX-5 is usually an outright replacement for the earlier ZRC and SRM despite it's higher noise and more visible tracers, though some players may still appreciate the higher magazine capacity of the latter submachine gun.


Sergeant-tier (10-19 points)
-----------------------------------------------------
This suppressed version trades a lot of damage for suppression, to the point where it does slightly more per shot than the ZRS, but still retains the considerably worse dispersion of the MX. The high damage makes it very lethal in CQB where dispersion is not as big a factor.

Slightly less damage and penetration than the M41 in exchange for suppression.

Both the M41S and the MX-S are the only "stealthy" Support options - handier than you think, because muzzle flash will show through smoke - often the factor that lets enemy players triangulate and kill you. A "stealthy" Support seems like a contradiction in terms, but a solid corner still hides you almost as well as most other classes and a lack of muzzle flash prevents too much attention from being drawn to you. Some players may just simply prefer the higher raw damage of other unsuppressed options; whether suppression helps or hinders depends more on your playstyle and preferences.

Lieutenant-tier (20+ points)
-----------------------------------------------------
A high capacity 100 round machine gun. Aim in general direction of enemy and hold down trigger - it can even penetrate some softer corners. It's also surprisingly accurate when burst-fired so it's also possible to utilize this like a 100-round assault rifle, though damage-per-shot is lower than the MX and slightly less than the ZRC, albeit with much higher ROF.

Private Rank Weapon Selection
-----------------------------------------------------
The Support actually has quite a bit of choice in first-round loadouts due to the wide selection and high specialization of their weapons. You can choose an all-rounder like the SRM or ZRC, a shotgun for close-in work, or the M41 for sniper support.
Credits and Additional Reading
Important Contributors
-----------------------------------------------------
A very special thanks to the following resources that were instrumental in writing this guide:
  • Sanjuro Diplomacy Corps - the winning 3v3 tournament team, for being nice enough to pose for a publicity shot.
22 Comments
swagmaxxer9000 31 Aug, 2024 @ 2:52am 
played some matches earlier, thank you for the tips!
Dali 7 Apr, 2024 @ 10:01pm 
@Perturbed Princess yes that link's down. Callout maps, mods/scripts, additional guides and more can be found at https://bonahnsa.com

You're welcome to join the discord if you haven't already, at https://discord.gg/NjkAsDBR :Camo:
Velvet 7 Apr, 2024 @ 9:48am 
neotokyohq url is down
Boucher Charcutier 26 Feb, 2017 @ 11:35pm 
Nice guide !
Shady Bones McGee 21 Jun, 2016 @ 5:45pm 
Quite helpful and informative! Thank you for making this bud :happymeat:
Dali 9 Jul, 2015 @ 8:10pm 
Nice guide from a nice guy.
HANK HELL 30 Mar, 2015 @ 3:16am 
support machine gun walk toward enemy while firing profit
crump 18 Mar, 2015 @ 5:39am 
yeah. this game is neither of those. mental awareness is key, not flashy bunnyhops. you have a case of "Rambo Syndrome". Basically this game is the opposite of a rambo simulator. don't try to do anything with spray. doesn't work. Try to get as sneaky as possible. If possible use thermal vision. assault is best class for beginners or veterans, is very versatile. My four liner guide to neotokyo.
NLxDoDge 30 Nov, 2014 @ 1:23pm 
After reading this I still can't play this game just the fact that it's to hard to understand the damage or recoil, I never got a kill at all in all of my playin time, spraying on a enemy cqc also doen't help so basicly I suck at this And I will go back to Cod and battlfield :) bye
ferocious crabster 26 Oct, 2014 @ 4:57pm 
Really good guide, helps a lot!
Thank you for making this!