Darkest Dungeon®

Darkest Dungeon®

59 ratings
The Butcher's Circus: the most comprehensive guide about Darkest Dungeon's PvP mode
By PRO100_Sasha
All circus guides are outdated. It's a mess, I'll fix it.
I'll tell you about building teams, give examples of teams (including options for beginners), describe each hero and, briefly, trinkets.

To get started, you can look at the "starting teams" section in the basics. This is as short and simple as possible guide to four starting teams, for which you do not need to go into other sections to understand. With any of them you can start to understand the circus.

Next, I will give a more detailed description and analysis of heroes and trinkets, and at the end I will describe about a dozen teams (of varying degrees of effectiveness) with personal trinkets.

Further - on your wit! There are a lot of variations of teams, you can think of all sorts of funny teams. And I strongly advise you to do so.
2
   
Award
Favorite
Favorited
Unfavorite
BASICS
I would like to first tell a little about subjective exrerience at the circus.
In the first days of its release, it received a lot of criticism. Some of said criticism was deserved. In the beginning there were strong problems with the connection and constant disconects. The balance suffered in some cases, and it still does, there were no updates for the circus. There were many complaints about the Man-at-Arms and his Bellow, which destroyed all newly created beginner's teams, which usulaly contained just direct damage and simple heals. The circus has found a reputation of a stress hell. I myself joined, although silently, to this negative and simply postponed the DLC, especially since I wanted to finish with the main game first.

But still, despite this, time passed, and the circus got some attention. People used different tactics, noticed the advantages and disadvantages of heroes, unlocked trinkets. Some of heroes, trinkets, strategies came out of the shadows, some went there. Meta teams were created, some were created immediately, some were supplemented and improved. The understanding of the mechanic and whole variety of strategies began to form. YouTubers appeared. Some players developed a meta, some was fooling around, some just wanted to get achievements and go home.
I was one of these achievement hunters. Initially, I just wanted to unlock achievements and finish with the mode. After I finished with the base game, I didn't had plans to linger in the game, other achievements are waiting! At first I just found a few, as I thought, strong teams and grinded rank and prestige, trying to unlock the necessary trinkets. For a while, I just ran the same team over and over again. And I achieved the darkest rank. And the end of the prestige level is still far away. Victories have become far from important, I began to do nothing but experimenting. And I received what I did not expect to receive. Fun. And now, even when I am done with all achievements, I still want from time to time to go into the circus and try another stupid team around niche mechanics. Why not?

Now the circus has its own, not too small, audience. Who wanted to just try or get achievements, they did it and then left. The remaining players are no longer trying super hard to win, but invent interesting and funny teams and show them to the same inventors of interesting and funny teams. The YouTube scene also revealed, at least creators that I watch. And these guys suddenly began to gain subscribers and views. Hmm, is it the very time to start educational program? ..

The problems of the first days in the circus are over. The servers were repaired, desyncs and disconnects are quite rare. Braindead stress spammers are much less common, and those who remained are more often than not overplayed by a skilled player. The random at the basis of the whole Darkest Dungeon creates many interesting situations in which, it would seem, an absolutely stupid team can outplay the strong one, simply because a couple of necessary crits flew out and bad team managed to dodge a couple of times. A balance on the principle of a rock-paper-scissors also plays a role, in the circumstances when you also do not know in advance with whom you will fight, as a result, situations of obviously losing or winning often arise. But the ability to use the team correctly decides much more than you think! Here, scissors will be able to cut stone, especially if the poison is injected into the scissors and it gets to the weak point of this stone. And how nice it is to cut with such scissors, I will tell you! Even if they break down as result, and the stone will survive in the end.

With this introduction, I wanted to say this. If you doubted, give the circus a chance. If you do not sweat it too mich and not strive for victory at all costs, it can give extremely entertaining exercise for your mind. As part of this guide, I will try to describe all the mechanics so that there is somethig for your mind to work around, and I will give a few examples of teams, so you can have somewhere to start, so that it is clear what is stone, what is scissors, what is paper.

Let's start, future colleagues in gladiatorial art!
Brief description of the mode
The Butcher's Circus (BC) is a free DLC, which is a PvP mode of Darkest Dungeon. The player picks up a team of four (without duplicates) heroes, equips them with trinkets and sends them shoot, poison and yell against other soldiers of fortune.

As the battles holds, the player gradually unlocks new trinkets with prestige system. The smaller losses for themselves and large for the enemy, the faster the development is going on. 8 points plus the number of killed heroes are given for a defeat, 15 points minus the number of heroes killed by an opponent given for a victory. Thus, even the loss gradually unlocks new trinkets. At the 69th (nice) level, the last trinket unlocks, the rest of the prestige unlock customisation for banner and achievement. Initially, only one of each universal trinket is available, then you get a duplicate for each (two identical ones on one hero are still impossible, as in the basic game), and personalized trinkets will also unlock gradually. Prestige can be obtained for the tutorial battle, but it is impossible for practice battle (former, most likely, is a bug). Also in the tutorial you can get all the achievements, except to kill each hero, get the darkest rank and play in a duel.


The player also earns a rank. The rank does not affect anything except on the displayed rank icon, obtaining an achievement and unlocking banner customisation. The rank is obtained for victory and is lost for defeats. It is reasonable to expect that the player with the last rank (darkest from the third to the first, red icon) is at least competent in the mechanics of the mode
Key changes compared to the base game
In the circus, some skills, some basic mechanics, and the trinkets are changed. Here I will list general changes and new mechanics. Specific changes for specific heroes will be discussied alongside their reviews.
  • Who goes first is decided by random (50/50). The loser receives +15 DODGE for the entire first round (a unique buff that falls off only by the end of the round, and not after the hero uses their turn);
  • Heroes leave corpses after death (they do not if the hero was killed by crit). Corpses have 50% move resist, 200% stun and debuffs resists, 0% to both dots;
  • Speed is completely removed. The player selects heroes on their own. All debuffs for speed and buffs for speed are removed, the debuffs are usually simply removed, and the buffs are replaced with other bonuses;
  • There is no torch as a mechanic. A bar with a torch shows how much time it remains before turn ends (if it does your hero will pass);
  • There is no inventory and consumables;
  • There are no quirks;
  • The basic chance of a virtue is 0% (without buffs affliction is guarantied). Getting to 200 stress while virtued will get you a heart attack instead of virtue and stress reset.
  • Horror cannot be resisted (always applied);
  • Dots (bleed, blight) do not cause death check and as such cannot kill;
  • Each (failed) death check reduces deathblow resistance by 15% for the whole battle. Heroes have abilities with an increased chance to deathblow, and deathblow resistance can be buffed/debuffed as part of buff/debuff mechanic;
  • New mechanic – dazing. Heroes in daze can only be selected when the rest are selected, outside other dazed. A kind of half-stun. Daze resistance takes into account stun resistance. Does not give resistance to stun after daze is gone;
  • Stun resistance buffs do not progress. The maximum is 50%. If you stun again after the stun, there will again be 50% stun resistance.
  • The last survivor receives buffs: 10 ACC, 10% DMG and 10% deathblow resistance.
Some of the major changes among the heroes:
  • Almost all heroes now have at least one ability which can cause stress (the only exception is Bounty Hunter, and even he has a trinket for stress and caltrops are remade to support stress and dots). Usually it's abilities which used to do dot with dot resistance debuff;
  • Fully removed modifiers for damage to certain types of enemies;
  • The stats of the heroes were changed. Someone has base PROT. Most heroes have a vulnerability to some kind of dot and at the same time normal resistance to another (few are equally proteced against bleeding and blighting), and in general, these resistances are lower. Other resistances are changed (mostly reduced). The base deathblow resistance is 75% (flaggelant has 80%). Base DODGE is at least 0, a maximum is 25 (Jester), the difference between heroes is about the same. Base ACC is 95 (still 5 ACC is invisible, always there). Almost all the chances of applying dots/debuffs are 100%, rarely more;
  • About half of the skills which used to stun now daze instead. The skills which decrease speed on self now, as a rule, daze the hero who used them, ignoring resistance. Dazes lasts one move except the debuffs after finale of the jester (he has 3 turns of daze). Like in the base game, it is removed by arbalest's flare;
  • All stuns that remained have a 100% base chance to stun (there are no more differences in the base chance);
  • Almost all debuffs for resistances were removed (one was left – GR's Flashing Daggers); where they were now (almost always) stress;
  • All self-heals (except for Vestal's Judjement) can only be used limited number of times per battle (2 times, Helion's 4 times), but in return are buffed (Flaggelant's was almost unchanged, Helion's has only one new property to remove debuffs);
  • There are more skills which last for the whole battle;
  • Antiquarian is almost completely redone;
  • Musketeer is now not just arbalest's reskin, she has some skills changed (though with the same ideas and animations), basic stats and one trinket also differ;
  • All marks on allies and self were removed, except for Flaggelant's Suffer, Jester's Finale and act-outs.
How to build a team
The most important thing when creating a team is to decide what is its win condition. There are three such conditioins:
  • Damage. Well, it is clear, we drop the health of enemies to zero, we finish, and then next. AoE in direct damage is rarely practiced. It is absolutely necessarily to use the Finisher, preferably even two;
  • Dots. We distribute a bunch of blights and bleeds, stress is also decent side-damage on top. More often, dot skills hit two or more targets. The Finisher is very useful, but specific finisher character is optional.
  • Stress. We weaken the enemy with various stress-inflicting skills, in the process we may lose someone, but the enemy quickly catches afflictions and then does all kind of dumb nonsence. It rarely finishes with deathblows, the main emphasis goes on heart attacks. Often stress skills hit all ranks at once and the enemy usually dies from the chain of heart attacks.
No problem with combining them. Many skills with dots have stress. There are stress skills with damage. And no one forbade damage with bots (although there are not so many such skills). And heroes with different types of win condition can be used. Also, no one prevents building a team around defensive mechanics (howewer, as in the basic game, the offence tends to be more effective than defence). But emphasis in attacking skills should still be made on one of these win conditions.
Each of these types is also characterized by the level of protection.
  • Damage. Usually the most vulnerable category. Damage teams strive to quickly kill someone, and then crush with numbers, which is emphasized in the trinkets and heroes. Defenders and, in general, any sort of protection is kept at minimun, because enemies need to be killed very quickly, and damage then pushes on, even if under stress/dot pressure from the enemy, after obtaining superiority in numbers, which is emphasized by stuns and heals.
  • Dots. There are all kinds of dot heroes. Some dot heroes are played through DODGE, some are very strong, but vulnerable. Also there's flaggelant. Usually extremely aggressive up to recklessness in terms of skills due to high damage of the dot, but they can have one or two stun-support heroes in order to delay the battle while dots are ticking.
  • Stress. Most stress heroes either evade well, or have high health, or strongly weaken the enemy. They tend to effectively apply stress from any slot. Also, two main stress heroes have guard in their arsenal, which prevents damage from killing weak heroes. Many old support heroes are now about stress, so they often have a variety of functionality. They want to quickly apply afflictions to the enemy to force the heroes of the enemy to suffer from all kinds of nonsense act-outs instead doing stuff, which is often main bet for stress. And then heart attacks come.
Despite your chosen heroes and win condition, it is often important or at least useful to have the following opportunities:
  • Heals. At least in some form. Holds damage teams, allows you to exchange the turn of less important member of the team for the "last breath" of more important member, it is effective when the enemy cannot return the team’s member back to zero HP in one move or if they are forced to finish the team member with lesser deathlow chance. Ineffective against stuns (if the heal is weak and stun will drop hero back to Death's Door), against dots (often there are too many of them, even battlefield medicine from the plague doctor barely helps, although there are cases), against AoE, against stress (if there is enough damage to drop hero back to Death's Door). Effective with heals without using a turn (regeneration that flaggelant gives with his Reclaim, as well as antiquarian's Rejuvenating Vapours, but dots do counter that), healing of two or more heroes from Death's Door, if patient has decent DODGE, if patient has riposte active, if patient has a lot of PROT (and damage to us is direct damage), if the enemy suffers and you can stall effectively (everybody afflicted and/or has dots and is barely alive), if we have more heroes. Keep in mind that most heals are quite weak, and it rarely makes sense to heal “in advance” (that is, not from Death's Door). There are exceptions here, too, you must be able to assess the situation. It is especially important to understand the situation against Jester and as Flaggelant. By the way, forget about almost all stress healing. Too weak, and absolutely useless if the enemy does not play through stress (and believe me, a lack of different ability, useful not only against stress, any hero will feel). Only Crusader's Inspiring Cry makes sense (gives a chance for virtue, and even then the choice is specific, I rarely see the skill in competent teams), Musketeer's Ranging Shot (decent bufs to the team in addition to healing stress) and self-heals. It is more effective against stress to prevent it (trinkets, Bolster, etc.) and/or punish for using it (riposte) than the reaction to stress after it's done.
  • AСС. We either keep it up with trinkets, or we have either Jester, Musketeer or Man-at-Arms, which can raise ACC. As an option, decrease enemy’s DODGE, but only Highwayman is good at this, the rest of the skills suffer from either low base ACC (and we are trying to reduce DODGE, I remind you), or the hero has no slots left for the skill, or the duration is too small. Debuffing should still undergo a resistance check, with characters with high DODGE debuff resistance is also often high. Don’t forget that debuff can be removed (such a mechanic finally appeared within the circus), you can hide using stealth from using the debuff, you can just wait (if it is short), and that they are only for one target (as far as DODGE debuffs go). You can ignore accuracy if the basic accuracy is high (this, however, is quite rare). In general, the probability of hitting (ACC minus DODGE) 90-95 is comfortable, 80-90 is decent, 70-80 is unpleasant, everything below is risky.
  • Move skills. Most often pulls, since almost all heroes who like hang out in the rear rows have low move resistance, but pushing is also very useful. It is best to have one pull in the team, a maximum of two, and one push is good, there is no need for more. Look at what the opponent have, shuffle, make him spend turns on weak skills or on a simple move. Our main mover should have a trinket to an increased chance of move, and who does not have a personal, universal net is quite a worthy replacement. Keep in mind that against stress teams move is ineffective, since the main stress skills can be used from anywhere, but there are exceptions. Look, study, analyze. Do not forget that even if the enemy has a skill to use after move, it may be worse than what he would do if he had not moved.
  • The ability to always harm all heroes. If the hero cannot attack in the first slot, it may turn out that they will be left alone in the first slot and cannot attack in any way. And also they will be forced to go back with just a move in case of pull. Therefore, Vestal should always have some sort of 1st rank skill in her arsenal, and Grave Robber should always keep her pick ready to be send to the face. I can agree with only one exception in the form of a plague doctor, because she can always release a couple of vapors, and then it is not too bad for her to perish. Similarly the opposite (there is nothing to do in the back rows) is quite bad, though there is little to do to fix this. Most heroes do not want to just move. However, do not forget that in a Circus all means are justified. The solution to modern problems may well go beyond an amazing move. Look at what you can do, and most importantly, what the enemy cannot do, and analyze. Heroes who can move (and, accordingly, move others to a more convenient place) with skills are also effective, even if it's not as effective as their main attack is.
Brief analysis of strength of different game mechanics
Here I briefly analyse all non-basic mechanics (everything that I did not mention in the previous section). You can consider this as continuation of the previous section, because on the basis of this information you can estimate your own team. Probably, this is even more suitable than this name. Anyway.
  • Stuns. In the base game, this is a must. In the circus, stuns are not so strong. Still powerful, but not outright broken. Firstly, a bunch of skills lost stuns (the full list of the stuns in the circus is as follows: Crusader's Stunning Blow, Abomination's Manacles, Vestal's Dazzling Light, Houndmaster's Blackjack. That's it. RIP boss of all stuns plague doctor, RIP the strongest stun by tentacles from occultist's ass). Secondly, they do not always work (if in the basic game it is clear how much stun chance you need, how much ACC is needed, in BC you won’t know in advance what are you gonna be faced with, with stun res, or with a bunch of DODGE, or with an unfortunate plague doctor). Thirdly, you win not only by just damage, so stuns will not always progress your victory. Stress teams almost do not need stuns, or rather, they almost do not profit from them. Dot teams can stall with stuns, but only Crusader can more or less adequately use his stun, it is more profitable to spit as Abomination, throw a dog as Houndmaster, and Vestal's stun does not really cause damage. Teams for damage profit from stuns the most of all, since stuns force numerical superiority, which is the base for damage team, in addition, stuns with adequate damage (Crusader and Abomination, in fact, in damage team these are the main stunbots) will directly counter weak healing. Fourth, stuns will also conunter guard, which only direct damage truly wants.
  • Debuffs. In the base game, you need them only to reduce resistances, or to lower PROT with a mark. Spam with damage debuffs remained in the past after the change of Occultist's Weakening Curse. In the Circus, debuffs is one of the possible attributes of stress teams. They will weak enemy's turns, forcing enemies to spend turns to remove debuffs, or to make ineffective moves with low damage or misses. Remember, stress is ticking... Think of debuffs as side damage, like dots, just that they don't reduce HP but stall. The MAA's Bellow, who turned the first days of the circus into endless screams, is especially successful in this, as beginners used just pure damage. The rest of the teams rarely work around debuffs. Almost every dot resistance is gone in BC, as such there's no moves with both dot and debuff. There is no time for debuffing to damage teams excluding debuffs attached to marks, they need to take the enemy as fast as possible. An adequate player also interferes instead of an artificial idiot, and a player will somehow try to make this debuff less effective if there are options.
  • Marks. In the base game it is a niche strategy that is fully effective only against large enemies with one turn per round (smaller ones can be deleted with one crit, the bosses usually drop the mark quickly with their two or three moves in a round). In the Circus they're stronger, but only for one reason: Arbalest is absolutely broken. And her mark damage is doubly broken. Well, the second reason is that moving the enemy is much more important than in the base game, and BH has a hook. Without arbalest, marks are tangibly weaker, since the rest of the skills with mark synergy have their own problems: it is either a small bonus to damage, or the skill itself is weak, or accuracy suffers, or the character can do something more useful, or everything is normally balanced, but Arbalest is simply stronger, because the balance is a myth. They can still work, only in a lot fewer situations than Imbalest.
  • DODGE. In the base game, the king of niche teams because of crazy DODGE numbers, and in general is a pleasant bonus. Here, as a mechanic, it is also very useful, forcing the enemy either to miss or to spend turns on increasing ACC, if they have such characters at all. Heroes with high DODGE tend to work around stress and able to hide from follow up targeting (there is only one exception – Jester, and even then he does not have a personalized trinket for DODGE, so the number is not so crazy) that it makes the enemy to either focus slightly more on defence or waste turns spamming ACC buffs/DODGE debuffs, which works well for stress teams. The enemy can always be lucky and hit even 10%, but the opposite is also true, once in a blue moon even a 94% (efficiently 99%) hit chance will miss. In general, dodgers strengthen the already random nature of the circus. DODGE is countered by three heroes with buffs for ACC, well, no 100% overpowered strategies in the darkest. Except for Arbalest of course. Teams built around DODGE preferably use MAA with exclusively two jobs: use Bolster for 10 DODGE for the entire fight and soak up all the damage for first round or two. But more often, DODGE better build on just one character, exploiting the weakness of DODGE debuffs (not that many players takes DODGE debuffs, and heroes with high DODGE tend to be highly resistant to debuffs) and forcing the enemy to spend accuracy buffs only for one hero (such a strategy sometimes, if you are lucky to break through the debuff res and even manage to hit in the first place, can be countered by Highwayman's Vendetta).
  • Protection. PROT for short. Useful vs pure damage, but you should not build the entire team around PROT, since it will only weaken teams with direct damage (it will weaken dot teams if the opponent doesn't have decent finisher skill and they hope to get a kill with AoE skill with low damage, and even then we need to lower this hero's damage beforehand). Crusader’s Bulwark of Light helps very well, though Arbalest does not care, because the balance is a joke. However, trinkets for protection are sometimes strong even outside PROT itself (Pitfighter's helm as an example). Crusader with Pitfighter's helm and Bastion used is a 55% PROT without hit crit buff, while his accusation will simply remove their faces with another damage trinket and 10% stress from the helm.
  • Resistance. It is useless to raise small numbers of resistance, you resist today, you don't tomorrow. Large numbers can be raised depending on the need and on the goal of the hero in the team. From debuffs it's not worth it, at least purposefully, there's almost no debuff resistance trinkets anyway (only Tears of the Lost are actually good). There is little benefit to raise resistance to dots, even if dots will be resisted, then at least stress shall apply, and when affliction begins, it is -15% to all resistances. In addition, dot teams are build with an increased chance to get the dot in trinkets. It is not useless, of course, but if there are no dots in opponent's team, the trinket is much less useful. It is more useful to take care of them with riposte, dot teams almost do not play around single target. It is pointless to raise deathblow resistance, it is better for a hero instead of one more deathcheck needed will do some dirt with a offensive trinket.
  • Crits. Well, what can I say, crits are the same as in the base game. Lucky crit means you delete enemy's face, inflict more dot, stress more, get any side effect bang their mother. Not lucky, and everything is as usual. It is inefficient to look for crit purposefully in trinkets, but to support good trinkets with other useful stats outside crit – sure, why not.
BEGINNER'S TEAMS
We'll begin with two really effective teams that can be assembled from the very beginning of the game, made by Sheperd Doggy. Original videos:

Dot team:


Stress team:


I would not advise using a team through pure damage with starting trinkets, since main trinkets for damage and those who support the damage are personalized, universal ones are too weak. Nevertheless, I will offer two options (mark and non-mark), first one is a meta team without personal trinkets and second one was made by myself. They are not very strong, but you can try to see how damage team feels with them. I will describe the teams in my own words, on the basis of mainly my experience.
Of course, these teams are not craved in stone, like a commandment, and may well be changed to your own ideas/favorites/views. Consider them as a basic line, from which you can build up something for yourself. Nevertheless, if the reader is reluctant to think, teams can be used as presented.
Dot team
Looks like that:


This is a very serious and aggressive team, which is based on the imposition of a large amount of dot, quickly taking out the most dangerous enemy with Jester's Finale and then finishing off with Antiquarian (who will most likely guard herself on either Flaggelant or Shieldbreaker). Stress as collateral damage is also quite noticeable, although without Houndmaster it is not so high.


Shieldbreaker.

Uses the following skills:


And the following trinkets:


Shieldbreakers are usually build in almost any teams through two DODGE trinkets: universal and personal. The personal one unlocks quite early, you can put it on when you have it. They give her enough ACC, and Shieldbreaker herself is mainly used for pulls, knocking down defenses and for a very unpleasant Adder's Kiss (25 blight damage in total plus damage from the blow itself), which really wants ACC. Her base DODGE is very good, and her Serpent Sway instead of speed gives 15 DODGE, which also plays a role in her trinket choices. But even while you haven't unlocked Graceful Anklet yet, Retarius' Net is quite good alternative for an increased chance of pulling the enemy. Expose is very useful for sending Jester to the second position, so that he can use sudden Finale and finish someone off.


Flaggelant.

Uses the following skills:


And the following trinkets:


Flaggelant is simply the king of the circus. You try to kill him, he bleeds in response, he can heal allies, and he can get up from the floor five times. True, he really wants personalized trinkets, in particular the penultimate one, Gauntlet of Absolution, in order to be truly strong. But in this case, he is used as a distributor of dots, which he copes with all my respect. Using Rain of Sorrow is strictly mandatory – with it he applies 6 dot damage (4 from the skill and 2 from Crushed Hemlock) to two heroes in the back rows, plus serious stress with Crimson Hook. He won't rise from the ashes that well, so he remains vulnerable to focused fire (if the word vulnerable applies to him at all compared to other heroes xd). If he has tanked enough, however, and the enemy is already writhing in agony from a ton of dots, you should not feel sorry for him too much. This is literally his best setup right before unlocking his gauntlet. However, experiment, the only trinket really bad for him is Madman Collar.


Jester.

Uses the following skills:


And the following trinkets (you can replace Eagle Eye Talisman with Jagged Chopper, here I somewhat disagree with Shepherd):


Jester is extremely useful even without personalized trinkets. They're not that good anyway except for Blood-red Coin. Jester really wants DODGE, but as long as there is no second paw, you will have to do without. The jester also often wears the Finisher, but it's better to give it to an antiquarian, she is more likely to live longer than Jester. Therefore, for now, you will do fine with trinkets for damage and chance of bleeding: Spiked Bat and Eagle Eye Talisman. With them, he will be able to give Finale one move earlier, which may very well decide the course of the match. And until he dies, he will hit more painfully. Also, on the first turn, he almost always uses Battle Ballad (unless he is pulled), which is very necessary for both Antiquarian and Flaggelant, whose skills are rather inaccurate (and Shieldbreaker will gladly accept accuracy, her kiss is extremely shaky). Overall this is all of his powers. And also Dirk Stab for pretty weak finisher that goes trough guards, and Harvest for decent bleeds. Over time, it is worth dressing him up in doubles mentioned above, and Blood-red Coin is a good alternative to the Finisher.


Antiquarian.

Uses the following skills:


And the following trinkets:


Antiquarian's job is to spam Festering Vapours, inflict stress and blight and finish enemies in the process. This is what her trinkets are for: Rotting Trophy and the Finisher. She is our main source of damage after Flaggelant. The rest she does according to the situation. Protect Me on Flaggelant (or SB) if the enemy has nothing to bring down the guard, but has reach to her position (look out for ripostes, Highwayman may well bring her health down to zero with a crit). Rejuvenation Vapours if the enemy plays through damage and without dots. And hide if she is pulled and can be thoroughly beaten. Over time, such an Antiquarian really wants Materia Pestis, but this trinket is at the end of the list. However, along the way there are others, also useful, it will be possible to change her role. Just forget about Ghoul Claw, it's a meme.
Stress team
Looks like that:


This is a very powerful stress team. Although it lacks some personal trinkets (ESPECIALLY Wretch's Cloak that extends the duration of Abomination'shorror), it is still quite strong.


Crusader.

Uses the following skills:


And the following trinkets:


One of the strongest circus characters, in this team his job is Zealous Accusation spam. It does a tremendous mix of direct damage and stress. Vulnerable to knockback, as Holy Lance, while not just a no-action move, is still noticeably worse than accusation. And vulnerable to stuns. But with Pitfigher's Helm and Carnival Mask he will give out a lot of stress and at the same time have a lot of protection, especially if you press Bulwark of Light at the beginning of the battle to increase PROT of the entire team (this should not be done in all battles, it is useful against direct damage and against such types of dot abilities, which, when properly debuffed, will deal zero damage). Healing is more useful towards the end of the match, but will help to maintain the advantage in numbers and / or afflictions. Over time, Carnival Mask should be replaced with Wirt of Executiion (the same stats but better), which, by the way, unlocks quite early.


Man-at-Arms (MAA).

Uses the following skills:


And the following trinkets:


One of the main reasons, coupled with Ptfighter's Helm, why stress teams counter direct damage. More precisely, not MAA by himself, but his Bellow. In the Circus, this ability reduces enemy's damage by 20%, which stacks up and just kills direct damage teams if they have no way to reset debuffs (and even if they do, it's an extra wasted turn). Don't forget about Command – it gives a good 20 accuracy, and a crit chance will not be superfluous. Mandatory against teams with DODGE, and in general it will not be superfluous, since our main sources of stress are quite inaccurate. Starting combat with Command, especially if you go first, is very important for teams that need ACC (this one definetly fits the mark). Bolster is applied against stress teams, guard someone who is focused. He desperately needs debuff chance, so take Eerie Eye in trinkets (over time, you can replace it with a Insignia of Rank, but if there is no Retribution in skills then there's no difference). He would like Ptfighter's Helm, but it's occupied. However, Exotic Snuff is quite good, as it increases the reliability of the guard – it is not so easy to break through 90% stun resistance (enemy has a 50-60% chance with the best trinkets without a crit). On top of that we get a huge stress resistance to weaken the influence of enemy stress teams.

Abomination.

Uses all skills (duh).
And the following trinkets:


A hero which just by his presence immediately says that all enemies will definitely receive at least 24 base stress. And most likely 48. Transformation instead of imposing stress on team imposes stress on enemy. And not just stress but horror. True, he stopped healing himself with transformation, well small details. The main task of Abomination is to turn into a beast twice in order to apply horror. In the process, ram someone with Slam in order to limit your opponent in actions according to the situation, but in general even just a move after Transformation is not so bad. As soon as Transformations are over, you need to stay in the second or third slots and just spam Beast Bile, Absolution as needed. You can use Manacles if there is a risk of getting caught in an unpleasant riposte, but this is of little use without stun trinkets, and don't forget that in this team we are not talking about stuns, we are talking about stress. He does not need universal trinkets for his main job, but making bile more dangerous with Rotting Trophy will increase his power at the end of the match, and Retarius' Net will significantly increase the likelihood of pushing with Slam. Over time, he definitely, 100%, replaces trophy with Wretch's Cloak, which increases the duration of the horror; this trinket is sure to be used by Abomination other than stunbot. Net is a perfectly adequate trinket that can be replaced with Shattered Padlock, but bonus to accuracy and 5% more push chance are also quite significant.

Houndmaster.

Uses the following skills (you can use Blackjack instead of Hound's Rush or instead of guard):


And the following trinkets:


The most stressful of all stressful heroes. Hound's Harry is just death to all living things, especially if it crits, and it crits alright. 48 base stress per use, 12 done to each hero, and if it's a crit, and if we have bonus stress done... Bleeding is still applied on top, so that the enemy also dies physically, forced to spend extra moves on heals. In addition, Houndmaster also dodges with 15 base, and resists stuns a little. His most serious problem is ripostes from opponent. You most likely will have to bite the bullet and hope to dodge. Guard from MAA may well come in handy in order to reduce incoming damage and block many finishing moves. But if the guard can be breached, it's better to just forget everything and spam Harry no matter what. After all, this is our victory condition. And if MAA does not guard then he yells, as such he will reduce the damage of the enemy and bring our victory closer. Other abilities are rarely used, Lick Wounds is useful against direct damage teams without dots, guard is used occasionally to protect against enemy stress and for some kind of pastime against ripostes, Hound's Rush is a rather weak skill and is used only if it is completely disadvantageous to use Harry, for example against two ripostes; sometimes it’s still useful to throw enemy on Death's Door for the sake of bonus 33% stress taken and the opportunity to bring his stress to 200 in the process. Punish the enemy who decided to pull Houndmaster with Blackjack (but still do not forget, stress is our victory condition, and stuns are just stalling while having a chance to fail). He wears trinkets for his stress and for DODGE, that is Monkey's Paw and Crimson Hook. No personal trinkets are needed. The hook is fiercely wild, anyone who causes stress and bleeding loves this thing. You can replace the paw with Carnival Mask for absolutely crazy stress numbers, but in this team it is better to give it to Crusader so that he is also dangerous. And dodges can definelty clutch in a difficult moment, especially if you go second. Plus, more accuracy.
Damage mark team
Looks like that.


This is a meta team called Heylow (this is the nickname of the author of the team). It was made almost in the early days of the circus, and is still relevant (no wonder, there were no changes for the mode). Its base is that Arbalest provides insane damage on marks and some support (removing stuns and marks, healing), Crusader keeps the enemy’s front line under control and carries at the end of the fight (stuns and heals are very effective with numerical superiority), Bountry Hunter pulls, marks and finishes, and Jester can quickly remove someone with Finale, forcing superiority in numbers, and provides accuracy with Battle Ballad, in addition Harvest counters regen in slots 2-3 and can attack (and finish) through guards. Such a team must quickly take out at least one enemy, otherwise they begin to suffer from piling up debuffs, stress and / or dots. Weaker without personalized trinkets, but in general team can work without them.


Crusader.

Uses the following skills:


And the following trinkets:


His job on this team is to stun the most dangerous and vulnerable enemy. There's not much choice – first or second hero of the enemy. But it's still important to prioritize. Most often it is better to stun an enemy stunner. First stunner controls the match. Next, enemy resistances are important. Don't try to get a stun on full DODGE Houndmaster who has 50% chance to dodge and 20% to resist stuns, unless there's nothing else to do. Well, MAA with a trinket on stun resist is also not his client, especially without two trinkets for our stun cahnce. Next, stun the enemy finishers. If Death's Door is approaching in our team, it is worth giving the enemy finisher a proper rest in order to delay the moment of finishing off or spend the enemy’s moves on death checks instead of a guaranteed kill (just remember that BH has 50% stun resists, Crusader with one stun trinket have a 30% chance to fail the stun) . And finally, Jester. Just stun Jester, always, while he hasn't used Finale yet. Crusader's trinkets should be aimed at stuns: this is Brass Knuckles and Eagle Eye Talisman for accuracy (replaced by Sacred Blade, but it is closer to the end of the prestinge list unfortunately). Use other skills as needed. Relocating back to the front with Holy Lance, heal as needed. You can take Bastion of Light against direct damage, but this team is about quickly taking out the enemy, not surviving, so Zealous Accusation for damage and for hitting two enemies at once will be more useful IMO. It will be especially important if it turns out that the enemy has high stun resists upfront.


Bounty Hunter.

Uses the following skills:


And the following trinkets:


A very effective hero within non-stress teams. BH is the only one who can finish an enemy with a single blow with 100% probability, without debuffs and already passed death checks. He is also strong at rebasing the enemy with his hook (Come Hither), can throw out Caltrops so that the enemy suffers the whole match for 2 bleed damage each turn, and also has a strong mark for 4 rounds, which reduces deathblow resistance, which also scales well with Arbalest (her shot now have increased chance of killing vs marked). His opening move is often a pull of a vulnerable enemy from slot four into slot two, and that enemy is then fired at by Arbalest, removing that enemy's face. The Finisher is almost his trademark trinket, he wears it in 99% of the teams (you can replace it with Heart Seeker when you have it, but the choice is dubious, BH is not about damage, he is about guaranteed finishing moves, with Heart Seeker it will be 15% probability of epic fail, in addition, he'll lose 20 accuracy against beaten enemies and 15% (25% with the Finisher minus 10% given by Heart Seeker) chance to finish off with Come Hither). The second slot is often taken by a trinket for movement skills, he has a personal one, but Retarius' Net is only slightly worse (2 less accuracy and 5 less chance of a movement skill, tolerable).


Jester.

Uses the following skills:


And the following trinkets:


He still has the same job as in the dot team, as in 95% of the teams – to give out accuracy, finish someone off with Finale, throw a couple of bleedings, and if you're lucky even finish someone off. This time, the dodge paw was left free for him, as a result he'll have 40 DODGE – a very unpleasant amount that the opponent will have to reckon with until Finale or hope for good luck. Second, he would not refuse the Finisher or a blood-red coin, but the option with Crushed Hemlock is also quite adequate – if you are lucky to break through resistances, this is 16 dots for two targets with a high crit chance, decent damage. And +4 blight damage to Dirk Stab will not be superfluous.


Arbalest.

Uses the following skills:


And the following trinkets:


"Ha ha, get a crit for 41 lol" – the whole Arbalest in a nutshell. Her damage modifiers are insane, so insane in fact that she can crit for 20-25 damage even without a mark. This is not your base game. And she also has 50% move resist, she is never guaranteed to be moved. And 5% base PROT (reduces all direct damage by 1, always, because the numbers round down) because why not? Sniper Shot is her main action, the rest she does only when necessary - she goes into position not just with a move with Bola (this skill pushes Arbalest back one position in the circus), removes debuffs and stuns with Flare, heals when absolutely necessary. She really wants personalized trinkets for damage, but until they are available we'll manage with what we have. We exploit her high move resistance, while there is nothing to wear, with Exotic Snuff, and Hunter's Charm, a trinket with the highest damage bonus, will help us with damage. Can sometimes go first for the 10% Snuff damage bonus, but these are small numbers, even with a crit, so don't purposefully try to do that. Don't worry about her accuracy, she has decent ACC numbers on her skills, especially under Battle Ballad.
Damage team without marks
Looks like this.


I'll tell you right away, this is not a meta team at all. Even with a large pool of trinkets. If Heylow without personalized trinkets is, well, quite a working team, just less versatile in some moments, then this one is just for fun. However, it still has a lot of damage and has its own tools for "tactial problem solving".
It starts the match perfectly with Highwayman's Point-Blank Shot followed by Grave Robber's Lunge (either pull a weak enemy, use Musketeer's Aimed Shot and then Lunge; by the way, you can combine pull of the enemy on the third slot into Point-Blank Shot and then do subsequent shot from Musketeer (if you manage to move that is), it won’t be tickling that's for sure). Relatively immune to shuffling, as everyone except BH can move with skills quite effectively. It's also quite handy to have two additional finishing characters along with the main one, which at the same time do quite good damage. HWM with a riposte is very useful, after using Vendetta he'll have + 55% DMG bonus in total, a very solid figure, which even damage debuffs (Bellow, Weakening Curse, Intimidate) cannot reduce that easily. The team is suffering in terms of survivability, even with a dedicated healer, and it is difficult to maintain superiority in numbers, especially if Musketeer is not allowed to heal (stuns, shuffling, has to spam Ranging Shot for stress relief). It is even more important for this team to grab at least one frag at the beginning of the match with their teeth in order to get a tangible advantage. It can’t ignore guards in any way (no stuns, no Jester’s Dirk Stab, no breaking through guards, there are no trinkets to ignore guards yet), it can do little against PROT, except Pick tn the Face and Caltrops.
By the way, for the smart guys who find fault with the name of the team (we have a mark) – this team does not focus on them. Musketeer here is mainly support, shoots at the mark only if she has no one to heal, that is, well, the first two rounds, then it’s better to get our heroes up from the floor. The rest have abilities with increased mark damage, but they are very weak (BH could, but he needs other trinkets, in the circus he is about finishing and shuffling, not about damage). If you want to hit on the mark, take Arbalest or Musketeer with damage trinkets, because the damage numbers are broken and personalized trinkets are absolutely awesome. In the circus, the other mark synergies are too weak.


Highwayman.

Uses the following skills:


And the following trinkets:


The main strength of our Dismas in the Circus is his riposte. Few can ignore it. He also deals very decent damage with his Point-Blank Shot and his Wicked Slice, and Circus' Vendetta works as a permanent -20 DODGE debuff to the enemy, plus it still buffs HWM himself. It’s not always worth starting a fight with Point-Blank Shot – if the enemy has too much AoE, then start with GR's Lunge, then punish the enemy for these AoE with Duelist's Advance. Dismas is purely about damage, except for Grapeshot, which is not for this team, so give him trinkets for universal damage – Eagle Eye Talisman and Hunter's Charm. Over time, as a rule, his trinkets are replaced with personalized ones depending on what we want from him, among them there are absolutely no bad ones.


Bounty Hunter.

Uses the following skills:


And the following trinkets:


As part of this team, he has the same task as in Heylow, as in 95% of the teams – to reposition the enemy and make guaranteed kills. Few Houndmasters will hit HWM with riposte active, knowing that if he falls to Death's Door, he will be killed immediately. Our particular team is not about marks, so we can use Uppercut instead of a mark for more control variability. Over time, he also replaces Ritarus' Net with his personalized Grappling Mits.


Grave Robber.

Uses the following skills:


And the following trinkets:


Quite an interesting lady, she is most often used for her Panic Darts due to their broken combination of stress, crit chance and blight damage. In our case, we will try to use the character for direct damage, with which she also copes quite well. She really wants DODGE (high base and crit bonus is 10 DODGE, plus Toxin Trickery for 15 DODGE for the whole fight), so we are not shy about giving her Monkey's Paw. The second trinket could be universal damage, because GR can hit with both melee and ranged damage. This will add functionality, it will be possible to use fairly strong Flashing Daggers (as in the base game, just ignore bleed resistance debuff). But for now, let's get by with Jagged Chopper for really sick Lunges. There is not enough accuracy, so if necessary, use the Musketeer's Raning Shot – it will be extremely unpleasant to miss with a lunge after going into stealth. Or maybe exchange something with HWM. Her second trinket unlock is Cloak and Dagger, a good option for a melee GR who likes to finish off from stealth, but if you prefer daggers, then there is a Balanced Stiletto that rewards alternate use of ranged and melee skills. Paw is rarely removed from her, without it GR is too easy to focus and destroy. However, as always, experiment.


Musketeer.

Uses the following skills:


And the following trinkets:


Due to changes in support abilities, Musketeer is more often used just as a support character. Her Ranging Shot is an interesting mix of Command and stress protection, against stress teams that tend to be about high dodge and stealth, a very useful skill that doesn't require a stress heal trinket to be decent. Her normal heal also works well without trinkets if used on the same target. But here an extra (never superfluous) healing bonus will be very helpful, so we take Silver Syringe. Leave Aimed Shot to start the battle, Buckshot to go back and for the end the match. Like Arbalest, she has 50% movement resistance, so it's not a bad idea to abuse it with Exotic Snuff. Over time, replace syringe with her personalized healing trinket – Tincture of Iodine, a very strong trinket, allows you to cure blight and reduces incoming stress, leaving (almost) the same numbers of bonus healing.
HEROES (and trinkets) ANALYSIS
In this section I will describe in detail all the skills, features and best ways to use each hero. I will also analyse which trinkets are good (including universal ones). As a rule, each hero has at least two different directions, although often only one of them is truly effective, the rest are more like for fun or just outright a meme. Not everyone was born equal in the circus, someone is a lion, someone is a tiger, and someone is not allowed to perform at all. Some heroes are frankly weak, some are frankly OP, which I, of course, will report on, both with a brief general assessment and in the analysis itself.
Also a few notes on analysis:
  • If I say that a hero uses a skill ALWAYS, it doesn't mean literally always. I do not forbid you to use your own builds. But such an indication suggests that the ability is very necessary for the hero, and without it they lose their main strength within the specified build, or even in any build, if I don’t specify such;
  • My assessment of the characters is subjective. It is close to the meta, but still subjective. I did not interview anyone and made the rating myself.
Speaking of ratings. They roughly reflect how useful the hero is in a vacuum, but you always need to remember about the compatibility of certain heroes, about the situations in which they are used, about your overall strategy. Once a year even Helion will shoot, as they say. So think of ratings as a general measure, but by no means as a recommendation on how to use a hero. Except for Helion. She's not very likely to shoot. Translate the numbers like this:
[/list]
  • 10/10 – A very powerful hero, obviously too strong or too versatile. I gave this rating only to two, and mostly because of their OP trinkets, it would have been lower without them.
  • 9/10 – Stronger than average, but still relatively balanced. Or they have some disadvantages, but are extremely strong if their weakness(es) are not exploited, or they're very versatile, but not like super strong. Most often, they have at least one very strong ability, or have unbalanced strong trinkets.
  • 8/10 is an example of a well-executed balance. The hero have both weaknesses and strengths. In some way they are unique and can offer special tools in the art of war. Not always they're able to do everything in the world and not everywhere will work. The most balanced hero, in my opinion, is Bounty Hunter. 9/10 and 8/10 ratings are the most common. Developers understand a little about balance after all.
  • 7/10 – A little lacking in variability, but quite capable of playing an important role in a match if their conditions are met. Not limited enough for lower ratings, not strong enough for higher ones.
  • 6/10 – only Vestal deserved this, for her translation as follows: until she sent to the first slot, she is decently strong and will help in most situations, but as soon as she is in the first, everything is too sad.
  • 5/10 – two heroes who are not able to fight outside their slots received this rating. If they stand in them, they may be adequate in terms of power to the rest, but as soon as they lose their place, everything collapses.
  • 4/10 – Helion. Help Helion become useful.
In short, the main reason for low ratings is the limited slots within the lack of tools to resolve the issue of shuffling, the main reason for high ratings is too strong trinkets or skills.
I could change the decimal scale to five, but does it matter? Arbitrary number anyway. It's all relative, ladies and gentelments.
(very brief) Analysis of universal trinkets
Despite the initial availability of such trinkets, some of them are very strong. Not all, of course, but it's definitely unfavourable to ignore them. Over time, the player receives a copy of each such trinket in order to be able to use two of them in one team. It is still impossible to put two identical ones on one hero.
– probably the worst trinket of the circus, after Occultist's Bleeding Skull. Developers in general have grossly overestimated deathblow resistance bonus. I see no reason to use this.
– Well, the second overestimated stat is health. Health works as a nice bonus, but not as the main reason to wear a trinket. In the best case, the trinket will protect you from one extra blow (and also Flaggelant's Redeem will heal slightly more), kind of poor exchange for something more useful.
– very rarely used, because the ability to heal stress is already a loss of a skill slot for only one type of enemy teams, and then if you also spend a trinket, then the hero is significantly weaker against non-stress. Let's also not forget that skills never have an effect that is pure stress, always something else, so even if we get rid of stress, side harm still remains.
– mandatory trinket for stable stuns, not needed in all other cases.
– is a great all-purpose stress trinket, but stress characters often have stronger options. However, some want to maximize stress done with this.
– a very, very strong trinket for all the bleeding that comes with stress. Houndmaster loves this trinket. Stress is applied after the dot is applied, so even on the first turn we do not lose the bonus stress (if the bleeding is applied). Also a crit chance. Superb trinket.
– significantly increases dot pressure for those melee skills that affect two. Allows poor Helion to pierce at least something (and gives her bad breath lol). If the team is about dots, then someone should definitely wear it. Does NOT apply dots on ripostes.
– a simple trinket for accuracy and damage. If some direct damage hero lacks accuracy, a decent option. Very often powercrept by personal ones.
– Pretty good for debuffers. Powercrept often, yet again. The ability to hit stealth is almost useless, in the circus stealth must be taken out, since 2 out of 3 stealth skills give strong buffs while the hero is in stealth.
– a very worthy option for raising high stats of stun and/or move resistance. The damage bonus is even used sometimes. Significantly increases Leper's fixation in the first slot. But -4 ACC is pretty bad, it is necessary to fix the problem.
– Pitfighter's Helm powercreeps this, 10% PROT and 10% stress is much better than 5 constant health. Even for a full PROT team it is better to take something more useful.
– Eagle Eye rebalance, less accuracy, more damage. For those who are fine with their accuracy.
– although the crit chance is nice, the melee-only limitation significantly reduces its usefulness. Melee skills also tend to be non-accurate.
– one of the strongest trinkets of the circus, despite its downsides. Gives both dodge and accuracy at the same time, you know, one stat allows you to increase the chance to do all aggression, another stat reduces the chance of getting (almost any) harm. Any hero with a high dodge base (20-25) wants one, and a 15 base would love to. Cons are unpleasant, but do not play any role if the hero dodges.
– pretty weak. All stats are unreliable and only counter stress. If your enemy has no stress and debuffs, the trinket is useless.
– this is a much more worthy option against stress. Because even when the enemy is not about stress, it is a good bonus to stun resistance. Suitable for those who have a high base of said resistance. Also a good option for Abomination, so that he does not stress himself too much in Transform.
– a wonderful trinket for stress heroes. MAA's signature trinket, you can put it on his sprite right away. Any hero with low DODGE can enjoy this, and even just for PROT it's okay to use.
– if the enemy is not about dots, a useless trinket. You can strengthen the high base of dot resists, so that if they are in opponent's arsenal, they are somewhat weaker. Against one specific hero. So yes, in general a rather weak trinket.
– A great trinket for movement skills. Powercrept on everyone except Shieldbreaker, but up to this point it's good. Powercreep doesn't even fully creep, not everyone has bonus accuracy, and not everyone has the same chance of skill or more (Shattered Padlock, I'm looking at you).
– weakened resistance often matters, blight heroes tend to resist blight themselves. But the upsides are sweet. Whoever inflicts both blight and stress will not refuse.
– very weak. Specific stats needed for direct damage against afflicted enemies... and if the enemy is afflicted, then we are about stress. Conflict of conditions for victory, even for hybrid teams for direct damage / stress, because before affliction trinket doesn't exist, and after affliction happens it only helps with direct damage. Garbage, in general.
– bonus healing by itself rarely carries, and also personal ones often powercreep this. It makes little sense to combine it with personal, it’s better to give the hero more functionality. Up to personal unlock it is a tolerable alternative.
– low stats, and characters with heavy bleeding don't really want damage. Only Jester in the early game might somewhat use this.
– is literally the main reason why damage teams have any chance of existing at all. Without it, their stability is crumbling before our eyes. A BH's signature trinket, shove it on his sprite, and any other finishing heroes want this badly. Can be used on AoEs (Antiquarian, Houndmaster) to finish off with tempo and through guards, even if without the skill's bonus chance. If our team is about direct damage or dots and direct finishing moves, then at least one copy is mandatory for someone to use, and even better to use both (dots can drop a second copy, depending to the situation, and AoE hero usually wears the first one in them).
– with a stretch it is adequate for characters with strong self-healing (Leper, Flaggelant). Requires some kind of dot resists in the base stats so that they are not just barely useful. It's better to give aggression, honestly, or solve some specific problems of the hero, than to try to get up from the floor a little better.
Highwayman


Overall rating of the hero's power: 7/10.

All the main power of Highwayman is in riposte. Of course, he can do other things, but his riposte is the only one that is both strong on activation of the skill and strong as the riposte itself. It also moves the character forward. Riroste can sometimes hit so hard that the enemy would have been better off not attacking at all. 25 damage crit, for example. Because of this property, I with love nicknamed him "Hey Bro Nice Dmg" (too bad mine is bigger):

Highwayman is quite limited in everything else besides direct damage, having only one stress skills (although it is strong, at the level of Crusader's Zealous Accusation), and only one dot ability (rather weak, with damage instead of stress and only one target with a small number of dot). Used in direct damage teams and in hybrid stress-direct damage. Makes most stress teams suffer, can also step in as a finisher. He can very effectively return drawn allies to their place with Duelist's Advance. Just don't show him Man-at-Arms. Dismas is allergic to protection, guards, and screams. A known cheater, after all.

Skill Analysis:
– good damage, increased chance to deathblow. Primary direct damage tool. Usually used.
– a specific skill, rarely used in the circus, since there are not enough buffs against marks and the accuracy is low, although the crit chance is high.
– is used mainly to be able to reposition back to the second position, but in general the damage is very serious. Sometimes even the push of the enemy plays a role. Used frequently. Without the skill, it is desirable to have a plan to get back (be ready to just move, or have allies who can move him back), since in the first slot without this skill he can only swing his dagger.
– used mainly by stress-direct damage teams, in pure direct damage it is better to have a little more functionality or reach. Although, it allows you to ignore guards if both the target and the guardian are in slots 1-3. A very inaccurate skill, even with Vendetta, it is better to have accuracy buffs in allies, or take care of accuracy with trinkets.
– is always used, unless one more slot is desperately needed. Directly counters strategies with one character with a lot of DODGE (if you're lucky to hit and apply a debuff). Gives decent buffs for the whole battle even if you miss. Even without riposte damage trinkets it provides strong enough buffs that riposte cannot be simply ignored. It can finish off one or two health left, like in the base game, you can also check for death effectively with this.
– is always used. HWM's main strength. It's not worth keeping a riposte active 100% of the time, it may not always be beneficial. Allows you to return back the allies who were pulled. Allows HWM without Pistol Shot and Grapeshot to hit the third slot. Allows HWM himself to leave the fourth slot, where, in addition to this skill, he can only tickle with a pistol. Greatly increases the power of the character towards the end of the match. Keep in mind, his riposte has a base accuracy of 85, it's not that much, it's better to raise it at least with Vendetta.
– sometimes used by direct damage teams to be able to counter regen. Along with this skill trinket parry dagger is highly desirable to use. Usually taken instead of Wicked Slice, since there are not enough slots for skills.

Trinket analysis:
Of unverisal trinkets, his clients are universal damage (Hunter's Charm, Eagle Eye Talisman), sometimes the Finisher. Monkey's paw also makes sense, for Grapeshot spam Pitfighter's Helm and Carnival Mask are good. Spiked Bat for bleeding chance if you use Open Vein. Personal trinkets, however, outshine most of the unversal ones.
– Mandatory for Grapeshot spam. Direct buffs to damage and crit chance also come in handy for riposte.
– very good if we want to directly make sure that no one wants to AoE. Bonuses to melee skills enhance HWM's riposte. Significantly improves Open Vein, allowing it to penetrate bleed resistance relatively steadily. A decent trinket, but with it on you often have to forget about Wicked Slice, and this is good direct damage and good chance to finish off.
– rarely used, a character with a 0% stun chance is very easy to keep in an eternal stun (do not forget, in the circus the buff for stun resistance does not stack, 50% of the bonus is the ceiling). While the buffs are tempting, they do nothing to enhance riposte. You could have fun with Dismas without melee skills in the third slot, but it's better not to.
– a good option if you have no ideas what to put. General defensive stats. Counters bandana and gunpowder cons. Without gunpowder, it makes riposte less controllable by the enemy (although double stun trinkets still pierce the resistance consistently).
– not the worst trinket. 5% crit at all times and 10 accuracy in the first slot are universal. Has no cons. A good option for spamming Grapeshot in conjunction with maintaining the effectiveness of riposte, or to combo Duelist's Advance into Point-Blank Shot (although the disadvantage of this strategy is that AoE hits slots 2-3 more often than 1 and 4; but the main types of AoE it'll still counter).
Helion


Overall rating of the hero's power: 4/10.

Certified worst circus hero. A big jump compared to the one-shot generator from the base game, I understand, but still, a fact. Pure damage in the circus does not carry. Especially in her case. She is similar to Highwayman in many ways, only her movement instead of the strongest riposte is a pathetic tickle, which is worse than buckshot, because it does not cause stress, it is also self-destructive. Self-inflicted daze really ruins Helion, which she catches on herself just by using her normal attacking moves. Honestly, I'd give her a 6/10 if it wasn't for this self-daze (and also if Breakthrough dealt at least 5 stress, or she would move two slots forward, then even a self-daze would be acceptable). Incredibly vulnerable to pushes, can't do anything with guards, can only do mediocore bleeds vs PROT. Her only adequate ability is a redesigned YAWP that allows her to be on a stress team, no jokes here. And even then stress team usually does not have the ability to move, but it also does not care about positioning, in the case of Helion she will have to use a skill that does not contribute to the victory of stress teams at all. And in comparison with the Bounty Hunter, she is also weak, BH has a higher chance to finish off, much better positioning (both for him and for the target), and he can pull and mark the enemy. The only thing is that Helion does somewhat more damage, kinda weak achievement. Honestly, if you want a one-shot machine, it's better to take Leper. He has the same problems as Helion, even raised to a square, but he will at least naturally remove enemy's face with a crit, also has high health and 10% PROT. And Helion will barely crit for 80% of most heroes' HP, then she'll get pushed (with her low move resistance it's kind of inevitable), get critted and then dies without anything done.

Skills analysis:

– her simplest attack. Taken almost always. Can finish, in theory, if you're lucky.
– if in the base game you need this to take out an enemy in the fourth slot with one-shot, it doesn’t work like that in the circus. A human opponent has a lot of options on how to avoid such a blow. And who will finish the enemy? Her? The opponent is likely to do something to prevent it. Therefore, there is little sense to use the skill.
– everything is simple, if we are talking about stress, then this is our spam stress skill. If not, then don't take it. The skill is quite adequate, it allows you to weaken ripostes for free, from which stress teams usually suffer. Eh, if she had a normal move skills instead of her shame...
– probably literally the worst skill in the circus. It parameters are all terrible: accuracy, damage, crit chance, dot number, targets to choose, amount of targets. It is rarely needed even in the base game. And at the same time, everything is so bad with Helion that sometimes there is a place even for this skill.
– always take this. Literally always. Otherwise, Helion has nothing to do at all in slots 3-4, except for Adrenaline Rush or simple move. Although, honestly, sometimes even simple move is better than this. At least it won't daze her.
– take almost always. Some kind of self-heal. Can counter damage debuffs, and debuffs in general. The healing amount is low, but at least it will remove Death's Door.
– if we are talking about damage, a relatively good opening ability… if not for its absolutely terrible accuracy. I'm not kidding, Leper has the exact same accuracy. However, if this hits and crits, this is at least some benefit from Helion for the match. Already an achievement, I suppose.

Trinket analysis:

Of Helion's universal clients, this is Jagged Chopper for direct damage, this is Pitfighter's Helm for stress, this is the Finisher for finishing moves (duh), this is Crushed Hemlock so that her Breaktrough does at least something other than pathetic damage (by the way, it works for her YAWP, lol), this is Eagle Eye Talisman for accuracy.

– She does want accuracy, bad. But the numbers are small. And the chance to bleed, well, she doesn't want much. It's better to take Eagle Eye Talisman. If It Bleeds is a terrible ability anyway, and Bleed Out is more about damage. However, you can combine them until Savage Gauntlets are unlocked. At least she'll stop missing. Sometimes.
– everything is simple, if we are talking about stress, then we take it, if not, then we don’t take it.
– A very good trinket for direct damage. The crit numbers are decent, 8 accuracy is pleasant, the damage during an affliction is also nice.
– reskin of Jagget Chopper with bonus chance to finish off. In theory, it's a 100% kill chance for Iron Swan and a 90% chance for Wicked Hack when combined with the Finisher. But Bounty Hunter exists, just so you know.
Grave Robber


Overall rating of the hero's power: 8/10.

Grave Robber has become almost all about panic darts – the skill allows to choose any target, deals decent stress, almost guaranteed 16 blight damage, these are all very worthy upsides for a stress-dot team. The number of blight damage is quite small for a dot-stress team, but you can still play through dots, since the relatively good base damage makes it so that the skill does not deal zero damage under most circumstances, so deathblow check will be for sure. Plus the crit chance is high. GR's tools do not end there, however. She has high base DODGE, her crit buff is 10 DODGE (and she crits a lot), Toxin Trickery is another 15 DODGE – yes, this lady is all about dodge. And she can do direct damage, albeit not so effectively. She is good at shuffling your team, both backwards and forwards (although forward is more versatile, since Lunge is just direct damage, not always needed that). And while moving backwards is limited to three uses, and does no damage right away, just looking at Grave Robber in stealth will put anyone in PANIC.

Skills analysis:

– is always taken. Not because the skill is strong (although 100% damage with prot bypass is not so bad). But because this is the only GR's combat ability in the first slot. If she is the last one left (which she tends to be due to her high dodge and stealth), then she will literally have nothing to do, nothing to attack with. Although, not taking this skill is an interesting psychological move – the enemy may not focus her, hoping that she, left alone, will not be able to defend herself.
– very decent damage and an increased chance to finish off (even higher from stealth) – two qualities that make Lunge a must-have skill if we are talking about direct damage.
– for AoE on two targets, the damage is very good, with a high crit chance. Can be combined with Jester's Harvest for almost guaranteed bleeding if the debuffs proc, but you can also ignore the debuff, the damage is enough. For a finisher GR, this is a good skill as well, although the chance of a kill is not guaranteed, you'll at least damage the second target.
– is always taken. GR's main defensive skill, which does not make the turn useless at the same time, allowing the next move to either deal insane damage, or kill someone, or inflict high abount of stress. Grave Robber also hates to sit in the first slot in any build, so this skill is a great way to get out of there.
– The most rarely used skill for her. It has too little bonus against marked, and the only advantage of the skill is its huge accuracy. To reach the fourth slot, it is better to take darts, even for Robber through direct damage. Better yet, pull the fourth slot.
– is taken very often. If we are talking about stress and/or dots, then everything is clear, this is our main spam skill. It is not necessary to take for direct damage, since there are few slots avaliable (after Lunge, Pick to the Face and Shadow Fade there is only one slot left). But it's also possible. Variability is one of the main properties of GR, you can do exactly what counters the enemy.
– most often is taken by stress GR, since she only needs darts then. However, melee Grave Robber can also take the skil in order to not be so vulnerable after Lunge. Directly counters Caltrops, can somewhat remove a couple of unlucky hits with strong dots attached, can remove the dodge debuff (or any debuff for that matter).

Trinket analysis:
Of the universal ones, Grave Robber almost always wears Monkey's Paw for these sacred dodges. Yes, and the accuracy will not be superfluous. Also of the worthy options is Carnival Mask, if we are talking about stress, the Finisher if we are talking about direct damage, Jagged Chopper for a melee GR (personalized trinkets powercreep it though).

– one of the more rarely used GR trinkets, nevertheless quite interesting. If our flow of "lunge-flashing daggers-pick-daggers..." is not interrupted, we have decent damage, every second move an increased chance to finish off. Places limits on targets and makes us predictable, so it's not used as often, but can be surprisingly effective.
– the main client of GR through stealth and subsequent Lunge. One of the rare ways to ignore guards with abnormal damage and chance to finish off. Yes, and Pick to the Face after stealth is a worthy argument against PROT. In addition, high DODGE in stealth make it not so easy to pull her out of stealth, especially if there is a paw and / or toxin in business.
– a fairly versatile trinket, despite the bonus to ranged damage. Decent DODGE bonus, 5% crit is universal and very pleasant. A worthy replacement for Paw if we want a more aggressive Grave Robber. Or combine it with Paw in order to achieve maximum DODGE.
– is almost exclusively for stress GR. 10 accuracy is universal, but 5 crit chance and more dodge are still more useful for Robber without darts. If we are talking about darts, then she's very likely to wear this.
Vestal


Overall rating of the hero's power: 6/10.

The Vestal is one of those rare characters who hasn't changed much in the circus. Not in terms of mechanics, although there are few changes in them, but in terms of application. She's still just a healbot with a stun. In this regard she is quite universal, although she is more about teams with direct damage since they want stuns more. But the combat output from the vestal as it was small, remained as such. She lost in comparative power due to the fact that AI do not really try to pull characters, while in the circus, the opponent will certainly pull Vestal at least to the second slot, and even more often to the first one. Especially if the enemy is about direct damage (which Vestal should counter with her big heals, FYI). You will have to compensate with a dancing team and / or guard. However, without pulls she is still quite effective. Just remember, healing is healing, stuns are stuns, but we still need to win in the process somehow.

Skills analysis:
– it was a meme, a meme it remained. Daze doesn't help much since the choice of targets is small.
– although it can be quite effective, it is rarely used. There's two reasons. First, she needs a skill that can be used in the first slot. Second, three slots are already occupied by heals and stun. If it could be used at least in the second slot, it would be a more or less effective self-defense skill in teams with direct damage.
– always use it. The only Vestal combat skill that doesn't frankly suck. Decent accuracy, it can target the third rank, good crit chance, can be used from the second slot. The only thing is that the damage is low, it penetrates only the weakest heals, and even then on the target without PROT. Do not forget, by the way, Vestals crit buff is a bonus healing, after a crit it will be possible to decently heal someone if there is no important target for her stun.
– Vestal's signature skill. Always used. Also counters horror. Juicy crits for full hp, oh they're so nice.
– the healing amount is weak, but it is AoE. In the base game it is much more effective, since the group tends to be evenly beaten, in the circus I would say if it were not for the possibility to use this from the second slot, then it would be a decent idea to drop the skill. As is stands though, it's better to have it. Doesn't help directly against AoE, however, AoE often overdamages the heal, not to mention the accompanying stress.
– for a skill that reduces evasion, terrible accuracy. The stress done is small, the damage is even less. Stealth targets tend to have high DODGE as well. And the skill, as a matter of fact, does not crit at all for some unknown reason. And in addition, it cannot be used from the fourth slot.
– is a relatively tolerable offensive tool if Vestial is stuck in the first slot. Increased base damage helps tremendously. Forget about the chance to finish off with melee, occupying a slot with a meme means significantly weakening Vestal' versitality in the back rows. After a couple of uses, it can notably crit for decent damage, if by that time Vestal is still alive by some miracle. By the way, it self-buffs even if it misses.

Trinket analysis:
Stunhealbot has only two functions: to stun and to heal. A sudden revelation, I understand. The answer is simple: Brass Knuckles and Silver Syringe. Forget Exotic Snuff, Vestal's base move resistance is too low. For fun, you can raise the resistances to dots with the help of Rancid Cure-All because Vestal has a lot of dot resistance for some reason, but remember, there are no dots – effectively there is no trinket. She doesn't give a damn about most debuffs, so this resistance won't do much.

– (almost) direct syringe upgrade. Efficient thing.
– in fact, just 15% protection. The rest of the stats are of little use. Weak trinket, especially taking into account her other trinkets.
– a meme trinket for a meme skill. Have fun when there's nothing to do. Quite effective in terms of pure stats, though, if we stop treating Mace Bash as a meme. But it's a meme.
– a wonderful trinket, alas, at the very end of the list. With this, plus Brass Knuckles, Vestal has the highest chance to stun in the circus – 150%. At the same time, with an accuracy of 115, only an enemy with >20 DODGE has a chance to dodge. Such a Vestal can very effectively keep Jester in eternal stun. Or Grave Robber. And it breaks through guards very well (MAA without trinkets and without a crit on our side has an 20% chance to resist, Houndmaster has no chance at all, only if he dodges). This trinket plus Idol of Purity is a very strong all-purpose Vestal. But combing this trinket with Brass Knuckles is a very good choice, especially for aggressive direct damage teams. It also makes Illumination slightly less useless skill. At least if it hits it will break through the resistance to debuffs. But to place Vestal at the third slot is to sign for loss to any team with a pull if it goes first.
Shieldbreaker


Overall rating of the hero's power: 7/10.

Shieldbreaker has significantly changed her role within the circus, however she is still quite effective. Her two main roles are to pull and break through guards, and to inflict blight (without stress). She can also deal direct damage with Pierce, but in the circus it is not as impressive as in the base game. Can inflict stress with Expose, but in this case the team must definitely use the debuff on crits taken, otherwise the return is small. In the circus focus on dodge became a separate property of Shieldbreaker – her base is 20 DODGE, the level of Grave Robber, while she has a personal trinket for 15 DODGE and Serpent Sway gives another 15. If we add to this MAA's Bolster and Monkey's Paw in trinkets – this is 60 DODGE without Serpent Sway buff, extremely dirty amount, no one without additional influence to ACC (buffs and debuffs) will have a guaranteed hit on such a Shieldbreaker. Because of this property, I with love called her "Hitsdontgetter":

But this is compensated by not very high personal return – Shieldbreaker uses the strongest blight skills only from the first slot while moving backward, that is she can only use them every second turn without external help. And Expose pushes her back, at the same time it is impossible to use the skill from the fourth position, so you can't spam stress. At the same time, an additional effect is important for any of her skills, and without chance trinkets she can fail the check, which only strengthens her randomness. One match she crits with a kiss, which naturally removes the Crusader from the match closer to the middle of the game, the second match she misses twice in a row. One match, she will dodge even marks with dodge debuffs, another time Leper without buffs will one-shot all her hp, and then Finish Him from Bounty Hunter, well, will finish. Her. She is very strong in pulling and breaking through guards, but if this is not necessary and she is not in the first slot then she has nothing special to do. And this affects overall offensive power of the team.

Skills analysis:
– a relatively good option if we want Shieldbreaker to deal damage. Not so huge damage, but it can play its role.
– Always take it, there are no exceptions. The accuracy of the skill is huge, it can be used on anyone and from anywhere. There is no escape from Puncture. Any hero with low movement resistance who really wants to stay in the back (Vestal, Plague Doctor, Grave Robber) will not be able to stay in the back, and no amount of guards will help them. Its only downside is small crit chance.
– Extremely high blight damage. Crusader hates this skill. Taken very often. I would even say always, but in a team with Jester Expose is a mandatory skill, and this skill can be given upon according to the team.
– The damage nerf plus the lack of an additional effect significantly affected the power of the skill. However, the bare numbers are higher than those of Adder's Kiss, in addition to being an effective finisher. Taken in pure dot teams.
– is always taken in niche stress teams. A couple of crits with strong stress skills after Expose almost guarantee an affliction. Can push another hero forward, which is extremely important for Jester.
– for teams where it may be unprofitable for Shieldbreaker to move forward. However, if you have such a team then it is strange that you generally take Shieldbreaker in the first place. The stats of the skill are bad, you have a small choice of targets, and you need to stand in 2-3 slots, and the accuracy is terrible. The damage isn't that bad though, considering its blight. Not often taken, but can be situationally effective. For example, against a healer in the third slot, in order to prevent them from healing and, in addition, notably damage them.
– take this skill. SB's way to compensate for lucky hits by the enemy. Even without trinkets she will have 35 DODGE, you won’t always hit such a Shieldbreaker. Ineffective against stress and against AoE.

Trinket analysis:
Monkey's Paw is her client without any doubt. Dodges, dodges and some more dodges. Accuracy from this trinket will also not be superfluous, especially for her Adder's Kiss. Of the good options, there is also Retarius' Net for an increased chance of pulling, the Finisher for almost unavoidable high chance kills with Puncture and decent tempo with Impale, some damage if we want to try to pierce the enemy (but it’s better not to, SB is not about direct damage in most teams).
– here they are, our dodges. Take this for the most versatile (and dodgy) Shieldbreaker in the whole circus.
– I don’t often see this even in pure dot teams. It's still better to dodge more often. In addition, dodge trinkets give 12 accuracy in total, more or less enough. But for active blighting this trinket is more than decent.
– if Shieldbreaker wants survivability, then DODGE is everything. In addition, the bonuses are extremely low. Terrible trinket.
– can be quite effective with blight support, for example in the form of Antiquarian. Pirece with this trinket will start to deal good damage numbers even if we take DODGE trinket as second. But Shieldbreaker in the circus is still more about Puncture and blights, not about direct damage.
Plague Doctor


Overall rating of the hero's power: 5/10.

The reason why PD fell so hard from her throne as one of the strongest heroes of the Darkest Dungeon is not only loss of all stuns, but also extreme vulnerability to draws. Exotic Snuff can sometimes help Vestal, but Queen – not at all. You can be 100% sure that any opponent, just seeing PD, will pull her with their very first sneeze. Unless they don't have pulls or they are a man of culture as well, of course. Considering almost no self-defense, an extremely limited number of skills in the first slots and a small number of options for escaping, I with love called Queen "2 embold, dies":

However, Plague Doctor is quite effective if she is not pulled, or if we get her back with dance skills. The numbers of her blights are huge, stress from Blinding Gas is very high, and it's coupled with an unpleasant debuff, she herself can pull anyone you want (with both chance to fail and chance to pull to slot 1). Even in direct damage teams she has Emboldening Vapours. Battlefield Medicine, though infrequently comes in, but when it works in, it really works just right. What's Rancid Cure-All, we have a universal remedy! But one pull and that's it, the royal parade is over, roll up her retinue. She just gives 2 Embold and then dies.

Skills analysis:
– is used mainly if we are about dots. There is not enough space for this for stress PD. But the skill is strong, high blight damage, high crit chance, decent stress.
– is always used if we are about dots. Stress Doctor does not take this, Blinding Gas performs the same function for her.
– Speak of the devil. If we are talking about stress, we take it, otherwise we don’t take it.
– in the original game a meme, here, well, not really. Some kind of self defense. I usually don't take this skill, I roleplay her nickname lol. If you take it anyway, then also take Amputation Saw in trinkets, otherwise it’s kind of sad meme.
– is taken almost always. A heal is a heal. It works very well against Flaggelant, against Kiss from Shieldbreaker (although if the enemy has Shieldbreaker, your Queen has already given out two Embolds and has already died), and works for our own Flaggelant, he can distribute regen to the right and left without stacking too much bleed, he will not refuse. In general, against a large cluster of dots condenced at one hero.
– is her best skill if she is in the first slot. This is not a joke, even just for the sake of bonus ACC for the whole battle you can use this. Although, more benefit for those who cause damage, of course. Well, not for herself. Good candidates to get high on this are Flaggelant, Crusader, Highwayman, Leper. In general, if a doctor is on a team with direct damage, then this is most likely stress damage. That's the kind of guys we give some vapours. Just don't waste time squeezing the skill if she is calmly standing in the fourth slot and ready to melt some faces. Unless if the enemy has zero movement in skills.
– situational skill, usually there is not enough space for it. Stress PD might take it, if we are talking about dots then she'll have to sacrifice something. However if there's no pull options in your team, it is better to have at least this.

Trinket analysis:
Her personal trinkets powercreep universal ones. If we really want Queen in the team ahead of schedule, then this is Eerie Eye for accuracy and debuff chance if we are talking about stress, Retarius' Net for Disorienting Blast, Rotting Trophy in all cases.

– Queen's best trinket. Almost always taken, at least for the sake of 15 accuracy. Even stress PD wants this.
– a relatively good defensive option if we have something to heal Queen with. There is nothing more to take, in fact, for dot PD.
– if we are talking about stress and / or use Disorienting Blast, then we take it, otherwise there is no point.
– remember that Incision exists with this very thing! But it's better not to. Doesn't even give crit chance. Even Vestal's meme trinket has crit chance, why not this one?
Man-at-Arms


The overall rating of the hero's power: 9/10.

MAA has become one of the most commonly used stress characters. His main power is his completely broken Bellow. It inflicts a very decent amount of stress and destroys any team build around direct damage, whether it's pure direct damage or stress direct damage. As they say, when in doubt Bellow it out. Also, MAA has many other tools that help in certain situations. And even then sometimes you have to think whether they are worth it, because you really want to scream... Man-at-Arms has lost only stun, and finishing functionality of his mace in the circus is not relevant, otherwise he still has many different useful skills. Just don't use him on pure direct damage teams (on dot teams it can work to guard weak dot sources, and his slowness won't play that big of a role here, because dots are ticking). MAA is a natural brake on the match, for both sides, and direct damage wants to kill immediately, and preferably even yesterday.

Skills analysis:
– almost never used. If we want to reduce PROT, then it is better to take Houndmaster's mark. Better yet, have other tools to bypass protection. 10% PROT reduced is very small abount, and what's the point of skill's damage if we are trying to reduce protection? Yes, and the damage is terrible. This is an old man, what do you expect from him?
– rarely finds use, because it no longer stuns. Truly effective only against Jester. Can be useful for moving allies, but if we do not need to push the enemy then there is little use.
– the main skill of the stress MAA (which is very often). It is used almost always, because when there is nothing to do Bellow will always help, will always do something.
– I rarely see Man-at-Arms without Guard. His signature skill, after all. Allows him to protect allies from pulls, except for Shieldbreaker's Puncture, limits the enemy's avaliable targets. One of the main reasons why many old characters have become noticeably weaker in terms of pure damage – one Guard, and you can wave to the target you just focused.
– Despite this skill's buffs in the circus, it is still weak. The slightest number of PROT, a couple of Bellows from the enemy's MAA, and this riposte will only tickle. In addition, the skill itself is very weak (the best that can be achieved from it is a death check, and a crit, which will give your MAA buff -33% stress take and tiny stress dealt on the enemy). Sometimes, even if the enemy hits into riposte it is not worth using it, because every second move we do almost nothing, only set up the skill. It's like spending a turn on Mace Bash without PROT debuff. The problem of the weakness of this skill is solved by one of MAA's trinkets, however, more precisely even by two.
– Always use this. Absolutely. If the team is fine with their accruacy, then firstly let me introduce you to Shieldbraker with 60 DODGE, and secondly MAA is hardly a suitable character for such a team. Stress skills tends to be inaccurate, and Command is the answer to the problem. It is obligatory for use if we suddenly went first, and the enemy has at least some DODGE to speak of.
– is taken almost always. Only if we don't want something else super hard. See stress team – use Bolster, if not on the first turn then on the second. See the enemy without buffs for accuracy – it is also quite reasonable to use Bolster. If we have extremely dodgy team – use instantly. If these conditions are not present in the match, then it is not necessary to use the skill.

Trinket analysis:
Universal Pitfighter's Helm is almost his signature trinket. Insane protection coupled with a small stress bonus, and congratulations, your grandpa will barely scratch from enemy blows, especially after a couple of rounds from the start of the match, taking into account Bellow debuffs stacked and likely Guard used. Good options are also a Eerie Eye for accuracy and a chance for debuff, Numbling Incense to increase the reliability of Guard (stun resistance) and to reduce enemy stress applied, Carnival Mask if MAA will spam Bellow the whole match. Exotic Snuff for even larger stun resistance is also not very bad, but if the enemy has no stuns then we essentially have a move resistance minus four accuracy, bad exchange. Especially taking into account low base move resistance.

– a very good trinket, with high stat numbers. It helps to yell effectively, strengthens riposte, allows to skip Command if we are lucky for a couple of crits. Used quite often.
– a very good option if we initially plan to protect someone, and we do so in 95% of matches. For example, Plague Doctor. Also a useful trinket for a bit of a meme tactic by spamming Command and guarding someone on order to use damage bonus while guarded. But if we are talking about aggression, then of course something else is better.
– terrible trinket. The incoming healing bonus will not make much of a difference (if we use it, then we use the previous trinket, that is our MAA can only effectively guard and nothing else). You won't be able to build him through DODGE, this is not the base game. If you want a guardian through dodges, then Houndmaster is your answer. Tiny blight resistance will not help in 95% of matches.
– I rarely see this trinket. If suddenly very lucky, it allows to daze by activating Retribution, but for riposte itself it will not work. For some reason, riposte only inherits stats from the type of damage, does not inherit special properties, the same as with Crushed Hemlock. If you really want MAA for some reason and plan to dance with Shield Bash at the same time then you can use it, but this is a very niche strategy.
– Literally all its stats are for riposte, but they are very worthy. Without this trinket, MAA's riposte can almost be ignored, with it, especially if you add Insignia of Rank – dream on! At the same time, such a Man-at-Arms will still be good at yelling if riposte is suddenly not needed. Just remember, if riposte is not active, or the enemy capable of ignoring your MAA without loss in their effectiveness, then trinket effectively doesn't exist.
Occultist


Overall rating of the hero's power: 7/10.

Occultist, while still having his support function (only his stun is lost), has become a highly stress-oriented character. The only hero in the circus who inflicts horror on an ongoing basis. Loses horror skills in the first slot, however. But his curses won't be lost, and he can still kick anyone from anywhere for juicy 30 stress and weaken them in addition. Swapping a stun for stealth is an interesting trade-off, especially given the two-turn stealth duration and strong stress dealt buff. Has uses in mark teams too, especially with one of his trinkets, but it's clearly not meta. His main problem is that he is quite vulnerable – he is easily pulled, after which he easily gets stunned. In terms of self-defense you have to rely only on his base 15 DODGE and on allies, trinkets and other basic stats do not help much in defense. But at least he can do something in any slot. Already a plus compared to some other heroes.

Skills analysis:
– used in mark teams with its specific trinket. Becomes the only mark skill with applied damage excluding Come Hither. But the skill is extremely inaccurate, and the damage is not that high, although it is noticeable when it crits. Killing heroes in affliction is rarely used (in stress teams, Occultist does not have enough slots for skills), but can be an unexpected turn in teams for stress and direct damage. But stress Occultist tends to be severely short of slots for skills.
– Occultist's main stress skill. It is always taken if we are talking about stress. It sends the enemy into affliction not that quickly, but reliably. The crit chance is nice too. And there is even some damage to speak of.
– used a little more often than Vulnerability Hex, due to higher base damage and more need to reduce these stats. Choose one curse if you're talking about stress. Damage teams might find it useful to shave enemy's PROT off, though.
– is taken almost always. Our (un)favorite sl0t machine. Healing from any position is quite an important tool. A sudden crit heal on hero's full hp at Death's Door could very well turn the match around.
– usually used specifically for mark. But there are cases for the skill even without mark synergies. Very effectively counters Shieldbreaker's Serpent Sway, for example.
– despite interesting mechanics, I don’t often see use of the skill. Three problems – you can’t heal yourself, there are few slots for Occultist, destealths on the opponent’s side makes the skill of little use. If it work though it can be very, very effective. Allows you to 100% (sl0t machine might fail even just that) get hero up from Death's Door with stealth attached, for example. Just one interesting idea: a target in stealth and under guard can only be revealed by Flare from Arbalest / Musketeer.
– is always used. A very competent pull, with horror, excellent accuracy, decent damage, also crits often.

Trinket analysis:
Without personalized trinkets, Occultist is not as effective. Usual stats don't help him much. If we really want to, then good options are Eerie Eye to increase debuff chance and chance to hit, Silver Syringe for juicy crits of sl0t machine, Carnival Mask in case we want mainly to apply curses (for "roof spaghetti" – Abyssal Artillery – stress dealt bonus is almost not needed for this skill), Pitfighter's Helm for some kind of protection, Retarius' Net for pull. Monkey's Paw can always be used, 30 DODGE is not that much, but is better than 15.

– Occultist's most key trinket. Stats are excellent. Increases accuracy of almost all of his skills, lengthens the horror, improves pull chance. An absolute must-have trinket for a stress occultist, not bad for a mark one as well.
– Occultist is not tabout damage at all. I rarely see the trinket, even for mark occultist pretty unneeded bonuses.
– simple stats to enhance curses. A good trinket, makes our occultist dangerous even in the first slot, without tentacle skills.
– one of the worst trinkets in the game. Someone considers it frankly harmful, almost worse than an empty slot. The main reason for this logic is that the debuff is, firstly, guaranteed, and secondly, for the entire battle. And I can understand this point of view: bonuses are not that strong. 15% health won't carry at all, 4 bonus heals is almost a joke. Trinket helps Stygian Embrace quite well, at least random 2 AoE damage won't immediately get hero back to Death's Door, but this is already the most rarely used skill. If there were stronger bonuses, then it might be decent. The debuff is quite tolerable, because if the enemy focuses on finishes with deathchecks, then often they already have some sort of finisher, which means that the chance of dying from a death check and without a debuff is extremely high anyway, if not guaranteed (hello, Hunter). But, alas, little return. We get medium risk for small reward. And usually trinkets, within the circus even so more, are medium-high rewards for little or even no risk.
– that one trinket about the mark Occultist. Mostly needed for mark, rarely used by stress Occultist, although 25% stress against marked is powerful, spamming with Vulnerability Hex will cause dirty numbers. Especially if combined with Hand. But horror is still stronger, not to mention the improvement in movement skill chance and accuracy, so I would not ignore Grimoire.
Leper


Overall rating of the hero's power: 5/10.

Leper, as he was the most narrowly focused, so he remained. Stress he inflicts is very specific and not so high, he is rarely used in stress teams, and he has no dots at all. That leaves only direct damage. Moreover, in this playstyle he can only wave his sword at the first two enemies and push. As usual, with terrible accuracy, and only the first two slots of the enemy. But in terms of damage and survivability to health damage he is still pretty damn good. In the base game, his main strength is a critical hit equals somebody is dead, unless it's 2-size enemy or it has PROT. In the circus, the situation is noticeably worse. Leper only counters strong heals, otherwise his gigantic damage is only needed for one or two hits per match. Furthermore, healing just for 3 hp is enough for Leper to once again have to wave in vain. Of course he will drop the enemy with just one crit of his main blow, don't need to visit the fortuneteller for that one (if there is no protection). But he needs to hit, and he needs to crit, and at the same time be in the first two slots. And with all this Leper has trouble. Chase survivability and moving resistance – good luck dropping somebody or even hitting at all. If you try to put everything into damage, it won’t work right away anyway, Revenge must be squeezed at the beginning of the match, and then the enemy will try to throw Leper into the back rows. And how King has nothing to do in the back rows everybody knows. Without heroes who can move back with their skills, there is nothing to do but slowly walk. As a result, they kick him, kick him, we drag him back, drag him back, in the end he is left alone, and he has no tools to complete the match on his own if the enemy has at least some kind of healing. If he got into the fourth slot and you can't get him back you may even surrender immediately. It turns out that his problems are one and the same as those of Plague Doctor, just the opposite side. Some royal drama we've got here.

Skills analysis:
– the most basic direct damage tool. The damage is so huge that sometimes it is dropped and only Hew is left, with which Hew buff in the circus helps.
– is used quite often, otherwise absolutely any healing dramatically makes Leper far less useful.
– quite a strong skill in specific situations. It starts the match perfectly, you can even do without revenge. Crusaders hate it. But once Leper loses his royal first slot – goodbye skill. The restriction on targets and functionality also does not help, Leper does not have enough slots for skills.
– very strong buffs at the cost of not so big debuffs. The worst thing is the strengthening of incoming dots. No, not even that, the worst thing is that we spend a turn on its use. And Leper in direct damage would very much like to remove the enemy with a crit here, right away, and preferably even yesterday. Until he's kicked the hell out.
– if you plan to make a raid boss out of Leper at the end of the match, you might consider this skill. Supported with Bulwark of Light from Crusader and with Pitfighter's Helm, and congratulations, 80% protection (absolute maximum) has been reached. But again, few people will purposefully try to remove Leper with direct damage, if it is much easier to kick him out. And also, you need skill slots. By the way, it does absolutely nothing against stress.
– take almost always. A very strong self-healing, and if the crit also comes upon then it’s a wonder. Without it, Leper can even be focused. It's a pity Leper cannot use it in the back rows. I would even rate the King 6/10 if it were possible.
– if we want to get some stress out of Leper, then here it is, our skill. You can try to debuff someone's damage to absolute zero. The only pity is that, like Purge, any sneeze at the position of the Leper will erase the skill.

Trinket analysis:
If we want King to survive and to stress, then our client is Pitfighter's Helm. Otherwise, standard damage: Hunters Charm, Eagle Eye Talisman, Jagged Chopper. Resistances from Exotic Snuff is also very pleasant, in all cases, if the enemy decided to place their bet on base 100% move chance then they will regret it with a 90% chance for each attempt. It will also add damage if Leper goes first, and Leper really wants to go first until he is still kicked out. The only problem is that an external source of accuracy is definetly needed, otherwise it’s quite sad to miss attack on Flaggelant. Treated Bandage, by the way, is also a good solution, if used with Withstand you get worthy dot resists and very strong heals. Numbling Incense is not such a bad idea for protection against stuns and stress. Retarius' Net is a worthy choice, it allows you to guarantee Purge on Crusader for example, and the accruacy is also appreciated.

– Literally Jagged Chopper's reskin. You can combine them, of course, but then you definitely need to do something with terrible accuracy.
– a simple trinket for decent accuracy and normal health numbers for Leper. Pretty obvious choice if we want to hit at least a little more often than sometimes.
– almost reskin of Treated Bandage. Slightly better than it, but still not used quite often. I would say it's a good combo with this very bandage for a strong improvement in self-survival, especially against dots and with third-party heals, but the impossibility of self-healing in the back ranks still comes to bite you.
– a very good trinket, with great crit chance and some kind of dot, will help to cope with weak heals.
Crusader


Overall rating of the hero's power: 9/10.

The multifunctionality of Crusader has somewhat diminished, but the power is more than enough. 15% base PROT is very nice. Deals a huge combination of stress and direct damage at the first two ranks of the enemy. He can heal himself and an ally at once, which just incredibly carries the end of the match. Has an awesome stun, with decent damage. Can raise PROT of the whole team. Even if kicked back, Holy Lance deals quite large numbers of damage, albeit somewhat inaccurate. By the sudden genius of the circus's balance he has absolutely insane resistance to bleeding, good luck breaking through it. His main vulnerability is low stun resistance. However, PROT allows him to somewhat weaken the effectiveness of the stuns. All in all, strong as all hell. Crusades like there's no tommorow.

Skills analysis:
– The most rarely used Crusader skill. Just damage, no effects. It is used occasionally in direct damage, in those cases when we want to protect ourselves from a situation where the damage of Zealous Accusation is not enough to put the enemy back to Death's Door but Smite is enough (if you use Sacred Blade, which gives bonus only to melee, the difference is noticeable) .
– is the cornerstone of stress-direct damage teams. The figures for both stress and damage are kinda broken. Sometimes even teams for just direct damage use this skill, for variability and simply high numbers of direct damage.
– is one of the main reasons why direct damage teams suppress when it outnumbers. Very decent damage, which sometimes breaks even mediocre 7-9 heals. Normal accuracy. If we are talking about direct damage, then the main tool of the crusader. Sometimes taken in stress-damage comps to stun heroes with low resistances and high power (Jester, Grave Robber, Antiquarian, etc.).
– if our team has at least some kind of PROT to speak of, then a very worthy skill. Even for the sake of Crusader himself a good choice, 35% protection is no longer a joke. Significantly reduces all direct damage of the enemy team. It even helps against dots, if the enemy hasn’t bothered with a normal finisher and hopes to finish with abilities with low base damage (it only works reliably if we have MAA yelling, or other damage debuffs are in action, for example affliction with reduced damage on an opponent’s finisher).
– always use. The more healing options, the better. The second main reason why direct damage teams suppress when it outnumbers. And the main reason for the strength of Crusader at the end of the match: while at least one of his ally is alive, you can easily get both from Death's Door.
– always use. Otherwise, going back to the first two slots will be inconvenient. Always weaker than what Crusader would have done without the push (either stun or stress + damage), so he will still be pushed, but at least we will inflict something, we will not just move.
– I see the skill almost less often than Smite. The fact that even as little healing it had was removed greatly weakens the skill. Can be effective against stress, especially if you get lucky Virtue, but if the enemy has no stress, then the skill is useless.

Trinket analysis:
Of the universal ones, each of the two types of Crusaders has their own mandatory. For stress direct damage, this is Pitfighter's Helm, for the sake of juicy PROT numbers and a stress bonus. For just direct damage, this is Brass Knuckles to boost his stun. Other universal trinkets get powercrept by personal ones, but good starting options are Carnival Mask for stress and Eagle Eye Talisman for ACC.

– A wonderful trinket for stress Crusader. The stats are crazy, it's strange that there are no downsides. Occasionally, even stun crusaders use it (still having Accusation in their skills) to have higher accuracy, a chance to deathblow, and for variability.
– I see this less often, but can be very effective. You can ignore stress healing, it's optional and the trinket is pretty decently stated even without it. With it, Crusader's healing is noticeably stronger, especially if crit comes, allows you to have strong level movement resistance (and they do like to push Crusaders), and the reduction in incoming stress is nice. Again I am surprised that so many stats are without a minus.
– yet again, a wonderful trinket. Significantly enhances stuns, and also gives a chance for an advantage against stress teams. Damn it, just because of the absolutely fierce trinkets Crusader gets 9/10, if they were more balanced then the rating would be 8/10.
– ... except for this one. Natural joke. 5% PROT is a very small bonus, 15% health is pleasant but not really strong, and death resistance is probably the most overestimated circus stat by the developers. Compared to the rest of his options this is garbage.
Flaggelant


Overall rating of the hero's power: 10/10.

Flaggelant's role has changed quite noticeably compared to the original game. As the main healer, he is not so valid. His Reclaim is no longer free, due to almost zero resistance to bleeding, which is unrealistic to resist and pointless to raise to the desired numbers. However, he does not hold on his power. This is the strongest hero in the circus, he's able to rise from the ashes as many as 5 times per battle, inflicting crazy bleeding, restroing allies and inflicting some kind of stress in the process. His unique properties help him a lot and must be taken into account when the hero participates in the battle. One of his trinkets is completely broken. Despite the fact that he only has combat skills in the first two slots, support skills are available everywhere, and he can move forward in just one movement, which, coupled with high movement resistance, significantly reduces the effectiveness of pushing him. Very nice stun resistance. Good luck controlling him. He is truly vulnerable to only one thing – Jester's Finale. But who is not vulnerable to it, right? This is partly offset by, well, not exactly OP strong combat skills, but still, ignoring Flaggelant is quite painful. At the end of the battle he is quite capable of winning two, or even three, against him alone. In general, Flaggelant is a certified Final Raid Boss of the entire circus. Because of that he got his nickname (with love, of course):


Skills analysis:
– Flaggelant's key combat skill. Always use. The only skill that has no damage reduction, has a dot applied, and even has some kind of stress. A universal skill that will always do something harmful to the enemy.
– is not always used, but if we focus on aggression then this is clearly our client. Very strong skill, but competes with support skills.
– almost always used. The main reason Flaggelant is a raid boss. Not only lifts him off the floor, but also removes the face of the enemy with a huge amount of bleeding applied. The main disadvantage is bad accuracy. Take care of it.
– the main competitor of Rain of Sorrows. If our Flaggelant is more about supporting the group than about the distribution of dots then we take it. The regeneration is very strong, it is not interrupted by one hero with dots, with rare exceptions (another Flaggelant and a Noxious Blast of Plague Doctor, plus Crushed Hemlock with 4+ damage melee dots). Very useful against direct damage teams. Keep an eye on Flaggelant himself – if he is stunned at the wrong moment, with a bunch of dots collected, you can lose your raid boss.
– always used, I can't think of any exceptions. The second reason Flaggelant is a raid boss. It helps a lot against AoE damage, works great in tandem with guards, or if the enemy has to remove the focus from Flaggelant for other reasons. Sometimes you can even use it on a healthy team member, because the skill is guaranteed to heal while Exsanguinate can miss, and it has no slot restrictions as well.
– probably, in the top 5 worst circus skills, this one is in the second or third place. Not only is stress healing in the circus already a rather unhelpful phenomenon, but there is also small amount of heal done, and without additional effects, and only on one target, and Flaggelant himself gets stressed. Forget it.
– despite the fact that it is very effective in narrow situations, you likely won't have space for the skill, since three skills for Flaggelant are firmly occupied and are always taken, and for support Reclaim is useful in a significantly larger number of situations.

Trinket analysis:
Flaggelant's 100% client is Crimson Hook. Very strong buffs for bleeding skills with stress. For Rain of Sorrows, Crushed Hemlock would be a good choice to apply 6 dot to the back rows, and it will strengthen the rest of the combat skills. Such a Flaggelant, even if ignored by the opponent, reaps and heaps on the level of a Plague Doctor, my respect man. Exotic Snuff is a good option, but be sure to raise his accuracy. If we want the raid boss without personal trinkets, then we can use Silver Syringe or Treated Bandage, but it's better to wait for personal ones.

– Flaggelant, he is still not about direct damage. Well, not completely. Crit chance is nice, but it requires bleeding, and it will not always be applied. The bonus to accuracy is small. In general, there are better options.
– Solves Exsanguinate accuracy issues on 5 DODGE enemies or less. However, other stats can both harm and help. If the enemy decides to generally ignore our raid boss, then there is a chance that we can heal someone without enemy pressure. But the increased incoming damage is very unpleasant and can cause his death. The damage bonus, again, is not very useful.
– a rather specific trinket, I see it less often than all the others. It would be a good response to stress teams if not for the next trinket. The bonus to damage, however, is serious, we add all the natural bonuses, and with affliction the raid boss can crit so juicy with Punish that no bleeding is needed. And he'll bleed, by the way. It's a pity that the healing bonus is tiny.
– this thing is as broken as it can be. The third reason why Flaggelant is the final raid boss. It's a natural middle finger to almost any stress team. Absolutely any hit on Flaggelant will heal him 10 stress. Even if there was no damage. And stress teams find it difficult to focus on one target. The universal answer to braindead MAA who do nothing but yell. Come on, inflict 2-3 stress on me, I DARE YOU. Against the health focus, he has a strong bonus to healing, moreover to healing skills, not to incoming healing, and 10% PROT. In general, take this and enjoy life.
– a narrowly focused trinket for defensive Flaggelants, oriented in advance to support. Not so badly combined with outside heals. Dodges rarely save, but death resistance allows you to risk once and catch a death check: if the enemy does not have an increased chance to finish off, then this is only an 8% chance.
Arbalest


Overall rating of the hero's power: 10/10.

Arbalest from one of the variants of mark heroes has become almost the only one mark damage hero. The main reason for this is hidden in the trinkets, without them both Houndmaster and BH are still comparable candidates for mark damage. Why such a high rating then? Incredible bust in stats. Count: 50% move resist (the only character in the back rows with such a resist, also Bola allows you to return to the position with a skill), 5% base PROT (reduces any incoming direct damage by 1, always, this is how rounding works), broken Sniper Shot even at its base (more on that below), broken trinkets (more on that later, but in a nutshell, they solve almost all problems of marks), nice buffs to support skills, and, like a cherry on the top of a cake, 45% resistance to bleeding. She can be used as support, and in this role is comparable to Musketeer, but still a little worse (no, not like that: a little less versatile). The only thing this lady can really do effectively is hit the mark, but damn, how overpowered is she at that.

Skills analysis:
– the main problem of Arbalest in the base game was the low base damage. The circus version of the skill with +25% bonus to damage is a multiplier, which is why not only the damage on the mark is still high, despite the decrease in the bonus on marks, but also without the mark she'll crit for like 25-30. Skill is always taken, for obvious reasons, if we are talking about direct damage. Occasionally used by a support Arbalest, for death checks, and it will be fine to hit a random mark. By the way, excellent accuracy.
– Used only by support Arbalest in stress teams, and even then it’s a rather niche choice. It can be effective, but it does not always turn out to be so, if the back rows of the enemy are not about direct stress, then the return is very small. Stress heroes also tend to have high resistance to debuffs.
– taken infrequently even by Arbalest for direct damage. There are two reasons: she needs to damage, not to wave her fingers, and there are not enough slots.
– is always taken so that we have something to go back with, not just a move. Acceptable damage, good accuracy, sometimes it even shuffles the enemy.
– I, as part of the description of the skills of Helion, called If It Bleeds the worst skill of the circus. Well, I admit I was wrong. Here is the worst skill of the circus. And in the base game it's the worst too, probably. The reasons, I hope, do not need to be explained.
– is always taken, heal is heal. Pretty good heal at that, not every damage will break through it, even without trinkets for healing done. Good synergy with Flaggelant and his Reclaim, allows you to both remove his self-bleeding, and remove bleeding from the target of his regen if it is interrupted by too much bleed dot.
– taken very often, since it counters a fairly large number of enemy mechanics: stealth, marks, stuns, debuffs. If we were suddenly brazenly yelled at by all sorts of different mans with some arms there, we use it, and congratulations, we again have damage. Just don't forget, afflictions are coming... Removing marks and stuns allows you to maintain tempo against direct damage.

Trinket analysis:
Without personalized trinkets, Arbalest is noticeably weaker. Better to wait for them. If we really want her, then it’s obvious: damage. Eagle Eye Talisman, Hunters Charm. Exotic Snuff is a relatively good choice in the early stages and for a support Arablet. Speaking of support: Silver Syringe. Eerie Eye, if we want to spam Suppressive Fire. Bonus stress is not necessary, the numbers are too small anyway.

– stats my respect. One of the problems with direct damage is PROT, well, the enemy’s PROT becomes noticeably lesser. Complete disregard for any random protection in the base stats, noticeable weakening with large protection numbers. 20% damage dealt versus 40% with 80% target PROT – is there a difference? Insane crits in addition. Looking at these stats, 10% damage even looks pitiful. If we are talking about direct damage, our client.
– a wonderful trinket for support. Minus stress is pleasant, protection is also good. Bonus healing, of course.
– what genius of balance came up with this fierce OP, let me clarify? Probably the same one who invented Gauntel of Absolution. Why the hell do we need tools to protect against marks, if Arbalest stupidly takes this trinket and Piercing Quarrel, and voila, the only means of salvation is removing the mark (and only Arbalest herself and rarely used Flaggelant skill can do this, I remind you), or move to the first slot (the whole team will not fit there, unfortunately). Also, even without bypassing the guards, the bonuses are very high. 30% damage, 12 accuracy, and 5 crit against marks if Arbalest is the last to go. There are also bonuses without a mark (15% damage and 12 accuracy, which is already stronger than any universal direct damage trinket, just for information), so no one will stop Arbalest from critting for 30 on an unmarked target. With 20% protection or less. Honestly, without this particular trinket Arbalest's rating would be 8/10. And without ignoring guard, 9/10. I remind you that direct damage teams often use stuns, and they already counter guards. But here we have at least a chance to resist or dodge. Holy chili dogs, how salty I am. I think there is no need to explain that we always take this if we are talking about marks. Or overall about direct damage. Even without marks, the stats are not bad.
– compared to the rest of the trinkets this fades, of course. Only Arbalest about spamming with Suppressive Fire might use it, which is a niche tactic.
Bounty Hunter


Overall rating of the hero's power: 8/10.

Bounty Hunter retained his old functionality of a shuffler, marker and finisher (in the base game, Finish Him was about finishing off the enemy with low HP and damage against a stun, while in the circus the skill has an incredibly high kill chance), but lost a lot in stuns. Can still hit the mark for great damage with Collect Bounty, but not as strong as some Arbalests, since there are no OP trinkets and accuracy definetly lacks. Surprisingly, despite these properties, he has rather little functional. His main advantage, and the reason why he is worthy of appreciation, is a guaranteed kill (without buffs to deathblow resistance) with the help of the Finisher and Finish Him. However, it should be borne in mind that if you don’t particularly need to move the enemy, the mark is not required and there is no one to finish off, then the best that Hunter can do is to scratch someone with skill with bad accuracy. Pace is very important to him.

Skills analysis:
– as in the base game, the choice is questionable. Hunter needs skill slots. In trinkets, he is very limited, there is nowhere to insert damage. The accuracy of the skill is low. Hunter is often taken out first to stop shuffling and remove the guaranteed kill, so he is not allowed to swing his axe. In general, it is better not to.
– if we are talking about marks, then we take it. The duration of the mark is what important. In addition, it is not always necessary to move, but it is almost always necessary to mark in marking teams.
– Always use, no exceptions. Even if we are not talking about marks. A very accurate pull, it also allows Hunter to perform Death Check on the fourth slot or if he himself was thrown into the fourth slot.
– if we are not talking about marks, it can be used instead of the actual mark for greater control variability. A good tool for a stress hunter (yes, there is one).
– rarely used, the reason for this is that the hook performs the same function, but many times better. The dodge debuff is not as relevant. It has pretty good synergy with himself through Finish Him, however.
– Always use, no exceptions. BH's most powerful tool. Guaranteed kills are extremely important to reduce the randomness of the circus, which is already extremely random. By the way, it deals very decent damage to stunned enemies, even trinkets for damage are not necessary.
– used very frequently. Allows you to keep the pace, used once per fight if Hunter has nothing to do. The main tool of Hunter in teams without marks, it allows the bearers of the Crimson Hook to synergize, and simply slowly kills the enemy. Also a useful tool for finishing through guards (however, small direct damage of the skill makes the check not guaranteed, it can roll zero, especially of the guardian is MAA with his buffs to PROT for the target and his Bellow reducing direct damage done).

Trinket analysis:
The choices are very simple. Of the universal ones, he always, with only one exception, uses the Finisher. When you finish, he is unlikely to miss and is also guaranteed to kill. Also a great option is Retarius' Net for movement skills, though his personalized trinket powercreeps it. Better forget about direct damage, Hunter is still not about it, and if about it, then only with his trinkets.

– if we still want to hit the marks so badly, then we can take it. But the trinket does not give a chance to finish off, nor a chance to move, and both of these stats BH wants badly.
– Net powercreep, as I said. Is used by almost any hunter.
– is the Finisher's exception. Balance between Bounty Notice and the Finisher. Significantly increases the randomness of Bounty Hunter by increasing his damage. Finish him off now has both a (too high for comfort) chance to miss and a chance to fail a kill, but does decent damage even without stuns/dazes.
– a very, very niche trinket if we want to use Hunter in stress teams. Almost like a meme. If we want to use move skills in stress teams, there are more suitable heroes. And Caltrops do not help stress teams so much. But you can meme.
Abomination


Overall rating of the hero's power: 9/10.

Abomination has become a key character in stress teams. His transformation horror always works and deals a total of 48 stress on each enemy (no horror trinket) if he has turned into beast twice. In stress teams, his task is to stupidly turn into a beast twice, and then spam Beast's Bile. However, even a simple move from the fourth position is not so terrible if he is thrown there. Horror is just too strong. Although Slam is a great skill for moving the enemy, with very decent damage and breaking through guards. And the other two skills of the beast have decent damage. Can still be used as a source of direct damage while in beast form, which works well as part of stress and direct damage teams. The ability to get back in beast form after affliction helps in this. Also effective as a stunbot, Manacles is an excellent stun, with normal damage, target selection 1-3 and available in slots 1-3. An acceptable tool at the end of a match, even for a stress Abomination. In general, the hero is terrifyingly strong.

Skills analysis (it is clear that he takes them all, but it is still necessary to analyze what to use and when and what is used more often):
– if we are talking about stress, then use as soon as possible. Horror is key. For direct damage, you can delay the second transformation to after affliction in order to continue to be in beast form (although if the enemy is about direct damage, then it’s better not to linger too much, they can focus Abomination). Stunbot Abomination may not transform at all, but if you suddenly need a burst of damage, then you can.
– a wonderful stun, but stress Abomination often wants to spam bile. Stunbot Abom's main skill.
– a good source of blight, and riposte cannot be ignored. An interesting property of ripostes, they have a base damage of 100%, and their minus to damage stacks additively with buffs and debuffs on damage. This is a two-sided coin for Abomination: a couple of debuffs on damage, and riposte will deal zero, but if we throw in buffs (after the form of the beast there is a buff for damage, Abom's crit buff is also damage), then riposte will start to deal good numbers of direct damage. This, however, does not work on the use of the skill itself, there is a multiplier as usual.
– simple self-heal. For the sake of stress heal is rarely used, too slow pace. However, if Abomination is stuck in the fourth slot, then you might as well. At least he'll be relatively safe in most cases.
– not so often used, more often you need either Slam or targeted damage. As in the base game, if you really want to Rake, then Rake you shall, the self-buff on the skill plays a role. You can just apply it once only in order to put an enemy on Death's Door or make a death check. Good skill for stress direct damage teams, especially with Shattered Padlock or Clasp of the Beast.
– if you do not need to Slam, then it's a good alternative. If it'll crit, then it'll crit alright. Watch out for small accuracy.
– very high damage for move skill. May crit somewhere around 20-25. Helps the beast escape from the third slot. For the sake of breaking through the guard it is rarely used, but it can also be an important point within direct damage teams. The only negative is not that big accuracy. Difficult to hit if we went first, or just on dodgy heroes.

Trinket analysis:
Of universal ones, an adequate trinket is Retarius' Net to improve the reliability of Slam, and accuracy is not superfluous. Stress Abomination really wants Wretch's Cloak, so it's better to wait for it. As a good alternative use Rotting Trophy, it will significantly improve Bile. You can try the standard direct damage for beast form. Brass Knuckles for stunbot, however by itself is not enough, as for any stunbot it is better to wait for a personalized trinket. In general, there are options, it all depends on what we want from Abom.

– a very worthy alternative to the Net. Slightly less reliable due to less chance of movement and lack of accuracy, but other stats make up for it. The main trinket for direct damage Abom in the beast form.
– the main trinket of stunbot. Improves both Bile damage and riposte damage if needed, plus a chance for blight, although rarely used for this purpose.
– a very, very strong trinket. It can, in theory, be used by any Abomination, if the team has at least some kind of stress (for example, teams about direct damage with stress). In total, horror will inflict 64 stress on each enemy if there were two transformations into the beast. 10 accuracy is also an important argument, stress dealt helps spam Bile.
– the bonuses are quite small, I rarely see this trinket. You can meme in team build around chance for Virtue.
– a very worthy option for self-defense. Combines well as part of a direct stress team, both because it actually adds stress to Rake and because Crusader has Bulwark. However, it competes with Shattered Padlock and with Retarius' Net for more reliable Slam.
Antiquarian


Overall rating of the hero's power: 8/10.

Since there is no economic reason within the circus to take Antiquarian, she has been noticeably buffed to be on par with the rest of the crew. She is still vulnerable, with low HP and low most resistances, but she is evasive and has self-defense tools. It was her aggressive component that was noticeably strengthened, due to rather strong Festering Vapours, which really needs bonus accuracy though, she will not help herself much here. A few rounds of its application, and the enemy is already in affliction with a bunch of dots applied. Also, she can now work as a full-fledged healer – several stacks of Rejuvenating Vapours is a very serious healing. If a team on direct damage has weak (or no) dots, they will not be able to break through this regen, and each hero will get a chance to recover from Death's Door by simply choosing himself once per turn. And if the enemy has no dots at all, then one use of the skill is enough. However, she also has decent downsides: ripostes significantly limit the combat effectiveness of Antiquarian (either use weak powder, or catch the riposte in the face in return), and strong dots (or just spam with dots) pierce regen, losing the ability to rise from Death's Door with Antiquarian's help. Watch out what your enemy has in store, and do what needs in response.

Skills analysis:
– if we want to make a support finisher out of Antiquarian, then it's a good skill, since the low base damage of Vapours may well deal zero damage under debuffs on damage and / or target's protection. And the main tool for meme Antiq through one of her trinkets. Not needed for any other reason.
– is the main attacking tool of Antiquarian. We always take this. Excellent crit chance (positive crit chance for a full AoE skill is very strong despite Antiquarian'ss low base crit stat). Watch out for low accuracy, and ripostes. Abom with little or no damage buffs can be relatively ignored. MAA without Shield Spike in trinkets and / or with a damage debuff is also not that threatening. You have to be very careful with Highwayman. If Antiquarian has a lot of DODGE, and he does not have enough accuracy, then we can take a gamble.
– is always taken. A great opportunity to stretch for time and save Antiquarian from focus. One-for-one counters Bounty Hunter's pull (if we don't account for the skill's limited number of uses), unless Arbalest has stealth ignore for some unknown reason. It can be used if Antiquarian is left alone, so that dots tick off on the opponent and to increase her resistance to deathblow.
– taken often instead of Nervous Stab. Option for aggression against riposte. Allows you to securely finish off a target without buffs to reduce incoming stress who just survived a heart attack, or just someone on Death's Door with a stress of 175 or more (the enemy on Death's Door gets + 33% stress, don't forget). A good option for finishing off the last enemy if they have a lot of stress accumulated. Very useful in duels, especially if Antiquarian is dressed in dodges.
– is always taken. The strongest tool against direct damage without dots or with weak dots. Can counter one dot character when spamming, unless there is too much dot (Flaggelant and Plague Doctor for example). But when spamming, don't forget that dots, even if they don't kill today with damage, they will tomorrow with stress and/or direct damage.
– if in the base game a good option to fool around with a rather useless Antiquarian, there are much more effective options for grandma's entertainment in the circus. You can try to indulge in crazy dodges team, but otherwise an ineffective skill.
– this skill in situations where the enemy has nothing to break through the defense, but has something to beat Antiquarian with, can be effective. But this doesn't happen often enough to justify replacing some other tool. The limited number of uses also prevents the skill from being revealed. If you do use it, keep in mind that the ticks of the remaining guard comes from the guardian, not from Antiquarian. For maximum guard duration, cast on a hero that was already played this turn. Keep in mind, because of this, if we don't guard on the hero that is still guarding, there will be at least one turn of one opponent's hero without guarding that will occur between the guard's turn and the reapplication of the guard.

Trinket analysis:
Of the universal ones, Monkey's Paw is a worthy choice as part of a build for maximum dodge and accuracy, Rotting Trophy for general strengthening of Festering Vapours (gets powercrept by Materia Pestis), the Finisher to have a support finisher (although there is no bonus chance in skills, aoe nature of Vapours allows to ignore guards and miss a kill with almost no loss of tempo), with a stretch Eerie Eye for acc and debuff chance. Trinkets for stress are more likely to be taken away by other heroes (Antiquarian does not have such a huge return of stress), but they can also be used.

– is a good trinket for general Antiquarian survivability enhancement. Given the many different options for trinkets, it can be used even without Paw.
– a wonderful trinket. It also works for more aggressive Antiq, since if we have to use the regens once, then they'll work longer allowing you to reapply them later. Good defensive stats against stress teams where regen is of little use. Makes spam a little more reasonable, after four moves it's 12 regen on average, good luck breaking through this with weak damage or small dots.
– a pure meme, at the level of a Plague Doctor's Saw or Vestal's Talisman. It can work with a stretch as part of a stress-direct damage team, but even so it’s better to spam Vapours. Both stress and damage are less than from them, even without taking into account the trinkets to increase the corresponding stats.
– not so bad for dealing stress, but it is not so great for Antiquarian, and she has better trinkets. If you use Antiquarian in the direct stress team, then you might consider this.
– a great trinket for dot teams. Decent dot numbers, the increased chance is also nice. Dramatically makes Antiquarian one of the strongest dot delivers. 32 dot damage in total without crits.
Musketeer


Overall rating of the hero's power: 9/10.

Compared to Arbalest, at direct damage, Musketeer is a complete reskin. The differences are in the details and in team support. She lost some of the nice perks of Arbalest, like base PROT and heal trinket PROT, some bleeding resistance (10% blight resistance doesn't compensate, don't forget, the more resistance the more effective it is). As single mark damage dealer she performs worse only and only because her Ranging Shot is designed to buff the team, while Arbalest's Flare is for countering debuffs and maintaining tempo by removing stuns, also helps vs enemy markers. This is enough reason to use Arbalest over Musketeer as part of a team of one sniper. The main reason for the overall decrease in rating by one is mainly in this aspect, but I would even leave 10/10 if it were not for a slight deterioration in stats, because as a support unit Musketeer would be a little more versatile than Arbalest, if not for these reductions in stats and not slightly worse support trinket. However, they can work quite effectively in tandem. Interesting (and of course made with love) pairing, by the way:


Skills analysis:
– the main attack, as effective as that of Arbalest. Just as broken, yes. Decent damage and accuracy even on unmarked targets.
– a noticeably more universal skill for a support musketeer than a similar one for an arbalest. Effectively removes crit chance from most sources of damage, and the minus for accuracy is good. Only a short duration of two moves is kinda bad though. The debuffs are so powerful that even within a non-stress team, the skill has reason to exist. However, shooting at the mark is still more effective.
– here there are some differences from mark Arbalest. Her Flare is very necessary for the pace, so she does not take the mark. Musketeer does not need her Ranging Shot, so she can wave her fingers. This is especially true if they are both on one team.
– similar to Arbalest. Lets relocate not with just a move. Tolerable damage on the first slot, if necessary.
– wow, a reskin of the worst circus skill! The only reason to use it is to see the unique animation and sound. I am not kidding. The first move damage bonus is a great joke, by the way, I appreciated it.
– is always used. A very good healing, a little more universal than that of Arbalest, but not really better. As part of the circus, changing your focus on the target is undesirable (if the team is on direct damage), and the buff on incoming healing just works against focusing. With her trinket, it is further strengthened.
– A great skill for a support Musketeer. Works well against stress teams, especially given the tendency for stress heroes to have both dodge and stealth. In this regard, I would say it is more effective than Arbalest's Suppressive Fire even if we use increased stress taken debuff. The only bad thing is that it has a chance to completely fail stress heal (here, as in the base game, it's either heal everybody or nobody). Musketeer for direct damage would rather prefer the mark.

Trinket analysis (excluding direct damage, they're is similar to Arbalest):
For universal ones see Arbalest, there are no differences. Regarding stress heal of Ranging Shot with a Brass Bugle: no need. The skill is already adequate, the extra 6 stress heal won't make much of a difference, but if the enemy has no stress, then the trinket is useless.

– instead of protection, removes blight and buffs resistance to blight. Blight is a little less common than bleeding on a single target, and even less likely to go without stress, but in some cases more effective than Arbalest's healing. For example, against Adder's Kiss. In addition, Musketeer herself helps against stress with her Ranging Shot.
– although the stats are similar, it is used more often, since it helps a different skill. Smoke Screen is noticeably more versatile than Suppressing Fire, so support Musketeer often goes with it, and this trinket helps a lot for the skill.
Jester


Overall rating of the hero's power: 9/10.

Jester has two main powers – Battle Ballad for a bonus to accuracy for the entire battle, and Finale, the strongest skill in the game, can simply remove almost any hero from the match. Jester starts with Ballad in most cases, continues with Finale as soon as possible (despite the name of the skill, the sooner we remove someone, the better). This is all offset by the low return of the other skills of Jester. He can't really deal much damage outside of his Finale, his dots are without stress and limited on targets (although they're not bad in raw numbers), and his stress return is almost the worst – only Bounty Hunter is worse. He is very vulnerable, survives only by dodges, all resistances (except for debuff) are either mediocre or none. Of course, this is better than literally nothing that remains after a successful Finale, but still, in almost any team the main two tasks of Jester are to give birth to Ballad and one-shot with Finale. With this, his powers are all, over, for which reason I with love called Jester "Finale into corpse":


Skills analysis:
– Always use, no exceptions. Otherwise, there is nothing to do in slots 1 and 4 after our main skills are exhausted. In addition, it advances Jester to the slots of Finale. It finishes well through guards, but the 60% chance (with the Ffinisher) is very far from guaranteed. However, for a character who can one-shot, not bad.
– The most commonly used last skill of Jester. Pretty decent bleeds with great crit chance and normal direct damage. Terrible accuracy, even under Ballad is not quite sufficient.
– always use, there are no exceptions, this time literally. Without Finale, Jester's rating barely gets to 6/10, and that's solely because of Ballad. It is important to finish off the most dangerous enemy. This is usually the next priority: Flaggelant (this is not because of his danger, but because of his strongest self-heals, which are directly countered by Finale), enemy finishers, heroes pushing the enemy’s victory condition (the main examples are Houndmaster for stress, Abomination in stress if he is not managed to transform into a beast twice, Antiquarian with Materia Pestis for dots, Bountry Hunter for direct damage), strong heroes at the end of the match (Crusader, Flaggelant), heroes with a lot of dodges and low hp (Shieldbreaker (by the way, counters not yet used Serpent Sway), Grave Robber, Antiquarian). Sometimes we have to finish whoever we can, if we feel that Jester is about to meet his demise or be denied of action without another opportunity. Who we are going to Finale should be thought over right at the beginning of the match, preferably having a fallback option if the opponent somehow interferes with us. Finale is very difficult to use at the very beginning of the match, due to the lack of base damage, but after two or three rounds it is already more than enough. You should always keep in mind the approximate numbers of Finale, especially if it is your opponent who has Jester. You should not count on crit and damage spread, reliability is much more important, but if you want a little adrenaline, then why not...
– I rarely see the skill, since Harvest gives decent dots. I love it myself as it's pretty well stated, guaranteed on anyone but most dodgiest 12 base stress per enemy and the dodge buff for a hero with a base of 25 dodge sounds like a well spent move. 4 uses per battle is more than enough, considering moves spent on Ballad and Finale. But how difficult it is to return Jester to his place without losing efficiency... Look at the skills that move the hero forward. Maybe you'll come up with something.
– low damage for a skill on one target, a limited choice of targets, a debuff of little use and the existence of Harvest that hits the same targets with a much better effect – the main reasons to not take Mortal Wound. Can be effective on niche teams playing from a non-Hunter finisher, but the debuff should also work, which it likes to not to.
– We always take it, there are no exceptions. Almost any hero will appreciate the bonus accuracy. Even a 90% chance (effective 95%) to hit can completely miss. Heroes for stress adore Ballad, as they are usually inaccurate. And Jester himself will not refuse, in fact, Harvest and Dirk Stab both have terrible accuracy. Denying Ballad to an enemy Jester by pulling or stunning is a good opening of a fight, since Jester in the first slot can only tickle with Dirk (until buffs for Finale are ready), and Jester rarely starts from the fourth slot. Dodges save him, however.
– An extremely rare skill. Yes, it will do something against stress, of course, but any adequate source of stress inflicts more than 30 stress per turn, and if less, then it has an additional effect besides stress that is noticeable. Again, it is useless if the enemy does not have stress, and Jester does not have enough slots for skills anyway.

Trinket analysis:
Jester makes do with universal trinkets. His clients are Monkey's Paw to achieve 40 DODGE until Finale and the Finisher for the role of a support finisher. If we want something else, as a rule, the Finisher is sacrificed, otherwise Jester is too vulnerable (and he really needs to Finale). A good option is also Crushed Hemlock, it will give increased dots from Harvest if you manage to break through the resistances, and Dirk wil also become stronger, allowing Jester to work adequately within dot teams. With a stretch, Spiked Bat might work for more reliable bleeding (and even then, a blood-red coin in personal powercreep this). There is an argument, albeit a specific one, for Nepenthe in order to raise debuff resistance, the only adequate one, and give a chance for Virtue (and after Finale Jester gets affliction from any sneeze).

– Jagged Chopper reskin, with added accuracy against low hp targets. In theory, a tolerable replacement for the Finisher allows you not to lose accuracy, and a 35% chance to finish with Dirk, well, not the worst, for the sake of increased direct damage. But Blood-red Coin will be stronger 95% of the time. That is, whenever Jester uses Harvest.
– is used as rarely as Inspiring Tune. That is, very rarely. If suddenly the opponent turns out to be not about stress, we not only have an useless skill, we also don’t have one trinket at all.
– a very, very adequate trinket for a combination of both direct damage bonus and bleeding bonus, and a little accuracy. It will also strengthen Finale, against those who bleed. It can synergize normally with itself, an external source of bleed is not necessary.
– a rather weak trinket. 10 stress heals per round (and even if Jester hits) won't save from affliction. 20% hp is only 6, barely does anything.
Houndmaster


Overall rating of the hero's power: 9/10.

The most important, key and absolute power of Houndmaster is Hound's Harry. His other tools are still valid, but Harry is clearly in the top five strongest circus skills. It works both as a distributor of dots and as one of, if not THE strongest source of stress. Other that Harry, Houndmaster can do all kinds of support, and sometimes even inflict direct damage by throwing his dog in the face of the enemy. Not bad he can be build through dodges, Guard Dog helps a lot with this. He has reasons to exist in mark teams, mainly because of his strong mark combined with dodge setup (not to kill enemies with a dog, of course, we have Imbalest "haha get crit for 41 lol"). But all this is barely 7/10, even in total. Harry is everything.

Skills analysis:
– a rather weak skill, with very poor accuracy, although it retained a 100% bonus vs marked. However, Houndmaster usually doesn't have a lot of options to take from skills, so it's okay. Suitable for those cases when sending a hero to Death's Door will simply kill him (due to horror, another source of stress, or just 5 stress from falling to Death's Door). Can also be used if ripostes really choke our Harry.
– the main star of the hero. Incredible stress dealt with very good dot damage. If it crits, oh gods, it critis so much! Can be used from anywhere, which is the norm for stress skills though. The skill is so strong that sometimes you can even hit yourself on riposte, if only to send the enemy to afflictions as soon as possible. The only negative is the terrible accuracy, we must raise it from external sources. Used by all Houndmasters, even mark ones, for death checks through guards and for passtime when there's nothing to do. Keep in mind that if an attack triggers riposte and it kills the attacker, then there will be no additional effects. No stress, no bleeding, nothing. On Death's Door, it is often better to slow down after all.
– it is necessary exclusively and only in mark teams. I don't think I need to explain why. Retained very high debuff chance from the base game, so Houndmaster doesn't need debuff chance in trinkets at all.
– although the numbers of stress heal are more or less adequate, the chance of failing and the existence of much stronger Harry in general makes it extremely doubtful to use the skill.
– a very good guard, which is very reliable in cases of strong dodges. Good luck hitting the dog with 72 DODGE. The buff should not be ignored either, if our Houndmaster is not too aggressive and uses Paw in trinkets, then protecting someone from stress will not be the worst pastime. To maximize the duration of the buff, select a target that has been selected already in this turn. A tolerable skill to use if ripostes choke us, at least just for the sake of dodge buff. It’s ineffective if we don’t bother with any dodges, not only because there won’t be enough dodge, but also because in this case we have HM about stress aggression, and this is exactly what he needs to do, and not whistle at random people.
– always used, except for one specific team. A simple heal that works great against damage without dots. It will help you rise from Death's Door in order to release one more Harry on team with riposte. Against direct damage it will at least stall.
– due to lack of a personal trinket for stun, the skill is somewhat unpopular. Damage is also quite low, which prevents the effective use of Brass Knuckles. However, good accuracy. A pretty decent argument against dodgy heroes with little to no stun resistance. Often used by mark HM.

Trinket analysis:
You can immediately get perfect stress Houndmaster from universal trinkets. Monkey's Paw and Crimson Hook. That's it, you're dressed like the devil now. The existence of the Hook, with its stats literally created for Harry, is almost the reason for the high rating of Houndmaster. You can take Carnival Mask instead of Paw for absolutely crazy stress numbers, but then our MAA will have to literally nurse the dog, both with guards and Ccommand spam. The rest of the trinkets are of little use.

– if we don’t want to worry about accuracy that much, then a good trinket. Also a normal option for dot team.
– strange stats that seem to counter stress and help with direct damage, but the trinket is still stupid. The main reason for this is quite simple: Houndmaster needs other stats. Either dodges for support, or stress for guess what. Not howling at the moon. Can suddenly be effective against stress teams, but it's business as usual: the enemy has no stress, and we have a useless howl into asylum and a trinket with a small Lick Wounds buff. Guard Dog counters stress adequately (the guarded one will not receive stress, HM himself will most likely dodge), there is no need to force dominance.
– a very, very good trinket if we want to dodge. More dodges for the god of dodges! The duration of the guard does not play such a big role, because the buffs do not lengthen, both on themselves and on the target, I would like to maintain them. Again, dodge is everything. Protection is also pleasant, kind of cheap MAA.
– Houndmaster in the circus, you see, is clearly not about damage by marks. Like, not at all. However, fierce buff to crit chance provides a fun idea through maximizing the crit chance of Harry. But Paw is still better, or Mask. Or at least Attack Whistle. Crit doesn't carry by itself, usually.
STRONG (and not so strong) TEAMS
In this section I will give several examples of end-game teams, with all available trinkets. It’s worth starting with such teams in order to start capturing the game instinct of the circus, pump up the rank, and just if now you want to win right away. Some of them are directly meta-meta and are already well-established, some just have a funny name, but they are not meta (although they are competent), I came up with a few teams myself. It is assumed that the reader is already familiar with every mechanic and knows all the basic information about the circus, about heroes, about trinkets, and so on. The review of the teams will be minimal, I will describe the composition and briefly what are the strengths of the team, how the team “breathes”. But don't hang onto them! These teams are rather for understanding how team building is done. The list is far from complete, and I do not plan to update it. Better come up with a bad, but such your team. Who knows, it might turn out to be very strong. For me personally, this is the main charm of the circus.
Heylow, World Domination and more (Direct damage with marks)
Combined almost all mark teams into one group, since they have the same core. Mark teams aim to control the fight with stuns, quickly kill at least one enemy to significantly increase their effectiveness and healing, then overwhelm on the opponent with more turns, killing while doing so. In all mark teams, there are two main characters: Arbalest and Bounty Hunter. I think there is no need to explain their synergy. Arbalest always uses same trinkets and moves, same goes for BH , everything else is a loss in efficiency:


The other two characters vary. At least one of them is definitely stunbot, i.e. one of the following:


Each within the mark pair has their own advantages and disadvantages:


The crusader is the most objectively strong option, he's tough, stuns with excellent damage, tolerably moves forward with Holy Lance, heals from any position, can, if necessary, decently damage with Smite or pierce 1-2 guard with Zealous Accusation. Of the downsides, weak own stun resistances and a limited choice of targets for the stun. His build is as follows:
or


Abom can support stress when needed and deal high burst damage with Rage, has a good choice of targets and the second stun in terms of damage. Strong self-heal. Slam can be very useful, although he usually uses double stun trinkets (but you might prefer Net for accuracy as well as push chance), so the push is not guaranteed, but breaking through the guard is guaranteed. Less HP than Crusader, the same level of stun resistance, does not support allies with healing and cannot leave fourth place. Overall he's slightly worse in a vacuum, but can still be very efficient.
or

Houndmaster does not have a personal trinket for stun, and the damage of the stun itself is quite bad. He compensates for this with variability – guard and mark that reduces protection. In addition, in such teams, he is going to dodge, so he can help against low ACC teams. Hound's Harry gives some chance to kill through guard. Since you need to be in the front to stun, and the slots for skills are not infinite, he's not always going to have dog throw and dog lick, both of which cannot be used from the first slot.


Vestal stun is unique with the highest stun chance and great accuracy, given her strongest trinket. But damage is the lowest. In addition, the hero can notably heal. Alas, too vulnerable to pulls, and this is the main reason for the rare use of Vestal.

or

The fourth hero of the team is either another stunner or a second finisher, most often Jester (the rest are not so effective).


The main advantages of Jester within the marks team: a strong decrease in randomness and direct counter to dodge with the help of Battle Ballad, finishing through the guard with Dirk, worthy 40 dodge (Jester is very important in the early-mid game, as such 40 DODGE can really come in clutch), counter regen with the help of Harvest's bleeding, and, well, Jester's star is a one-shot ignoring a death check, a crucial move to pick up the pace and put pressure on the enemy, even if Jester does absolutely nothing afterwards.


Here's few mark team examples. There is a lot more of them for sure, but I be damned if I enlist more:

Heylow (author's nickname):


As meta as it gets. Probably the most objectively strong team within the circus. Counters a lot of mechanics of various heroes. It kills better than anyone else, it is extremely difficult against Heylow to leave without losses, even if you manage to win in the end.

World Domination:


The only advantage of the team over Heylow is that it directly counters this same Heylow. Against most other teams, it will lose a lot in the absence of bonus accuracy, weaker dots and lack of Finale.

Scylaac's Special (Scylaac is the author's nickname):


Vestal can stun heroes with low stun resistance very, very reliably. And her heals can significantly help. But if Vestal suddenly appears in the first slot, you're kinda screwed. However, until this moment, Arbalest and the rest of the crew should have enough time to put enough pressure on the enemy.
The Howlers (honourable mark damage mention)
(it's not like super honourable, there was not enough space in the previous section and I wanted to get just one more team example because this one is kinda unique)


The team have no connection to a named team of the same name from the base game. The team was made by 135jman.

Musketeer's skills:


The trinkets are the same as Arbalest has.

Two snipers practically guarantee at least one shot on the mark. Lots of healing. Musketeer's mark gives a chance to break through dodges, and Houndmaster's mark guarantees the death of all prot. Has a guard. The stun, although less reliable in terms of chance, is more reliable in terms of accuracy, it works fine for a one-time stun on a hero with small stun resistance. In general, the team suppresses not with stuns, which is what direct damage usually does, but also with huge damage that is not so easy to prevent (even if a couple of successful pulls pass, the girls will still fire a couple of return shots, and then Death's Door is almost guaranteed; and when pulled, there will be a response bola / buckshot for 100% damage in total with excellent accuracy and crit chance). Significantly weakens the front of the enemy, good luck hitting HM, especially if he threw a guard on someone.
Specifically, The Howlers is done precisely through Bounty Hunter in the second slot and Houndmaster in the first one. Since the team is less about stuns, and there is no Jester, Harry and Caltrops allow breaking through guards except for sniper shots on the marked ones. You can try to swap them in order to give HM, for example, dog throw for another synergy against marks. But Hound's Rush skill is very inaccurate, and this must be borne in mind. Plus it's hard to choose what to replace. Hunter can replace Caltrops with Uppercut for more control variability.
Shep's Stress (guess what its win condition is lmao)
Looks like that:


The main advantage of this team is efficiency at all stages. The tricks of the enemy are quite predictable, if the enemy kills an extremely dangerous houndmaster, then we have a second transformation of Abom on the way, and screams of MAA do not allow them to live in peace, and at the end of the game we have a very strong Flag, he can end the match even one against three, provided that these three are beaten and in affliction (which will most likely be so). Flaggelant himself also counters other team stress, along with MAA and his Bellow, in addition it will be unpleasant for AoE teams, since the collateral damage from said AoE will allow him to restore someone with Redeem.


His main job is spam Harry. Guard is needed to protect Abom from death until his second transformation into beast, Rush against very hard ripostes, Lick Wounds is clear why. Wants ACC,
badly, do not forget about Command, if the enemy has at least some DODGE to speak of.


or

For Abom, you need to Transform as quickly as possible. Two transformations into a beast, few Slams – that's all, consider the work of Abomination is over. 64 stress on each enemy is respectful. Bile will help a little against enemy AoE, and even without riposte it's a good skill. Forget about direct damage and stuns unless the situation really calls for it.


The busiest hero on the team. Often wants to use the entire arsenal. Incense stun resists help to solidify the guard to protect an ally from focus, it's also strong argument against stress, and Insignia of Rank almost guarantees Bellow debuff on all relevant targets. Command is very necessary against evasive enemy, all allies in this team want ACC. Bolster against stress, but Command has priority. Bellow against direct damage and in general if there is nothing better to do.


A full-fledged boss of the Circus, especially with his most impressive Gauntled. Stress dealt from Crimson Hook allows his Rain of Sorrows to inflict decent numbers of stress, and Punish crit is a very unpleasant experience (for the opponent). Directly counters stress, strong against AoE. With focused fire, one of his 5 heals will let him rise, and if the focus continues, we already have two guards on support. Very, very strong at the end, even if all his allies were killed, the enemy is probably in afflictions and is barely alive, Flaggelant will finish the job.
The Old Gold (stress)
I'm kinda not sure what the name is supposed to mean, but if I had to guess it's like "good old classic". Looks like that:


The main property of this team is incredible simplicity. Everyone speams with their attacking skill, except that MAA needs to Command sometimes, and Bolster once. The simplest team imaginable. The circus began with teams like that one, when everyone realized that stress is very easy to use and very unpleasant to fight against, many began to spam stress, and such a team was made up very quickly.


And again the strongest stress dealer. I don't think it's necessary to explain his power for like 5th time in this guide.


Since, in terms of stress dealt, Antiquarian produces not exactly huge numbers, she usually goes into dodges to be annoying. Rejuvenating Vapours will allow you to defend against direct damage, and Take Cover helps to escape from pulls. Flashpowder will help against counters, in duels and to finish off the enemy after a heart attack (the enemy immediately after heart attack, that is, 0 health and 175 stress, will die from the skill, unless he has buffs to reduce incoming stress).


or

As usual, two transformations, a couple of slams, then spit.


Focusing slightly on other trinkets slightly increases and decreases the effectiveness of his guard at the same time. If the enemy does not have a guard penetration, then it becomes almost impossible to break through MAA himself under a bunch of protection. Against stuns, the guard is less reliable, and it’s better to just yell. A little less often Commands because HM actually uses ACC trinket, but a little more often he Bolsters because of Antiquarian's high DODGE. Even more often he wants to just Bellow, regardless of what is going on.
Zealous Rakeshot (stress-direct damage)

A team that I myself came up with based on the well-known pair of Zealous Rake (I think it's made by 135jman, but don't quote me on that one), that is, Crusader spamming Zealous Accusation and Abomination spamming Rake, which in total inflicts high numbers of both direct damage and stress on the enemy front. I added Grapeshot from HWM on top, and MAA in slot 4, so that it would already become a full-fledged team.


Usually MAA does not carry Snuff, but in this team, I preferred the most impenetrable guard. PROT will be from Bulwark anyway, and that Bellow will not always work is less critical because of the same Bulwark and the team’s defensive trinkets. In addition, some kind of resists to at least sometimes protect ourselves from the situation when, after a pull, our ally ends up in the fourth slot (no one wants to be there, even HWM will have to Duelist instead of Grapeshot). Thus, the absence of Bellow trinkets encourages our MAA to support the team, which he will actually do: all our attacking skills are inaccurate, go-go gadget Command (as they say, two Commands equals crits!), defend against stuns and, in general, focus on one of team members at the expense of guard turn will also not be superfluous. By the way, the bonuses from Command for allies under guard will also play a role, we are not only talking about stress.
MAA might be replaced by Arbalest, she has 15% PROT support trinket and very decent support capabilities as well as strong healing (which is super good with PROT teams), but I just personally don't like her. Also, this team wants ACC, badly.


A slightly non-standard HWM who focuses just on stress. But he does it quite skillfully. His riposte will still not be weak, firstly, Vendetta (which is almost always worth using, even if there is no one to reduce DODGE in the enemy team), secondly, Grim Bandana will give universal bonuses to damage, and thirdly, Pitfighter's Helm, although it does not directly raise damage , but reduces damage taken from direct damage, so it is unlikely that HWM with an active riposte will get focused. Plus more stress. However, it’s better to spam with Grapeshot, leaving Duelist only to return Abomination to a more convenient position (if he wants to Slam, it’s better to get him to the third slot, from where he can Slam without going to the first slot where he can't Bile if it comes to it) and for protection against enemy AoE.


While the transformation stress is still extremely important, Clasp of the Beast will allow Rake to inflict some stress, and it provides synergy with Bulwark, giving Abom a decent level of PROT. Basically, Abomination does not Slam here, except perhaps to return HWM to the third slot or to push very low move res enemy (Jester), but simply spam with Rake. You don’t need to leave beast form right away, unless there is a strong focus on Abomination it’s better to spam Rake so you can get back into form after affliction inevitably comes in.


The main strength of the crusader, of course, is in Accusation – the strongest skill for stress and direct damage at the same time. But don’t forget about Bulwark either, this team almost always wants it, except that it will be useless against pure stress. Everyone has 30%+ PROT with minimal losses in aggression, quite effective, in my opinion. Lance is rather weak within our team, but better than nothing if Crusader is kicked out. Heal is quite low, but it will restore from Death's Door, and remove harsh debuffs. FYI: the guard broken debuff can also be removed in this way, if it is strongly necessary.
Queen's Guard, and variations of The Wall (can have different win conditions)
The main idea of ​​The Wall is to use three heroes-"defenders": Crusader, Leper and MAA. The idea is taken from a named team from the base game with that name: in this team, the fourth slot is occupied by Vestal. The fourth slot, however, varies, in particular, within the Queen's Guard team, this slot is occupied by Plague Doctor.

First, let's look at The Wall as a base:


This is not a very efficient team. The main problem within the circus is the conflict of victory conditions. Leper is still more about direct damage, his stress is weak, and MAA can hardly do direct damage, but excellent stress. Crusader, however, can do both. Against just direct damage, the team will do well, but it will be very difficult to deal with dots, there are not enough tools against stress, and the character in the fourth slot can be focused quite easily. However, if you want to play through defensive mechanics, this is a good option. You can also replace Leper with Flaggelant, but the team loses its Wall (as well as King-Queen) theme sadly. He's way stronger though, that's for sure.

Within The Wall there are no specific sets of skills and trinkets, so I will not advise. The main tools of both stress and direct damage are clear to any experienced player. As part of direct damage, I just want to add that MAA, as a finisher with the help of Retribution activation, is not the worst option, if he doesn’t kill then at least he will activate his riposte. Shield Spike with a second trinket will allow you to counter AoE, which such teams will not refuse, because it is hard for them to fight stress and dots. However, you can try and work around defense. One has only to keep in mind a clearly chosen victory condition.

In the conditions of The Wall, I see three heroes from behind: the already mentioned Vestal and Plague Doctor, as well as Antiquarian (Arbalest might also work well, but let's not speak about her okay). In any case, it will be hard to protect against pulls, but at least Holy Lance will save from one, and then the guards will definitely come in. Let's look at each option separately.


Vestal works as a great source of direct healing and as an additional stun along with Crusader. Stuns allow you to stall while Leper sets up, and after his crits, which for sure will get any unPROTected enemy to Death's Door, they allow you to immediately do Deathcheck, which, if it fails, it's okay, the enemy is stunned. Her trinkets thus should focus on her roles:


Doctor works better in a stress wall and allows you to spread very strong dots and/or debuffs along with stress. As part of direct damage, two of her vapours right under the mask of Leper significantly raise accuracy and damage stats he needs so much so that the enemy will surely fall from one swing. It helps to remove dots, if suddenly the enemy decided to break through our defense with them. But such a setup requires a lot of time, during which someone from the team will definitely suffer, and who will finish the work? In general, in direct damage, there are certain problems. However, if Doctor is allowed to scatter her blights, then there will definitely not be any dissatisfied clients. You can't be dissatisfied if you're dead! Wears trinkets for aggression, anything else is useless to improve:
or for stress


Antiquarian is the most versatile solution, she can work both as a finisher through guards with the help of Festering Vapours, and as a strong healer with the help of Rejuvenating Vapours. Able to independently escape from pulls. The relevant two trinkets are, I think, quite obvious:
Bleed & Blight Torture (DoT)
A team invented by me. Emphasizes that absolutely all members of the team are extremely aggressive and important for a quick kill by the opponent. Even if we lose one, or even two, the opponent is so heavily overwhelmed with dots that they, with the whole team, especially the back rows, simply dissolves in them. No heal, other than which removes dots, or too strong (crit heal), will be enough to stop the damage. The team has problems with finishing moves, obviously there is little defense, in addition, certain troubles vs ripostes and kinda low ACC. But the team will break through all other means of protection quite decently.

Looks like that:


The Queen within this team is about 95% bait. Dot damage numbers are on the level, and she certainly loses part of this in the second slot. But the rest of the heroes will give out no less, or even more. And while the enemy is busy with the Queen, we are already distributing damage left and right. And it’s not for her to finish off ... However, if the enemy decides to ignore the Queen, they will receive simply dead back rows in response, and Ddisorienting Blast can control the enemy in order to weaken him and stall time for dots ticks.


And this is our real source of harm. Because of her stealth, she is difficult to pull and control. But in return, she gives out a bunch of blight – 2 blight for 4 turns on each enemy, 32 damage. ACC is definetly a problem, but when finishing it is quite enough. If strong ripostes are encountered, or the enemy has dodge buffs (first round), regen is a perfectly normal response to play for a little time. Nervous Stab is left for finishing through high PROT and / or damage debuffs (when Festering Vapours will deal zero damage).


HM is our second bait. He is generally considered more dangerous than Antiquarian due to his greater stress dealt and lack of stealth. But our team is about dots, and at distributing them Antiquarian is stronger. It is not necessary to spam Harry. We heal as needed, we protect whom they focus (50 dodge while guarding, decent number), the stun is also a well-spent move, especially against heroes with no stun resistance and high impact. Stall until the enemy dissolves.


two of:

Considering more dangerous other heroes, Flagellant is more likely to be left for last. And it's a mistake for sure. Rain of Sorrows, if it can break through resistances, will deal some very serious damage numbers. You can also replace Crimson Hook with Crushed Hemlock, but Hook is more reliable, and crit chance is very pleasant. When using them together, be sure to use Emboldening once or twice on Flag once in order to raise his accuracy from the floor. When focused, he will be pushed back so that he has to spend a move to get back. And such an action is a blessing in disguise. Flaggelant wants to take damage on this team in order to be able to pick someone up from the floor, because the rest of the team members are quite important themselves, just like Flaggelant. We do not focus on raid bossing part of him though, but on dot damage. Without Hemlock, by the way, you can replace Rain of Sorrows with Reclaim. Allows you to both stall and raise an ally without much loss in efficiency. Even though, without Gauntlet of Absolution, his Redeem will not be as powerful.
Can't touch this (stress-DoT)
The direct opposite of The Wall. Instead of defending, we try to dodge. This is what our team is focused on.
Looks like that:


In general, the team is not exactly very strong, and is incredibly dependent on randomness. Unlucky to dodge several times, and you're in trouble. However, it is relatively stable to dodge even against Battle Ballad if the enemy has low base accuracy. But Command spam will be hard to dodge. Well, there is no perfect team.


You could ask, where are Eboldening Vapours? But I will say this, this is too little return in one move, even as part of the dodge team. At the beginning, the enemy will focus MAA, most likely, and dodges are unlikely to help him. But the main problem is that there is nothing to replace. Every skill I listed Antiquarian still really wants. Regen, and powder, and stealth, and of course Festering. In general, this Antiquarian works as usual, only she's a little dodgy and not very powerful.


GR's base dodge within this team is the smallest, after MAA. Accordingly, drink her 15 dodges as soon as somebody as much as looks at her. And even earlier. The rest of the time, everything is clear, we just spam with Panic Darts, the other two skills are out of desperation.


The main task of MAA in this team is to give birth to a buff for 10 dodges for the entire battle. But what about his setup? Quite a strange set, I understand. Its essence is to be both a desirable and an undesirable target. Undesirable because of riposte, desirable because of The Finisher, and because the rest of the crew is quite dodgy. In order not to be completely undesirable, we do not use Shield Spike. Kinda unique case when we have MAA without Command, it is not really needed, MAA is likely to die first anway, and the team does have decent accuracy excluding Antiquarian. Especially it's fine if he manages to crit. And at the same time, if the enemy still decides to ignore MAA, he may well finish somebody, or at least threaten to. By the way, you don’t need to Bolster right away, sometimes riposte is more necessary. But it should be pressed ASAP anyway. Take this into account.


Everything is clear with SB. She gives our team a pull, gives focus damage in the form of Adders, can support stress (Expose into crit Panic Darts is a very, very unpleasant experience for the enemy). Well, and crazy dodges, of course, where would we be without them, our dearest. By the way, she finishes well, since there is no way to hide from Puncture behind any guards or places.
Final Raid Boss (stress-DoT)
The last team that I would like to talk about, and again I came up with it myself. It takes advantage of the fact that Flaggelant is incredibly strong and tries to max him out for the entire fight and keep him from dying while he supports allies, removes faces with Punish, and remains unkillable at the end of the match.

Looks like that:


Even though the team needs a whole round for setup, the consequences of that single round will be very severe if the enemy fails to focus and/or counter Flag. Carefully monitor our raid boss until the enemy is too weakened, so he will destroy everyone on his own. Guard, remove debuffs, heal, all the good stuff. The main thing is that if it ends, then the last one shall be Flag.


The main (and only) task of the Queen in this team is to give two Eboldenings to Flag so that his attacks are very painful and at the same time accurate. Otherwise, she is more of a bait, as they say, "2 ebold, dies". However, it’s not worth giving her away just like that, don’t forget, we have guard, and Holy Lance, and heals; in general, we have tools. If the Queen, with her last gasp, sends her opponent's back ranks straight into a blights embrace, this will be very, very effective.
There is an argument, and a very worthy one, for replacing her with Jester. I chose Her Majesty mainly because I follow my own rule of having at least some sort of movement skills. Plus more heal is never bad. But Jester is also very good, here you get +20 accuracy in one move (and for everybody at that), and removal of some enemy with Finale, and possible finishing moves, and dots on more convenient slots. Try them both if you want to do this team. Jester's setup is standard in this team. Starts from the third slot, switching places with MAA.


Pretty standard MAA. The main reason for taking him is to reduce incoming stress with Bolster – with it, Flag does not care about stress so much that, in theory, purely stress teams can immediately surrender. It is expected that he will have to protect someone, because we do not want death of Jester / the Queen, and it is not permissible to focus too much on Flag as well. We leave Command to begin the battle with, so that PD might blight a little before giving out Embolds. Yes, and Crusader will not refuse, Accusation is inaccurate. If the team has Jester, the choice is still not bad, there is still nothing to take for 4th slot MAA. In theory, riposte is possible, because Battle Ballad is for the whole battle, but without Shield Spike his riposte is too weak.


Pretty standard stress Crusader. Start with Bulwark in most cases, accuse the enemy front for watching tiktok. Heals as needed, Lance if pushed. Everything is simple.


In general, standard Flaggelant raid boss with some support, but with our buffs for the whole battle, he becomes noticeably more durable and dangerous. With Ebolds, even just the basic damage of his Punish becomes quite high, and his crit chance is very high already, ready to spread blood and pain. Reclaim, even if used, not that much, watch out for our dear little raid boss, he must definitely put a raid party down, and not go first himself. Using Redeem or Exag (it’s usually better to spend Redeems first, because if there are no allies, there is no one to use it on) before Death's Door may turn out to be a completely reasonable decision, according to the situation.
Instead of a conclusion
Well, everything I knew about the circus, I described. You should not exactly cling to teams mentioned, or to any specific ratings of trinkets / skills / heroes. Everything is relative, and in the Circus, a variety of situations can occur. Learn, apply, watch! I hope I helped you to find your bearings, pointing out who is strong where and who in what teams you can use to a better extend. Many more different teams could be described, but I don’t see the point in that. I think I gave enough meta and relatively meta options, around a variety of ideas and mechanics. Try to implement a team for your favorite hero yourself. Or favorite mechanic. Or some named team from the base game. Who knows, they might just work. As they say in my country, "even a stick will shoot once a year".
But not Helion. She will not shoot.

Such is the way of the Butcher's Circus.

With you was PRO100_Sasha, also known as SashaX.

I wish you successful performances!

P.S. This guide was translated using Google Translate as base. The original guide was made by me. I worked with the text, of course, but it's not perfect by any means. Should still be pretty understandable though.
2 Comments
Airvanz 7 Dec, 2022 @ 2:38am 
If you have Problem with Stun Use The Trinket Like Numbing essence and Exotic Snuff you can Punish Stunner By Counter pick it Some Hero can almost Immune to Stun, you can have team that Counter Stun Entirely,

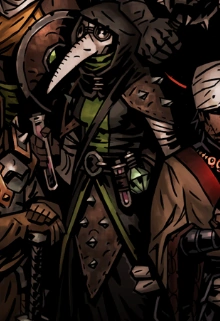
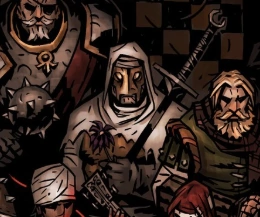
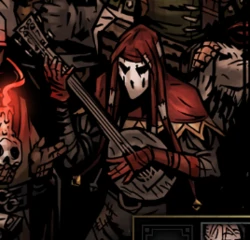
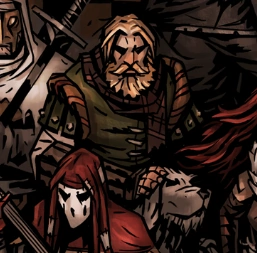
Then Flagellant People Forgot that Rancid Cure all and Treated Bandage Exist and Call Plague Doctor Toxic Waste, Flagellant rises above mostly to counter MaA bellow with his powerfull Bleed Only if he have Chance people dont know that Beside Occultist Flagellant can have Guarantee 0 Heal

and this Guide mosty Meta only work at Random Match team not Really goes to Obscure one like Virtue team,Anti Stress Team, DoT Less team, No Dodge Allowed Team, -100% DMG Debuff team ETC because its Situational not Really work at Random Match but if you know your Opponent you can just "Counter Pick" it, and this is a reason PVP its just OK ish for me its just Rock,Paper, Scissor at Streoid
U.N OWEN 1 Dec, 2022 @ 6:39am 
I quit months ago. I feel like I rather not coming back queuing a match in this game.
randomly stumbled your guide. It is useful, truly. But still, stun in this game is still quite unbalanced, it too rewards for player who constantly plays stun lock and at the same time, bellow may need changes.
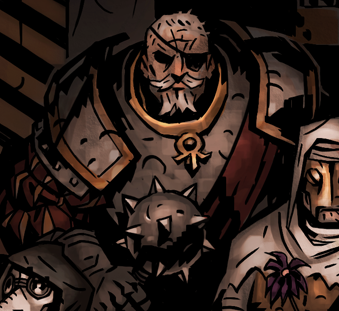
Also flag has a broken trinket, I do agree that should be changed too.
these are major reasons why I rather play with friends or someone invited.