Wildermyth

Wildermyth

68 ratings
High Calamity Walking Lunch Builds
By psionusoid
This guide is intended to provide a list and explanations of builds that perform well in high starting calamity games on Walking Lunch difficulty.
3
2
4
2
   
Award
Favorite
Favorited
Unfavorite
Introduction
The builds in this guide work as of 1.16 Omenroad; however, please note that with the release of Omenroad, nearly any theme combination is now possible. There are far too many combinations to discuss the merits of each one, but I'll try to add some of the ones I find the most interesting and/or more discussion of theme pieces individually. This may take a while for me to update. Additionally, if you are attempting high peril Omenroad challenge runs without using any odes, the relative power of builds may be different as compared to regular campaigns. In my experience, the ability to deal very high damage to one or a few targets becomes relatively more important than being able to deal moderate damage to many targets as it often is in regular campaigns. Since it is more difficult to kill all threatening enemies before they can attack you, it also seems more important to have very high armor and warding on at least one hero. Similarly, control effects such as pin and hobble are also more valuable. With the addition of Ability shrines, builds that require more than five (or even more than seven) specific abilities are now more likely/now possible to obtain.

If you are trying to get specific themes, I believe it's still usually faster to use regular campaigns, but if you don't want to deal with setting up everyone's personalities or plan on taking several pieces of the same theme at once, it may be easier to get them in an Omenroad challenge run. If you want a normally-restricted theme combination, you can only get them with Omenroad shrines.

Please let me know if you have any comments, suggestions, or criticism about content or formatting, or if you find any information that is out of date and/or wrong.

Spoilers: This guide includes many spoilers about Themes, Aspects, Abilities, and of course build strategy in general. It also has some mild spoilers about campaign strategy.

This guide includes builds that I believe perform well when playing on Walking Lunch with a higher number of calamities than the game recommends by default based on the legacy tiers of your heroes. Typically, I am assuming 100 starting calamity Walking Lunch as long as you have, say, at least two (maybe three?) Mythwalkers in your party. All discussion of stat breakpoints also assumes playing on Walking Lunch difficulty, and the build guide assumes heroes will be recruited as Mythwalkers.

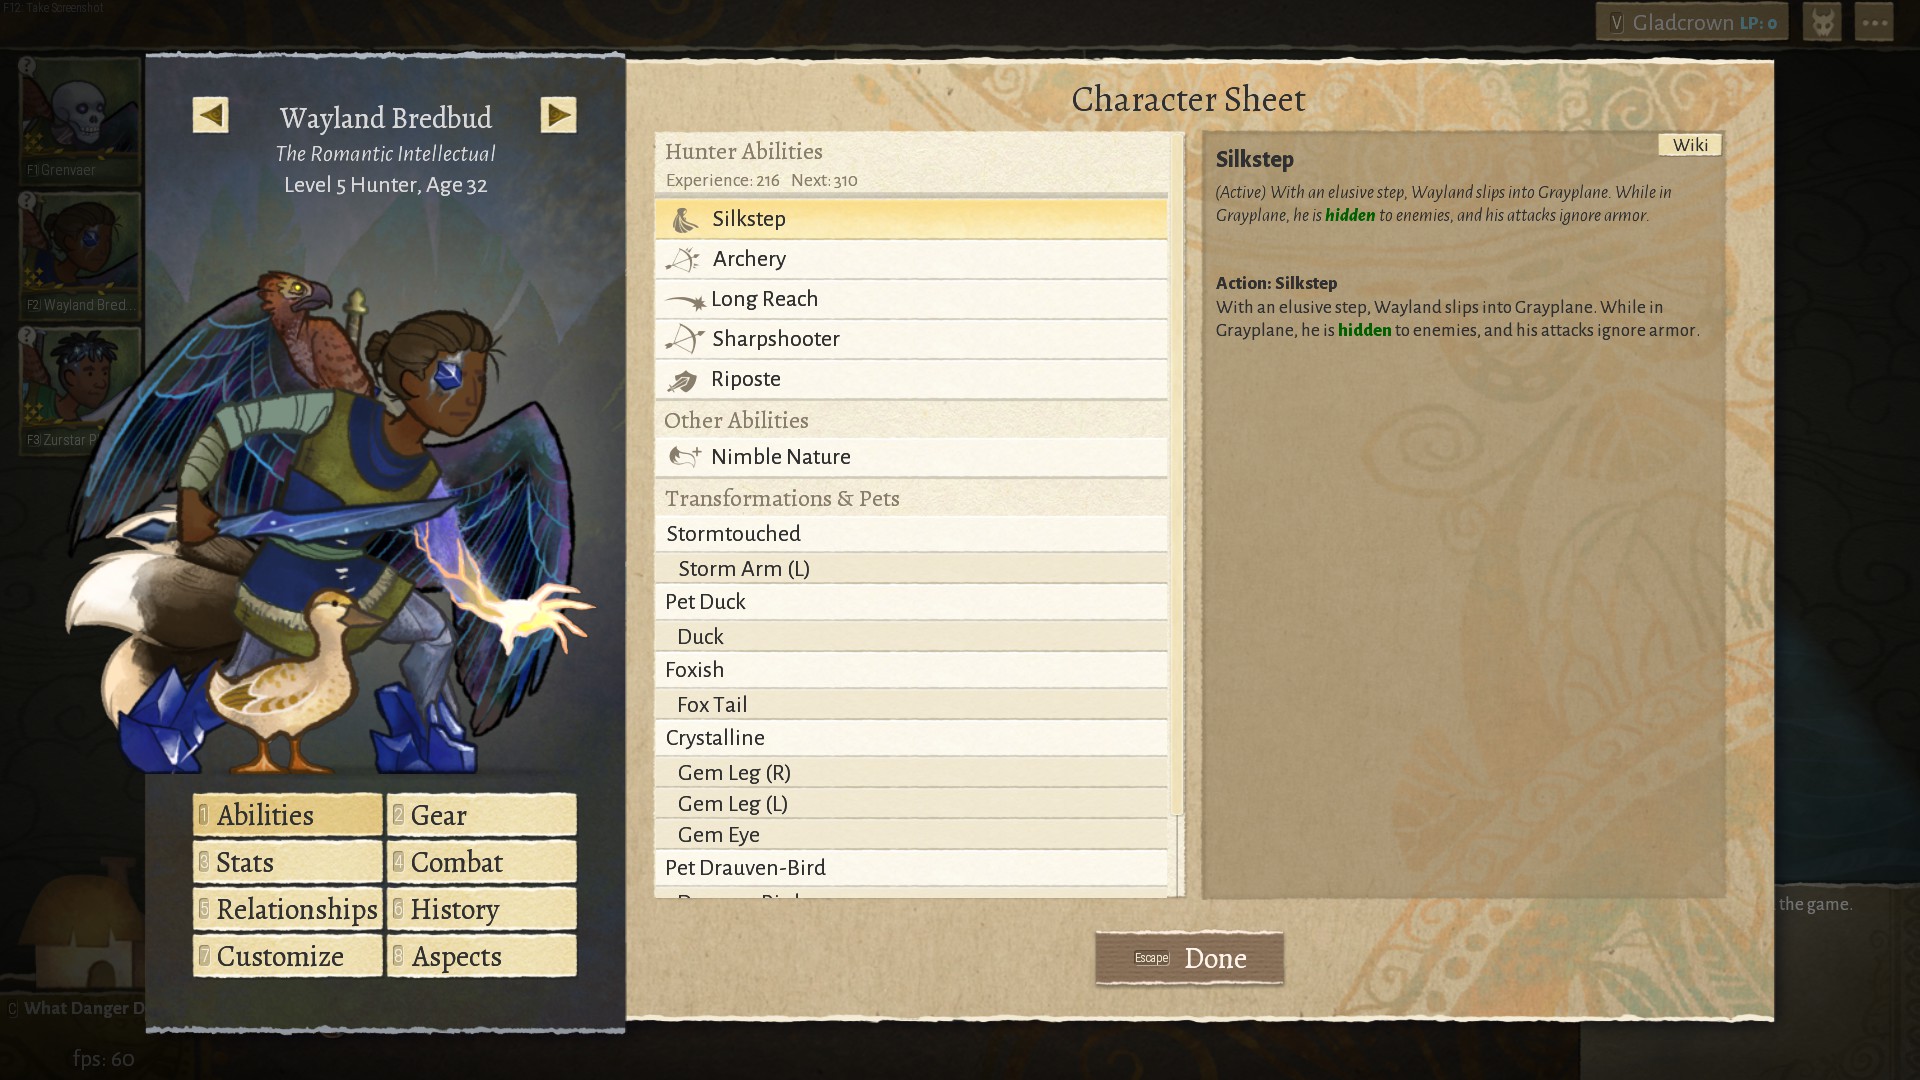
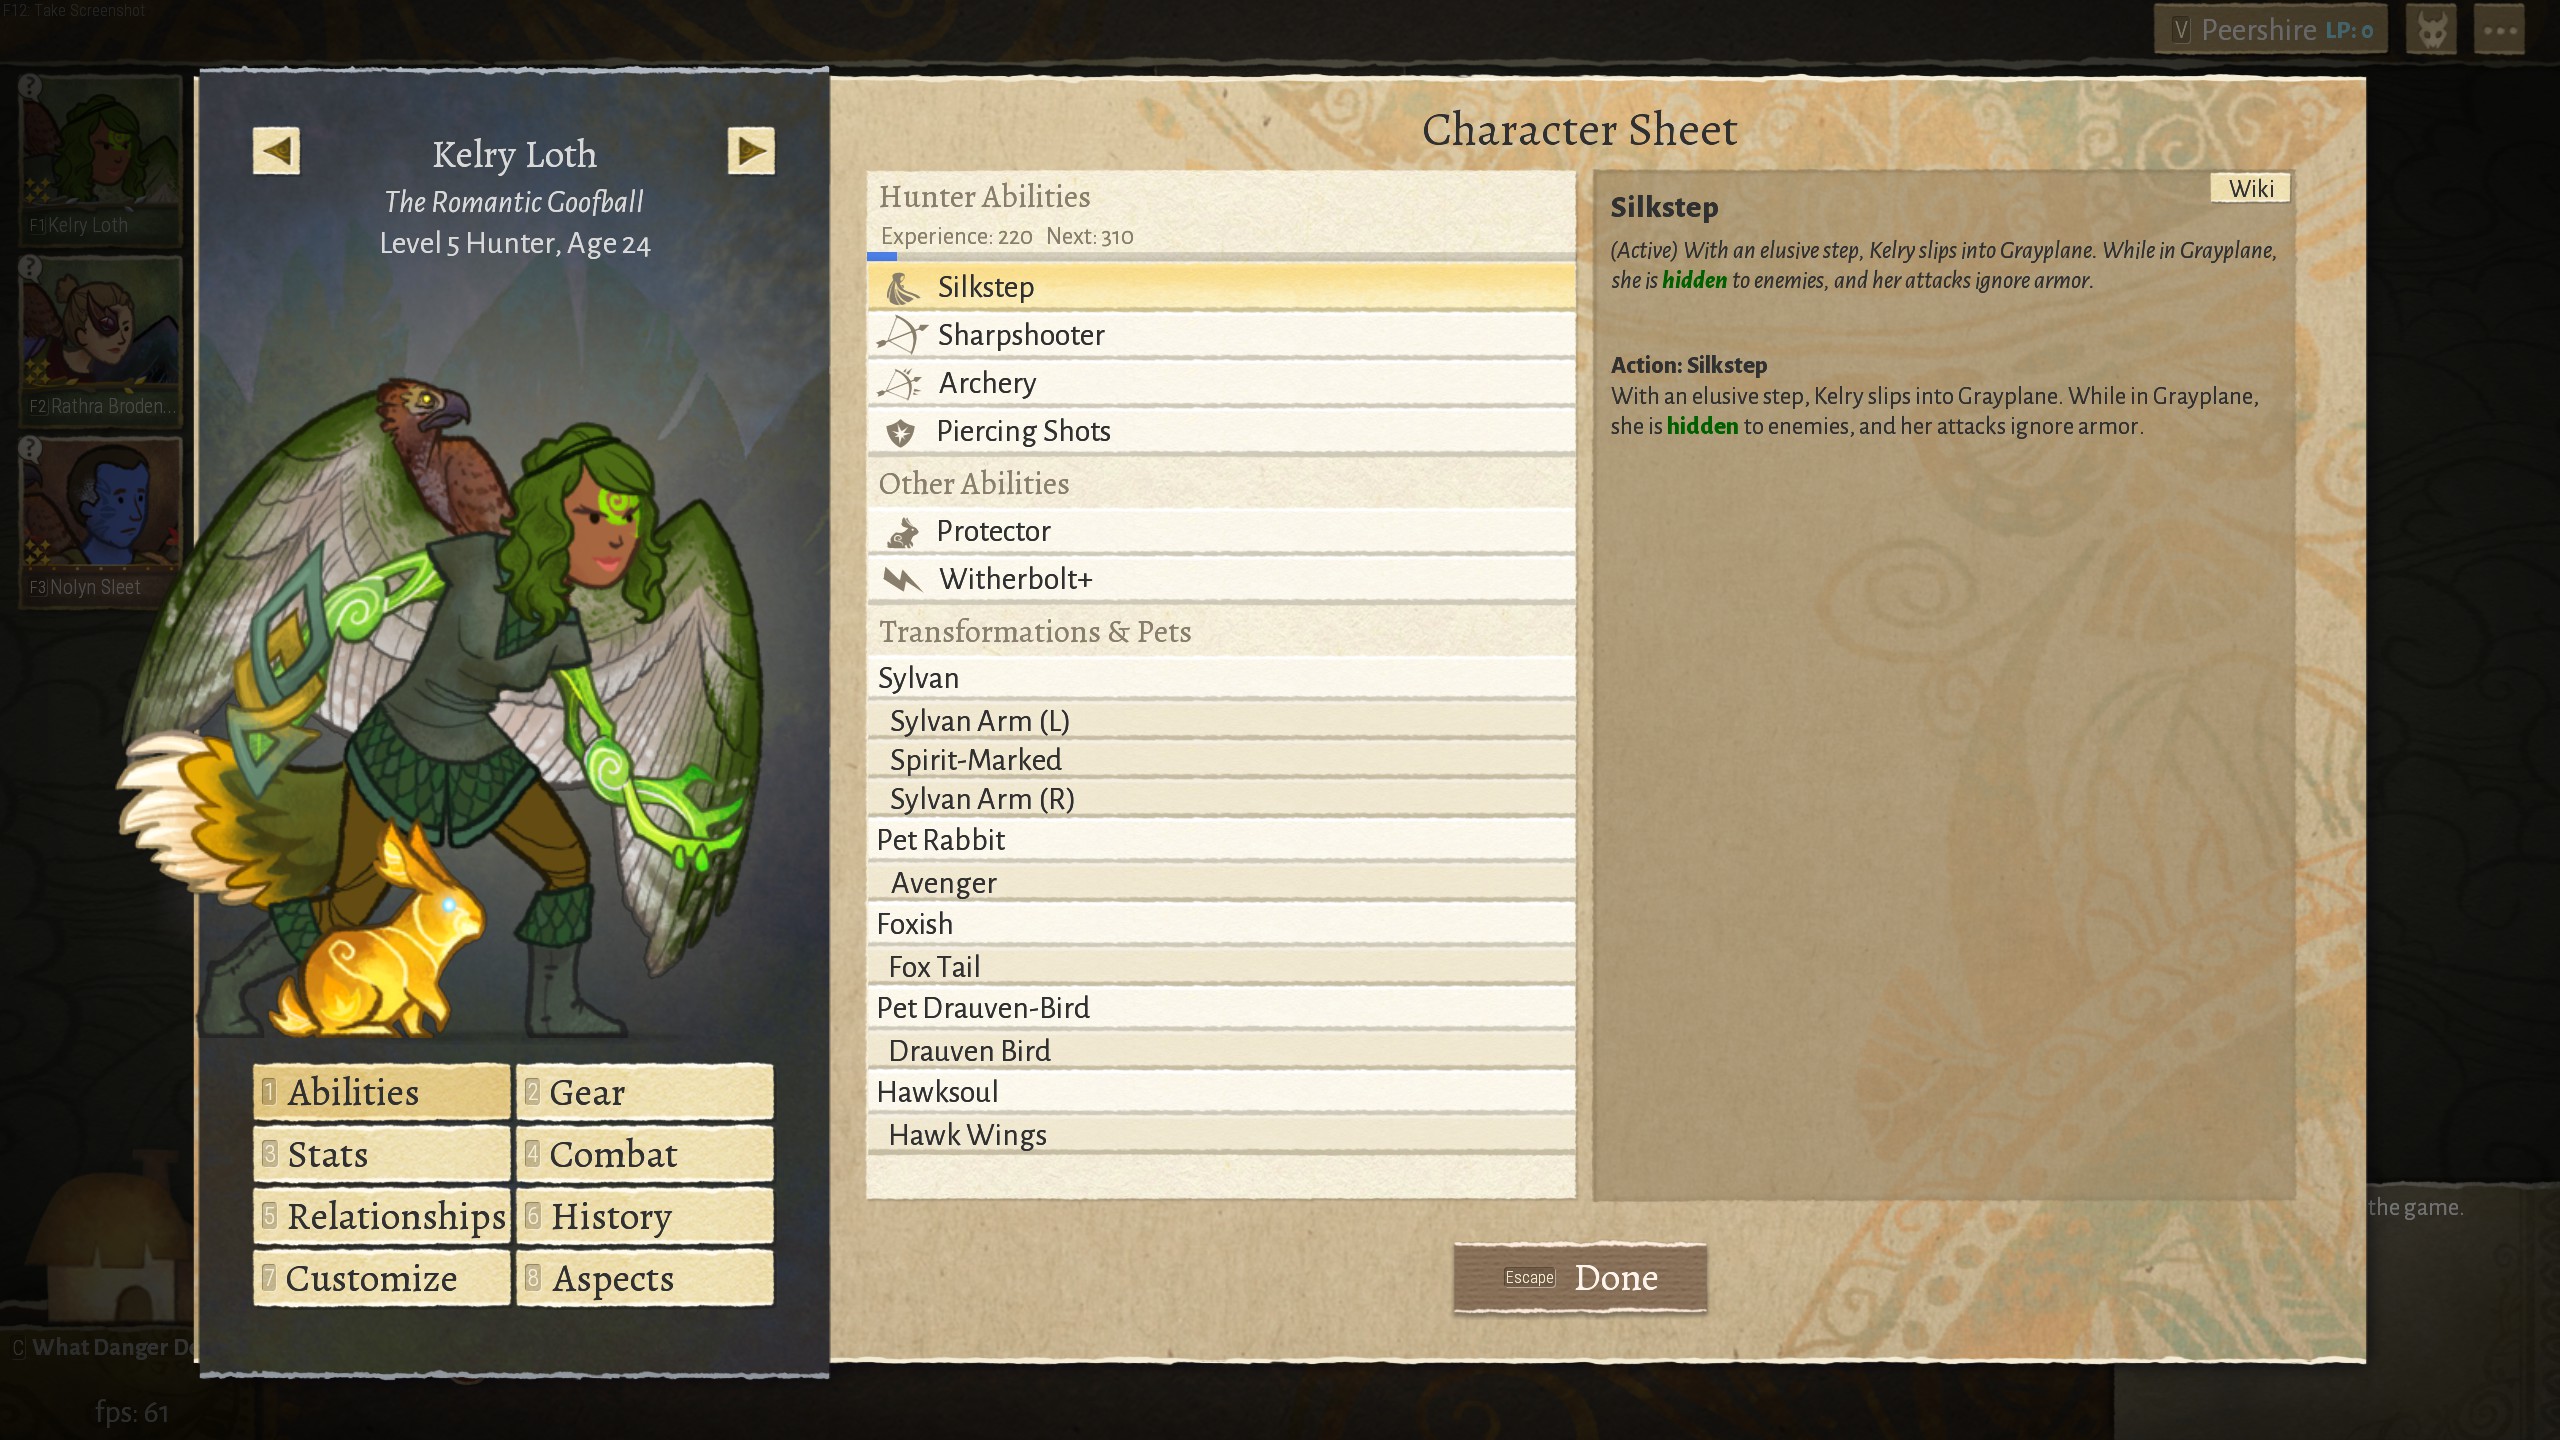
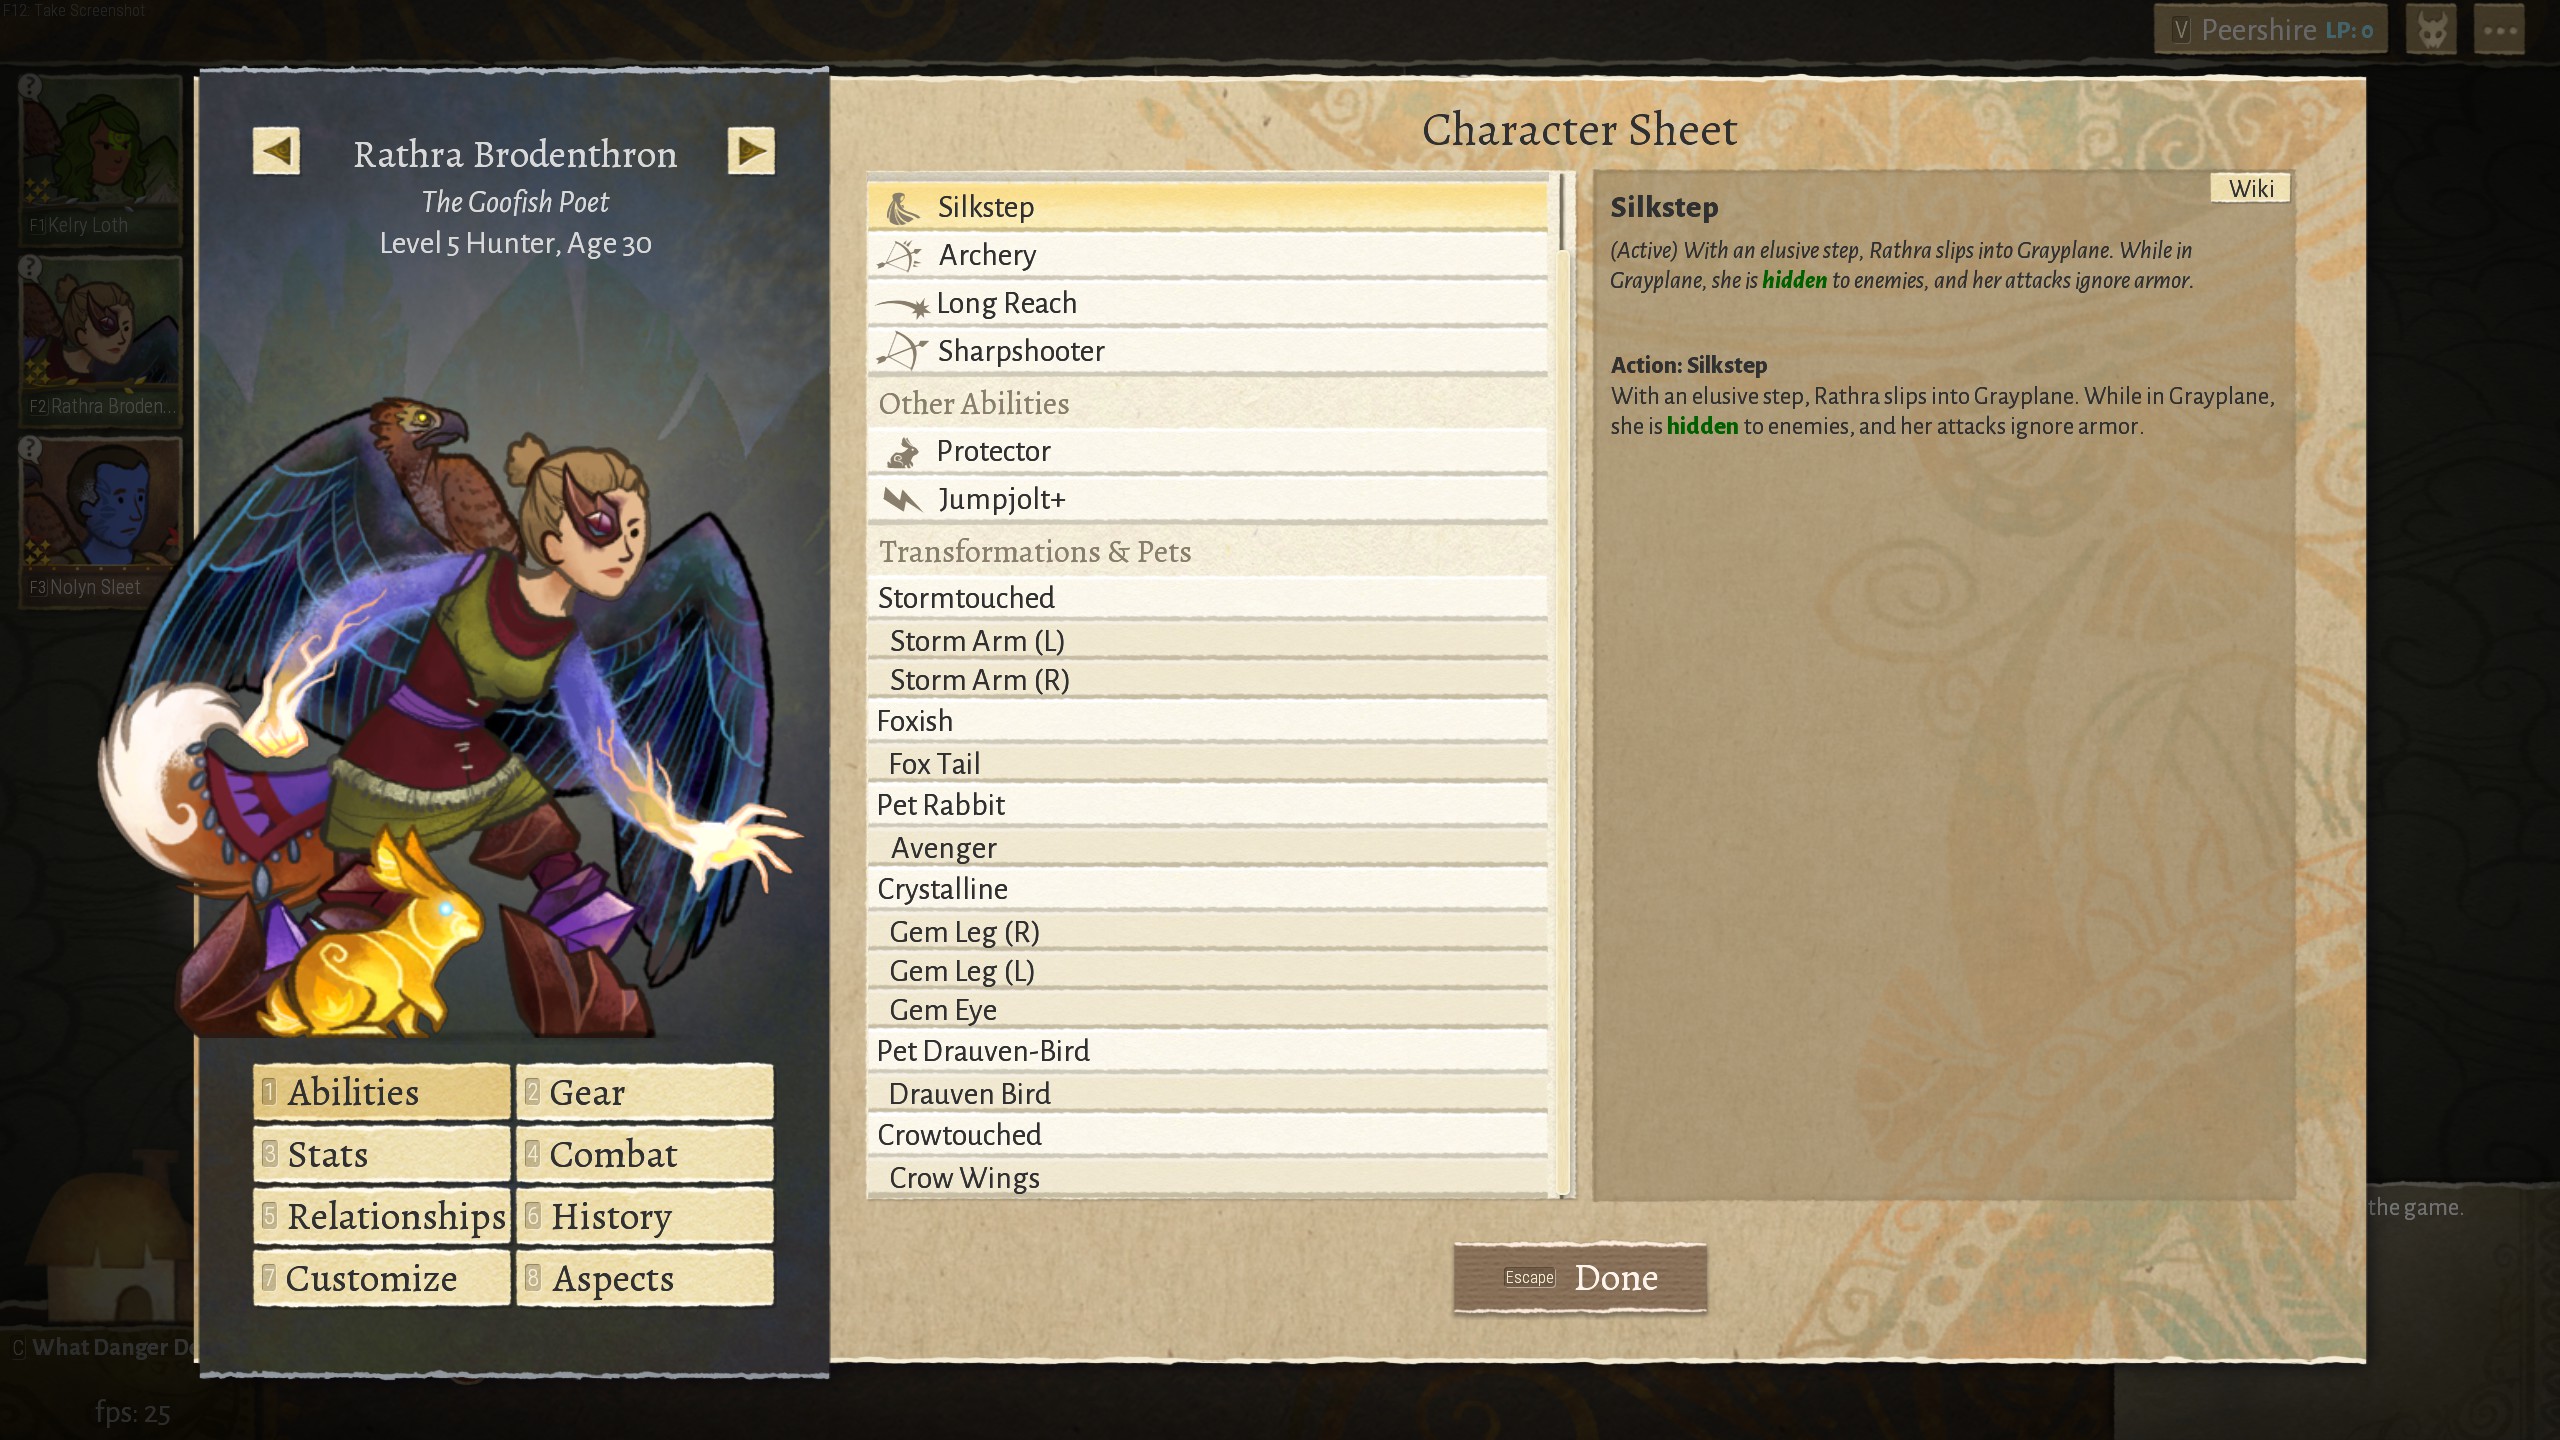
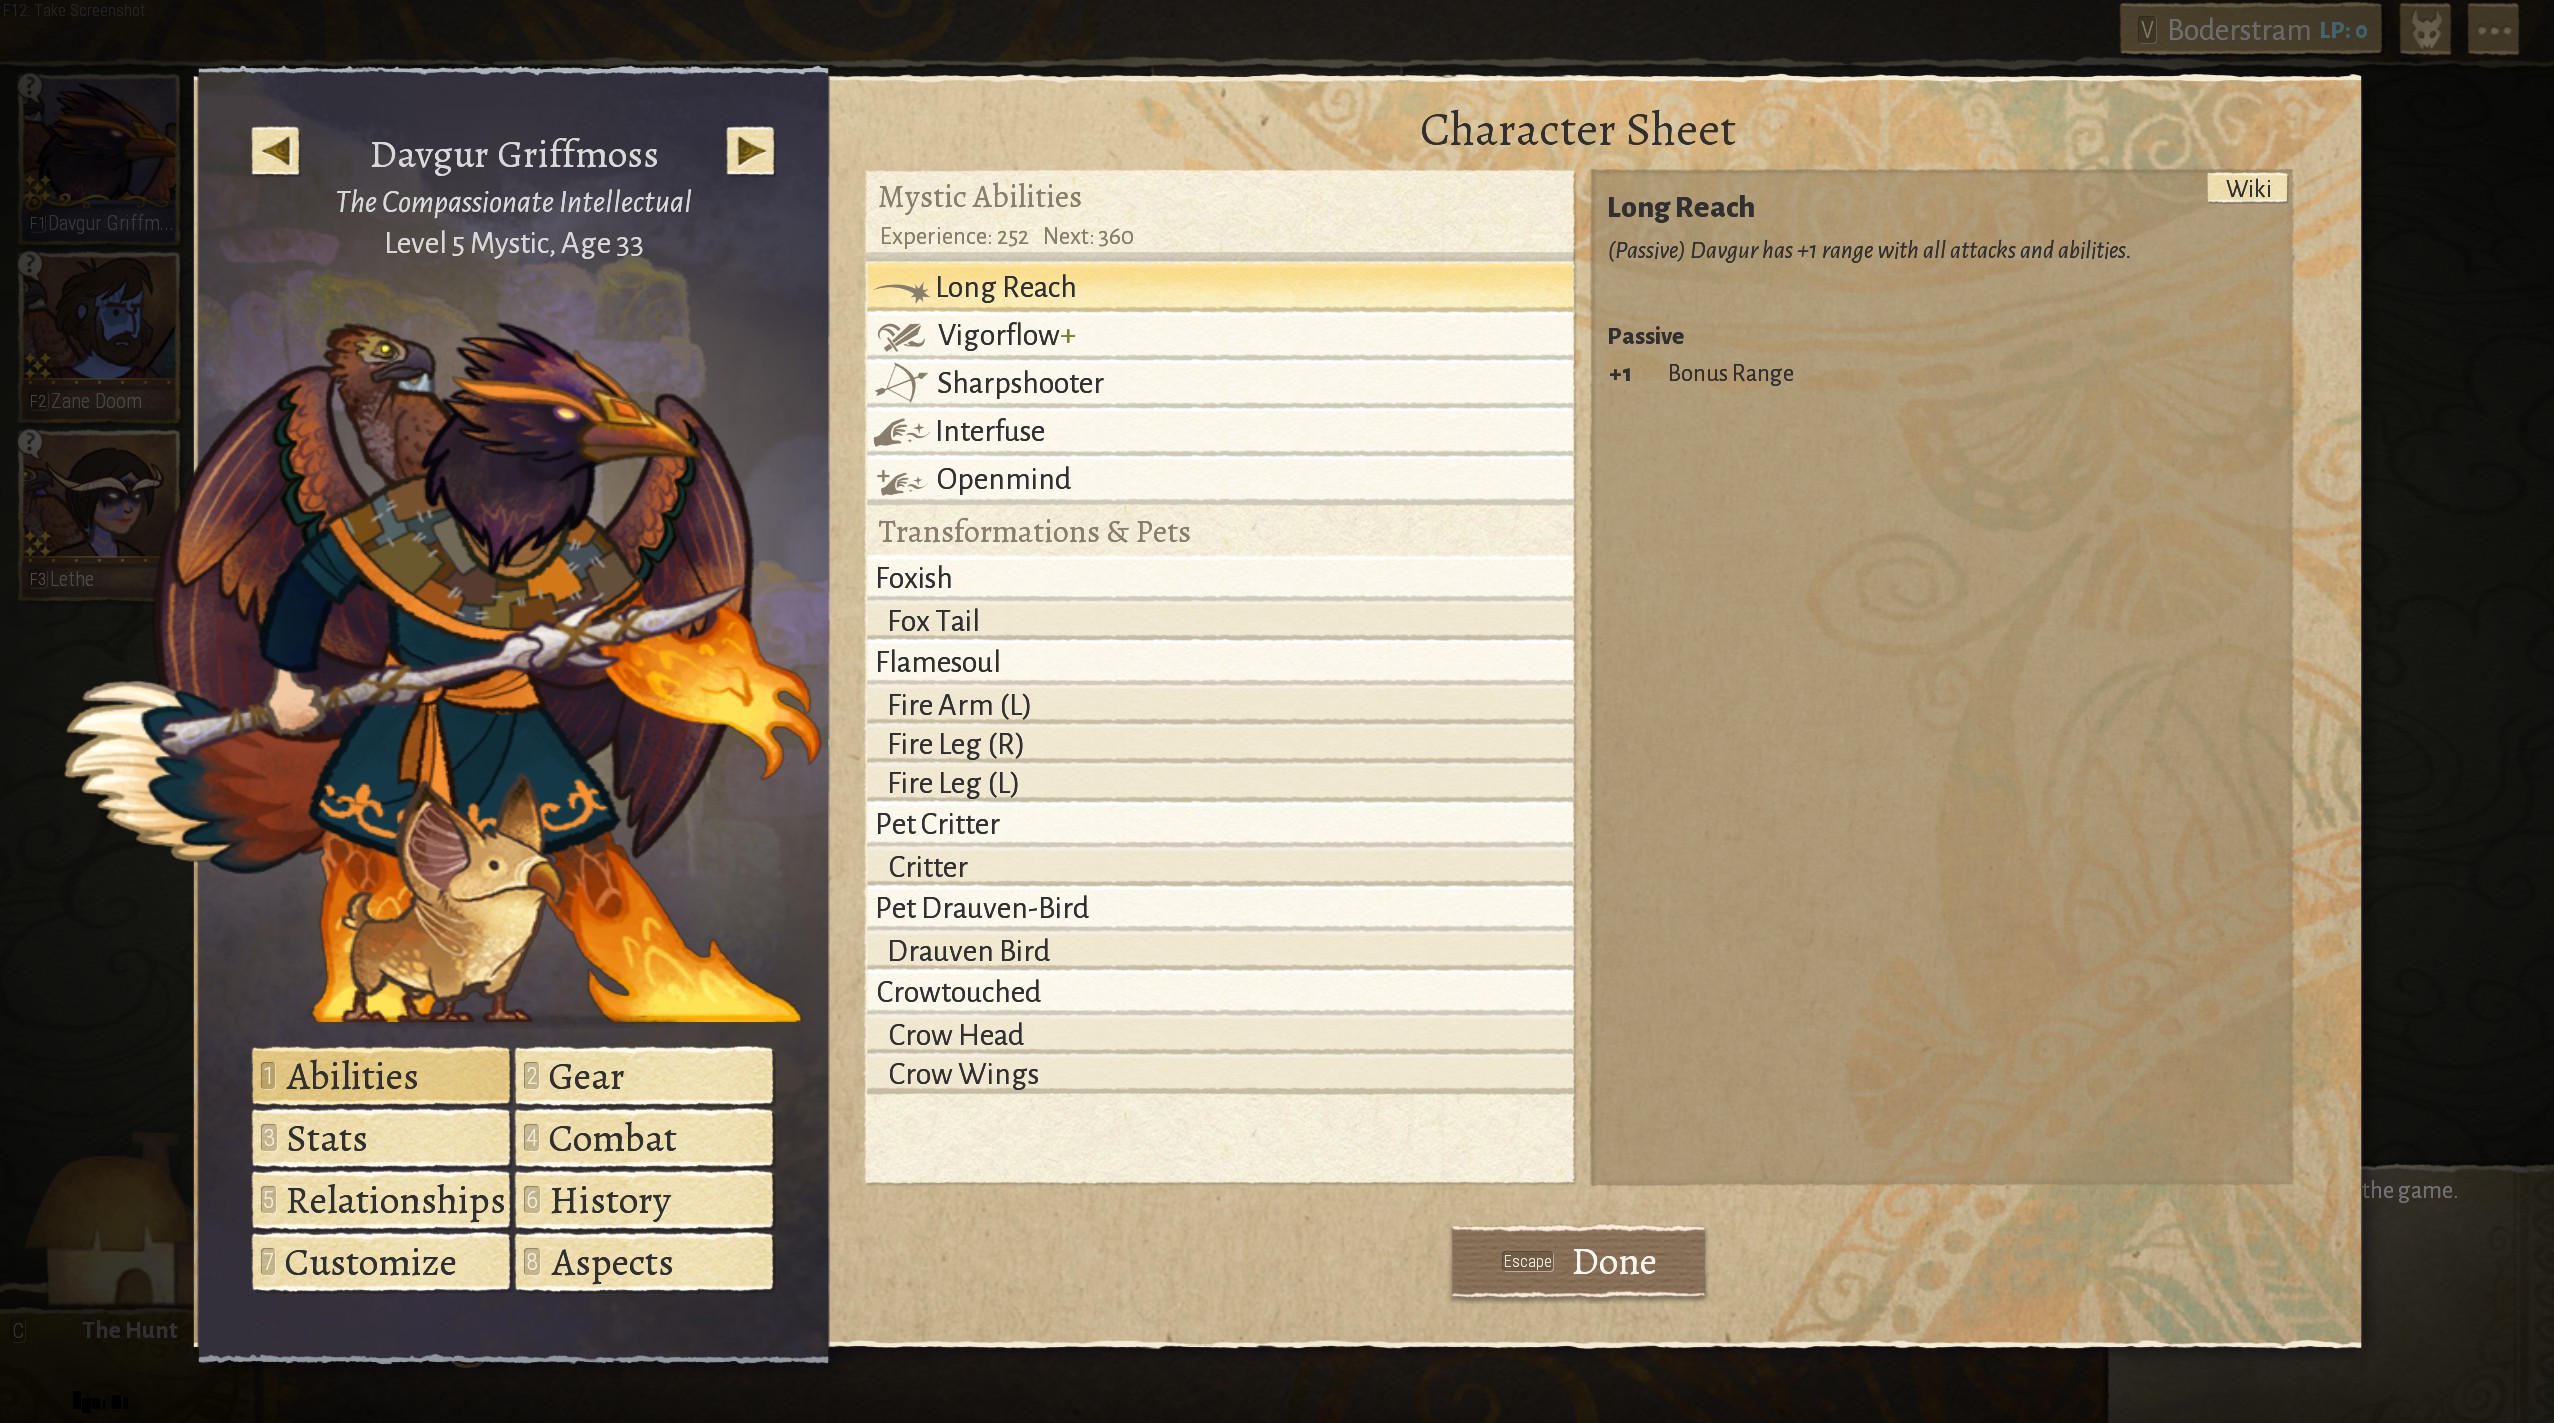
There are twelve major categories of builds described: the Swift Attack Broadswipes Warrior, the Zealous Leap Broadswipes Warrior, the Engage Shard Skin Warrior, the Vigilance Warrior, the Ember Arrows Through Shot Hunter, the Thornfang Rogue Hunter, the AvoiDance Hunter, the Archery Protector (Avenging) Hunter, the Vigorflow Mystic, the Arches Mystic, the Ignite Mystic, and the Spiritblade Mystic. These builds work as of 1.16 Omenroad. If the current version of the game is later, there may be some issues with some builds.

Instead of fully specified builds, I will usually focus on categories of builds and discuss pros and cons of different variations. Because some builds have a large number of options available in terms of Abilities, Themes, and gear, I will typically try to list things at the highest applicable level in order to avoid saying things multiple times, although there is still a lot of repeated advice between the theme variation sections of different builds and themes in general. Bulleted lists of choices should be assumed to be in order of recommendation unless otherwise noted, although the ordering is often not particularly strict. The omission of an option from a list does not necessarily mean that I think it is a bad choice; I may have just not considered it deeply. Armors from the Armors and Skins DLC will be identified by "DLC: AaS".

Most of these builds have been discussed on the official discord, so I am not trying to take credit for creating them, but rather to describe them in a way that is more convenient and complete than you could find elsewhere. I typically name the builds just using the key abilities unless it is already commonly referred to as something else in the community. Most builds had to be split into multiple sections due to the per-section character limit.

While I have used at least one build (and typically multiple) from the major categories (usually in a party of 3 on 100 starting calamity Walking Lunch), I have not used all the variations that I will mention, so there is some amount of speculation.

As all builds are compatible with and benefit from Evergreen Strength, Evergreen Voice, and Starheart, they are not mentioned under any build categories, but they are explored in the general optimization sections.

The general optimization sections are intended to provide advice on advanced optimization techniques that are relevant to all (or at least nearly all builds). Those sections contains lots of spoilers. Also, please ignore any suggestions that you feel are "optimizing the fun out of the game". This level of optimization is definitely not required to play Wildermyth on 100 starting calamity Walking Lunch (even on Carved in Stone), and is presented for those who simply enjoy creating optimized heroes. This advice goes for everything in this guide, but it is especially relevant for the general optimization sections.
General Optimization: Upbringing
The stats shown on the right of the history page are referred to as “Upbringing”. You can read more about how it is generated on the wiki[wildermyth.com], but I will cover some of the major points and additional recommendations here. Note that since 1.10, melee and ranged accuracy have been merged, but some of the charts have not yet been updated to reflect that at the time of this writing.

Potency
Since potency is a relatively expensive stat in terms of how much of the total value of the upbringing stats it is worth, but it can have substantial impact on how a build performs, it is often a good idea to aim to get only exactly as much potency as you need. This means trying to hit certain breakpoints (whole number amounts of potency) at levels 5, 6, or 7. Since if is difficult to guarantee any specific augment, I also typically assume no augments. Most of this will be repeated in the individual build guides, but I will also put it here for convenience.
  • Warriors: 0, 0.4, or 0.6 potency. Assuming you are using a build with Spell Touched, but not counting other sources of potency from gear, warriors with 0 potency from Upbringing will reach 4.0 potency at level 6, warriors with 0.4 potency from Upbringing will reach 4.0 potency at level 5, and warriors with 0.6 potency from Upbringing will reach 5.0 potency at level 7.
  • Hunters: 0, 0.4, or 0.6 potency. Not counting sources of potency from gear, hunters with 0 potency from Upbringing will reach 3.0 potency at level 6, hunters with 0.4 potency from Upbringing will reach 4.0 potency at level 7, and hunters with 0.6 potency from Upbringing will reach 3.0 potency at level 5.
  • Mystics: 0, 0.1, 0.4, or 0.8 potency. Not counting sources of potency from gear, mystics with 0.1 potency from Upbringing will reach 5.0 potency at level 6, mystics with 0.4 potency from Upbringing will reach 6.0 potency at level 7, and mystics with 0.8 potency from Upbringing will reach 5.0 potency at level 5. In practice, it may be difficult to get a stat block with exactly 0.1 potency, so settling for 0.2 is fine. Also, some build don't benefit much from potency, so if you get a stat block with 0 potency but other things that are good for the build you have in mind, that will also work.

Retirement Age
In order for a Mythwalker warrior to make it through a 5 chapter campaign without retiring after starting in chapter 1 at age 30 (the lowest possible age at which to recruit a Mythwalker), they will need some bonus to retirement age other than resolving hooks. I usually recommend +3 to +6 retirement age from Upbringing for warriors, but you may want more if you like to take your time each chapter in case you get a map that requires a lot of travel and pass/bridge building. It's also possible to make it through a 5 chapter campaign without retiring without Upbringing bonuses if you get a map with an easy layout and are exceptionally efficient. Note that the Sylvan theme includes +5 retirement age, so if you are planning on using it, you most likely do not need bonuses from Upbringing.

Mystics do not need retirement age bonuses (assuming at least one hook is resolved) unless you want to use them are the starting parent mystic in All the Bones of Summer (AtBoS). In that case, you may again want around +3 to +6, either from Upbringing or Sylvan.

Hunters do not currently need any bonuses to retirement age as long as they have at least two hooks resolved.


The need for most other stats will vary greatly depending on the specific build, and are discussed in each build guide. Keep in mind that for most kinds of recruits, stats from Upbringing can be highly correlated/anticorrelated; for example; on standard recruits you cannot have both high speed and high potency.

Non-standard Recruits
There are three ways to get heroes with a different distribution of stats from Upbringing as compared to standard recruits: children of heroes, plot-relevant heroes, and events.

Children can get different stats compared to standard recruits, such as bonus damage and stunt. Keep an eye out for warrior or mystic children with 0.2 bonus damage (in addition to the amount of potency you want), as this allows warriors with Spell Touched to start with 2.0 bonus damage at level 5 or mystics to gain 2.0 bonus damage at level 7.

Most plot-relevant heroes have fixed stat blocks, but the non-legacy starting hero in Monarchs Under the Mountain (MUtM rescuee) has very flexible stats. The method of stat generation is described on the wiki, but it is notable because it allows very high values of single stats, although the total value of the stats may be lower. For example, it's possible to roll a hero with 0.8 potency and 0.2 bonus damage, one with 2.1 or more speed, one with 9 or more stunt, or one with 20 or 25 avoidance (dodge+block). Keep in mind that if you want to roll extreme distributions like that naturally, you could be rolling a very long time.

Heroes recruited from events, such as "A Mending Path[wildermyth.com]", each have their own possible Upbringings, but it is not currently well described, as far as I am aware.
General Optimization: Hooks
Aside from the +10/+7/+5 bonus to retirement age for resolving the 1st, 2nd, and 3rd hooks[wildermyth.com] respectively, hooks no longer provide any bonuses that persist through legacy. However, they can still have some mechanical impact, so there are a few things to keep in mind when selecting them. First, some hooks block some themes. The Mysterious, Destiny, Inhabited, and Dreamer hooks block Spell Touched, and Inhabited also blocks Beartouched and Elmsoul. Second, if you want the Skeleton theme, you must have the Integrity hook, and if you want the Shadow theme, you must have an unresolved Inhabited hook. Fortunately, both of these hooks are possible to add after character creation, so it is possible to make a Spell Touched Shadow warrior by adding the Inhabited hook after they have become Spell Touched. Adding one or both of these hooks is also useful if you find yourself in the situation where a character has become locked out of completing one of their existing hooks. Third, heroes can become PERMANENTLY locked out of ever completing the following hooks:
  • Creative: Flamesoul heroes cannot complete this hook
  • Flirt: Heroes who have ever had a romance with the waterling (in a campaign where they entered into legacy or were promoted) cannot complete this hook. (This appears to be the case from my testing, but I am not 100% sure about this one)
  • Loyal: Can no longer be completed if the character has ever had a child in any campaign and then entered the legacy or was promoted, even if the child is not in legacy. I recommend you turn off "Allow Random Children" on Loyal heroes until this hook has been completed.
  • Integrity: Only characters eligible for the Skeletal theme can complete this hook.
  • Thorny: Heroes without a human left arm cannot complete this hook.

Another consideration with hooks is that some hooks affect event targeting whether they are resolved or not. Here is an incomplete list of hooks with positive and/or negative mechanical effects due to targeting (there may also be other positive or negative effects for hooks even if they are mentioned):
  • Wildheart: Positive: Allows characters to still be eligible to acquire Evergreen Voice even after acquiring their final pet. However, the Wildheart opportunity is one of the most difficult opportunities to trigger, requiring at least four heroes in the company, requiring the Wildheart hero and the helper to be exactly two tiles away from from a grassland or foothill tile when the opportunity event triggers, and requiring that the Wildheart hero is not in a romance but could potentially form one with another member of the company (based on compatible "interested in []" and lack of a current romance.
  • Mysterious or Thorny: Positive: Eligible for "Former Colleagues", which provides the Night Shard (or a new recruit for 2 Legacy Points with no training time).
  • Darkheart: Positive: Eligible for "The Eater", which may provide an augment.
  • Brash: Negative: Eligible for Mind the Gap, which has no benefits, but potential downsides.

Resolving Hooks
In order to complete a hook, you must reach relationship level 3/3/4 for the 1st/2nd/3rd hooks with a non-family member as well as fulfill the other event specific requirements. Additionally, a hero may only be the focus hero in one opportunity event per campaign, regardless of whether they accept it or not. The same is true for being a helper in an opportunity event, so each hero can be the focus character once and the helper character once. If hero A is the helper in hero B's opportunity, hero B cannot be the helper for hero A in that campaign. You do not need to complete the event immediately after it if offered. It may be deferred indefinitely as long as you still fulfill the targets, but it is possible to become ineligible. Like nearly all events, you can only see opportunity events once per campaign.

If you are trying to resolve the third (or fourth) hook on hero A with hero B as the helper, hero B should also have at least two hooks resolved, otherwise hero B will be the focus hero (since the opportunity would usually trigger for hero B shortly after reaching relationship level 3).

I recommend that warriors resolve three hooks, hunters resolve two hooks, and mystics resolve one hook in order to have adequate retirement age bonuses. Mystics that you want to use in All the Bones of Summer as the parent should have three hooks resolved (and some other bonuses) in order to make it through the campaign without retiring.

Leaving Hooks Unresolved
Since all hooks provide a level-up on completion, and some provide additional benefits, a more advanced strategy with hooks is to intentionally leave some hooks unresolved so that they may be completed in future campaigns in which you are not planning on promoting the hero. The basic strategy is to resolve hooks in campaigns where you are planning on promoting a hero only if you don't mind not being able to complete it later.

This strategy is possible on warriors (while still having three completed hooks) by adding hooks through events and them resolving them. "Grimly Glowing[wildermyth.com]" can add Integrity for the rest of the campaign and "The Witchstone[wildermyth.com]" and "Whispered Secrets[wildermyth.com]" can add Inhabited permanently. Completing a fourth or fifth hook does not increase retirement age, but it still has the usual benefits.

Hooks with notable campaign benefits on completion of the opportunity event:
  • Brokenheart: +1 health. It also has the potential for increased retirement age if you pass a roll. If you fail the roll, you lose it instead, but you don't need to risk it.
  • Dreamer: This is not necessarily beneficial on Mythwalkers, but if does have an interesting effect. If the hero decides to leave the company and become the Woodland Seer, there is a 50% chance of incursions being cancelled.
  • Inhabited: Provides the Grimblade, but the helper hero needs to be able to defeat the focus hero.
  • Integrity: Provides the Atonement of Oldwane, a cloak augment that gives +0.5 warding, +0.5 bonus damage, and +0.5 potency, but it's only possible to complete with heroes that are eligible for the Skeletal theme.
  • Loyal: Provides the greatspear Will of the Forest at tier 3, but it's very easy to get locked out of this quest, either permanently (having a child) or temporarily (becoming older than 35).
  • Lucky: Can provide the strap augment Fortune's Girdle (+7 stunt, +7 dodge, and +7 block), depending on choice.
  • Mysterious: +1 Legacy point or +10 retirement age depending on event choice.
  • Nostalgic: Can provide the Memorial Pauldron (+0.7 Armor and +0.7 Potency) depending on choice.
  • Physical: Provides both the focus hero and the helper (but not anyone else who goes along) with +1 health and +0.3 or +3 accuracy and +0.3 potency.
  • Shame: +1 health if you cure the hero, but you will also temporarily lose a large amount of health. You can also have the hero sacrifice themself to recruit a new hero, although with a Mythwalker, that probably only makes sense if you want to do it for story reasons.
  • Slacker: +3 legacy points or +15 Charisma or Tenacity depending on choices.
  • Wanderlust: +1d2 Legacy Points and a free recruit if you can pass a difficult Charisma roll.
  • Weird: +0.7 potency or +0.5 health, +0.5 armor, and +0.5 warding depending on choice.

If you want to use this strategy, try to have a variety of unresolved hooks on your legacy heroes so that it's possible for multiple heroes to resolve hooks in a campaign.
General Optimization: Permanent Buff Aspects
Since 1.9, there are 3 permanent non-theme aspects available to all characters: Evergreen Strength (+1 Health), Evergreen Voice (+25 Charisma), and Starheart[wildermyth.com] (+20 Charisma and chance to blind enemies when you are hit). In 1.8 and earlier, it was also possible to acquire permanent aspects by completing the opportunities for the Weird, Shame, and Slacker hooks[wildermyth.com], but those were changed to campaign only in 1.9 (characters that already gained those aspects before the change get to keep them for now). The three that still remain are nice to have, but they do not typically have a huge impact on how a character performs, Of the 3, Evergreen Strength is probably the most valuable. Unlike themes, these aspects can be acquired in a campaign even if another hero in the company already has them.

Starheart can be acquired from “All the Sweltering Stars[wildermyth.com]” at any time (the targets for the role that gets a chance at Starheart only depend on personality scores, so you can't get locked out of it, but you may not be eligible in every campaign), but Evergreen Strength always must be acquired before the character’s final ground pet. Evergreen Voice is often easier to acquire before the character's final ground pet, but it is not possible to be locked out of it. Both Evergreen Strength and Evergreen Voice are from the events “Silver and Shadows[wildermyth.com]” and “Answer to Austerity[wildermyth.com]”. Evergreen Strength is gained by returning the pinecone pet to Lord Evergreen in Answer to Austerity after sprouting the seed acquired from Silver and Shadows, which does not have to have been in the same campaign. Evergreen Voice is acquired by “giving away their heart to Lord Evergreen”, also in Answer to Austerity, so you can only get one of Strength and Voice per campaign. There are two ways a character can be eligible for Evergreen Voice: by being an "observer" in the Silver and Shadows event earlier in the same campaign (which is granted to all party members if option 1 is selected and the two focus characters if option 2 is selected in Silver and Shadows) or by having the Wildheart hook. Keep in mind that characters with the Wildheart hook that do not already have Evergreen voice have priority over the Silver and Shadows observers, and a Silver and Shadows observer without the pinecone has priority over one who does.
General Optimization: Event Hunting
In order to get the themes (and sometimes gear) that you want, you will need to trigger the right events. I recommend reading the Targets and Scoring Guide[wildermyth.com] so you know how to read the Targets sections of events on the wiki, but as before, I will emphasize a few points and add some other tangentially related tips, in no particular order:
  • All events (aside from the very basic ones like incursion interception or defense) can only occur once per campaign.
  • All events have a base weight that determines how likely they are to occur relative to other possible events. Most events have a base weight of 1, but some events have a lower weight of 0.25 and a few have higher weights, such as 5 or 6. There is also a modifier that divides the base weight to produce the actual event weighting in a campaign. This value starts at 1 and is multiplied by 4 every time you finish a campaign that included that event and is divided by 2 every time you finish a campaign without seeing the event (if the divisor is currently at least 2). For example, an event you saw in for the first time two campaigns ago and then again in the last campaign would have a weight modifier of 16, meaning it would be 16 times less likely to happen than it would be otherwise. An event that you saw for the first time four campaigns ago and not since would have a weight modifier of 1, meaning it would be back to just its base weight. Events also have a priority. If possible, the game will always choose an event with higher priority over one with lower priority regardless of weighting. On the event picking screen, the three numbers are priority, base weight, and the weight modifier. For example, an event say (10 > 0.3/4) meaning that it has the default priority for regular events, lower base weight (0.25 is displayed as 0.3), and reduced weight from being seen recently.
  • For almost all themes[wildermyth.com] (pets and transformations), the events to acquire that theme are only possible when no one else in the company already has that theme. For example, if one hero in a company has the Crowtouched theme, then the event “Company of Crows[wildermyth.com]” cannot occur in that campaign even if there are heroes who would otherwise be eligible. The main exception is with tails. Having a tail does not prevent another hero in the party from getting a tail, even the same tail.
  • For random artifact drops, each artifact can only drop if no heroes in the company currently have that artifact. For example, if a hero in the company has a Swan Scepter, another cannot be acquired in that campaign (unless the hero dies or retires first). Typically, the most efficient way to acquire a specific random drop artifact weapon is to use "Houses in the Heights[wildermyth.com]" or "For Their Own[wildermyth.com]" (assuming you don't want to just give the hero the weapon directly with devMode cheats). In Houses in the Heights, if you choose to explore the tunnel, there is a 1/3 chance of being awarded a random artifact weapon. If you save the game after the event starts, but before making the choice, they can reload that point if they do not get the weapon they are looking for. Alternatively, For Their Own always awards an artifact weapon if you choose to take the NPC into the battle and they survive, but it is awarded in the mission victory event, so you must save just before the end of the battle in order to reload efficiently. This also has the side effect of skewing the number of kills the hero making the final hit has, as that counter is updated immediately and does not reset on reload.
  • The previous point does not apply to artifacts acquired from specific events. For example, you may still get the event "Dreams and Bones[wildermyth.com]" if a member of the company already has a Bone Spear or Bone Bow, allowing you to acquire another.
  • Scoring functions prefer the hero with the highest score regardless of whether there is a threshold or not. When there is a tie, one character is chosen in a non-random but difficult to predict way. This sometimes depends on the composition of the rest of the party, so if you are trying to get a tie to break differently, but can't simply remove the other tying hero, you can try bringing different combinations of the remaining heroes.
  • Roles are matched in order (from top to bottom in the event targets), and the game does not go back to try and different order if the first one fails. For example, if the scoring function for the first role in an event requires a hero with a Healer score of at least 60 and the scoring function for the second role requires a hero with a leader score of at least 60, the event would not be able to trigger if one of your heroes had 85 Healer and 65 Leader and the only other had 62 Healer and 45 Leader since the first hero would be matched to the first role (because they have the highest Healer score), leaving no heroes that fulfill the second role.
  • It’s easy to focus on the hero requirements and forget to look at the other requirements. For example, “Dreams of Icarus[wildermyth.com]”, the post victory event where a hero has a chance to get the Hawk wings) can only happen on a tile with a swamp, pine forest, or broadleaf forest biome after a battle where a Deeven was defeated.
    Additionally, the names displayed in game and the names used in targeting do not always match exactly. For example, a “Pine Forest” in game is the same as “forestConiferous” in targeting and a “Deeven” in game is the same as “drauven_skysinger” in targeting.
  • In order to get all of the events you want on a particular character, you may need to change their personality scores. Personality scores can be rearranged in the legacy browser or when recruiting without needing to use devMode or cheats.
  • If you are using the event picking cheat, you will still need to fulfill all of the targeting requirements as you would normally.
  • If you are using the event picking cheat, make sure it is turned off before the final battle of each chapter. If left on, the peacetime tidings will fail to have effects, so some themes, such as the pet Pinecone and the Skeletal transformation, will not be applied properly. Make sure to double check that it is off before attacking the site, as it can turn itself back on depending on when you disable it.
  • You can still use promotions at the end of the campaign on Mythwalkers to update them; they just won't increase their legacy tier.
General Optimization: Efficient Hero Creation: Setup
This section describes a rather silly but efficient way to create new heroes with commonly sought after themes and buffs (such that they are still part of a hero's story instead of just being added directly with devMode). If any sections of this guide are "optimizing the fun out of the game", this one is the most guilty. Since having a hero in the company with a theme typically blocks anyone else from acquiring that theme, some themes may become difficult to acquire on new heroes as more of your existing heroes have it. For example, since the Drauven Bird is beneficial on nearly all builds and is the only available theme for the shoulder pet theme slot, you may prefer to acquire it early in a hero's career, if possible. As mentioned previously, this does not apply to tails.

The basic idea is to start a 3 chapter generic legacy campaign with Drauven as the main enemy using heroes that do not have any themes you may want to immediately acquire on a new hero. You would then make a manual save at the end of chapter 2 and/or the beginning of chapter 3. From this save, you can recruit a new hero in chapter 3 and finish the game and add the new hero to your legacy as many times as you like (although you will eventually run out of promotions and have to add them at legacy tier 1).

More specifically, the campaign recommendations would be:
  • Start a 3 chapter legacy campaign with Drauven as the main enemy.
  • Can be done on any difficulty, but Storyteller would be fastest and provide the most Legacy Points.
  • If you want to be able to obtain the Drauven wings, you must must have enough calamities for Pilots to be in the calamity deck by chapter 3, so you should start with around 40 unless you want to wait for calamities to pile up (although maybe you do want to start with fewer calamities and just wait for pilots to show up on the runs where you want Drauven Wings, which is probably not that often).
  • You may wish to check the map seed in the map tool to make sure there are a few Broadleaf forest, Pine Forest, or Swamp tiles in chapter 3 so a recruit could gain the Hawk Wings, although since both kinds of forest tiles are typically plentiful, the large majority of seeds should work. The map tool can be found under "Tools" -> "Open Editor" -> "Overland Tile Map". The appropriate map type is "legacy_threeChapters_v3", which can be set with the top right drop-down menu. You can see which tiles are added in chapter 3 by clicking on "Chapter 2" and "Chapter 3".
  • You should use a company name that you don't mind having on many heroes.
and the hero recommendations would be:
  • Avoid legacy heroes with Crowtouched, Hawksoul, Drauven Wings, Pet Pinecone, Pet Drauven Bird, Spell Touched, or any others that you may want to acquire immediately (although keep in mind that some theme events require multiple heroes with specific stats, which may be difficult to fulfill for multiple different themes).
  • Exactly one legacy hero should not have a pet. This hero should have as low of a poet score as possible so that the recruited hero can acquire the Pet Pinecone.
  • For the recruit to acquire the Drauven Bird, the recruit needs a Healer score of at least 60 and one of the legacy heroes needs a Hothead or Leader score of at least 60. This means none of the legacy heroes should have a healer score of 60 or more.
  • For the recruit to be the targeted for receiving Evergreen Voice, none of the legacy heroes should have the Wildheart hook.
  • For the recruit to acquire Hawk Wings, one of the legacy heroes needs to have a Goofball score of at least 60, and the recruit needs a Leader, Hothead, or Greedy score of at least 80. This means that none of the legacy heroes should have Leader, Hothead, or Greedy scores 80 or over. However, these requirements may change at some point, as Dreams of Icarus[wildermyth.com] is rumored to be up for a rework.
  • For the recruit to acquire Drauven Wings, they need to have the highest bookish score in the party. This means the legacy heroes should have relatively low bookish scores.
Less important but still potentially desirable hero recommendations:
  • For a warrior recruit to become Spell Touched, one of the legacy heroes must be a mystic.
  • For the recruit to acquire Starheart, one legacy hero needs to have a score of at least 60 in Romantic, Poet, or Loner. Loner is preferable in order to make it easier for the recruit match the role that is given Starheart, which requires a score of at least 60 in Goofball, Romantic, or Poet. The recruit's highest score among goofball, romantic, or poet score must be higher than for any other party members. However, this is not that big of a deal since having a hero with Starheart does not prevent another from acquiring it as well.
  • At least one hero will fully resolved hooks to guarantee that another hero will be available to be the helper to resolve a hook quest on the new recruit.
Summary of legacy hero personality requirements:
  • At least one legacy hero with a Hothead or Leader score between 60 and 79
  • At least one legacy hero with a Goofball score of at least 60, preferably as close to 60 as possible.
  • At least one legacy hero with a Loner score of at least 60.
  • No legacy heroes with a Bookish, Healer, Romantic, or Poet score of 60 or higher. It is better to have relatively low Bookish scores on all legacy heroes. The legacy hero with no pet should have Poet as their lowest personality stat.
  • No legacy heroes with a Hothead, Leader, or Greedy score of 80 or higher.
  • No legacy heroes with the Wildheart hook (this isn't really a personality trait, but I thought it was better to recap anyway)
General Optimization: Efficient Hero Creation: Strategy
Play strategy:
  • Play through the first two chapters, avoiding Silver and Shadows[wildermyth.com], Answer to Austerity[wildermyth.com], Company of Crows[wildermyth.com], Dreams of Icarus[wildermyth.com], Featherless Flight[wildermyth.com], One Small Life[wildermyth.com], Worlds Apart[wildermyth.com], All the Sweltering Stars[wildermyth.com], and any other events related to themes you want to acquire immediately on a new recruit (You should not be eligible for any of these except Company of Crows and possibly Worlds Apart with just the legacy heroes, anyway).
  • Make a manual save before the final kill in the chapter 2 capstone battle (so you can turn on or off random children), another at the calamity removal screen (if you are trying to reroll children), and another at the beginning of chapter 3 before starting a recruit job (if you are using a regular recruit).
  • Recruit a hero from town or a child of one of the legacy heroes. If you roll a hero that you might want to use but aren't sure, you can recruit them and make a new save, then reload the earlier save and keep rolling. Remember to check the targeting requirements for the events you want and set the new hero's personality stats accordingly, such as setting their Healer score to 60 or higher if you want the Drauven Bird and making sure their Poet score is higher than the pet-less hero's.
  • If you want to get Hawk Wings on the recruit, make note of the locations of Broadleaf Forest, Pine Forest, and Swamp tiles. You will need a hostile site one of those types of tiles, an event that does NOT have an automatic Mission Victory event, and there will need to be a Deeven in the battle. Save before the end of the battle or use event picking to get the Mission Victory event Dreams of Icarus[wildermyth.com], then choose the second option (note that the success chance is only 1/3).
  • Attack a hostile site and roll or pick the event Silver and Shadows[wildermyth.com], choosing to follow the creature (choice 2). After the battle, the new recruit should find the seed.
  • Attack a hostile site and roll or pick the event Answer to Austerity[wildermyth.com] without including the legacy hero that saw the creature in the party. Choose to have the recruit give their heart away to Lord Evergreen to acquire Evergreen Voice.
  • If you want Crowtouched, attack a hostile site and roll or pick the event Company of Crows[wildermyth.com], choosing the second option for the Crow Wings and the third option for the Crow Head. Regardless of which you start with, you can acquire the other later, but the history entry is more positive if you start with the wings. The new recruit must be the youngest party member and at least level 2 to be targeted for the transformation, so you'll need to do a couple other battles first.
  • If you want Drauven Wings, roll or pick the event Featherless Flight[wildermyth.com] at the end of battle that included a Drauven Pilot, then choose the second option.
  • If you want the Drauven Bird, roll or pick the event One Small Life[wildermyth.com] at the end of a battle that included a Drauven Stormthroat, then choose the second option.
  • If you want Spell Touched, scout a wilderness tile with the warrior recruit and a mystic included in the party and roll or pick the event Worlds Apart[wildermyth.com], then choose the second option.
  • If you want Starheart, attack a hostile site and roll or pick the event All the Sweltering Stars[wildermyth.com] (requires four heroes), picking the first option. You can save after getting the event but before making the choice to try again if you fail the roll.
  • Finish the campaign. IMPORTANT: If you were using the event picking cheat, make sure it is off before the start of the final battle so that the campaign end tidings execute properly. Turning it off during the battle does not work. If you found the seed in Silver and Shadows, the new recruit should gain the Pet Pinecone. Even if you do not have enough LP to promote them, you will still be able to add them to your legacy. If the campaign end tidings do not properly execute and you accidentally add the new hero to your legacy, you can forget them and reload the campaign from before the final battle and then re-add them to legacy.
  • In a future campaign, roll or pick Answer to Austerity to give away the pet Pinecone to acquire Evergreen Strength and open up the theme slot for the hero to get their final pet.
Warrior: Swift Attack Broadswipes: Overview
The Broadswipes warrior is one of the most well known high optimization builds. Broadswipes warriors are able to deal moderate damage to many enemies in a huge area. While incapable of spectacular single target damage except in a few niche circumstances, they can take out or finish off many weak or weakened enemies and set up flanking on stronger ones. They are also better able to take a hit than most builds on other classes; however, they do tend to be a bit on the less durable side as compared to other warriors.

There are two main variants of this build, both of which allow triggering Broadswipes with a non-turn-ending attack so that you can either trigger it again with a turn-ending attack or retreat afterwards. The first I will call Swift Attack Broadswipes, where the non-turn-ending attack is a swift action, and the second I will call Zealous Leap Broadswipes. This section will focus on the Swift Attack Broadswipes warrior.

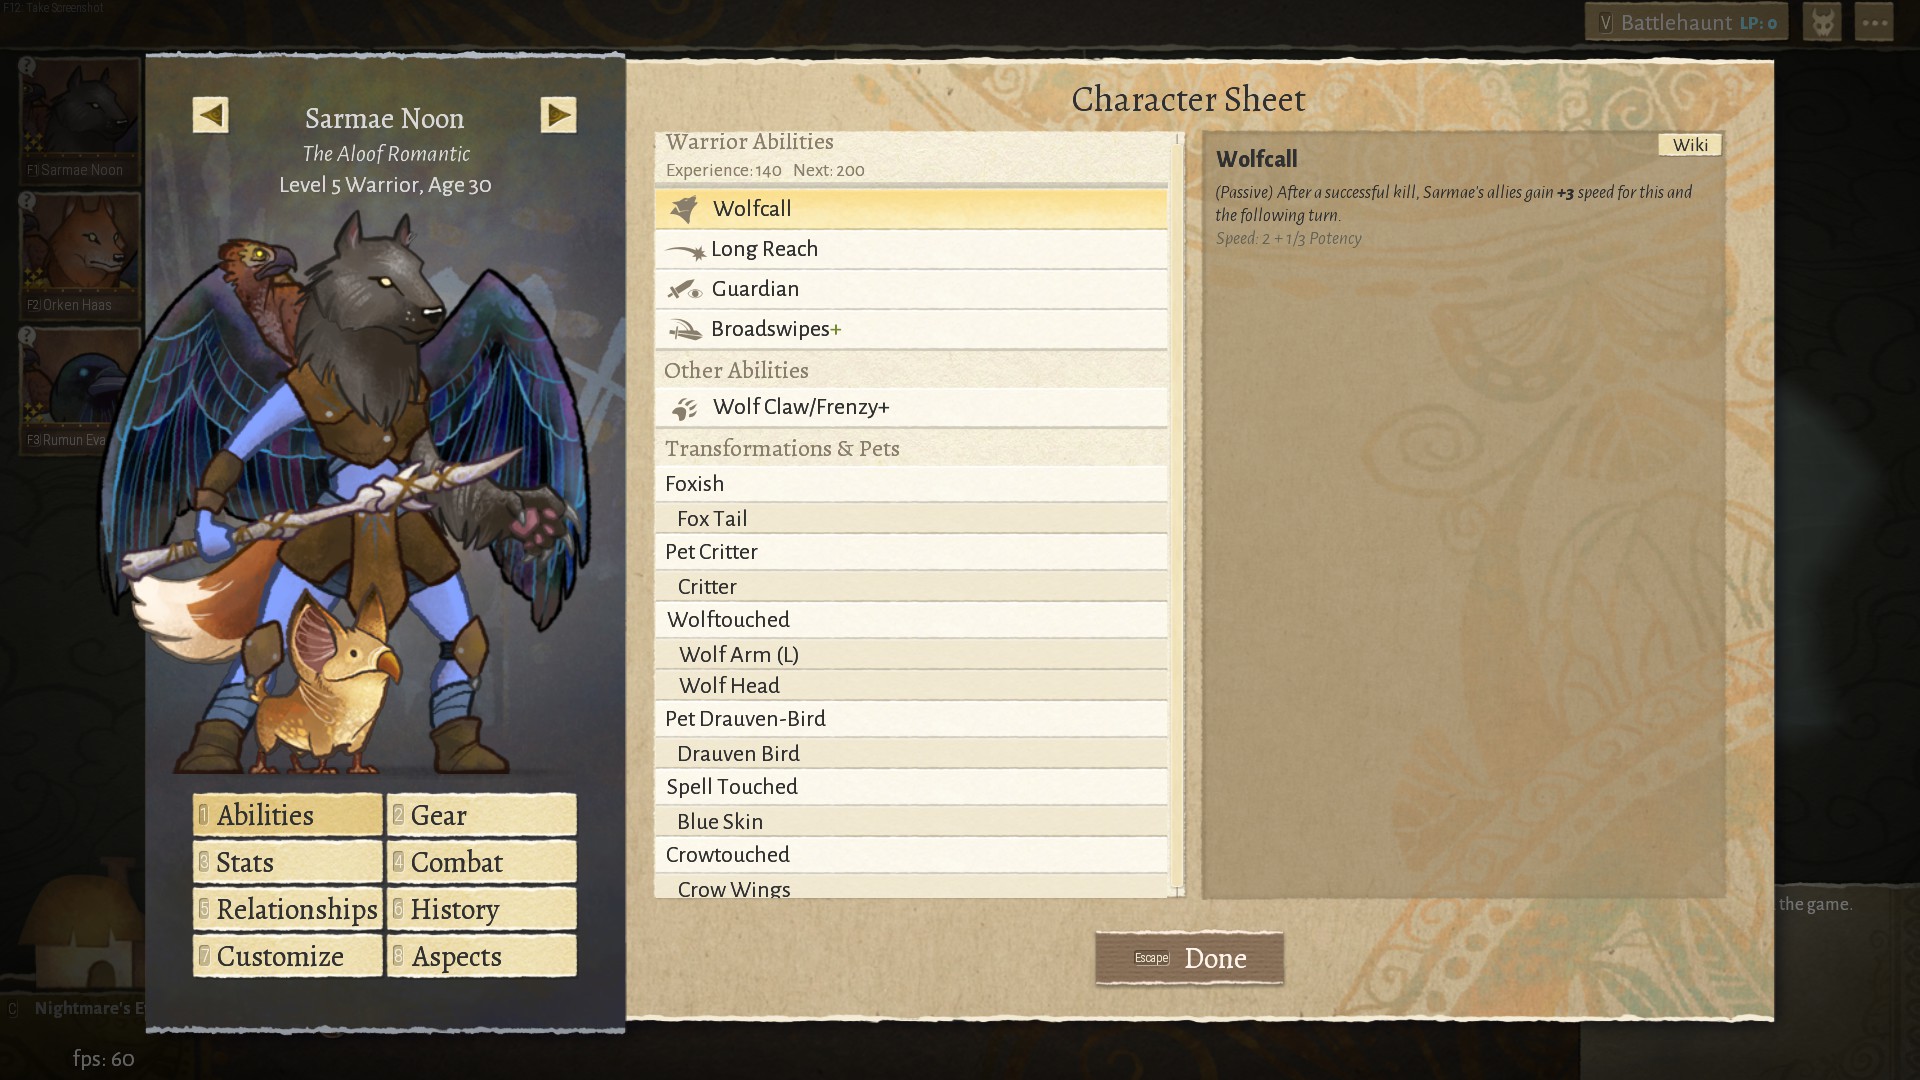
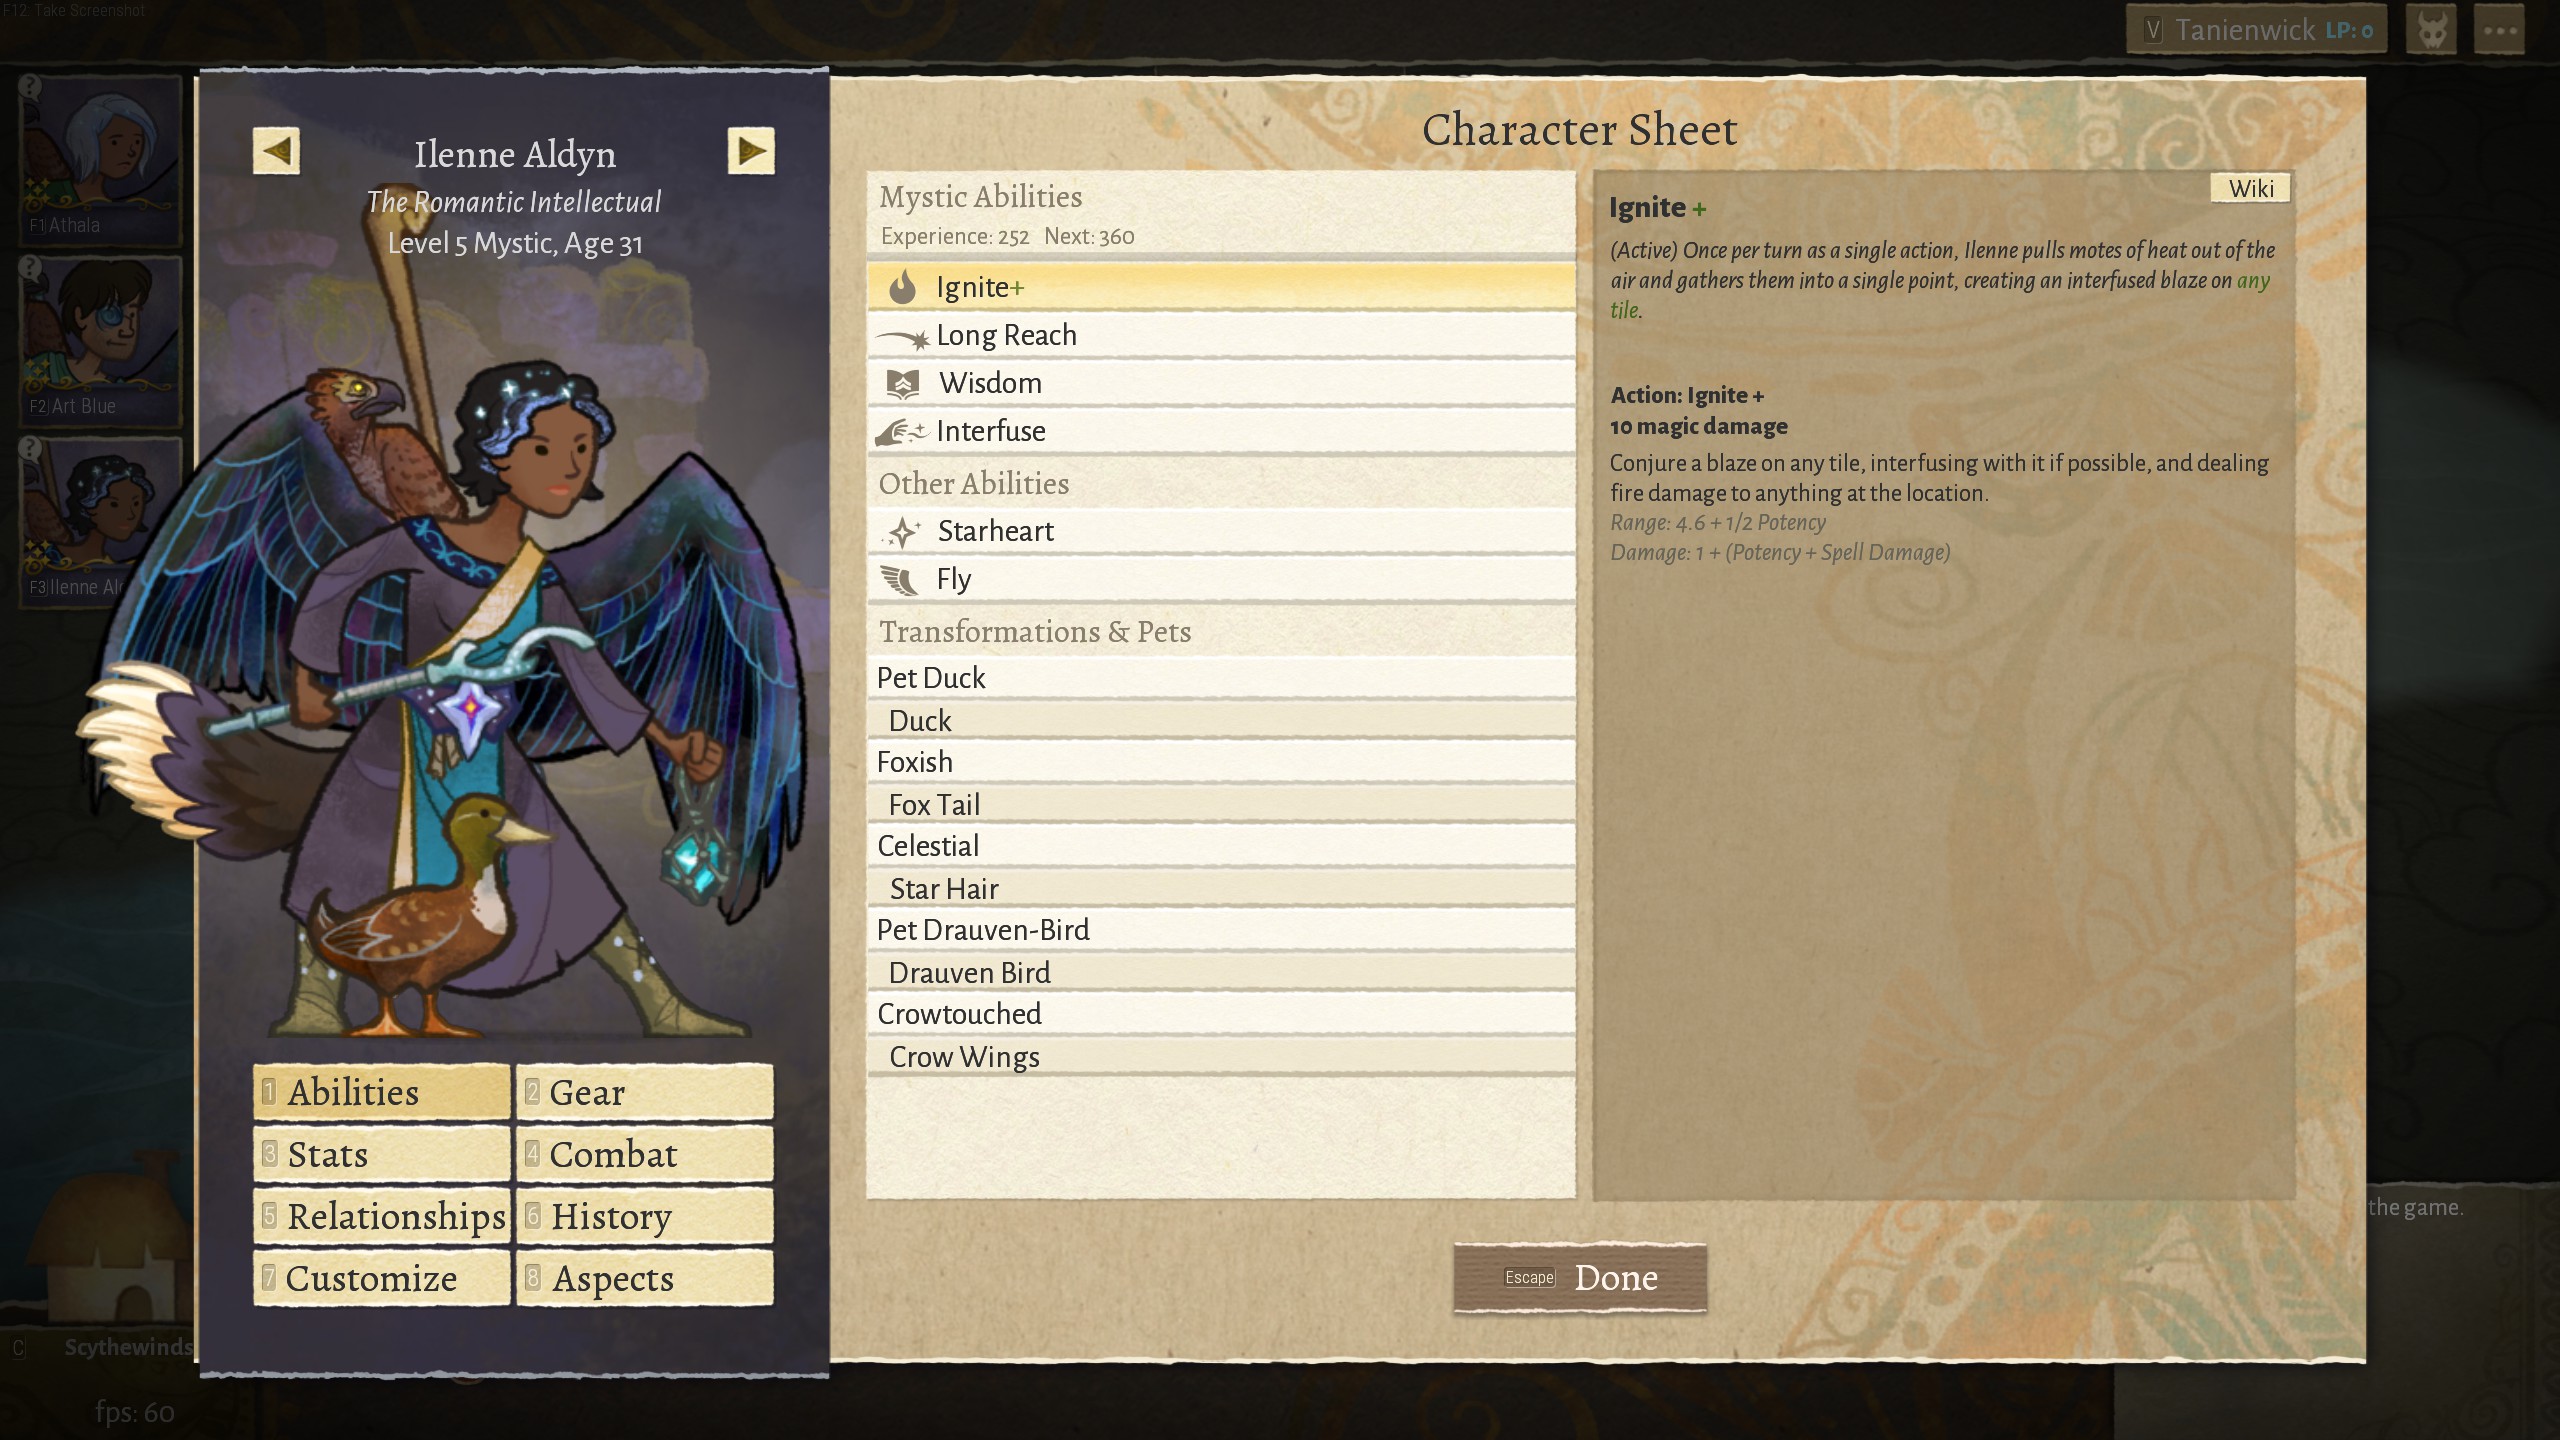
The two main options for a swift action attack are Peck, from the Crowtouched head, and Bite, from the Wolftouched head, although Scratch from the left Skeleton arm also technically fits in this category. Compared to Bite, Peck deals one less damage, but blinds on stunt, which is probably a good tradeoff, so I would recommend the crow head if you have a choice between the two. On the other hand/talon/paw, I would consider the wolf arm abilities to be better than the crow ones, so if you want access to those, you will also need to use the wolf head.

Typically, you will transform the left arm in order to use a theme attack as your main attack, with the other arm holding the bone spear, which provides +1 potency and a base range of 2.1 for the Broadswipes attacks. For most themes, transforming just the right arm is mechanically equivalent, but I tend to think the art looks better with the weapon in the right hand. For a few themes, the right and left arms do different things, so you must transform the correct one. There are also variations with none or both arms transformed, which are described below.

SHORT OMENROAD EDIT: If you have the Omenroad DLC, you can now use any theme limb with the Crow or Wolf head. Until I have a chance to decide how I want to reformat these sections, I recommend looking between the theme variations for both the swift attack version and the Zealous Leap version to decide which themes you want to use.
Warrior: Swift Attack Broadswipes: Details
Defining Abilities
  • Broadswipes+
  • Long Reach
  • Long Reach+: (for variants that do not hold a spear)
Additional Abilities
  • theme attack+: The theme attack upgrade abilities, such as Wolf Claw/Frenzy+ will dramatically improve your single target damage, although there are exceptions, as noted below.
  • Long Reach+: I would consider this a "defining" ability for variants that do not use a spear, as the range increase from 2.6 to 3.2 is quite substantial. For variants that do hold a spear, it's more of a nice-to-have ability.
  • Wolfcall: Movement speed is very important for this build as well as many others. It can also dramatically help the whole party during escape missions.
  • Heroism: Single turn nova damage at a key moment can sometimes make all the difference in a battle. The upgraded ability, Heroism+, can also be worthwhile, but I would recommend picking it up at level 6 or 7 rather starting with it as one of the 5 Mythwalker abilities.
  • Untouchable: A good defensive option.
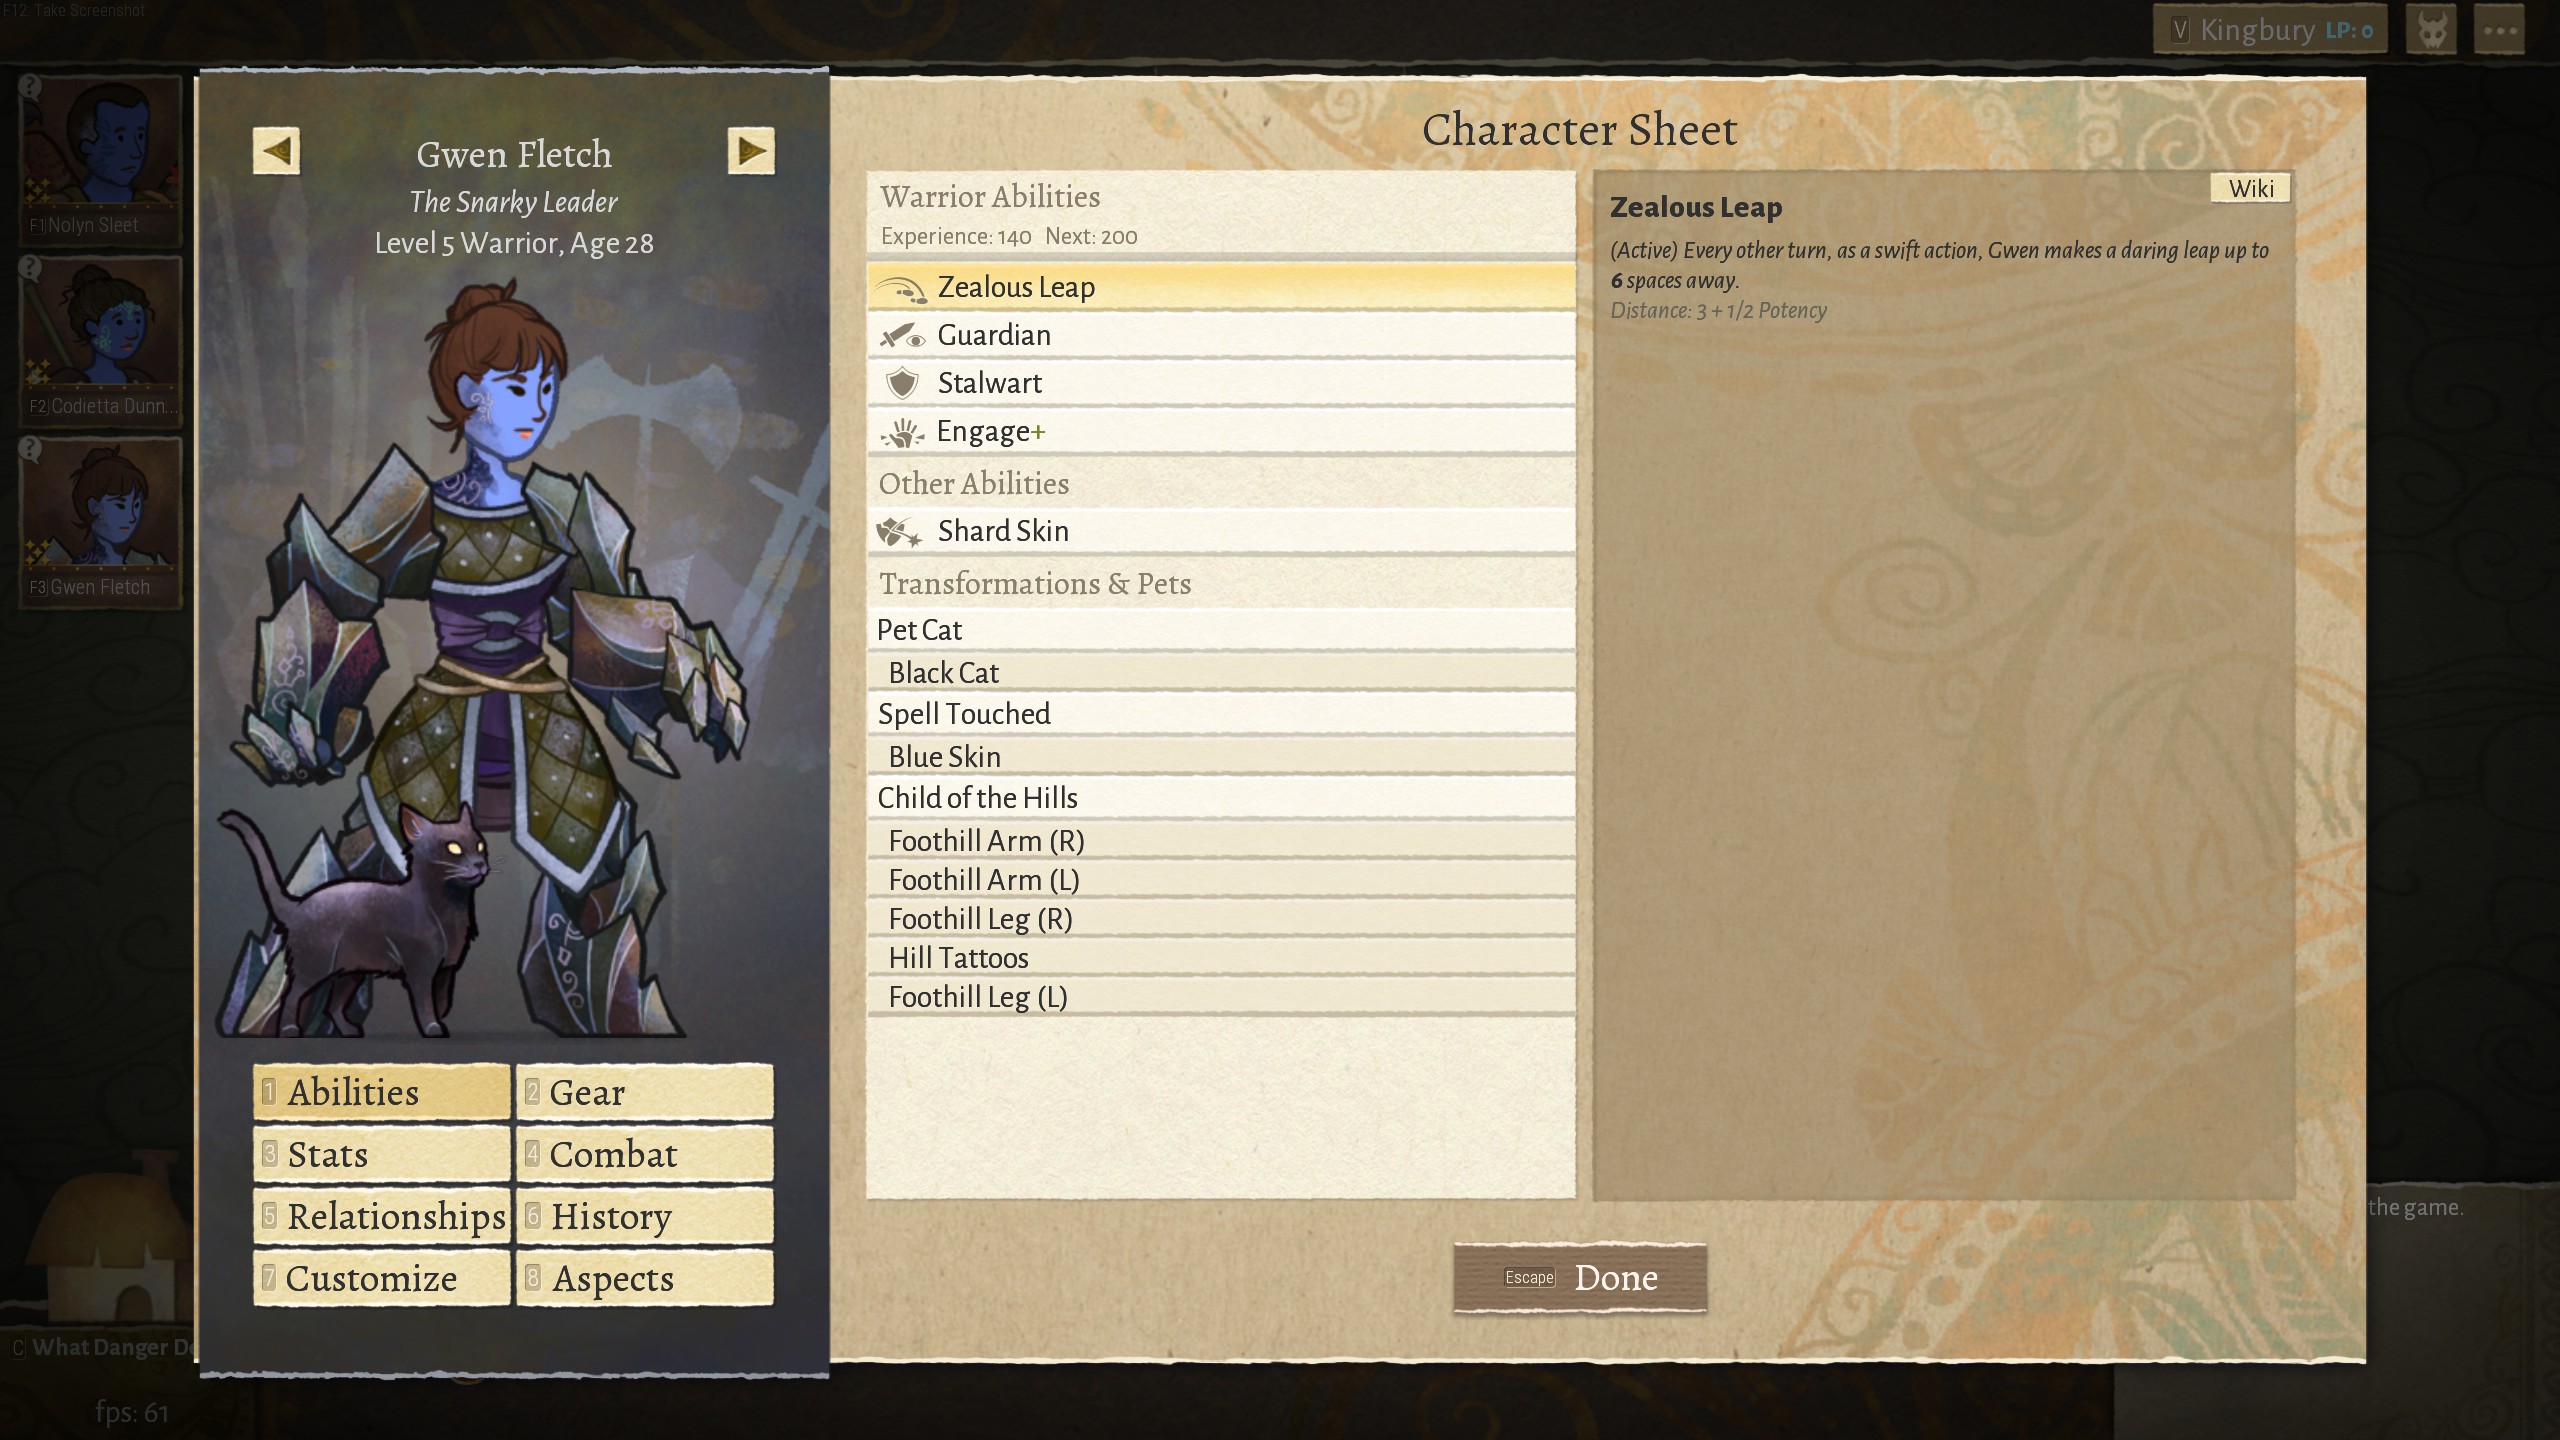
  • Zealous Leap: Can be useful to get behind enemies even if you don't need to rely on it for movement as in the other version of this build.
  • Nimble Nature: Extra speed, dodge, and stunt chance is always helpful. Only available with the Fox Tail.

Upbringing
  • +3 to +6 Retirement Age: In order for a warrior to make it through a five chapter campaign when recruited in chapter 1, they will most likely need a retirement age boost, even with three hooks resolved. More than +6 is probably overkill unless you spend a lot of time in each chapter. Retirement age bonuses are completely unnecessary on Skeletal heroes.
  • 0 or 0.4 Potency: Having 0.4 potency from upbringing will allow a warrior to start with 5.0 potency at level 5 with the Bone Spear and no augments. A warrior with 0 potency from upbringing with reach 5.0 potency at level 6 with the Bone Spear and no augments. Intermediate or higher amounts of potency from upbringing are not that useful for this build, in my opinion. I would lean toward trying to get 0.4 potency from upbringing.
  • Speed: Try to get as much speed as you can while satisfying the above conditions. With 0 potency, you should be able to get +1 or +1.1 speed, while going for 0.4 potency might mean you can only get 0.3 or 0.4 unless you use the Monarchs Under the Mountain rescuee or are lucky to get a child with good stats.
  • 0.2 Bonus Damage: Keep an eye out for warrior children with 0.2 bonus damage, as this allows starting at level 5 with 2.0 bonus damage. Also possible with the Monarchs Under the Mountain rescuee.
  • Rough order of preference for remaining stats: Accuracy, Dodge/Block, Warding, Stunt, Health, Charisma, Tenacity
Additionally, make sure to avoid the Mysterious, Destiny, Inhabited, and Dreamer hooks so that you can become Spell Touched, unless you are planning on using the Skeletal theme, in which case you should start with Integrity (although you can acquire it later if needed).

Primary Weapon
  • Bone Spear: Provides +1 Potency and a base range of 2.1 for Broadswipes.
  • One of the listed melee secondary weapons
Secondary Weapon
  • Thorn of the Fens: The doubled-damage-after-armor effect also applies to Broadswipes hits that are flanking, even if you use a theme attack. (Could also be primary weapon)
  • Baleblade: Temp health for a directly adjacent ally for each enemy hit, including the Broadswipes hits, even if you use a theme attack. Long Reach+ would be very helpful if you plan on using this as the primary weapon.
  • Frostfang or a water or other crossbow can be a nice backup for heroes with melee themes.
Offhand
  • Typically transformed arm
Armor
    (lots of room for personal preference)
  • Riverscale/Oceanscale (DLC: AaS): The +0.2 bonus damage will typically effectively result in +1 damage at level 5, even for attacks with half scaling (like Bite and Peck), and the accuracy is also very helpful. The bonus damage is not as big of a deal at higher levels, so you may want to switch if you do not depend on the accuracy (e.g., have the Critter). Both tiers synergize very well with the Golden Rabbit.
  • Brawlgard/Wildergard: Dodge is always helpful, and the stunt chance is very useful if you often use attacks with powerful stunt effects, such as the Wolf Claw (water stunt).
  • Glimcowling/Spellcowling (DLC: AaS): More of a glass cannon option due to the high (+2) potency and extremely low armor, but the warding is also nice.
  • Rainscoth/Battlescoth (DLC: AaS): The extra speed is very nice, and the dodge is very useful if you use Riposte, but be wary of being flanked.
  • Linkmail/Knightmail: If you can overcome the -0.5 speed (e.g., have Wolftouched legs), the protection from physical damage is very good.

Wings
  • Crow Wings: +1 Speed and +10 dodge is very helpful for positioning and survivability. If you use the Crow Head for your swift attack, you cannot use any wings other than the Crow Wings. Fly is probably not as good as Zealous Leap due to the lower range, but it can still be useful.
  • Hawk Wings: +1.4 Speed. Some may prefer the extra 0.4 speed of the Hawk Wings over the dodge bonus from the Crow Wings since positioning is so important. Talon Dive is probably not as good as Zealous Leap due to the lower range, but it can still be useful.
  • Drauven Wings: Base stats identical to Hawk Wings. I wouldn't recommend any of the wing upgrade abilities over Zealous Leap, but Airlift is especially hard to use due to the requirement of bringing along an ally.

Tail
  • Fox Tail: The Fox Tail provides reliable passive bonuses, helping you with positioning and overland movement with the extra speed, survivability with the dodge, and various effects with the increased stunt chance. Offers a minor bonus that is always helpful.
  • Scorpion Tail: Allows an entire extra attack on those rare turns when you start exactly where you want to be. Offers a substantial bonus that only occasionally applies.

Ground Pet
  • Critter: The +12 accuracy from the critter is extremely useful for making sure your attacks actually connect. Do not underestimate the value of going from 95% to 100% chance to hit. Also helpful since with Broadswipes, it is likely at least some targets will be behind cover.
  • Golden Rabbit: The +1 bonus damage makes the golden rabbit a bit of a higher risk/higher reward option compared to the critter, although if there is a lot of cover, the critter may give a higher expected value of damage while being safer. This can be mostly mitigated by using the Riverscale/Oceanscale armor.
  • Duck: The duck is a viable choice if you are worried about attacks from out of reach enemies, but the critter and golden rabbit are better for making sure everything in your immediate vicinity is dead.
  • Fire Chicken: If you and/or your party tend to use a lot of fire, the fire immunity can be useful for both positioning and hit-and-run tactics, especially if you use Covering Fire. Covering Fire provides a decent amount of safety and a damage boost for the first attack each time you are able to use it.

Shoulder Pet
  • Drauven Bird: A modest +5 accuracy, but it helps.

Other Transformations
Spell Touched: All variations of this build benefit from Spell Touched, except the Skeleton version, as it is not compatible. It is generally safest to acquire Spell Touched before any other themes (although it is not always technically necessary).

Additional transformations are discussed below.
Warrior: Swift Attack Broadswipes: Theme Variations
Choices of transformations for the Swift Attack Broadswipes warrior are listed here.

Wolftouched Head, Wolftouched Arm (L)
The classic example of this build. Good range with the Bone Spear, decent damage and water stunt effect with Wolf Claw, and room for another ability after the necessities and the theme attack upgrade.

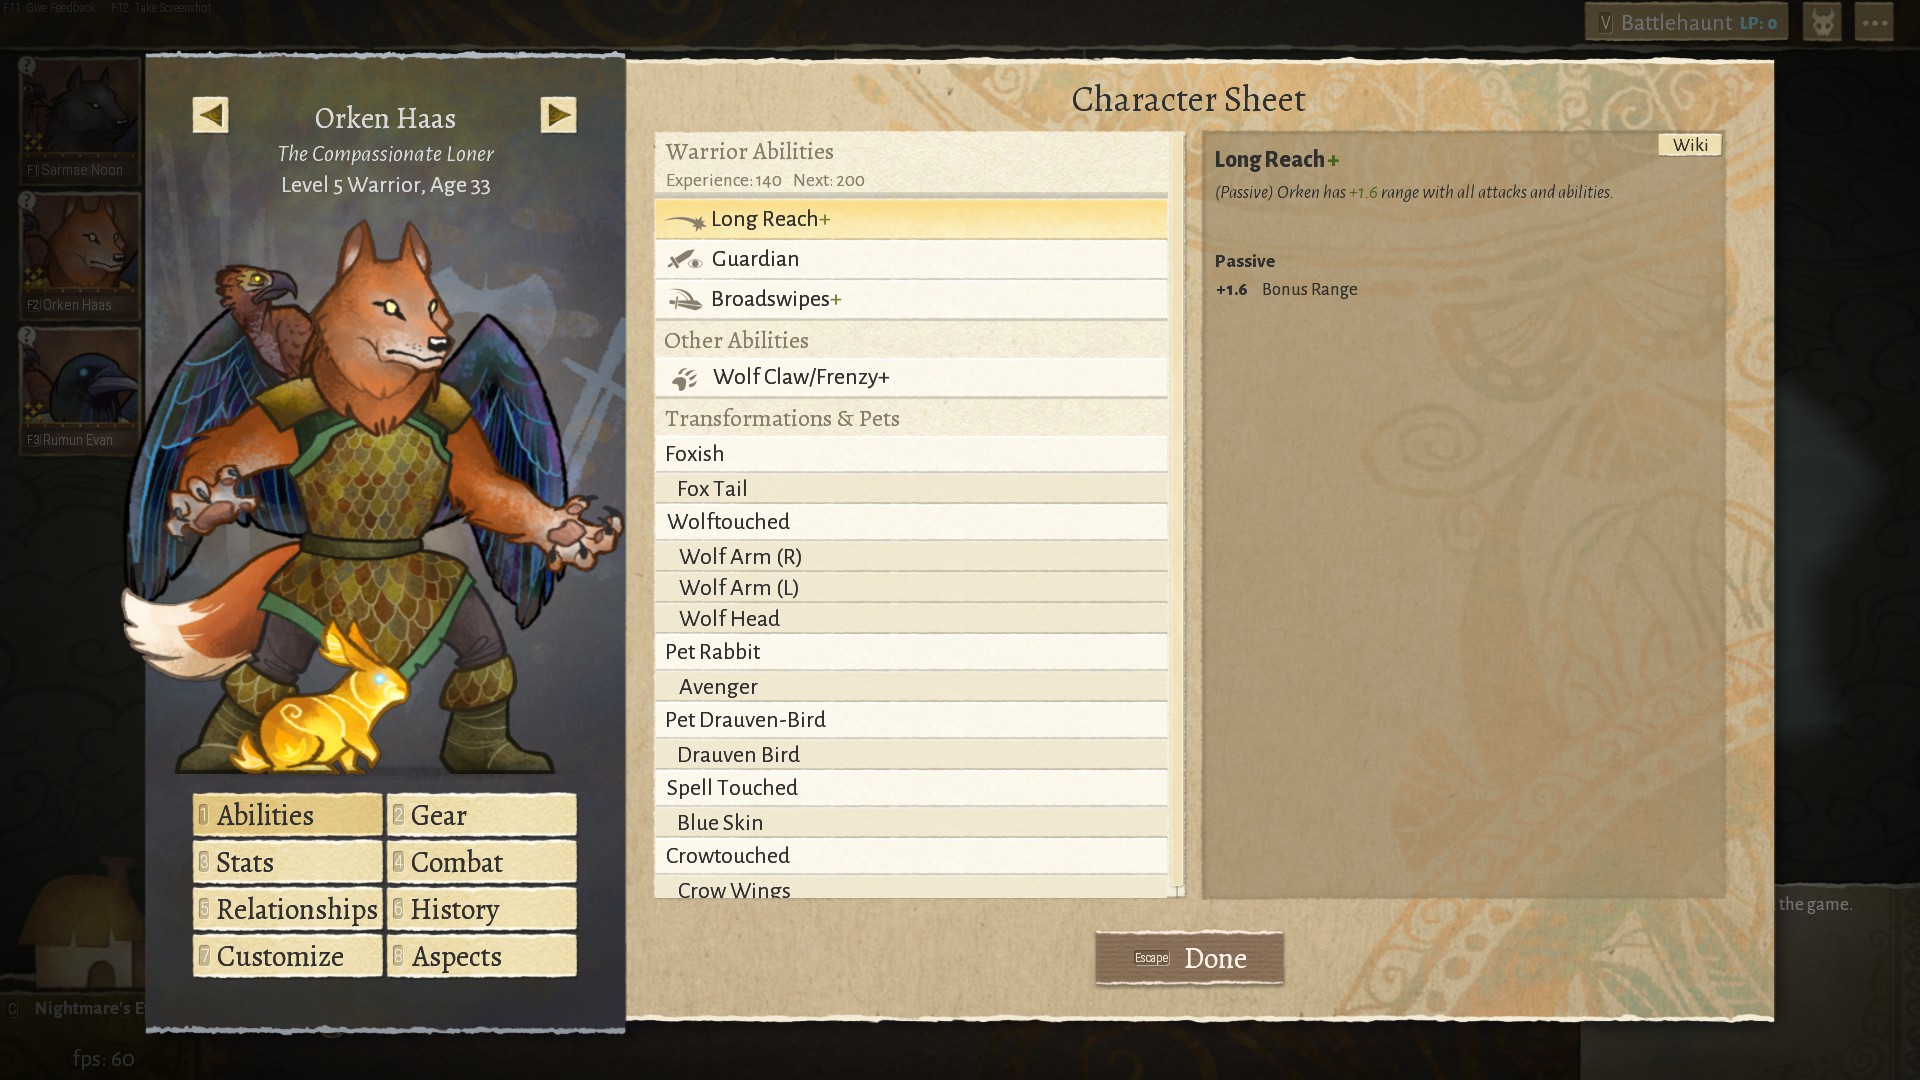
Wolftouched Head, Wolftouched Arm (Both)
This variation is notable since it allows Frenzy, which will trigger Broadswipes three times, resulting in massive amounts of damage if you are surrounded by high health, low armor enemies. The downside is that you need to invest in Long Reach+ to get decent range, and you will struggle a bit more against enemies with lots of armor. If you have the Armors and Skins DLC, consider using the Riverscale armor along with the Golden Rabbit to compensate for the lack of the Bone Spear.

Wolftouched or Crowtouched Head, Crowtouched Arm (L)
Shred and blind are nice, but probably not as good as either wolf arm variation.

Wolftouched or Crowtouched Head, Mortificial Arm (R)
The crow head version may be slightly better, but it comes down to personal preference. Note that Wrist Bolt, from the left Mortificial arm, does not trigger Broadswipes. A previous version of this guide incorrectly stated that it did.

Wolftouched or Crowtouched Head, Stormtouched Arm (L)
Jumpjolt means that an enemy may be hit by both the secondary jumpjolt hit and by a Broadswipes attack. Magic damage is also nice.

Wolftouched or Crowtouched Head, Human Arms (L and R)
This build works with either Will of the Forest or with the Bone Spear and the Spellshard. They both have the same primary target damage, but Will of the Forest has a leaf stunt effect and may plant trees on kill while the Bone Spear/Spellshard combination has 1 higher Broadswipes target damage at tier 1.

Crowtouched Head, Flamesoul Arm (L)
This one is interesting. By acquiring the crow head before Flamesoul, a hero can have the left flamesoul arm without the fire tattoo. Cone of Fire deals magic damage in a large area and occasionally allows an enemy to be hit with both cone of fire and the Broadswipes attack. As Flamesoul+ only provides +2 damage for cone of fire, I would recommend taking Sharpshooter or other abilities instead. On the other hand, Flamesoul+ is not the worst choice if you are offered it on level up and you don't like the other choices or want to reroll.

Skeletal Head, Skeletal Arms (L and R)
The hero will need to start with or acquire the Integrity hook. This variation can have better single target damage than most other variations with flanking, but even with Long Reach+, the the range is a bit low (2.7). If you want any legs other than Skeletal, such as Crowtouched, you should get them before resolving the Integrity hook, although Skeletal legs are probably the best choice anyway.

Legs (all build variations)
I would say that legs do not tend to have a huge impact on gameplay for this build, but there are some things to consider.
(in no particular order; not all legs are compatible with all variations)
  • Human: Consider leaving the legs human, as you may be able to transform them differently in different campaigns based on the specifics of that game.
  • Wolftouched: These give a good speed boost, but at the cost of armor, so consider using with the Linkmail/Knightmail. However, this will reduced your stunt chance which may be a concern if you often use Wolf Claw.
  • Crowtouched: Warding can be useful, and the fractional health reduction may not always reduce your actual (floored) amount of health.
  • Flamesoul: More warding than the crow legs, but the slight reduction in speed may be meaningful.
  • Stormtouched: Reduced block and a swift action you won't have actions to use. I don't recommend this.
  • Skeletal: Some speed with no downsides, but only available to the skeleton variation.
  • Mortificial: Some speed at the cost of dodge. I probably wouldn't want to lock in having them, though.
Warrior: Zealous Leap Broadswipes
This build is very similar to the Swift Attack Broadswipes Warrior, but you instead rely on the Scorpion Tail Sting for a non-turn-ending attack and Zealous Leap for movement. Hit and run tactics are still possible by retreating using regular movement after using Sting. This version of the Broadswipes warrior is also compatible with more themes.

Defining Abilities
  • Broadswipes+
  • Long Reach
  • Zealous Leap+:
Additional Abilities
  • theme attack+: Most theme attack upgrade abilities, such as Harvest+ will dramatically improve your single target damage.
  • Heroism: Single turn nova damage at a key moment can sometimes make all the difference in a battle.
  • Long Reach+: Potentially allows you to hit more enemies or position the hero more favorably.
  • Stalwart: If you are not using hit and run tactics, this will greatly improve your defenses.
  • Untouchable: A good defensive option.
  • Riposte: A decent chance of extra attacks, especially if your avoidance (dodge+block) is good.
  • Sharpshooter: Decent bonus for heroes using ranged theme attacks.
  • Wolfcall: This skill may not be that useful for this hero, but it may still be very helpful for allies.
  • Battledance: This is mostly redundant with the Scorpion Tail, but if you have a melee theme attack and picked up the theme attack upgrade ability at level 6, this may be a good choice at level 7.

Upbringing
  • +3 to +6 Retirement Age: In order for a warrior to make it through a five chapter campaign when recruited in chapter 1, they will most likely need a retirement age boost, even with three hooks resolved. More than +6 is probably overkill unless you spend a lot of time in each chapter. Retirement age bonuses are most likely unnecessary on Sylvan warriors due to +5 bonus from Spirit Marked and completely unnecessary on Skeletal heroes.
  • 0 or 0.4 Potency: Having 0.4 potency from upbringing will allow a warrior to start with 5.0 potency at level 5 with the Bone Spear and no augments. A warrior with 0 potency from upbringing with reach 5.0 potency at level 6 with the Bone Spear and no augments. Intermediate or higher amounts of potency from upbringing are not that useful for this build, in my opinion. I would lean toward trying to get 0.4 potency from upbringing.
  • 0.2 Bonus Damage: Keep an eye out for warrior children with 0.2 bonus damage, as this allows starting at level 5 with 2.0 bonus damage. Also possible with the Monarchs Under the Mountain rescuee.
  • Rough order of preference for remaining stats: Accuracy, Dodge/Block, Warding, Speed, Stunt, Health, Charisma, Recovery Rate, Tenacity
Additionally, make sure to avoid the Mysterious, Destiny, Inhabited, and Dreamer hooks so that you can become Spell Touched, unless you are planning on using the Skeletal theme, in which case you should start with Integrity (although you can acquire it later if needed).

Primary Weapon
  • Bone Spear: Provides +1 Potency and a base range of 2.1 for Broadswipes.
  • One of the listed melee secondary weapons
Secondary Weapon
  • Thorn of the Fens: The doubled-damage-after-armor effect also applies to Broadswipes hits that are flanking, even if you use a theme attack. (Could also be primary weapon)
  • Baleblade: Temp health for a directly adjacent ally for each enemy hit, including the Broadswipes hits, even if you use a theme attack. Long Reach+ would be very helpful if you plan on using this as the primary weapon.
  • Frostfang or a water or other crossbow can be a nice backup for heroes with melee themes.
Offhand
  • Typically transformed arm
Armor
(lots of room for personal preference)
  • Linkmail/Knightmail: The extra armor is nice, and the loss is speed is not a big deal since you will typically be moving with Zealous Leap.
  • Riverscale/Oceanscale (DLC: AaS): The +0.2 bonus damage will typically effectively result in +1 damage at level 5, even for attacks with half scaling (like Sting), and the accuracy is also very helpful. The bonus damage is not as big of a deal at higher levels, so you may want to switch if you do not depend on the accuracy (e.g., have the Critter). Both tiers synergize very well with the Golden Rabbit.
  • Glimcowling/Spellcowling (DLC: AaS): More of a glass cannon option due to the high (+2) potency and extremely low armor, but the warding is also nice.
  • Brawlgard/Wildergard: Due to the extra stunt, this may be preferable if you use an attack with a powerful stunt effect (e.g., Elmsoul), and dodge is always useful.
  • Rainscoth/Battlescoth (DLC: AaS): Probably only worth using along with Riposte.

Wings
  • Crow Wings: +10 dodge is very helpful for positioning and survivability, and the speed helps hit-and-run tactics and overland movement.
  • Hawk Wings or Drauven Wings: +1.4 Speed. Still useful, but I'd only recommend it if you are not using a build compatible with the Crow Wings.

Tail
  • Scorpion Tail: Your main source of a non-turn ending attack.

Ground Pet
  • Critter: The +12 accuracy from the critter is extremely useful for making sure your attacks actually connect. Do not underestimate the value of going from 95% to 100% chance to hit. Also helpful since with Broadswipes, it is likely at least some targets will be behind cover.
  • Golden Rabbit: The +1 bonus damage makes the golden rabbit a bit of a higher risk/higher reward option compared to the critter, although if there is a lot of cover, the critter may give a higher expected value of damage while being safer.
  • Duck: The duck is a viable choice if you are worried about attacks from out of reach enemies, but the critter and golden rabbit are better for making sure everything in your immediate vicinity is dead.
  • Fire Chicken: If you and/or your party tend to use a lot of fire, the fire immunity can be useful for hit-and-run tactics, especially if you are able to pick up Covering Fire, although that may be difficult with the Zealous Leap version of this build. If you do get Covering Fire, it provides a decent amount of safety and damage boost for the first attack each time you are able to use it.

Shoulder Pet
  • Drauven Bird: A modest +5 accuracy, but it helps.

Other Transformations
Spell Touched: All variations of this build benefit from Spell Touched, except the Skeleton version, as it is not compatible. It is generally safest to acquire Spell Touched before any other themes (although it is not always technically necessary).
Star Hair (Celestial Head): If you have the Omenroad DLC, you can add this piece to any build. Blinding Attacks applies to both theme attacks and the Broadswipes hits.

Additional transformations are discussed below.
Warrior: Zealous Leap Broadswipes: Theme Variations
Choices of transformations for the Zealous Leap Broadswipes warrior are listed here. This build will work with pretty much every theme, but the ones that are compatible with the swift attack version will probably perform better that way. Beartouched and Shadow are probably my favorites. I have not tried Botanical or Sylvan, but they are also intriguing options.

Beartouched
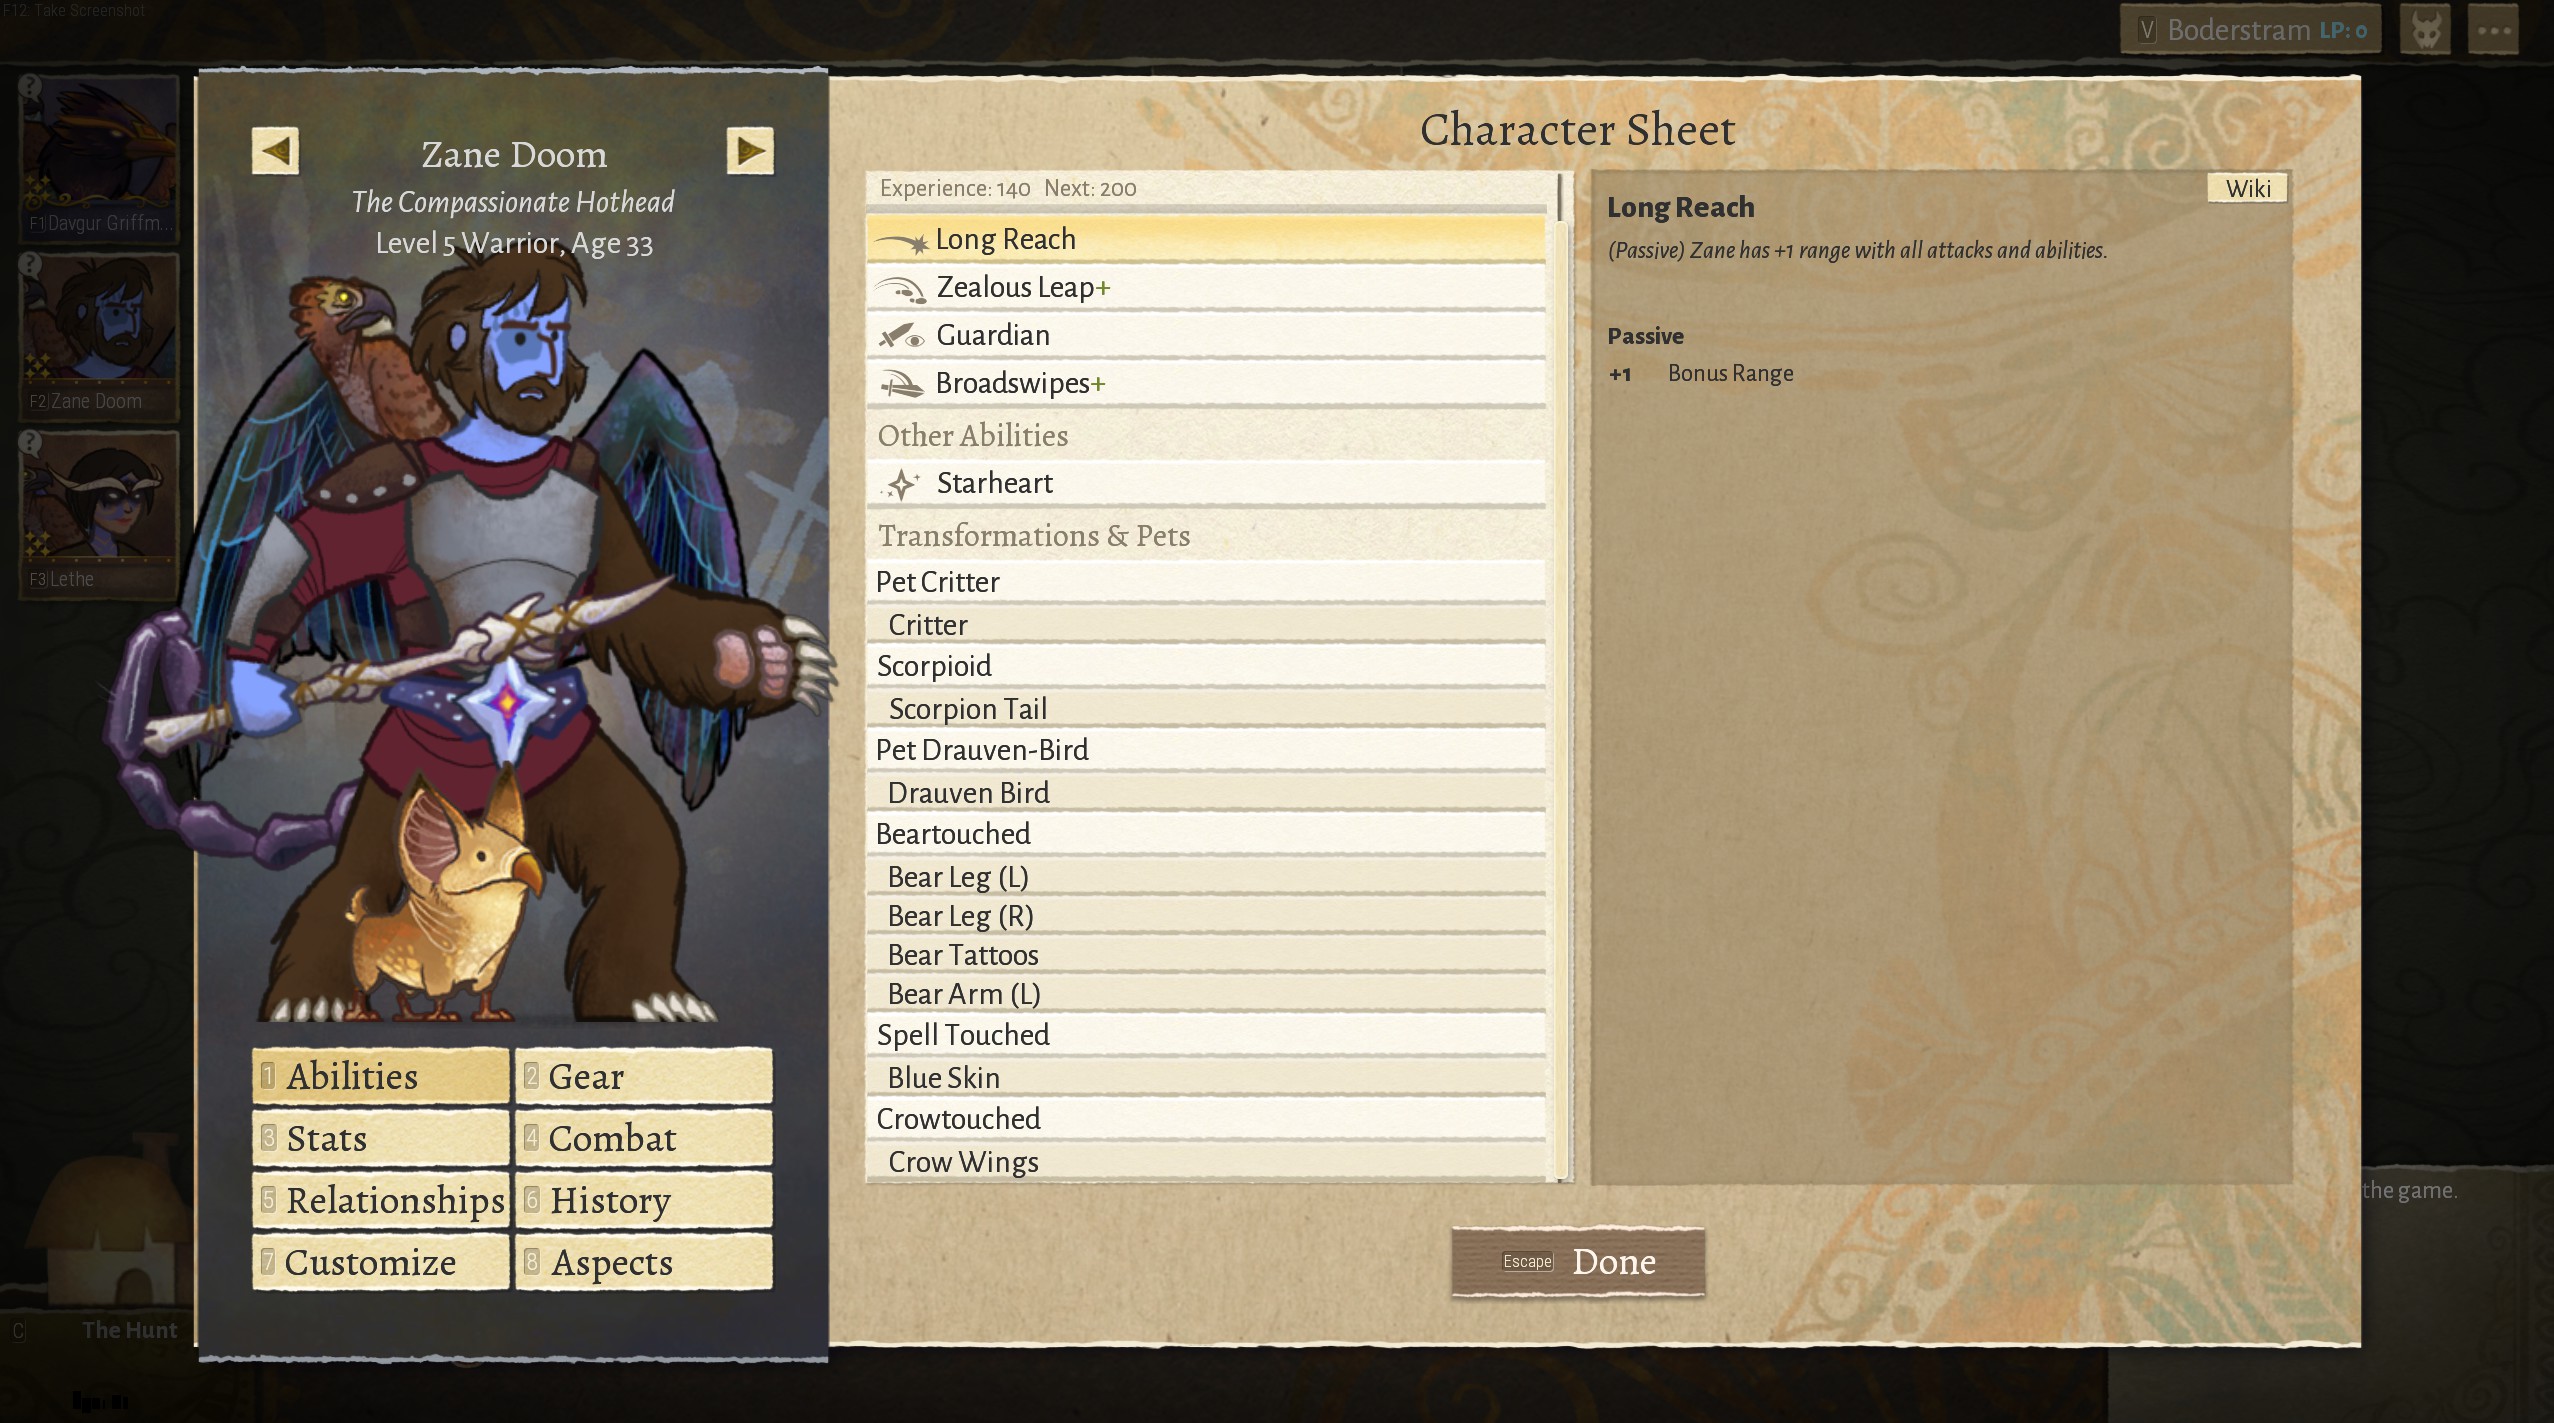
The main appeal of Beartouched is being able to hit two enemies at once. They must be directly adjacent to each other, so it won't happen every time, but it's nice when it does. As with the Scorpion Sting, hitting multiple enemies with Bear Swipes will occasionally cause a target to take damage from both the main attack and the Broadswipes attack.

Transforming both legs for +1 extra health at the cost of -0.3 speed per leg is probably a good choice unless you plan to use a lot of hit-and-run tactics. Crowtouched legs are also an option.

Make sure to avoid the Inhabited hook, as that blocks the Beartouched theme.

Botanical
Thorn Lash is very similar to Cone of Fire, but it deals physical damage instead of magic, the width of the line attack is a bit narrower, adds 1 poison, and it has the leaf stunt effect instead of fire. The leaf stunt effect effect is the main draw as it allows the building of temp health over time. As with the Scorpion Sting, hitting multiple enemies with Thorn Lash will occasionally cause a target to take damage from both the main attack and the Broadswipes attack.

Transforming the legs is probably a good idea. +0.3 speed and -0.2 health per leg is helps with overland movement even if you only move with Zealous Leap, and the extra speed definitely helps in combat if you use hit and run tactics.

Celestial
Shooting Star is a single action non-turn ending attack that deals magic damage and ignores cover, which means that unlike most versions of this build, you can use your main theme attack and Scorpion Sting in either order (or attack with Shooting Star and a weapon). Another benefit of Celestial is that Blinding Attacks applies to the Broadswipes hits as well as the main attacks, giving it some defensive capabilities.

I don't recommend using the Celestial legs, as most of your movement will be using Zealous Leap.

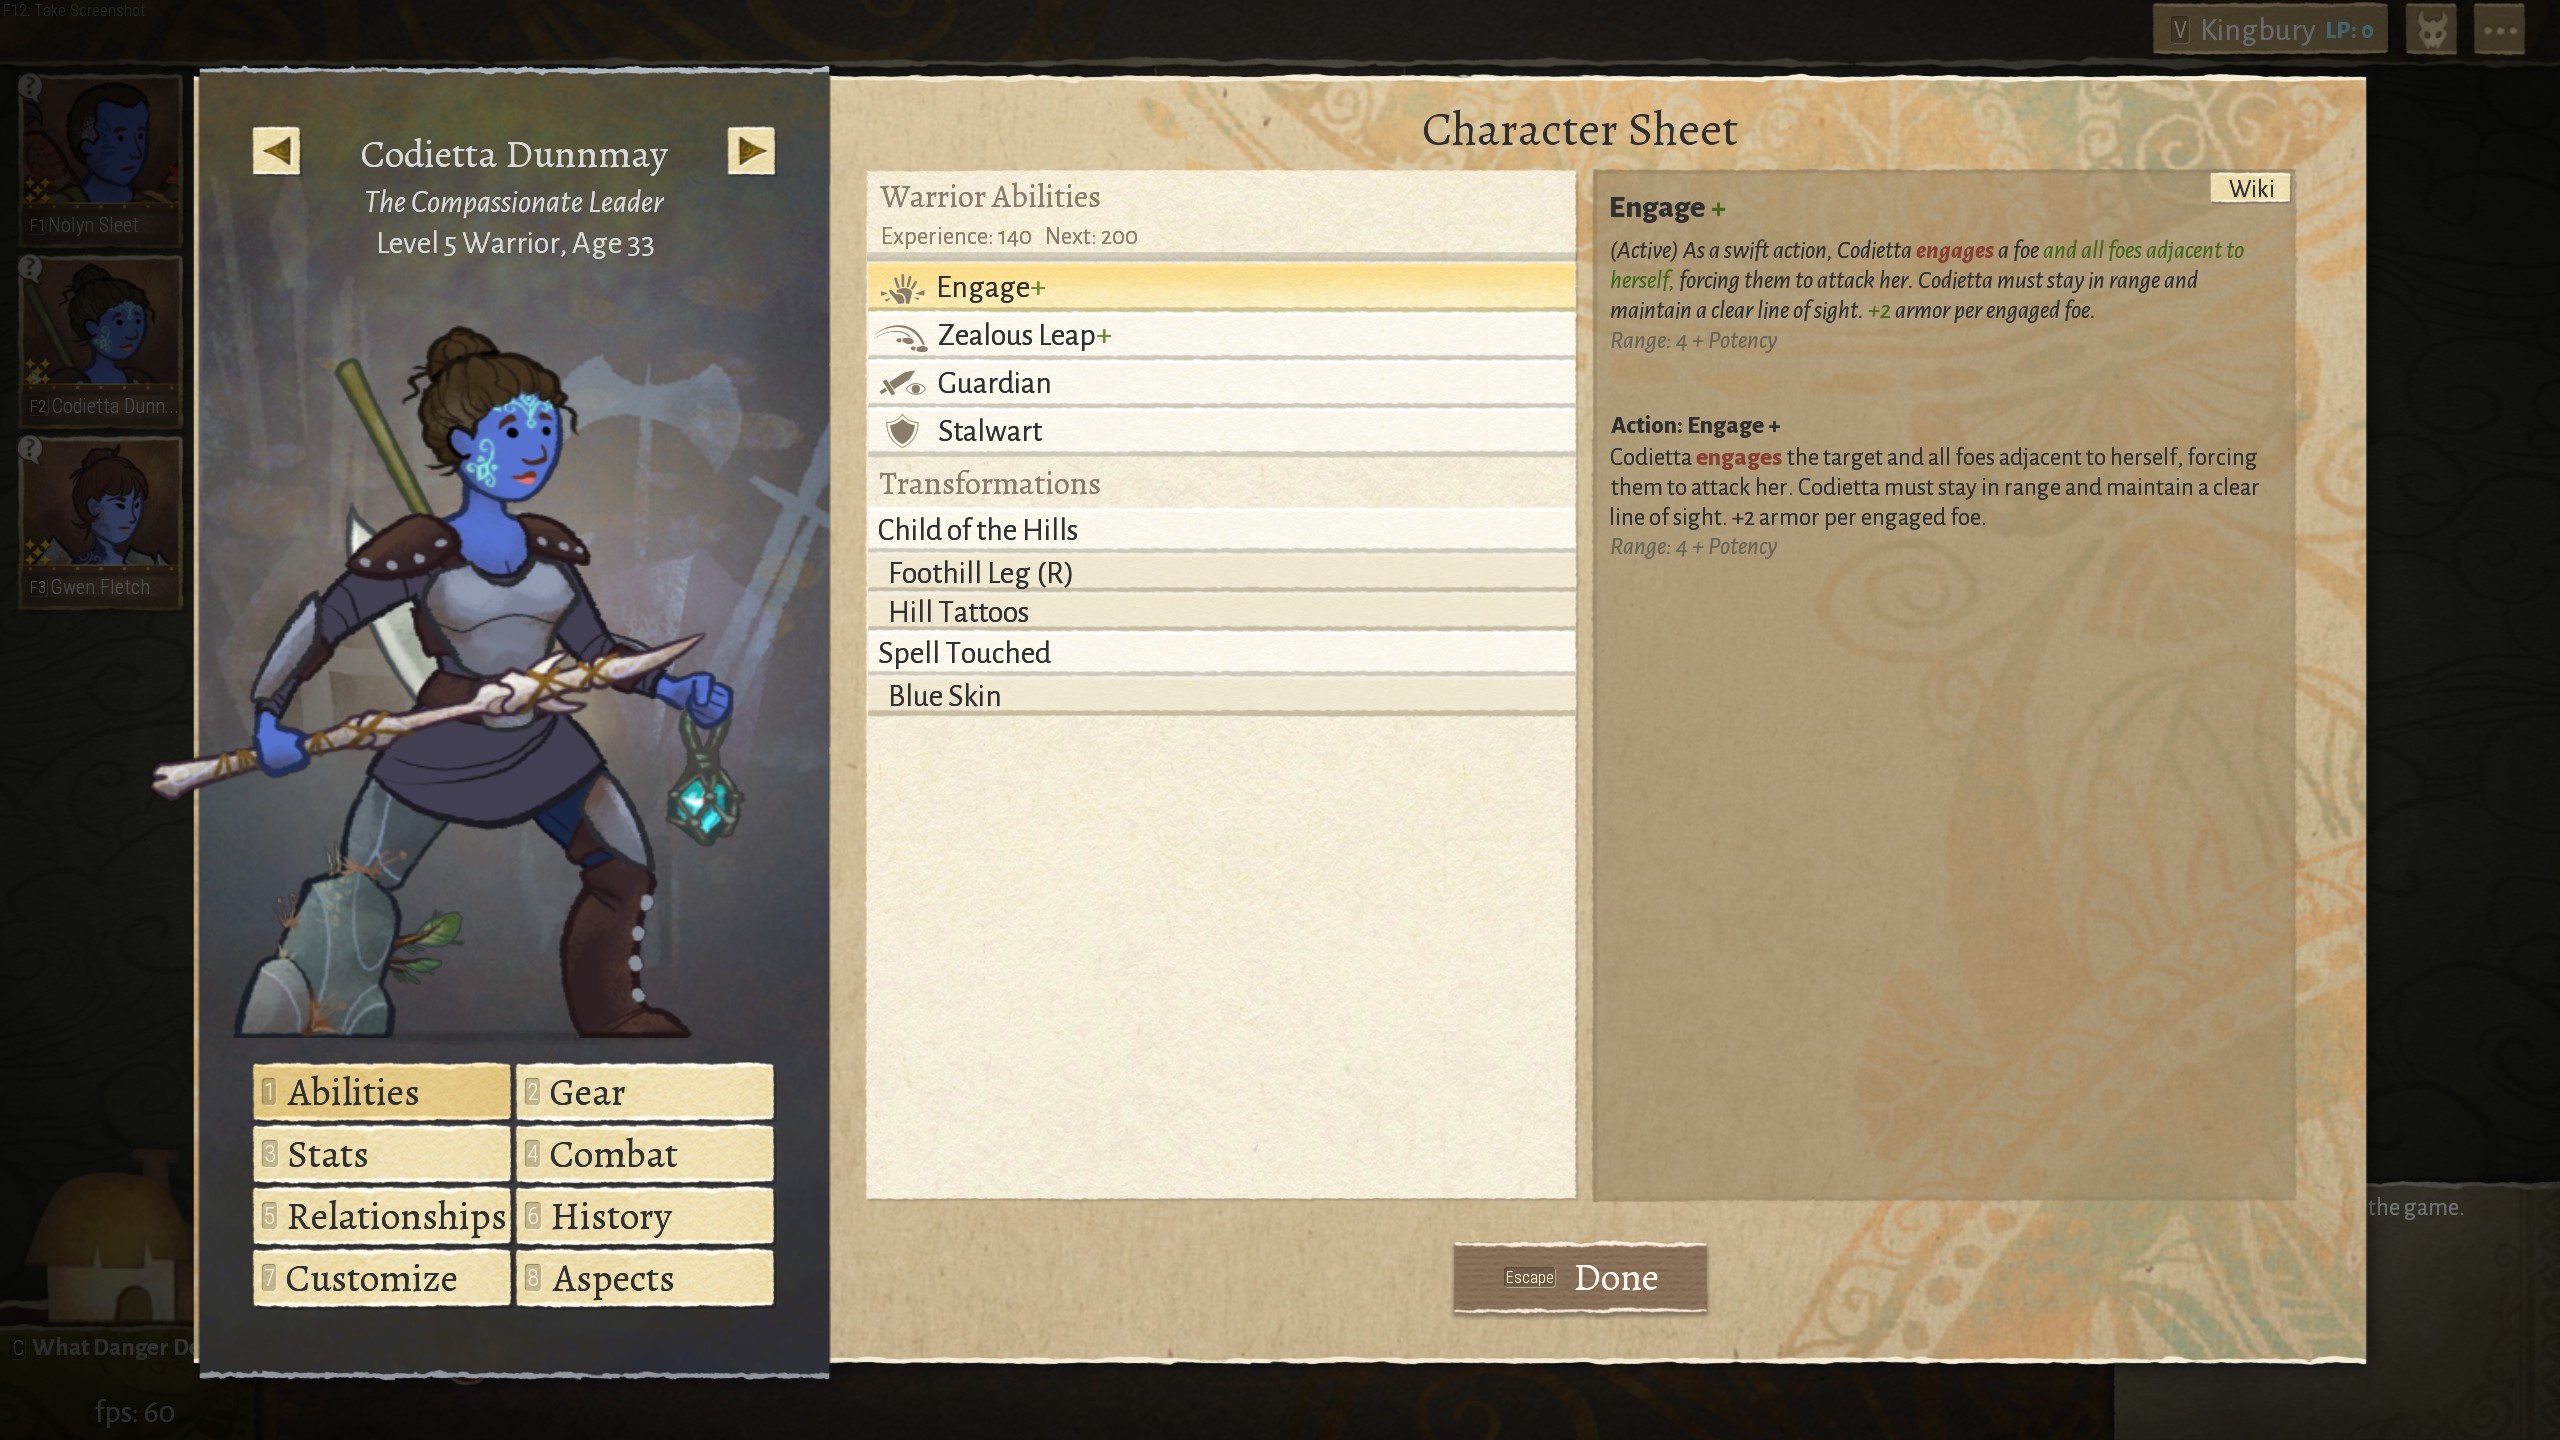
Child of the Hills
The Child of the Hills Crush attack's decent damage, knockback, and stone stunt effect make this theme a solid choice. Shard Skin is also worth considering on level up, especially if you also get Stalwart.

At +1 armor and -0.5 speed per leg, the legs offer a decent defensive boost, but the drop in speed is substantial.

Crowtouched
This will be very similar to but probably not as good as the Swift Attack Broadswipes version. The main difference is that since you will be relying on the Scorpion tail for the non-turn-ending action, you have more freedom about which head to use. The Crystalline Gem Eye and legs for stunt and block or the Celestial Star Hair for Blinding Attacks are good choices.

The crow legs can be good if you want a little extra warding, although I tend to only transform them in campaigns where I am not planning on promoting a hero (because the breakpoints happened to be favorable in that particular campaign but may not be in general).

Crystalline
The Crystal Sword has decent damage and a stone stunt effect, and the Gem Eye and legs are nice. Make sure to transform the right arm instead of the left to gain access to Crystal Sword. I have not played much with Crystal Chrysalis, but if you gain it on level up, it may allow for what would otherwise be very risky positioning or creating areas of denial to protect your allies occasionally.

I recommend transforming the legs (+5 block, -0.1 speed each), as I think the block is worth more than the reduction in speed.

Elmsoul
Bash has high single target damage and comes with built in knockback and a leaf stunt effect, so it will probably feel pretty similar to the Child of the Hills version, but maybe a bit better. Since stunt chance also helps you build temp health, it's worth considering the Brawlguard/Wilderguard instead of the Linkmail/Knightmail on this build. The mail is still probably a safer option, but the guard will be better for overland movement and defense against magic damage (because of the temp health).

The legs provide +0.6 armor and +1 knockback for bash at the cost of -0.4 speed each, so this can help both your damage and survivability if you are able to deal with the lower speed. Note that knockback only increases damage based on the number of tiles an enemy was actually knocked back, so you will not get the maximum bonus if there are walls or scenery in the way.

Flamesoul
This probably works better as the Swift Attack Broadswipes version, but this is still a good choice if you like the maneuverability of Zealous Leap+ or simply don't like the Crow Head. The longer reach and area of effect of the Scorpion Sting is also a benefit. Flamesoul is compatible with a few other heads (as long as you get the head before Flamesoul), including Child of the Hills (if you want the legs), Frogtouched, Mark of the Horn, and Stormtouched. Note that Child of the Hills and Mark of the Horn will disqualify the hero from having Crow Wings, and Frogtouched may not be helpful that often since you will typically be using all of your actions every turn already.

The Flamesoul legs (+0.8 warding, -0.2 speed) are a good choice since it is often difficult to get warding on warriors, and the speed penalty is not too significant on this build.

See the Flamesould section of the Swift Attack Broadswipes warrior for more details.

Mortificial Enhancements
Again, the swift attack version is probably better, but there is still a lot of flexibility with this version, especially with head transformations. As Wrist Bolt, from the left Mortificial arm, does not trigger Broadswipes, you will want to use the right Mortificial arm for the Hammer attack. This variation is compatible with nearly every other theme, but good choices include Celestial Star Hair, Crystalline Gem Eye and legs, and Beartouched (with or without legs). Make sure to acquire Mortificial Enhancements before any other transformation that includes limbs.

See the Mortificial Enhancements section of the Swift Attack Broadswipes warrior for more details.
Warrior: Zealous Leap Broadswipes: Theme Variations (continued)
Shadow
There are two main benefits to Harvest: magic damage and life steal. The +1 speed from the Shadow eyes is also nice. Because it is possible to regain health, it's worth considering the Brawlguard/Wilderguard instead of the Linkmail/Knightmail on this build. Due to the high speed, this build is also good for hit-and-run tactics.

I strongly recommend using both Shadow legs in order to raise the amount of health regained from direct Harvest kills to 3.

Skeletal
Skeletal is also probably better as the Swift Attack Broadswipes version. It's difficult to take advantage of Broadswipes on a Skeletal build without Long Reach+. This means that you will probably have to give up Zealous Leap+ (you'll still want Zealous Leap).

Stormtouched
Again, probably better as the Swift Attack Broadswipes version, but like Mortificial Enhancements, there is more flexibility. Jumpjolt+ offers reasonably high first target damage and the chance of a second hit for half damage. The second Jumpjolt hit can target an enemy also hit by Broadswipes, but it does not trigger another instance of Broadswipes itself. This variation is compatible with nearly every other theme, but good choices include Celestial Star Hair, Crystalline Gem Eye and legs, and Beartouched (with or without legs).

I would not usually recommend the legs, as Thunder Stomp may be difficult to use as you will typically be using Zealous Leap as your swift action, but it may occasionally be useful for setting up flanking, at the cost of some block.

Sylvan
Witherbolt is the longest range theme attack that works with Broadswipes, it ignores cover (it still requires line of sight), it has a hidden +10 accuracy bonus, and it can hit up to 3 enemies. The second and third hit enemies can also be hit by Broadswipes (but do not cause additional Broadswipes hits themselves). The damage also doubles after each hit, resulting in a chaotic but potentially very rewarding attack. Make sure you transform the right arm rather than the left arm to gain access to Witherbolt. Because of the chaining and escalating nature of Witherbolt, I highly recommend the Critter.

The legs are probably not worth transforming, as block is probably worth more than speed for this build, but they would help with overland efficiency and hit-and-run tactics.

Wolftouched
Since the head transformation is mandatory on Wolftouched, this basically is just the Swift Attack Broadswipes version, but with a Scorpion Tail and Zealous Leap. Consider starting with only one level of Zealous Leap so you can also start with Wolf Claw/Frenzy+. See the Swift Attack Broadswipes warrior for more details.

Two Human Arms
Like Crowtouched, Morticifial Enhancements, and Stormtouched, this is probably not as good as the Swift Attack version, but it has more head flexibility. This build works with either Will of the Forest or with the Bone Spear and the Spellshard. Will of the Forest has the leaf stunt effect and may plant trees on kill and the Bone Spear/Spellshard combination has 1 higher Broadswipes target damage at tier 1. This variation is compatible with nearly every other theme, but good choices include Celestial Star Hair, Crystalline Gem Eye and legs, and Beartouched (with or without legs).
Warrior: Engage Shard Skin
Are you tired of this guide recommending that you avoid even being attacked? As this is only the second (or third depending on how you count) build listed, maybe not, but you will be. In any case the Engage Shard Skin Warrior is a build where you actually want to get hit (by physical damage, anyway). The basic idea of this build is keep your allies safe by directing as many enemy physical attacks as possible towards yourself, then damage enemies with Shard Skin by letting them hit the you. Shard Skin is not strictly necessary if you have other allies that are capable of doing lots of damage, especially since Engage sets up flanking. For that reason, they pair very well with Thornfang Rogue Hunters. They also pair extremely well with Archery Protector Hunters, as they allow retaliation from all attacks against the warrior.

Defining Abilities
  • Engage+
  • Stalwart
  • Zealous Leap+
  • Shard Skin
You'll notice that this build actually has six defining abilities, which means that you'll have to leave one of them out and hope to be able to pick it up at level 6. If your team already has other heroes capable of dealing moderately high damage, then I recommend leaving out Shard Skin (to start). If the team needs both damage and survivability, then I recommend leaving out Zealous Leap+ (you'll still want the first level of Zealous Leap, though).
Additional Abilities
  • Stalwart+: Extremely useful in Thrixl campaigns, somewhat useful in Drauven campaigns, and not that useful otherwise. Against Thrixl, you may want this as one of your 5 starting abilities in favor of Zealous Leap+ and Shard Skin.
  • Shy Swipes: Not nearly as important as the defining abilities, but the upgraded Shy Swipes is nice to pick up at level 7 if you have the black cat.
  • Long Reach: Helps with both Zealous Leap and Engage range.

Upbringing
  • +3 to +6 Retirement Age: In order for a warrior to make it through a five chapter campaign when recruited in chapter 1, they will most likely need a retirement age boost, even with three hooks resolved. More than +6 is probably overkill unless you spend a lot of time in each chapter.
  • 0.4+ Potency: Having 0.4 potency from upbringing will allow a warrior to start with 5.0 potency at level 5 with the Bone Spear and no augments. A warrior with 0 potency from upbringing with reach 5.0 potency at level 6 with the Bone Spear and no augments. Intermediate or higher amounts of potency from upbringing are not that useful for this build, in my opinion. I would lean toward trying to get 0.4 potency from upbringing.
  • 1.2+ Warding: 1.2 Warding will allow you to reach whole number warding at level 7, although if you make it that far you might be likely to find an a warding augment, in which case 1.4 would be preferable.
  • 0 Dodge/Block: As your damage comes from being hit, you want to actively avoid any dodge or block.
  • 0 Tenacity: You should also avoid Tenacity so that the hero is less likely to be targeted by the event "Turtles All the Way Down", which provides a nice +15 block augment better suited to anyone else.
  • Rough order of preference for remaining stats: Charisma, Health, Accuracy, Stunt
Additionally, make sure to avoid the Mysterious, Destiny, Inhabited, and Dreamer hooks so that you can become Spell Touched.

Primary Weapon
  • Bone Spear: The +1 potency provides extra range for both Zealous Leap and Engage.
  • Child of the Hills Arm: Stonewalling provides +2 regenerating armor when you end a turn without making an attack. This armor is shredded before armor from Stalwart, meaning you will need to spend fewer turns refreshing it in order to protect your base armor.
Secondary Weapon
  • A water crossbow can be a nice backup.
  • Holding a tier 1/2/3 wand will increase your warding by 1/1/2.
Offhand
  • Spellshard: The +1 potency provides extra range for both Zealous Leap and Engage.
  • Spectral Lantern: The +2 warding provides a bit more of a cushion against magic attacks.
  • Avoid using a shield: It might make thematic sense to have a shield on a tanky character, but doing so reduces the incoming damage blocked and therefore the reflected damage from Shard Skin.
Armor
  • Linkmail/Knightmail: You want as much armor as possible and don't benefit from dodge or stunt.
  • Glimcowling/Spellcowling (DLC: AaS): This is probably only viable when using all four Child of the Hills limbs, but it is a good way to improve warding. See the "Two Child of the Hills Arms" section under Theme Variations for more details.

Wings
  • None: Although extra speed is nice, it's probably not worth the potential extra ability reroll to avoid the wing upgrade skills.
  • Hawk Wings/Drauven Wings: +1.4 Speed can be nice for overland movement, but it doesn't make a huge difference in combat since you'll be using Zealous Leap to move anyway.

Tail
  • None: Due to the importance of getting the right upgrade abilities, I don't recommend using a tail on this build.

Ground Pet
  • Black Cat: Armor shred is nice and can apply both on your own turn and on the enemies' turn. The upgrade ability is good, but far less important than the other options. Keep in mind that Shy Swipes triggers Sneer on Deevens and Redcloaks, which can make Engaging multiple enemies more difficult.
  • None: The Black Cat is not build enabling and you may prefer a smaller pool of upgrade abilities.

Shoulder Pet
  • None: The +5 accuracy from the Drauven Bird would not be unhelpful by itself, but it's not very useful either and it would increase the pool of ability upgrades.

Other Transformations
Spell Touched: The extra potency helps with Zealous Leap and Engage range, the recovery rate is nice, and you don't really need bonus damage anyway
Elmsoul: The Elmsoul hair is actually compatible with Child of the Hills, and increases recovery rate by 10. On the other hand, if you do not have Elmsoul, you could get the event "Splinter" and reject the transformation, which makes you eligible for the "Jealousy of Trees" event, a unique Mortal Choice that prevents you from dropping to 0 health and provides the Elmsoul Belt.
Stormtouched: Curiously, it may be worth taking one or two Stormtouched legs in order to reduce your block. Thunder Stomp may also be occasionally useful. The major downside is that it dilutes your upgrade ability pool with an ability that is not that useful on this build.
Mortificial Enhancements+0.3 speed and -3 dodge are both helpful in this case. This also makes you eligible for Salvage, which is not nearly as important as the 6 defining abilities, but is probably not a bad choice for level 7 if you do not need Stalwart+.

Warrior: Engage Shard Skin: Theme Variations
Two Human Arms
This is probably the more versatile option. You'll have more range on Zealous Leap and Engage, and potentially more warding. You will need at least one Child of the Hills leg for Shard Skin, and you may want both of them, although that will decrease your overland movement speed quite a bit.

Two Child of the Hills Arms
If you use the Linkmail/Knightmail, this variation is more resilient against physical attacks due to the Stonewall ability, which activates if the hero ends their turn without using an attack ability. This will help protect the armor from Stalwart as well as your base armor. It is most valuable when there are many enemies that are able to attack you but are not able to be Engaged (if all the enemies that can attack you can also be engaged, then you will almost always have enough armor). You may want no, one, or two Child of the Hills legs depending on how much you value armor vs. overland movement speed.

Alternatively, you may wish to use the Glimcowling (DLC: AaS) armor with this variation. You will almost certainly want use both Child of the Hills legs, in which case you will have one less armor than the two human arms and one Child of the Hills leg version with Linkmail, but more of the armor will automatically regenerate due to Stonewalling. You will also have the same amount of speed and potency but two more warding as compared to the version with the Bone Spear and the Spellshard.
Full Elmsoul
Another variation worth mentioning is using all limbs of the Elmsoul theme. With this variation, the hero misses out on the Shard Skin upgrade, but gains the Splinterskin ability without needing to spend a level up ability on it. You can also add the Stormtouched head for a chance for additional reflect damage. The amount of armor and potential damage output will not be as high as the Shard Skin variations, but it will have some amount of reflect damage right at level 5, and may be better against low damage, high armor enemies like Horn Children.
Warrior: Vigilance: Overview and Abilities
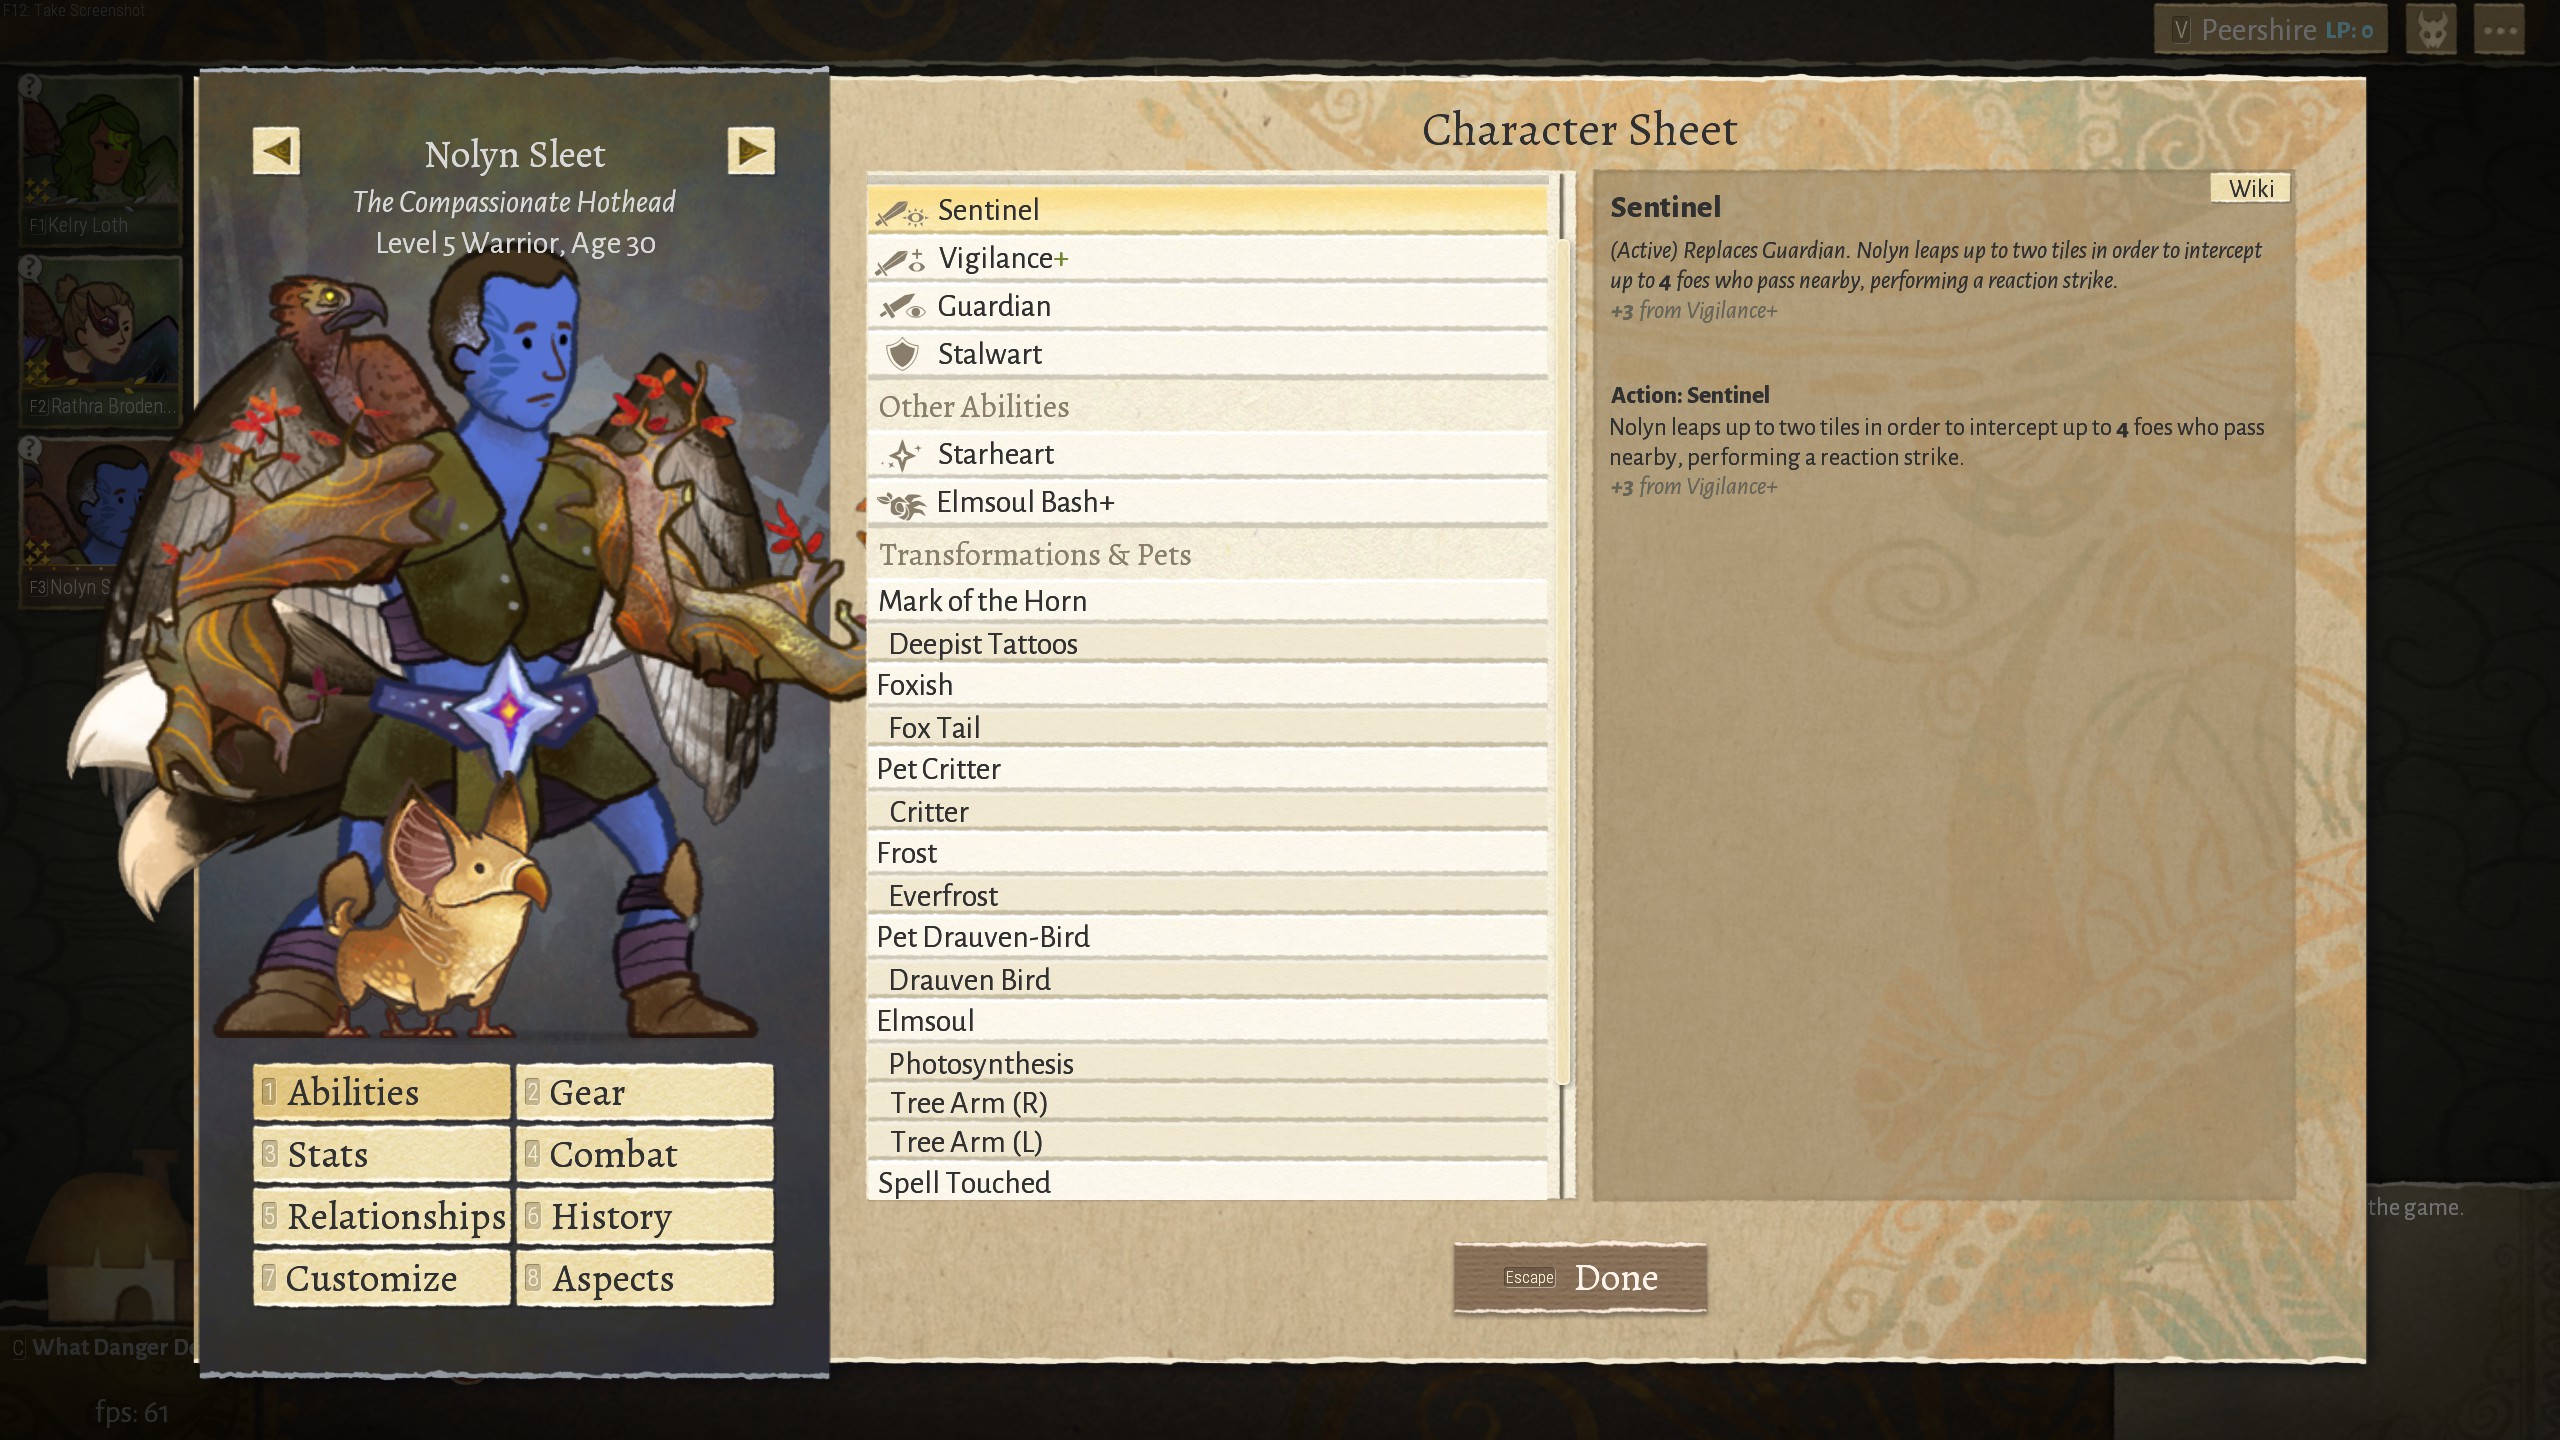
Vigilance Warriors have one thing that they can do better than any other build: intercepting enemies that appear from off-screen to prevent them from attacking squishier allies. For this reason, they are great to have around when facing enemies like Gorgon Ragers and Drauven Pilots. Successful attacks with knockback, such as from Maces, Hammers, or Elmsoul Bash, will interrupt enemy movement, often preventing them from being able to attack, although keep in mind that Ragers are able to move again and still attack if their first move action is interrupted.

In order to have a large enough area of protection, you will need some way to increase your effective range; that is, Long Reach or Sentinel. While Sentinel can often be more of a liability than an asset, if a hero has enough ways to increase their own survivability, it can be a very efficient way of increasing the area of protection of a Vigilance based hero as well as providing movement while Stalwart is active (although that movement may not always be in the direction you would like to go). Long Reach will not increase your range nearly as much as as Sentinel, so your allies will be more vulnerable to attacks with 2 tile range from the opposite side of where you are standing, but it does have the benefit of maintaining your formation, allowing you to use walling more effectively.

I also attempted to make a Broadswipes Vigilance build with the Will of the Forest greatspear, Vigilance+, Stalwart, Long Reach, and Broadswipes, which I tested on 100 Calamity Walking Lunch as I do with other builds; however, both the primary hit damage and the Broadswipes damage were pretty underwhelming, and the range is unimpressive when switching Long Reach for Broadswipes+. Survivability can also be an issue even with Stalwart and Leaf stunts due to the lack of knockback and low primary hit damage. This or a similar build may perform better at level 6 or 7, with higher tier gear, or in other situations, but I will not explore it further at this time.

Defining Abilities
  • Vigilance+: If you are using this hero more as a last line of defense and not expecting many enemies to get through, it may be sufficient to start with just Vigilance instead of Vigilance+.
  • Stalwart: It may be possible to drop this ability if you have allies with Aid or Invigoration so you can start battles with temp health.
  • Sentinel or Long Reach
Additional Abilities
  • theme attack+: Basically a defining ability if you are using a theme attack since it will greatly increase the number of enemies you are capable of one-shotting.
  • Zealous Leap: Can be useful for movement and positioning, especially with Stalwart active.
  • Untouchable: A good defensive option.
  • Stalwart+: Very helpful against Thrixl and somewhat helpful against Drauven, but not that useful otherwise.
  • Paladin: This basically amounts to extra movement speed, which is pretty helpful when you have Stalwart up.
  • Wolfcall: The more kills you are expecting to get with this hero, the more useful Wolfcall will be compared to other skills that effectively allow more movement like Zealous Leap and Paladin.
  • Riposte: Most useful if you are using an attack without knockback, especially if you also have Untouchable, but it is still useful when facing a large number of enemies.
  • Raider: Can be useful when paired with heroes with Spiritblade, Covering Fire, or Ember Arrows.
  • Bloodrage: How effective this is will depend on many factors, but you'll definitely want a way to regain health of temp health, or start with temp health.
  • Paladin+: Quite expensive in terms of number of abilities needed, but being able to attack a target of your choice on your turn and still enter Sentinel is nice.
  • Heroism: Not as impactful as on some other builds, but it usually allows you to make at least one attack before using Sentinel, and may do more.
Warrior: Vigilance: Details
Upbringing
  • +3 to +6 Retirement Age: In order for a warrior to make it through a five chapter campaign when recruited in chapter 1, the hero will most likely need a retirement age boost, even with three hooks resolved. More than +6 is probably overkill unless you spend a lot of time in each chapter. Probably not necessary with the Sylvan theme.
  • 0 or 0.4 Potency (if using a theme attack): Having 0.4 potency from upbringing will allow a warrior to start with 4.0 potency at level 5 with no bonuses from gear. A warrior with 0 potency from upbringing with reach 4.0 potency at level 6 with no bonuses from gear. Intermediate or higher amounts of potency from upbringing are not that useful for this build, in my opinion. I would lean toward trying to get 0.4 potency from upbringing. If using a weapon instead of a theme attack, potency is not needed unless Bloodrage is also used.
  • Accuracy: Hitting your targets is especially important on reaction builds since you cannot adapt strategies on the enemy turn.
  • Stunt: Useful with Leaf or other powerful stunt effects, but only possible on some non-standard recruits, like children or the Monarchs Under the Mountain rescuee.
  • 0.2 Bonus Damage: Keep an eye out for children with 0.2 bonus damage, as this allows starting at level 5 with 2.0 bonus damage without needing the Riverscale armor. Also possible with the Monarchs Under the Mountain rescuee.
  • Rough order of preference for remaining stats: Warding, Dodge/Block, Speed, Health, Charisma, Tenacity
Additionally, make sure to avoid the Mysterious, Destiny, Inhabited, and Dreamer hooks so that you can become Spell Touched, unless you are not planning on using a theme attack.

Primary Weapon
  • Two theme arms: Transforming both arms lets you use a theme attack as a reaction strike with Guardian/Sentinel
  • Hammer: Not as much damage as Elmsoul Heavy Bash, but it can be nice to have a secondary weapon and and offhand item.
  • Leaf Mace: Less damage and knockback than a Hammer, but allows you to hold an offhand item on the enemy turn.
  • Oakenbrand: 2.1 range with 2.1 (or more) knockback, which means that, with Long Reach, you can get almost as much protected area as with a 1.6 range attack and Sentinel while maintaining formation. The extra block is also nice, but it does not have an elemental stunt effect and it is only possible to acquire naturally on either of the two starting warriors in All the Bones of Summer.
  • Eaglewing: Very high knockback, but relatively low base damage and no elemental stunt effect.
Secondary Weapon
  • A water or other bow or crossbow can be a nice backup (only applicable to weapon variations)
Offhand
(only applicable to weapon variations)
  • Ice Shield: +1 warding and reduced damage from non-flanking attacks.
  • Torch: Can be useful when paired with heroes with Spiritblade, Covering Fire, or Ember Arrows.
  • Dragonpaw Shield: Depending on breakpoints, the +0.5 bonus damage of this shield may be useful, but it likely still won't be enough to one-shot many more enemies.
  • Hurlaxe or Throwing Knives: Can be useful for finishing off enemies or setting up flanking with a swift action.
Armor
  • Brawlgard/Wildergard: If using an attack with the Leaf stunt effect, this can be a great way to build a lot of temp health, but you will be more vulnerable the first few turns as compared to other options.
  • Mornclate/Gravenclate (DLC: AaS): The Mornclate has the same armor (and speed penalty) as the Linkmail while guarding, but 1.5 more warding and no dodge penalty.
  • Riverscale/Oceanscale (DLC: AaS): When using a knockback attack, higher accuracy means a lower chance that enemies will be able to hit you. The +0.2 bonus damage will also typically effectively result in +1 damage at level 5.
  • Linkmail/Knightmail: More first turn durability than the gard armors, but the speed penalty is noticeable.
  • Rainscoth/Battlescoth (DLC: AaS): Useful if you use Riposte.
  • Glimcowling/Spellcowling (DLC: AaS): The glass cannon option for theme attack variations. Probably best to use with allies with Aid or Invigoration.

Wings
  • Crow Wings: +1 Speed and +10 dodge is very helpful for positioning and survivability. As Crowtouched is incompatible with some themes, this option is not possible on those variations. Fly is probably not as good as Zealous Leap due to the lower range, but it can still be useful.
  • Hawk Wings: +1.4 Speed. Probably the best choice for theme variations incompatible with Crowtouched. Talon Dive is probably not as good as Zealous Leap due to the lower range, but it can still be useful.
  • Drauven Wings: Base stats identical to Hawk Wings. I wouldn't recommend any of the wing upgrade abilities over Zealous Leap, but Airlift is especially hard to use due to the requirement of bringing along an ally.

Tail
  • Fox Tail: The Fox Tail provides reliable passive bonuses, helping you with positioning and overland movement with the extra speed and survivability with the dodge and increased stunt chance.

Ground Pet
  • Critter: The +12 accuracy from the critter is extremely useful for making sure your attacks actually connect. This is especially useful with knockback attacks or attacks that can kill the enemy, as that often means they cannot attack you. Do not underestimate the value of going from 95% to 100% chance to hit. With Sentinel, you have little control over whether you are making attacks adjacent to cover (although probably not as big of a deal as with Broadswipes).
  • Golden Rabbit: The +1 bonus damage of the golden rabbit can increase your chance of one-shotting an enemy, but you have to be able to hit it. Consider pairing with the Riverscale/Oceanscale armor.
  • Duck: The duck is a viable choice if you use Riposte and can avoid being flanked. Consider pairing with the Rainscoth/Battlescoth.

Shoulder Pet
  • Drauven Bird: A modest +5 accuracy, but it helps.

Other Transformations
Spell Touched: Spell Touched is beneficial on the theme attack variations of this build, but you will not want it on the weapon variations.

Additional transformations are discussed below.
Warrior: Vigilance: Theme Variations
My top pick is probably Elmsoul.

Two Child of the Hills Arms
Typically lower damage than Elmsoul Heavy Bash and stone stunt instead of leaf stunt, but entering Guardian or Sentinel does allow Stonewalling, which adds 2 armor until the start of your next turn. Foothill Crush also has a 2 tile knockback by default, but cannot be increased.

The armor from the the legs is useful, but it comes at a fairly steep speed cost (+1 armor, -0.5 speed).

Two Elmsoul Arms
Heavy Bash provides very high base damage, and the leaf stunt effect is great for increasing survivability in long battles, especially when used with the Brawlgard/Wildergard.

Each leg adds one additional tile of knockback (and therefore damage) as well as 0.6 armor, but they also cost 0.4 movement speed per leg. A good balance may be to transform one leg, resulting in 2.6 knockback, which is enough to prevent enemies with 2.1 range from being able to attack a hero if they were intercepted directly adjacent to a hero.

Two Mortificial Arms
The Hammer attack from the right arm has decent base damage and 1.6 tile knockback, and the Wrist Bolt attack from the left arm can used before entering Guardian/Sentinel on turns where you do not need to use action points on regular movement.

You should also consider using the theme upgrade Salvage to boost your survivability.

The legs (+0.3 speed and -3 dodge) may or may not be worth it to you.

Two Shadow Arms
Due to the lack of knockback and lower damage as compared to Child of the Hills or Elmsoul, this variation is not as capable at protecting allies, but it is magic damage, and it also has the rare-for-Wildermyth healing mechanic. Riposte and Untouchable are good additions as you will be more likely to be attacked since you do not have knockback. Bloodrage may also be a good way to increase the change of getting a kill and recovering health when you really need it, but you will still be vulnerable to ranged attacks.

You will most likely want both Shadow legs as well as the arms in order to heal 4 health per kill.

One or Two Stormtouched Arms
This is an interesting option that may be difficult to make work in practice. The stun-on-stunt effect of Jumpjolt and Chain Lightning can sometimes prevent enemies from attacking, but it is not as reliable as simply knocking enemies back, and the stun condition only lasts until the end of that enemy turn (and, at the time of this writing, some enemies can also still attack even if stunned by a Guardian/Sentinel strike, but that is probably a bug).

Crystalline is a good secondary theme to pair with this variation for the +6 stunt chance of the Gem Eye and +5 block(/-0.1 speed) from the legs. If you want to use the left Gem Arm for the +6 stunt chance and shield functionality, you will have to start Stormtouched on the left leg, then transform the right one for Jumpjolt later. If you use the two Stormtouched arm variation, you can use two Crystalline legs.

Two Sylvan Arms
Like Stormtouched, this is an interesting choice that might be challenging in practice. The theoretical damage potential is very high, but the actual amount of damage will greatly depend on enemy positioning, and you will have to rely on armor (Mornclate/Gravenclate, most likely) and Stalwart to prevent damage.

Transforming the left Sylvan arm in addition to the right does provide Invigoration, which helps your allies' survivability.

Speed from the legs (+0.5 speed, -5 block) is nice, but may not be worth the loss of block.

One or Two Human Arms
As discussed previously you will most likely want a Leaf Hammer or Mace with this variation (although there are other choices). A two-handed hammer will typically be more powerful, but a one-handed Mace allows the use of holding offhand items during the enemy turn or transforming one arm.

Other Themes
  • Crystalline: The Gem Eye gives +6 stunt chance and the legs give +5 block and -0.1 speed each. If using a mace, you may also want to transform the left arm for shield functionality and another +6 stunt.
  • Celestial: The Star Hair provides a 25% chance to blind targets on hit, which can be very useful. You will most likely not want any of the other pieces, although transforming one arm for Shooting Star may be worth considering.
  • Sylvan: Spirit-Marked typically removes the need get extra retirement age from Upbgringing, and the left arm is useful for Invigoration.
  • Botanical: Entangle (from the right Vine Arm) can be used to move allies or enemies, and the +10 recovery rate from the Leafmark is nice.
  • Beartouched: The Bear Tattoos give +1 health, which is nice. You may also want one or more legs for +1 health/-0.3 speed each.
  • Shadow: +1 Speed from the Shadow eyes is useful for both positioning and overland efficiency. In order to get the eyes, you also need to transform a random limb, so you probably want to save before accepting the transformation to make sure you transform a leg instead of an arm.
Hunter: Ember Arrows Through Shot: Overview and Abilities
The Ember Arrows Through Shot hunter excels at long range combat; they are able to deal moderately high damage to anything between them and whatever is 8+ tiles away. You'll want a reliable way to stand next to a blaze, so holding an offhand torch or using the Fire Chicken is recommended, although you may be fine omitting those if you pair with another hero that regularly starts fires. Ember Arrows hunters synergize extremely well with Spiritblade Mystics, as the long range makes it more likely that enemies will be within reach.

Defining Abilities
  • Ember Arrows
  • Throughshot+ (In Omenroad challenges, it may be a good idea to start with only one level of Though Shot to make room for Crippling Strikes, but you'll still want to add Through Shot+ later)
  • Sharpshooter
  • Piercing Shots or Rogue: I prefer Piercing Shots since it is more reliable and using the torch or Fire Chicken breaks grayplane anyway, but I've heard some people say they prefer Rogue for this build.
Additional Abilities
(very roughly in order of recommendation)
  • Heroism: Single turn nova damage at a key moment can sometimes make all the difference in a battle.
  • Rogue: Even if you don't rely on Rogue for ignoring armor, it's still a nice defensive bonus.
  • Ember Arrows+: Helpful to make use of existing fires or get your positioning just right.
  • Archery: You should generally try to avoid standing where you might be attacked, but this can add a substantial amount of enemy turn damage if you are able to position yourself behind a tankier ally.
  • Crippling Strikes: A good crowd control option against melee enemies. This is extremely valuable in Omenroad runs, and may even be worth starting with just the first level of Through Shot to make room for it.
  • Long Reach or Sharpshooter+: Even more range can be very helpful, but keep in mind that with a tier 3 bow, your attack range could be longer than your sight range (10) if you invest in these skills, so you'd have to rely on closer allies to spot very far targets.
  • Ambush: Will occasionally let you get in an extra attack.
  • Foxflight: Both the passive and active abilities are fairly useful.
  • Nimble Nature: Decent bonuses, but nothing build-enabling. Probably more valuable if you use a water bow instead of the Bone Bow.
  • Quellingmoss: The passive is a pretty minor boost, but the active can add a fair amount of damage on turns where you don't need to move.
  • Wisdom: Can be very helpful for overland efficiency for scouting or if you get a map that requires many bridges or passes. Extremely helpful in Monarchs Under the Mountain.
Hunter: Ember Arrows Through Shot: Details
Upbringing
  • 0, 0.4, or 0.6 Potency: With a tier 1 Bone Bow and no augments, 0 provides 4.0 potency at level 6, 0.4 provides 5.0 potency at level 7 and 0.6 provides 4.0 potency at level 5
  • Accuracy: Accuracy is very helpful as it is usually difficult to set up flanking with this build. Try to get at least 5 accuracy, but more may be better.
  • Speed: Speed is helpful for positioning and overland efficiency.
  • Dodge and/or Block: Not getting hit is nice.
  • Rough order of preference for remaining stats: Stunt, Charisma, Health, Recovery Rate, Tenacity, Bonus Damage (Bonus Damage is helpful for this build but getting it from Upbringing won't usually help you due to flooring)

Primary Weapon
  • Bone Bow: The +1/2/3 potency helps with both Ember Arrows damage and armor piercing with Piercing Shots. It's even better if upgraded into the Empowered Bone Bow, but you cannot reliably trigger the event and the upgrade does not persist through legacy. Still, upgrading the bow is usually a bigger improvement than upgrading a spear, so if you are scouting with party members that have a Bone Spear, make sure they are holding it in the secondary weapon slot.
  • Elemental Bow: Lower direct damage per shot than the Bone Bow, but stunt effects can be very good. Water is often the best choice for the chance of multiple shots per turn, but if you have Spiritblade mystics in the party, another element will likely be preferable since a hero can only benefit from the additional action point from water stunts once per turn.
  • Vigilkeeper: Lower damage per shot than the Bone Bow, but the extra range will help you hit more enemies or attack from a safer distance, especially early game when attack range is still lower than sight range.
Secondary Weapon
  • Any Crossbow: If are using the Bone Bow as your primary weapon and have a turn where you don't need the extra damage or range, a water crossbow would allow you to attack two different sets of enemies if you stunt. Other elements or Frostfang also have benefits.
  • Any Dagger: Can be nice for single target damage, but probably only from grayplane.
Offhand
  • Torch: A torch will let you start a fire every turn, but it is only usable on a debris tile. Very highly recommended.
Armor
(mostly personal preference)
  • Rotshawn/Elkenshawn (DLC: AaS): The highest damage option due to the extra potency, but you won't want to get hit.
  • Graybark/Thornbark: Good armor and warding. Often relatively cheap to upgrade.
  • Tabbyflack/Towerclate (DLC: AaS): If you can work around the huge loss of speed, the high armor and bonus accuracy are great.
  • Traveltraff/Ghosttraff: Dodge is always helpful, especially if you pick up Archery at some point.
  • Roadswayth/Layswayth (DLC: AaS): May often allow you to get an extra attack by first using a water crossbow (or water bow) if you have a few stacks of Swashbuckler. (If paired with Spiritblade mystics, a non-water stunt effect would be preferable)
  • Softhasping/Dreadhasping (DLC: AaS): Extra speed is nice.

Wings
  • Crow Wings: +1 speed, +10 dodge are both helpful.
  • Hawk Wings: +1.4 Speed. The extra speed may not be worth giving up the +10 dodge of the Crow Wings, but it can be helpful with positioning.
  • Drauven Wings: Identical stats to the Hawk Wings, but Airlift is more difficult to use than the other wing upgrade abilities (although none of them are all that useful on this build).

Tail
  • Fox Tail: Speed, dodge, and stunt chance are all helpful.

Ground Pet
  • Critter: The +12 accuracy from the critter is extremely useful for making sure your attacks actually connect, especially since it may be difficult to set up flanking at long range. Do not underestimate the value of going from 95% to 100% chance to hit.
  • Fire Chicken: Mostly useful for the ability to start fires on debris free tiles, which you may want to do if you are unlucky with debris placement on a map. The upgrade ability Covering Fire is also worth consideration.
  • Duck: You generally want to avoid even being attacked, but extra block and dodge can save you at those rare times when you are.
  • Golden Rabbit: +1 damage is always helpful, although the critter may have a higher expected value of damage as well as be safer if there is cover.

Shoulder Pet
  • Drauven Bird: A modest +5 accuracy, but it helps.

Other Transformations
  • Celestial: The main benefit here is the Star Hair, which gives attacks a 25% chance to blind enemies, meaning you can basically ignore them for one turn if they only do one attack. You may want to use the legs as well for the speed bonus and Celestial Path, although it may be difficult for the celestial tiles to be that useful unless the party has other long range heroes.
  • Crystalline: The +6 Stunt of the Gem Eye is nice. You may also want one or both legs for +5 block and -0.1 speed each.
  • Shadow: +1 Speed from the Shadow eyes is useful for both positioning and overland efficiency. In order to get the eyes, you also need to transform a random limb, so you probably want to save before accepting the transformation to make sure you transform a leg instead of an arm.
  • Beartouched: Not my top choice, but the +1 health of the Bear Tattoos could spare you from needing to make a mortal choice. I recommend avoiding the legs, as your movement speed will become very slow, especially as you age.
Hunter: Thornfang Rogue: Overview
If nothing else, using this build should teach you what it really means for an event to have a 95% (or 99%) chance of happening. Thornfang(+) only applies when an enemy is killed (with a theme or weapon melee attack), so making sure that the hero's attacks hit is of paramount importance lest they end their turn visible and near enemies. The Thornfang Rogue can fill a couple different roles, like providing extremely reliable high damage with the Skeleton theme or highly mobile cleanup with the Wolftouched theme. If using a dagger (or Thorn of the Fens) build or a theme other than Skeletal, your damage may be somewhat low at first, but these builds can reach respectable damage levels once level ups, upgrades, and augments come into play.

Even with bonuses to accuracy, you will typically want to be flanking with this build as much as possible, so it's good to have allies that are capable of setting up flanking on lots on enemies, such as Broadswipes warriors or Engage warriors. It is also possible for the hero to set up flanking themself, such as with Thunder Stomp from the Stormtouched legs or Shy Swipes from the Black Cat.

I think the Skeletal variation has the most unique utility; that is, being able to deal high damage to a few high value targets each turn, often including the first turn.
Hunter: Thornfang Rogue: Details
Defining Abilities
  • Thornfang+
  • Rogue: If you use a theme attack, you could technically replace this with Piercing Shots, which may give you better turn 1 damage, but you would miss out on nearly always being hidden.
  • Long Reach: Extremely helpful for allowing you to be in melee range of multiple enemies.
Additional Abilities
(very roughly in order of recommendation)
  • theme attack+: You really want to be able to kill enemies in one hit with this build, and the theme upgrade abilities make a big difference. Basically a defining ability for melee theme attack variations.
  • Fly or Talon Dive: A swift action to reposition between attacks can be very helpful, and Talon Dive can even set up flanking (just for your allies unless you move afterwards) without breaking grayplane. The +25 dodge bonus from using Fly is also valuable.
  • Heroism: In addition to increasing the damage potential, Heroism can also improve flexibility in terms of moving mid-turn and taking multiple hits to kill a target.
  • Long Reach+: Adds more flexibility with positioning
  • Viciousness(+): If you are using a weapon version of this build, you may want to start with this ability to increase the number of enemies you are capable of one-shotting. Also good for Wolftouched heroes to pick up at level 6 or 7.
  • Piercing Shots or Rogue: Whichever one you didn't start with is still going to be useful.
  • Nimble Nature: +1 speed is great for positioning, and the dodge is always nice to have. Stunt is most helpful when trying to get water stunts.
  • Foxflight: +1 speed is great for positioning, or you can trade it for two guaranteed dodges if you get into a dangerous situation.
  • Wisdom: Can be very helpful for overland efficiency for scouting or if you get a map that requires many bridges or passes. Extremely helpful in Monarchs Under the Mountain.
  • Windwalk: If you need to move far away in the middle of a turn, Windwalk will help you get there with a swift action (once per battle, or twice with the upgrade).

Upbringing
  • 0, 0.4, or 0.6 Potency: With a tier 1 Bone Spear and no augments, 0 provides 4.0 potency at level 6, 0.4 provides 5.0 potency at level 7 and 0.6 provides 4.0 potency at level 5. Due to the difficulty of getting both speed and potency on standard recruits, it's probably best just to use 0 potency.
  • Speed: Positioning is extremely important, and the overland efficiency bonus is also nice.
  • Accuracy: You really want your attacks to hit. Try to get 5 or more, although 4 is probably acceptable. You don't have to care about accuracy if you only use flanking attacks, but that is not always possible.
  • Dodge and/or Block: Even if you intend to stay in grayplane the whole battle, you will occasionally get discovered, and you don't want to get hit when you do.
  • Rough order of preference for remaining stats: Warding, Charisma, Health, Recovery Rate, Stunt, Tenacity, Bonus Damage (Bonus Damage is helpful for this build but getting it from Upbringing won't usually help you due to flooring)

Primary Weapon
  • Bone Spear: The +1 potency will increase the damage of theme attacks by 1 (assuming you have the theme attack upgrade) and also boost a few other abilities, like Thunder Stomp range.
  • Water Dagger: Without flanking, the damage is insufficient against all but the lowest health (or nearly dead) enemies. With flanking, the damage is at the high end of theme attack damage (excluding Skeletal dagger), which is enough for most low mid health enemies assuming you attack from grayplane. If you stunt, you may be able to move to a new position and attack again.
  • Thorn of the Fens: This is effectively a dagger with +1 range. It will give you huge reach, or allow you to drop Long Reach.
Secondary Weapon
  • Water Crossbow: If you run out of targets in melee range, you may be able to pick off another weak enemy farther away with a crossbow. Water is probably best, but all the other elements also have merits here. If you have two human arms, a (non-cross) bow would be better for the longer range.
  • Wraithword Knife: If you have already gotten a water stunt or want to save the possibility to get one later, the Wraithword knife has a slight bonus in range (1.6 vs 1.1 tiles), which can be nice. It can also be used to attack at huge range (20 tile base range), ignoring all cover and line of sight (but still requiring the target to be visible) once per battle. However, this is a ranged attack and therefore does not trigger Thornfang.
Offhand
  • Typically theme arm
  • Throwing Knives: A swift action three times per battle with double flanking damage. Good for setting up flanking or finishing off enemies out of reach.
  • Hurlaxe: 1 shred and more damage than the Throwing Knives when not flanking, but only twice per battle.
Armor
(fair amount of room for personal preference)
  • Rotshawn/Elkenshawn (DLC: AaS): If using a theme attack variation, the extra potency is very helpful to ensure you have enough damage to kill enemies, especially since you will be hidden most of the time, but you won't want to get hit.
  • Softhasping/Dreadhasping (DLC: AaS): The extra speed is great for positioning.
  • Traveltraff/Ghosttraff: No speed penalty, and the dodge is nice.
  • Roadswayth/Layswayth (DLC: AaS): An interesting option, but you still won't usually be able to rely on a stunt to kill an enemy, so I think it would be mostly useful when using water (and possibly fire) stunts.
  • Graybark/Thornbark: More armor and warding and often fairly cheap to upgrade, but you'll need to work around the speed reduction.
  • Tabbyflack/Towerclate (DLC: AaS): If you can somehow deal with the huge loss in speed, the accuracy is very helpful.
Hunter: Thornfang Rogue: Details (continued)
Wings
  • Crow Wings: +1 speed, +10 dodge are both helpful.
  • Hawk Wings: +1.4 Speed. Mainly personal preference for whether or not the extra speed is worth giving up the +10 dodge of the Crow Wings, but it can be helpful with positioning. The upgrade ability Talon Dive is also good, both for repositioning in between attacks and setting up flanking without breaking grayplane.
  • Moth Wings: I would consider this a weaker option, but it does allow you to make your first attack from grayplane, and it can also help other party members.

Tail
  • Scorpion Tail: The Scorpion Tail Sting is an Area of Effect, non-turn-ending action, so it can be used to take out a low health enemy and set up flanking on a stronger enemy. If you kill two weak enemies in one hit after moving, you may be able to move and attack again. It is a great option against Deepists (with Horn Children) and Thrixl (with Thrusks and Chrysalises).
  • Fox Tail: Speed and dodge are both helpful. Stunt chance is not that important for most variations since you rarely want to gamble on needing to stunt to kill an enemy, but it doesn't hurt, and it can be quite helpful if you use a water stunt (from a weapon or Wolf Claw).

Ground Pet
  • Critter: The +12 accuracy from the critter is extremely useful for making sure your attacks actually connect. Missing an attack is extremely dangerous on Thornfang hunters, as it typically end your turn immediately, out of grayplane, and near enemies.
  • Golden Rabbit: If you use a dagger (or the Skeletal theme) the +1 bonus damage is effectively +2 damage on flanking attacks. Still, you are not likely to be able to guarantee every attack is flanking.
  • Black Cat: Depending on how enemies are positioned, you can often set up flanking on one enemy per turn with Shy Swipes just by walking by and around an enemy (this does not break grayplane). The shred can also help your first turn damage. Keep in mind that Shy Swipes triggers Sneer on Deevens and Redcloaks.
  • Fire Chicken: Provides fire tile immunity. If you use teams that use lots of fire, this will help you get around without breaking grayplane. You are also much less likely to be discovered if you end your turn standing in a blaze, as enemies avoid walking through them when possible.
  • Shadow Cat: Probably a weaker option, but it can be useful for setting up flanking and shredding warding if you use a magic damage theme (i.e. Shadow or Flamesoul), but only once every other turn. The upgrade ability (Spiritchase) would improve utility, but a level up ability is a fairly steep cost.

Shoulder Pet
  • Drauven Bird: A modest +5 accuracy, but every bit helps. The upgrade ability may be worth considering picking up at level 6 and 7.
Hunter: Thornfang Rogue: Theme Variations
Supplemental Themes
Additional themes that you may want along with your main theme.
Stormtouched
Left Arm: Transforming the left Stormtouched arm provides Jumpjolt. This may be situationally better than keeping a crossbow as a secondary weapon, but I think the primary use would be when you want to keep a ranged option available when using the Skeletal theme, as that automatically transforms the remaining human limbs shortly after it is acquired.

Legs: The Stormtouched legs provide the swift action Thunder Stomp at the cost of losing 5 block per leg. This has a chance to stun enemies, but the real benefit is being able to set up flanking (potentially on multiple enemies) with a swift action without relying on other heroes. If you use one of these legs, it's likely worth using both of them, as the +1 range from the second leg can greatly increase the probability that at least one enemy will be in range. Because Thunder Stomp breaks grayplane, this may only be a frequently viable strategy with the Skeletal theme.

Mortificial Enhancements
If you want to use any Mortificial limbs, you must acquire the Mortificial theme before any other themes that offer limbs.
Left Arm: Like the left Stormtouched arm, the left Mortificial arm also provides an opportunity for Skeletal heroes to keep a ranged attack option with Wrist Bolt. Since Wrist Bolt is a non-turn-ending action it has some new uses as compared to Jumpjolt, although the damage potential is lower.

Legs: +0.3 speed and -3 dodge is a decent trade unless you have a better option available.

Main Theme Variations
I think the strongest option is Skeletal by a fair amount, but other themes should also be viable, with Wolftouched, Beartouched, and two human arms probably offering the most interesting alternative styles.
The default damages listed assume level 5 with less than 0.6 potency and less than 1.0 bonus damage from Upbringing, no potency for armor, and no bonus damage or potency augments. The damage minimums are far more important than the damage maximums, as you want to guarantee kills as much as possible. If you are starting with the Rotshawn DLC armor, add 1 damage or 2 damage while in Grayplane to the damage values below, except for half potency scaling abilities like Crowtouched Peck and Wolftouched Bite.

Beartouched
Bear Swipes+ damage without Bone Spear: 9 to 11 (same with one or two arms)
Bear Swipes+ damage with Bone Spear: 10 to 12
Bear Hug damage with two Bear arms: 7 to 9 (does not require or benefit from upgrade)

The main appeal of Beartouched is being able to hit two enemies at once with Bear Swipes. They must be directly adjacent to each other, so it won't happen every time, but if it does, it can give you the option to move somewhere else mid-turn or, if one or more low health enemies are next to a high health enemy, give you multiple hits to take down the high health enemy. The +1 health from the Bear Tattoos also helps.

Since Bear Hug deals less damage than Swipes+, it is only situationally useful to stun a target that you would not be able to kill anyway and only if you can afford to end the turn out of grayplane. Therefore, I would not typically recommend transforming both arms.

Since speed is so important for this build, I do not recommend the legs.

Make sure to avoid the Inhabited hook, as that blocks the Beartouched theme.

Child of the Hills
Foothill Crush+ damage without Bone Spear: 9 to 11 + knockback (same with one or two arms)
Foothill Crush+ damage with Bone Spear: 10 to 12 + knockback
where knockback can be up to 2.

This build will likely be very similar to Elmsoul. When holding the Bone Spear, it will match the damage of Heavy Bash+ when attacking in a cardinal direction if there is room for the enemy to be knocked back 2 tiles, but will otherwise fall slightly short. There is almost no reason to transform both arms, as it does not increase damage and Stonewalling would only occur on turns when you make no attacks.

Since speed is so important for this build, I do not recommend the legs.

Crowtouched
Crow Scratch+ damage without Bone Spear: 8 to 10
Crow Scratch+ damage with Bone Spear: 9 to 11
Scratch and Claw+ damage (two arms): 10 to 12
Crow Peck damage with or without Bone Spear: 4 to 6 (does not benefit from theme upgrade)

If you also transform the head in addition to at least one arm, this provides a nice swift action attack to take out a weaker enemy and be able to move again. Depending on enemy armor, you may also be able to take out an enemy with Peck and Scratch that you would not be able to kill with Scratch alone. However, the blinding on stunt and shred effects are nearly useless with Thornfang since it relies on actually killing enemies. Therefore, Wolftouched is probably better for this style.

Transforming both arms will give a bigger damage boost than holding the Bone Spear, but you lose the possibility of ranged attacks. Still, that's probably a trade worth making.

The legs may be worth transforming, but it depends greatly on specific breakpoints, which will vary within and between campaigns.

Crystalline
Crystal Sword+ damage without Bone Spear: 9 to 12 (same with one or two arms)
Crystal Sword+ damage with Bone Spear: 10 to 13

Probably one of the weaker options. Crystal Sword does decent damage, but the Stone stunt effect, the increased stunt chance from the Gem Eye, and the block from the legs don't really make up for the lack of other interesting effects.

I recommend transforming the legs (+5 block, -0.1 speed each) unless you plan on using a different transformation on them.

Elmsoul
Bash+ damage without Bone Spear: 9 to 12 + knockback (same with one or two arms)
Bash+ damage with Bone Spear: 10 to 13 + knockback
Heavy Bash+ damage (two arms): 11 to 14 + knockback
where knockback can be up to 1 + the number of Elmsoul legs.

Heavy Bash+ has the highest single target damage and comes with built in knockback and a leaf stunt effect. It's probably worth transforming both arms to have the best chance of being able to one-shot enemies.

The legs are an interesting option. Each Elmsoul leg increases knockback (and therefore damage) by 1 (assuming there is room to be knocked back) which makes kills more reliable, but the speed reduction (+0.6 armor and -0.4 speed each) is quite substantial.

Make sure to avoid the Inhabited hook, as that blocks the Elmsoul theme.

Flamesoul
Flame Strike+ damage: 8 to 11

The damage is on the low side, and since you will typically be attacking from grayplane, dealing magic damage is not that helpful. There is also no way to use the Bone Spear, as you need to transform both arms to get Flame Strike. On the other hand (heh), Cone of Fire can be a good way to finish off weak enemies and damage others at the end of your turn.

The legs (+0.8 warding, -0.2 speed each) are probably not worth it on this build, but the speed cost isn't too bad.

Mortificial Enhancements
Hammer+ damage without Bone Spear: 9 to 12 + knockback (same with one or two arms)
Hammer+ damage with Bone Spear: 10 to 13 + knockback
where knockback can be up to 1.

This will play fairly similarly to but have slightly less damage than Child of the Hills or Elmsoul, but the theme upgrade Mortificial Enhancements+ applies to both the Hammer and the Wrist Bolt attack if you choose to transform the left arm as well.

The legs (+0.3 speed and -3 dodge each) are a decent trade.
Hunter: Thornfang Rogue: Theme Variations (continued)
Shadow
Harvest+ damage without Bone Spear: 7 to 9
Harvest+ damage with Bone Spear: 8 to 10
Dread Harvest+ damage (two arms): 9 to 11

This is a fairly low damage option, and the normal benefits of magic damage and warding drain are not as impactful as they usually are, so you will have to rely on the other benefits of the Shadow theme: the heal-on-kill ability and bonus speed. In order to have the maximum chance of being able to one-shot something and to increase the amount of healing, it's probably best to transform both arms and both legs (4 health recovered on kill). This allows you to position the hero more aggressively or be more willing to end the turn outside of grayplane, but you do still need to be careful; it's extremely easy to go from full health to no health in one enemy turn.

Shadestride is a good ability to pick up at level 6 or 7 if possible, as +2 speed and walking through scenery help greatly with positioning and overland efficiency.

Skeletal
Dagger Strike+ damage without flanking: 11 (7 without upgrade)
Dagger Strike+ damage with flanking: 22 (14 without upgrade)

Skeletal Thornfang Rogues are fantastic at providing high-ish damage right from the first turn of combat. With flanking, the damage of the Skeletal Dagger Strike+ is in a class of its own, and the minimum damage is still reasonable without it. Since flanking makes such a big difference, it's useful to have a way to flank lots of enemies. This can be in the form of an ally, like an Engage or Broadswipes warrior, but it's very convenient to be able to do it yourself. For that, I recommend using the Stormtouched legs for the swift action Thunder Stomp. You can also use the Black Cat to set up flanking on one enemy per turn by walking past them (which does not break grayplane), but the Critter is still probably more helpful overall. If you transform the left arm as well, you may be able to set up flanking with Bitter Scratch; however, the range is much lower than Thunder Stomp and it can only hit one enemy, but it does also cause a large amount of shred, which can be very helpful against bosses.

The alternative to the left Skeletal arm is the left Mortificial or Stormtouched arm. These arms provide a ranged option, which is probably preferable to Bitter Scratch, especially if you already have another swift action.

If you do not use the Stormtouched legs, the speed from the Skeletal legs (+0.3 speed each) is nice.

The Skeletal head also provides Inscrutable Stare, which is extremely situational since it breaks grayplane, but it still does have occasional uses for this build.

Make sure to transform all of the non-Skeletal theme limbs you want before acquiring Skeletal, as the remaining human limbs will automatically transform to Skeletal at the end of the chapter when it is acquired. Also, do not go into the chapter interval with the Event Picking cheat on, as that will mess up this process.

Wolftouched
Wolf Claw+ damage without Bone Spear: 9 to 12 (same with one or two arms)
Wolf Claw+ damage with Bone Spear: 10 to 13
Frenzy+ damage (two arms): 4 to 6, 1 pierce (three random attacks)
Wolf Bite damage with or without Bone Spear: 5 to 7 (does not benefit from theme upgrade)

Wolf Claw has reasonable damage and a built in water stunt effect, which allows you to reposition mid turn. The swift action Bite attack can also be used to take out a low health enemy and move again or to bring a higher health enemy down enough so that they can be finished off with another attack (Bite from grayplane + Claw will be more damage than Claw alone from grayplane except for very high defense enemies).

This variation can be played either one or two Wolftouched arms, but the subvariation with two arms is probably somewhat stronger. Essentially, the trade is losing one damage on Wolf Claw in order to gain Frenzy, which can situationally be very useful. Even though Frenzy has three separate attacks, you will stay in grayplane until the last attack is finished, and rogue will trigger if you got a kill on any of the attacks. Since you can't control which in-range enemies will actually be attacked, you have to be even more thoughtful than usual about positioning. When using Frenzy, make sure to let the attack simulation run for long enough that you have a decent idea of what the chances of not killing an enemy are, but keep in mind that it does NOT account for stunt damage, which is a considerable +4 for Frenzy. Also keep in mind that even if you have Frenzy available, Wolf Claw will still often be the better option.

The legs (+0.5 speed and -0.3 armor each) are a good choice due to the high speed, but keep in mind that the loss of armor will most likely make you less durable. The Graybark/Thornbark may be worth considering for that reason.

Since Viciousness gives the full damage bonus even on attacks with only partial bonus damage scaling like Bite and Frenzy, it is also a good choice to pick up at level 6 or 7.

Stunt augments are very useful for Wolftouched hunters, as it helps with both water stunts with Wolf Claw and damage with Frenzy.

Two Human Arms
Dagger or Thorn of the Fens without Flanking: 6 (7 with Viciousness)
Dagger or Thorn of the Fens with Flanking: 12 (14 with Viciousness)

Flanking is nearly necessary with weapon attack variations, but they do have reasonably high minimum damage assuming flanking. This is basically a less powerful but more flexible version of the Skeletal variation. You can use any theme for the heroes head, but the best options are probably Wolftouched for the swift action Bite, Crystalline for the +6 stunt chance (if you are using a water dagger), or Shadow for the +1 speed (make sure it takes a leg rather than an arm). Using Frogtouched for the swift action Tongue Whip may also be effective, but it may not often be worthwhile to break grayplane.

Since the weapon variation is so much more dependent on flanking, the Golden Rabbit is a good choice since accuracy will be less of an issue.
Hunter: AvoiDance
If the sum of a defender's dodge and block (also known as avoidance) is 75 higher than an attacker's accuracy, the attacker cannot hit the defender with a non-flanking attack. Since non-boss enemies have at most 110 accuracy, an AvoiDance hunter should aim for 185 avoidance from base stats, Upbringing, themes, gear, and abilities. Walling with a friend also adds 5 to 25 block depending on relationship level. Note that certain special attacks, such as the Redcloak's Channel Fireball, have an accuracy bonus. This attack requires 200 avoidance to safely stay in the area of effect region and should therefore be avoided by heroes with less than that.

With both Riposte and Archery (and some range extending skills), each non-flanking attack against the hero turns into an opportunity to deal damage. You do, however, need to be much more careful about positioning than you would with an Engage Warrior since you want to avoid being flanked.

There are a few different build variations possible with this build, with the most major differences depending on whether you use the pet Duck or pet Rat. I would consider the Duck version the more standard variation, where you can use turn-ending attacks on your turn. With the Rat and upgrade ability Erratic Movement, you can get more avoidance than is possible with the Duck, but you must end your turn by using regular movement in order to get this bonus (neither other movement abilities nor pressing "Done" without moving activate it). This means that you must use non-turn-ending attacks if you want to be able to attack on your turn, although there are some variations that do not need to. It also means that you must be careful not to let the hero become backed into a corner with enemies blocking their ability to move at all, as this would prevent them from being able to activate Erratic Movement.

I believe the name of this build was coined by discord user Ziggurat, based on the reasoning that the frequent dodges and counters give the impression of dancing.

Defining Abilities
  • Riposte
  • Archery
Additional Abilities
(very roughly in order of recommendation)
  • Long Reach: Allows Riposte to work against enemies with 2 tile melee range and extends Archery range. Very nearly a defining ability.
  • Sharpshooter: With both Long Reach and Sharpshooter, the hero will be able to counterattack with Archery against nearly all ranged attacks. The +1 damage for ranged attacks also helps. Also very nearly a defining ability.
  • Nimble Nature: +10 dodge is very useful for builds that lack compatibility with the Crystalline legs, but it is not generally necessary for those that can use them. Speed and Stunt are also nice.
  • theme attack+
  • Erratic Movement: A defining ability for variations that use the pet Rat instead of the Duck.
  • Wisdom: Can be very helpful for overland efficiency for scouting or if you get a map that requires many bridges or passes. Extremely helpful in Monarchs Under the Mountain.
  • Crippling Strikes: A good crowd control option.

Upbringing
  • Dodge and Block: Only the sum of dodge and block is important for this build, and I recommend getting at +14 from Upbringing. It's possible to have up to +16 on regular recruits, and the MUtM rescuee can have +20 or even +25 if you are very lucky.
  • Speed: Speed is helpful for positioning and overland efficiency.
  • Accuracy: Hitting more often is nice.
  • Rough order of preference for remaining stats: Stunt, Warding, 0.3 or 0.4 Potency (difficult to get and not super important), Charisma, Health, Recovery Rate, Tenacity, Bonus Damage (Bonus Damage is helpful for this build but getting it from Upbringing won't usually help you due to flooring)

Primary Weapon
  • Night Shard: +10 block for being a sword and +5/10/15 dodge as the artifact effect. Very valuable
  • Crossbow: For some variations, it is possible to use a crossbow (grass is probably the best) as the Archery counterattack and use a theme arm to counter melee attacks. This removes the need for Long Reach. You may also want to replace Sharpshooter depending on build specifics.
Secondary Weapon
  • Leaf Dueling Sword: If you reach a point where you have extra avoidance with the Night Shard, switching to a Leaf Dueling Sword can help you build temp health as a cushion for getting hit with flanking attacks. Dueling swords still get +10 block, so you are only losing out on the Night Shard's dodge bonus by using this.
Offhand
  • typically theme arm
Armor
  • Traveltraff/Ghosttraff: You need to stack a lot of avoidance to make this build functional, and the +15 dodge from the tier 1 armor helps you to get there. Upgrading to the tier 2 armor (+25 dodge) may be necessary later to compensate for aging effects.

Wings
  • Crow Wings: +1 speed, +10 dodge: Because of the bonus dodge, you should typically only consider other wings on this build if the theme you want to use is incompatible with Crowtouched.
  • Hawk Wings: +1.4 Speed.
  • Drauven Wings: +1.4 Speed. Airlift is more difficult to use than the other wing upgrade abilities due to the requirement of bringing along an ally, but it may be worth considering if paired with an Archery Protector hunter.

Tail
  • Fox Tail: +4 dodge as well as some speed and stunt. It is also necessary if you want to take Nimble Nature.

Ground Pet
  • Duck: +7 dodge and +7 block (+14 avoidance). Extremely valuable to make this build viable.
  • Rat: Strictly worse than the Duck unless you are using Erratic Movement, in which case it effectively offers +35 avoidance instead of +14 avoidance at the cost of one level up ability and requiring the hero to end their turn by moving.

Shoulder Pet
  • Drauven Bird: A modest +5 accuracy, but it helps.
Hunter: AvoiDance: Theme Variations
Choices of transformations for the AvoiDance hunter are listed here, ordered by the theme used for the ranged attack. All calculations of starting total avoidance assume 14 avoidance from Upbringing, so if your hero has more or less that that you will have to adjust accordingly.
Note: I am not sure the subvariations are presented in the best way; please let me know if something seems overly confusing.

Botanical
The main draw of the Botanical theme for this build is that Thorn Lash is a ranged line (area of effect) attack with the leaf stunt effect, allowing heroes to build up temp health. Botanical is compatible with Crowtouched, but not with Crystalline, so with tier 1 gear your avoidance will be:
Base: 95
Upbringing: 14+
Night Shard: 15
Traveltraff: 15
Crow Wings: 10
Fox Tail: 4
Duck: 14
Nimble Nature: 10
for a starting total of 177+ avoidance. You will therefore be vulnerable to some enemies before you are able to upgrade your gear or acquire augments.

For the Erratic Movement version:
Base: 95
Upbringing: 14+
Night Shard: 15
Traveltraff: 15
Crow Wings: 10
Fox Tail: 4
Rat: 5
Erratic Movement: 30
for a starting total of 188+ avoidance. In this case, I would recommend considering a leaf dueling sword instead of the Night Shard for a starting avoidance of 183+.

Celestial
Since Shooting Star is a non-turn-ending action, I recommend using the Rat/Erratic Movement version of this build, where the hero uses Shooting Star at the beginning of their turn and then moves into position. Celestial is compatible with Crowtouched, but not with Crystalline, so with tier 1 gear your avoidance will be:
Base: 95
Upbringing: 14+
Night Shard: 15
Traveltraff: 15
Crow Wings: 10
Fox Tail: 4
Rat: 5
Erratic Movement: 30
for a starting total of 188+ avoidance. Like Botanical, you can use a leaf dueling sword for 183+ avoidance.

Shooting Star does ignore cover, but it is also normally only capable of hitting one enemy. If you are able to pick up Through Shot on level up, you'll be able to hit up to two enemies, although the positioning for that to happen may be rare. Aesthetically, I think the art looks better with the left arm transformed instead of the right, but it does not matter mechanically.

Flamesoul
Flamesoul is very similar to Botanical, but more offensively oriented, with Cone of Fire having a wider Area of Effect and magic damage with a fire stunt effect. Also similar to Botanical, Flamesoul is compatible with Crowtouched, but not with Crystalline, so with tier 1 gear your avoidance will be:
Base: 95
Upbringing: 14+
Night Shard: 15
Traveltraff: 15
Crow Wings: 10
Fox Tail: 4
Duck: 14
Nimble Nature: 10
for a starting total of 177+ avoidance. You will therefore be vulnerable to some enemies before you are able to upgrade your gear or acquire augments. Be careful not to position your allies in places where they might be in the way of Cone of Fire from an Archery counter attack, in which case it will fail to go off to avoid friendly fire (friendly fire should not occur, but there may be rare cases where it can still happen).

For the Erratic Movement version:
Base: 95
Upbringing: 14+
Night Shard: 15
Traveltraff: 15
Crow Wings: 10
Fox Tail: 4
Rat: 5
Erratic Movement: 30
for a starting total of 188+ avoidance. Again, I would recommend considering a leaf dueling sword for a starting avoidance of 183+.
Hunter: Avoidance: Theme Variations (continued)
Mortificial Enhancements
As with Celestial, since Wrist Bolt is a non-turn-ending action, the Erratic Movement version of this build can be quite effective. However since Mortificial Enhancements are compatible with both Crowtouched and Crystalline you can also use the duck version. With tier 1 gear your avoidance will be:
Base: 95
Upbringing: 14+
Night Shard: 15
Traveltraff: 15
Crystalline Legs: 10
Crow Wings: 10
Fox Tail: 4
Duck: 14
Nimble Nature: 10
for a starting total of 187+ avoidance. On turns where you do not need to move, you can attack with both Wrist Bolt and your weapon. As before, a grass dueling sword for 182+ avoidance may be preferable.

For the Erratic Movement version, you probably have enough extra avoidance to transform the right arm to gain the Mortificial Hammer.
Base: 95
Upbringing: 14+
Night Shard: 15
Traveltraff: 15
Crystalline Legs: 10
Crow Wings: 10
Fox Tail: 4
Rat: 5
Erratic Movement: 30
for a starting total of 183+ avoidance. If you are able to pick up Mortificial Limbs+ on a level up, this can dramatically increase your damage output. You could also consider dropping Long Reach or Sharpshooter to start with Mortificial Limbs+, giving up the ability to counter some enemy attacks but dealing much more damage against those you can.

Stormtouched
Jumpjolt deals magic damage and can potentially hit one additional enemy for half damage if the first attack hits. Because of the stun on stunt effect, the second hit is also notable in that it is possible to stun an enemy before they are able to take a turn. This typically makes your party safer, but if the enemy was not in a position to flank the AvoiDance hunter or attack any other party members, it may just reduce damage output. Stormtouched is compatible with both Crowtouched and Crystalline, so with tier 1 gear your avoidance will be:
Base: 95
Upbringing: 14+
Night Shard: 15
Traveltraff: 15
Crystalline Legs: 10
Crow Wings: 10
Fox Tail: 4
Duck: 14
Nimble Nature: 10
for a starting total of 187+ avoidance. If you want to be a little riskier, you can switch out Nimble Nature for Jumpjolt+ for extra damage against ranged attacks with a starting avoidance of 177+.

You can also transform both arms to Stormtouched to upgrade Jumpjolt to Chain Lightning adding one more potential hit and allowing you to counter melee attacks as well as ranged attacks with Chain Lightning. In order to make this work, you will probably want to use the Erratic Movement Version:
Base: 95
Upbringing: 14+
Traveltraff: 15
Crystalline Legs: 10
Crow Wings: 10
Fox Tail: 4
Rat: 5
Erratic Movement: 30
for a starting total of 178+ avoidance. It may also be a good idea to drop Long Reach for Jumpjolt+ (which also upgrades Chain Lightning) in order to greatly increase your damage against most attacks at the cost of not being able to counter the longest range enemy attacks. I would still recommend trying to later pick up Long Reach or Sharpshooter+ if you did not start with one of them.

Sylvan
Sylvan is probably the most unusual option for this build. Keep in mind that you will need to transform the right arm in order to gain Witherbolt. Since Witherbolt has a base range of 6 instead of 4.6, you can switch Sharpshooter for Nimble Nature. Sylvan is not compatible with either Crowtoucher or Crystalline, and does not offer a non-turn-ending attack. I recommend using the Erratic Movement version, so with tier 1 gear you avoidance will be:
Base: 95
Upbringing: 14+
Night Shard: 15
Traveltraff: 15
Fox Tail: 4
Rat: 5
Erratic Movement: 30
Nimble Nature: 10
for a starting total of 188+ avoidance. If you want to be a little riskier, you use Witherbolt+ instead of Nimble Nature for a starting avoidance of 178+.

If you are feeling very brave, you can even transform the left arm as well as the right, giving up the Night Shard and dropping your starting avoidance to 173+ (with the starting abilities Riposte, Archery, Nimble Nature, Erratic Movement, and Witherbolt+), but making it so you will counter both melee and ranged attacks with Witherbolt and unlocking Invigoration. You will not be able to counter the longest range attacks without Sharpshooter, so you may want to start with Sharpshooter and try to pick up Witherbolt+ at level 6, but your damage against most attacks in the meantime would be lower. This might be a good time to consider using a MUtM rescuee with 20+ avoidance, although that could take a while to roll.

Crossbow Variations
It's also possible to use a crossbow (probably a Leaf elemental crossbow) as the Archery weapon and a theme attack as the Riposte counter. If you do this, you should not need any range extending moves in order to hit enemies with Archery, but you may still want Long Reach to be able to use Riposte against enemies with melee attacks with 2 range. On the other hand, due to the loss of the Night Shard, you may need both Nimble Nature and Erratic Movement, so a theme attack upgrade may be more valuable than a range extending ability. Through Shot is also worth considering. At this time, exact optimization of these variations is left as an exercise for the reader.
Hunter: Archery Protector (Avenging Hunter): Overview
The key to this build is heartlessness. And vengeance. Well, perhaps that is a bit harsh, but one way or another, you will have to have a warrior die in order for a hunter to adopt Avenger, the Golden Rabbit. Also known as the Avenging hunter (name coined by discord user AngusOfTheDandelion) the basic idea of the Archery Protector hunter is to stand next to a tankier ally and retaliate after every incoming attack against the ally. These attacks are always against an enemy that attacked the ally, so locking the two heroes as soulmates or otherwise having them in a romantic relationship is a big damage boost. In my opinion, the best build for the tanky ally is the Engage Shard Skin warrior, but the AvoiDance hunter may also being a viable option. In both cases, you should position the two heroes such that the tanky ally will be the one targeted by attacks. This can be quite difficult when relying on positioning alone (i.e., with an AvoiDance hunter), but Engage can make it significantly easier. Attacks that cause knockback can be quite troublesome, as they can break your formation or make flanking possible. The boulder throw ability of The Chastised and the Burrow ability of Scoriers are particularly hard to deal with, as they are effectively very long range area of effect attacks that move targets even when dodged or blocked. You also shouldn't be afraid of standing out of the way if it's just too dangerous to stand next to the ally. You will miss out on some damage, but that's often better than losing half of your health to a boulder.

If your ally is an Engage Shard Skin warrior, I recommend starting the warrior with Engage+, Zealous Leap+, and Stalwart since the extra mobility of Zealous Leap+ is likely more valuable than the extra damage from Shard Skin. Once you pick up Shard Skin, you should usually try to place the hunter diagonally adjacent from the warrior to prevent walling, which reduces incoming damage and therefore reflected damage from Shard Skin. However, this is not a general rule; in the case of attacks that may hit the hunter, you will want to use walling, and you may also want to use walling if the hunter is using an attack that ricochets (like Witherbolt), since Protector does not activate if the attacker is killed by Shard Skin.

If your ally is an AvoiDance hunter, you should try to place this hunter directly adjacent to the ally (although it is much more important to position the AvoiDance hunter such that they will not be flanked). If the AvoiDance hunter is a bit short of 185 avoidance, consider having the two heroes in a friendship instead of a romance to take advantage of the extra block.

There are a few categories of theme variations depending what the hero uses to counter incoming melee (with Protector) and ranged (with Archery) attacks: A variation where they use a ranged theme attack for both Protector and Archery, a variation where they use a melee weapon for Protector and a ranged theme attack for Archery, a variation where they use a melee or ranged theme attack for Protector and a crossbow for Archery, and a variation where they use a melee theme attack for Protector and a ranged theme attack for Archery. I think the Sylvan variation where the hero uses Witherbolt+ for both Protector and Archery is the strongest by a fair amount, but the other variations do have some benefits. Most (but not all) notable variations are discussed in more detail in Theme Variations section below.
Hunter: Archery Protector: Details
Defining Abilities
  • Archery
  • Protector
  • theme attack+: Very substantial damage increase except for Botanical Thorn Lash and Flamesoul Cone of Fire, in which case other abilities are most likely better.
Additional Abilities
(roughly in order of recommendation)
  • Sharpshooter: Very nearly a defining ability, especially if you use a theme other than Sylvan, but even then you probably want it. Increases attack range and damage by 1.
  • Long Reach and/or Sharpshooter+: Very helpful to be able to counterattack with ranged theme attacks other than Witherbolt. Probably not necessary with crossbows.
  • Piercing Shots or Rogue: These are both ways to increase damage by ignoring armor and warding. Piercing Shots is more reliable, but Rogue has the additional benefit of reducing the chance that an enemy will target you. I wouldn't recommend starting with both, but it may be nice to pick up the other later even if you start with one.
  • Through Shot: Allows Archery to trigger even when one enemy is blocking line of sight with crossbow attacks, Celestial Shooting Star, and Mortificial Wrist Bolt attacks. Does not do anything if you do not use any of those attacks.
  • Wisdom: Can be very helpful for overland efficiency for scouting or if you get a map that requires many bridges or passes. Extremely helpful in Monarchs Under the Mountain.
  • Nimble Nature: Decent bonuses, but nothing build-enabling. May be better if you want to stun enemies with Chain Lightning, although that can have downsides in this case. Also more impactful if you use a Leaf Dueling Sword or Leaf Crossbow variation.
  • Heroism: Not as impactful as with many other builds, but still nice to have.
  • Foxflight: Both the passive and active abilities are fairly useful.
  • Aid: Temp health can help your allies survive.
  • Bard: Increased stunt is useful, especially for certain other party members. Cheaper recruitment can be nice.
  • Thornfang: May be quite good if you use a melee theme attack and crossbow variation; otherwise it's probably not helpful.
  • Quellingmoss: Both the active and passive are decent.
  • Ambush: Will sometimes let you get in an extra attack (most often at the beginning of a battle or after opening a door)

Upbringing
  • 0, 0.4, or 0.6 Potency: With no potency from gear, 0 provides 3.0 potency at level 6, 0.4 provides 4.0 potency at level 7, and 0.6 provides 3.0 potency at level 5
  • Accuracy: Accuracy is important to get the most out of chaining attacks like Chain Lightning and Witherbolt. You should be able to get around 5 or more.
  • Dodge and/or Block: You should try to be positioned so that the ally is the one being targeted, but that is not always possible (and some enemies have Area of Effect attacks).
  • Speed: Speed is helpful for positioning and overland efficiency.
  • Rough order of preference for remaining stats: Stunt, Warding, Charisma, Health, Recovery Rate, Tenacity, Bonus Damage (Bonus Damage is helpful for this build but getting it from Upbringing won't usually help you due to flooring)

Primary Weapon
(grouped by variation category)
  • Theme arm: Typically, you will transform both arms.
  • Leaf Crossbow: The temp health from leaf stunts will help keep you alive.
  • Fire Crossbow: If there are other users of magic damage in the party, fire stunts can be helpful.
  • Frostfang: The crowd control can be useful.
  • Baleblade: Usually less damage than using a theme attack with Protector, but this should give the ally lots of temp health. You will need to stand directly adjacent to the ally for the effect to work. Also provides 10 block.
  • Leaf Dueling Sword: Giving yourself temp health from the stunt effect will help keep you safe from area of effect attacks or other non-engaged attacks.
Secondary Weapon
  • Typically, you will transform both arms, but if you are using a weapon variation, consider using a different kind of the same type of weapon as your primary. For example, you may want both the Baleblade and a Leaf Dueling Sword, or both a Leaf Crossbow and Frostfang or a Fire Crossbow.
Offhand
  • Theme arm
Armor
(mostly personal preference)
  • Graybark/Thornbark: Good armor and warding and often fairly cheap to upgrade, but has a moderate speed penalty.
  • Traveltraff/Ghosttraff: No speed penalty and the dodge is nice.
  • Tabbyflack/Towerclate (DLC: AaS): If you can still keep up with your ally after the huge loss of speed, the high armor and bonus accuracy are great, especially for chaining attacks.
  • Roadswayth/Layswayth (DLC: AaS): A good option if you use a variation with a powerful stunt effect.
  • Rotshawn/Elkenshawn (DLC: AaS): Extra potency for more damage, but probably not worth the low defenses unless you also use Rogue.
  • Softhasping/Dreadhasping (DLC: AaS): Speed is always nice, but probably mostly useful for overland movement on this build.

Wings
  • Crow Wings: +1 speed, +10 dodge are both helpful.
  • Hawk Wings: +1.4 Speed. The extra speed may not be worth giving up the +10 dodge of the Crow Wings, but it can be helpful with positioning and overland efficiency.
  • Drauven Wings:Identical stats to the Hawk Wings. Airlift is much more situational than the other wing upgrade abilities, but since you'll pretty much always want to be adjacent to an ally, this might be its time to shine relative to the others. However, none of the wing upgrades are all that helpful on this build, so it may come down more to aesthetic preferences if you are deciding between this and the Hawk Wings.

Tail
  • Fox Tail: Speed, dodge, and stunt chance are all helpful.
  • Skunk Tail: I usually don't recommend poison abilities since it's usually so important to kill enemies as soon as possible, but if your ally is an Engage warrior, they can often keep them from doing actual damage. Can only be used if you don't have to use movement.
  • Scorpion Tail: A bit of extra damage if you don't have to use movement.

Ground Pet
  • Golden Rabbit: The Golden Rabbit is key to this build due to the upgrade ability Protector, and the +1 bonus damage is also nice. It's possible to do an Archery only version of this build (in which case you would probably use the Critter or the Duck), but the damage would be much lower.

Shoulder Pet
  • Drauven Bird: A modest +5 accuracy, but it helps, especially for attacks that ricochet.
Hunter: Archery Protector: Theme Variations
Pure Ranged Theme Attack Variations
These variations depend on transforming both arms so that a ranged theme attack is used for both Archery and Protector. I think Sylvan is the strongest theme for this build, but Stormtouched, Celestial, Botanical will also work (probably ranked in that order).

Botanical
If you transform both arms, you will use Thorn Lash to counter whenever possible, which may hit multiple targets and has a built-in leaf stunt effect, which is good for building temp health. The poison is also nice on this build. On the other hand, if an ally is in the way of the attack, it will fail to go off to prevent friendly fire (usually, anyway; There may be some cases where friendly fire still occurs). Since Thorn Lash only extends as far as the triggering enemy, it means the attack is more likely to be able to be performed, but that also means it is less likely to hit multiple enemies when it does compared to Cone of Fire.
The theme attack upgrade ability is also not that impactful as it only adds +2 damage.

Entangle (from the right Botanical arm) is also useful to move allies or enemies around.

The legs (+0.3 speed and -0.2 health each) could be helpful, especially depending on breakpoints.

Celestial
If you transform both arms, you will use Shooting Star to counter whenever possible and gain access to Falling Stars. Falling Stars cannot be used with either Archery or Protector, but it does offer decent damage and long range for attacks on your turn. Shooting Star ignores scenery cover, and since it is a non-turn-ending action, you can even use both Shooting Star and Falling Stars on your turn if you do not need to use movement. Consider using both Long Reach and Sharpshooter (instead of just Sharpshooter+), as Long Reach applies to Falling Stars but Sharpshooter does not; however, this will increase your pool of upgrade abilities, which makes it more difficult to get a specific upgrade. Through Shot is also a good choice if you have the opportunity to pick it up at level 6 or 7. Meteor Strike may also be worth considering, but you need to be very careful about enemies with knockback.

I do not recommend using the Celestial legs, as I do not think the loss of armor is worth the benefits on this build.

Stormtouched
If you transform both arms, you will use Chain Lightning to counter whenever possible. Chain Lightning is somewhat similar to Witherbolt as they both have up to two additional hits, but Chain Lightning has higher damage on the first hit at the cost of lower potential damage and lower accuracy (it has no bonus accuracy and does not ignore cover).

The legs are an interesting option, providing the swift action Thunder Stomp at the cost of block. Especially if your ally is an Engage warrior, you (both) may end up near lots of enemies, so Thunder Stomp could potentially hit lots of them. These legs are available on any variation.

Sylvan
If you transform both arms, you will counter both incoming melee and incoming ranged attacks with Witherbolt, which has 6 base range and a +10 accuracy bonus, ignores cover from scenery, and has the potential for a large amount of damage if all three hits connect (the last hit has double scaling with both bonus damage and potency). The left arm also provides the swift action Invigoration, which can be used to give an ally temp health twice per battle.

I don't recommend transforming the legs (+0.5 speed, -0.5 block), as the loss of block is probably not worth the extra speed, but it's a bit of of a toss-up.

Melee Weapon Variations
All of the themes in the "Pure Ranged Theme" variations will work with this category of variations (if you just transform one arm), so I will focus on the new ones. You will probably want both the Baleblade and a Leaf Dueling Sword to switch between in order to provide temp health for yourself or your ally.

Flamesoul
Similar to Botanical, but Cone of Fire has a slightly wider area of effect than Thorn Lash and always extends to the maximum range, so there is a greater chance of the attack being prevented due to avoiding friendly fire, but also a higher chance of hitting more enemies when it does go off (and a greater chance of friendly fire actually occurring in some edge cases).

The legs (+0.8 warding, -0.2 speed each) are probably a decent choice.

There are also a few alternate choices for a head piece, such as the Crowtouched head.

Mortificial Enhancements
If you are using a melee weapon, you would want to transform the left Mortificial arm to gain access to Wrist Bolt, which is a non-turn-ending action.

The upgrade ability Salvage may be useful to pick up at level 6 or 7.
Hunter: Archery Protector: Theme Variations (continued)
Crossbow Variations
These variations will work with any theme arm that has a melee or ranged attack. As before, I will focus on the new ones. Since a tier 1 crossbow has 6.6 base range and Protector ignores range, you should be fine with just Sharpshooter (or possibly no range extending abilities at all), allowing room for Through Shot. You will probably want a Leaf crossbow and one other crossbow of your choice to switch between depending on the current situation. I think Beartouched and Shadow are the most interesting (new) options in this category. I will not go into as much detail for this category.

Beartouched
Bear Swipes allows you to hit two enemies at once if they are directly adjacent to each other, allowing for potentially high damage. The +1 health from the legs is nice, but they will slow you down.

Child of the Hills
Decent damage, but the knockback effect may not synergize well if your ally is an Engage warrior. The armor from the legs is nice, but the speed cost is steep.

Crowtouched
The shred is nice, but the blinding on stunt effect does not synergize well with an ally with Shard Skin. On the other hand, it would help if the ally is an AvoiDance hunter. The Bite attack from the Crow Head may occasionally be useful, especially if you use Long Reach.

The legs may be useful depending on warding and health breakpoints.

Crystalline
Decent damage and stone stunt effect. The +6 stunt from the Gem Eye and block from the legs are also nice.

Elmsoul
Fairly high damage, but, again, the knockback effect may not synergize well if your ally is an Engage warrior. The legs will increase damage and give some armor, but the speed cost is fairly high.

Mortificial Enhancements
This time you would transform the right arm to have the Mortificial Hammer. Again, it's decent damage, but the knockback effect may not synergize well if your ally is an Engage warrior. The upgrade ability Salvage may be useful to pick up at level 6 or 7.

Shadow
Harvest deals magic damage and heals the hero on kills. +1 speed from the Shadow eyes and the warding drain of nearby enemies is also nice.

I recommend transforming both Shadow legs in order to regain 3 health from each Harvest kill.

Skeletal
This isn't really a crossbow variation since it doesn't allow you to hold a crossbow, so you would instead have to use the Mortificial Wrist Bolt or Stormtouched Jumpjolt for the ranged attack. The main benefit of the Skeletal Dagger Strike ability is the dagger flanking bonus, which won't come into play much here, but it should still work.

Wolftouched
Decent base damage, but the water stunt effect of the Wolf Claw ability does not help when used on enemy turns. The Bite attack from the Wolf Head may occasionally be useful, especially if you use Long Reach. The speed of the legs is probably not worth the loss in armor.

Mixed Theme Attack Variations
You can also have both a melee and a ranged theme attack either from the same theme (i.e. Mortificial Enhancements or Flamesoul) or from different themes (e.g. nearly anything with Mortificial Enhancements or Stormtouched).
Mystic: Vigorflow: Overview
The Vigorflow Mystic is one of the strongest builds in terms of offensive capabilities, but within that general role, there is quite a large variety of more specific roles. Typically, this involves tradeoffs between range, single target damage, the number of targets that can be hit, and other offensive and defensive perks. Some variants are able to use swift actions or non turn ending actions to make multiple attacks per turn. Openmind synergizes extremely well with Vigorflow, increasing the maximum number of interfusion targets to 3 + floor(Potency/3). This means that at 6.0 potency, melee and ranged attacks can have +15 increased damage, which is added independently of any damage scaling present on the attacks themselves. For example, even though the first hit of witherbolt only has half damage scaling with bonus damage and potency even with Witherbolt+, Vigorflow+(5) will add the full 15 damage to the hit.

One downside of Vigorflow mystics is that it may be difficult to have more than one per party, as they would be competing for interfusion targets, although this may be mitigated somewhat if the party has a reliable way of starting fires (blazes). Blazes are useful both because they are new targets and because they can power Vigorflow without taking any damage.

Vigorflow mystics synergize very well with Spirtblade mystics and Arches mystics. Spiritblade provides more Vigorflow-fueled attacks while an Arches mystic ally can Treecall a Vigorflow mystic back to safety, allowing them to position themselves much more aggressively.

If you like to use an Engage warrior (or an AvoiDance hunter or another tanky build) in your parties, you may want to consider using a Protector variation. Unlike the Archery Protector Hunter, you will only counter melee attacks against the ally, but your counters against melee attacks will be empowered by Vigorflow (assuming you can maintain interfusions). As with Archery Protector, you will need to let a warrior die to adopt the Golden Rabbit on a mystic if you do not have the Omenroad DLC. In order to use a melee or ranged theme attack with Protector, you will either need to transform both arms or be holding a crossbow, but a crossbow is probably preferable since it allows use of the Swan Scepter as a secondary weapon. Like the Archery Protector hunter, Sylvan and Stormtouched are probably my top choices, but Shadow and some other melee options should also be good.

With the addition of the Witchingsheaves and Kestrelwing armors in the Armors and Skins DLC, it is now feasible to make a Riposte Vigorflow build. These armors add 10 and 20 dodge, respectively, which is 5 less than the Traveltraff and Ghosttraff at the equivalent tier. This means that all of the avoidance calculations based on Upbringing, themes, gear, and abilities for the AvoiDance build can be used for a VIgorflow Riposte build simply by subtracting 5 from the total avoidance. You should prioritize high avoidance (~14+) from Upbringing. In order to get the necessary abilities (Riposte and possibly Nimble Nature and/or Erratic Movement), you will need to sacrifice range boosting abilities and possibly the theme upgrade ability and/or only start with Vigorflow instead of Vigorflow+. Like the AvoiDance hunter, you need to be extremely careful with positioning to avoid being flanked. Due to the overlap with the AvoiDance Hunter, I will not be going over theme variations specifically for Riposte Vigorflow in this section, but you should be able to get a good idea of what might work by looking at the theme variation sections for both AvoiDance and Vigorflow.
Mystic: Vigorflow: Details
Defining Abilities
  • Vigorflow+
  • Openmind
Additional Abilities
(roughly in order of recommendation)
  • Long Reach and/or Sharpshooter: Depending on the attacks used, these can help with either positioning, Area of Effect size, or both. Long Reach applies to most things including melee attacks, ranged attacks, and interfusion range. Sharpshooter only applies to ranged attacks, but also increases damage by 1. If you use a melee attack with 1.6 base range, you may not need either.
  • theme attack+: Going from half to full bonus damage and potency scaling on theme attacks can make a big difference. Not as useful with Cone of Fire or Thorn Lash, as it only adds 2 damage.
  • Heroism: Single turn nova damage at a key moment can sometimes make all the difference in a battle.
  • Protector: Defining ability if using a Protector variation.
  • Long Reach+ and/or Sharpshooter+: Even more range can be nice.
  • Earthscribe: A decent boost to survivability, but only when there are rocks around.
  • Riposte: Defining ability if using a Riposte variation.
  • Soulsplitting/+: This does not work with blazes, and you should still try to avoid getting hit as much as possible, so it is pretty situational, but it should be useful if there are a lot of mossy rocks around.

Upbringing
  • 0.1, 0.4, or 0.8 Potency: Assuming you are using a tier 1 Bone Spear, 0.1 allows 5.0 potency at level 6 or level 5 with 1 augment, while 0.4 allows 7.0 potency at level 7 or level 6 with 1 augment. In practice, 0.1 may be difficult to obtain, so 0.2 is probably fine, but 0.4 will outperform it at higher levels. 0.8 Potency (obtainable from MUtM rescuee) allows 6.0 potency at level 5. 6.0 potency is the most important breakpoint, as it allows interfusion with 5 targets at a time with Openmind.
  • Accuracy: Try to get at least 5 accuracy, but more may be better.
  • Retirement Age: Only useful if you are planning on using them as the parent mystic in All the Bones of Summer, in which case you may want +3 to +6. Otherwise, retirement age bonuses from Upbringing are not needed on mystics at all.
  • Rough order of preference for remaining stats: Dodge/block, Stunt, Speed, Charisma, Health, Recovery Rate, Tenacity, Bonus Damage (this build does benefit form bonus damage, but it's difficult to get enough to be meaningful from Upbringing).

Primary Weapon
  • Bone Spear: +1 potency means that you'll be able to get up to Vigorflow (5) sooner and your theme attacks will do more damage.
  • Any Dagger: Pretty situational, but you can deal very high single target damage with a flanking Vigorflow dagger attack. The Wraithword Knife is an interesting choice, as it allows attacking nearly any visible enemy once per battle.
Secondary Weapon
  • Swan Scepter: Not completely necessary, but extremely helpful for building and maintaining Vigorflow, especially for variants that use a swift action attack.
Offhand
  • Typically theme arm
Armor
(mostly personal preference)
  • Dustydrab/Heatherdrab: A decent amount of armor and warding and fairly cheap to upgrade.
  • Hillthroft/Mountainthroft (DLC: AaS): The extra potency makes it much easier to start at level 5 with at least 6 potency (allowing 5 interfusions with Openmind), but you won't want to get hit. It's also quite expensive to upgrade.
  • Sparebolting/Haleclate (DLC: AaS): The high armor is very helpful, and Vigorflow+ should help overcome the speed penalty.
  • Witchingsheaves/Kestrelwing (DLC: AaS): Speed and dodge are helpful, and if an attack does get through, Witchveiling may save you, but that only helps if you do not get one-shot. Essentially necessary for Riposte variations.

Wings
  • Crow Wings: +1 speed, +10 dodge are both helpful.
  • Hawk Wings: +1.4 Speed. The extra speed may not be worth giving up the +10 dodge of the Crow Wings, as you'll already have extra speed from Vigorflow+. However, these are still a good choice, and for some themes Crow Wings are not compatible.
  • Drauven Wings: Identical stats to the Hawk Wings, but Airlift is more difficult to use than the other wing upgrade abilities (although none of them are all that useful on this build).

Tail
  • Fox Tail: Speed, dodge, and stunt chance are all helpful.
  • Scorpion Tail: If you don't move often, the scorpion tail allows an additional attack per turn. Not often applicable, but it can be a big boost when it is. This may be the top choice of tail if you are also using Covering Fire.

Ground Pet
  • Critter: The +12 accuracy from the critter is extremely useful for making sure your attacks actually connect. Do not underestimate the value of going from 95% to 100% chance to hit.
  • Duck: You generally want to avoid even being attacked, but extra block and dodge can save you at those rare times when you are. Necessary for many Riposte variations.
  • Fire Chicken: You should only consider this if you are planning on taking the upgrade ability Covering Fire, which can be extremely helpful in situations where you can wait for enemies to come to you, but can also be difficult to use regularly.
  • Golden Rabbit: Due to breakpoints, this should add +1 damage even to attacks with half scaling with bonus damage, assuming no augments. On the other hand, it almost certainly has lower expected damage than the Critter unless you can guarantee flanking or use the upgrade ability Protector. If you are using a Protector variation, the Golden Rabbit is necessary.
  • Ogogen: I'm not sure how helpful Celestial Path would be in practice, but you will likely be walking a lot, and some of those celestial tiles may end up in a useful place.
  • Rat: Necessary for Riposte variations that use Erratic Movement; otherwise outclassed by other options.

Shoulder Pet
  • Drauven Bird: A modest +5 accuracy, but it helps.

Additional transformations are discussed below.
Mystic: Vigorflow: Theme Variations
Choices of transformations for the Vigorflow mystic are listed here, in alphabetical order of the transformed arm(s). I think my top picks would be Flamesoul, Sylvan, and Stormtouched, although I definitely haven't tried them all. Since there are so many possibilities, I have most likely left out a fair number of interesting options.

Beartouched
The main appeal of Beartouched is being able to hit two enemies at once. They must be directly adjacent to each other, so it won't happen every time, but it's nice when it does. I highly recommend Swipes+, but feel free to omit Long Reach, which will leave room for Heroism or another ability of your choice. The +1 health from the Bear Tattoos also helps. The legs can help with survivability, but they come at a rather steep speed cost.

Make sure to avoid the Inhabited hook, as that blocks the Beartouched theme.

Botanical
Thorn Lash is very similar to Cone of Fire, but it deals physical damage instead of magic, the width of the line attack is a bit narrower, and it has the leaf stunt effect instead of fire. Botanical is also not compatible with other head pieces. Overall, it's less flexible but more defensively oriented than Flamesoul.

Celestial
Shooting Star is a single action non-turn ending attack that deals magic damage and ignores cover, which opens a few possibilities, but with a base range of 4.6, it may be difficult to use without using movement. A wing upgrade skill can help in this regard, although that does make it more difficult to maintain Vigorflow. Since it is only single target damage, the most compelling reason to choose Celestial (maybe aside from the aesthetics) is to take advantage of the non-turn ending attack.

If you transform both arms, you will gain access to Falling Stars, which, while it does not benefit from Vigorflow or Sharpshooter, does have reasonably long base range and full bonus damage and potency scaling without needing an upgrade skill. It is also unable to benefit from flanking, so I highly recommend the Critter.

Your armor will already be pretty low, so it may not be worth transforming the legs.
Child of the Hills
The generic version of this build will likely be very similar to, but not as good as Elmsoul. Since you don't really need Long Reach, you could try a combination of Earthscribe and Shardskin, although that will end up being fairly scenery dependent. If you do take Shardskin, you'll probably want to transform both legs. Your overland movement speed will be poor, but you can rely on Vigorflow to make your combat speed reasonable.

Crowtouched
If you also transform the head in addition to one arm, this will play very similarly to the one armed version of wolftouched, but wolftouched will likely be a bit better.

Crystalline
It will work, but unfortunately, there isn't a whole lot of reason to choose the Crystal Sword over other options. The Gem Eye and the legs are nice, though.

Elmsoul
Bash has very high single target damage and comes with built in knockback and a leaf stunt effect. Probably not as impressive single target damage as Skeletal, but it doesn't require flanking and you can still hold normal weapons. Since you don't need Long Reach, you'll also have room for another skill of your choice. You may want to transform the legs depending on how much you value damage, armor, and speed.

Flamesoul
This is one of my favorites. Although I don't recommend Flamesoul+ because it only adds 2 damage to Cone of Fire instead of doubling the bonus damage and potency scaling, this drop in single target damage compared to other options can be more than made up for by increasing the area of effect size of Cone of Fire. The base range of Cone of Fire is 4.6, and it has a wider affected area than most other line attacks. I recommend using both Long Reach and Sharpshooter, although some players may prefer swapping one of those out for Heroism for more nova damage. Maintaining Vigorflow is usually easier than other variations since Cone of Fire can start blazes. Blazes on debris tiles will keep burning indefinitely and, once interfused with, will be able to power Vigorflow as long as they are in range.

Another interesting thing about Flamesoul is that it can be acquired even if the head theme slot is already used (by a compatible theme). The crow head is a good choice since it provides Peck, a swift action attack that can be used to deliver even more Vigorflow damage, although it will often be better to spend the swift action on another interfusion instead. I especially recommend Long Reach with the Crow Head since the base range of Peck is only 1.1. Frogtouched and Mark of the Horn are also good choices (keep in mind that Mark of the Horn will disqualify you from Crow Wings).

The Flamesoul legs are a good choice since the extra warding can be useful and you should have enough speed in combat from Vigorflow, although they may have a noticeable effect on your overland speed.

If you are interested in a Covering Fire variation, then I highly recommend Living Hearth, which provides +2 range for Cone of Fire and and +1 potency, allowing you to skip Long Reach and Sharpshooter and not requiring any potency from Upbringing to reach over 6 potency at level 5 while standing in fire.

Mortificial Enhancements
The left or right (or both) Mortificial arms can be combined with any other theme. Wrist Bolt is a single action, non-turn ending attack with 4.6 base range, so it is similar to Shooting Star, but it deals physical damage and is affected by cover. See the Stormtouched section for more discussion of subvariations, as those are applicable here as well.
Mystic: Vigorflow: Theme Variations (continued)
Shadow
There are two main benefits to Harvest: magic damage and life steal. The +1 speed from the Shadow eyes is also nice. I highly recommend Harvest+, but feel free to omit Long Reach, which will leave room for Heroism or Shadestride. I would recommend using both Shadow legs in addition to the one Shadow arm in order to bring the life steal per kill up to 3. Mechanically, it doesn't matter which arm you transform, but I think it looks better if the left is transformed.

Skeletal
For the purposes of Vigorflow mystics, the right Skeletal arm is effectively a tier 3 Bone Spear, tier 3 wand, and tier 3 (or higher) dagger all at once. The downside is that you can't have the Swan Scepter (or any other weapon), so it will take more turns to reach full effectiveness. I recommend taking a compatible ranged theme option on the left arm becoming skeletal; that is, the left Stormtouched or Mortificial arm.

One intriguing subvariation is using the Black Cat. Shy Swipes activates once during the hero's turn (as well as once during the enemy turns). If you are able to walk behind or next to an enemy such that they are the first one you come into adjacency with (either direct or diagonal),
and you will come into adjacency with them at a position at least 90 degrees away from your final position, you will shred 2 armor (or deal 1 damage) and set up flanking for yourself without using even a swift action. In practice it may be difficult to set this up reliably, but it is an interesting possibility. Also keep in mind that Shy Swipes triggers Sneer on Drauven Deevens and Redcloaks.

Stormtouched
Jumpjolt+ offers reasonably high first target damage and the chance of a second, slightly smaller hit. The left stormtouched arm is also compatible with many other themes, so there is a lot of room for subvariations.

Head
  • Wolftouched: The swift action Bite attack works with vigorflow. You probably won't want the legs, as you already have good speed but not much armor.
  • Crowtouched: Peck is very similar to Bite, but you lose 1 point of damage and gain the blind effect on stunt. Legs are probably not worth saving to legacy, but they may be worth taking during a campaign depending on age and breakpoints.
  • Crystalline: Extra stunt chance is nice, and the +5 block and -0.1 speed from the legs is probably a good trade.
  • Skeletal: I'm not sure whether this should be at the top or the bottom of the list, but it's definitely an interesting choice. See "Skeletal" above for more details.

You can also transform both arms to Stormtouched in order to upgrade Jumpjolt to Chain Lightning, allowing one extra hit but giving up the Bone Spear and Swan Scepter, which is probably a good trade in long battles with lots of enemies (although at that point, Sylvan would likely be preferable).

Thunder Stomp (from the legs) may be difficult to use as you are already has lots of things competing for swift actions, but it is occasionally very useful for setting up flanking, at the cost of some block. The Stormtouched legs are compatible with any build.

Sylvan
Witherbolt is the longest range theme attack that is compatible with Vigorflow, ignores cover (it still requires line of sight), has a hidden +10 accuracy bonus on the first hit, and can hit up to 3 enemies. The base damage (but NOT the Vigorflow damage) also doubles after each hit, resulting in a chaotic but potentially very rewarding attack. Make sure you transform the right arm rather than the left arm to gain access to Witherbolt.

Because of the chaining and escalating nature of Witherbolt, I highly recommend the Critter, as well as high accuracy from Upbringing. The legs are probably a fairly even tradeoff between speed and block.

Wolftouched
If you just transform one arm, then this is a fairly basic, but strong melee option. The swift action Bite attack improves your potential for damage, but using it means sacrificing building more Vigorflow levels. The water stunt effect on the Wolf Claw attack also helps.

If you transform both arms, this build becomes even more extreme; it will be even harder to build Vigorflow, as you can't have the Swan Scepter, but between Bite and Frenzy, you can do up to 4 Vigorflow fueled attacks per turn, dealing very high single target damage without requiring flanking.

You will probably want Long Reach, as it makes the positioning for Bite much easier.

The legs are probably not necessary as you should have a lot speed in combat and not very much armor, but it's down to personal preference.

Two Human Arms
The Vigorflow Mystic also works without any arm transformations, instead providing very long range single target damage with a two-handed bow. Sharpshooter is probably a worthwhile addition.

Primary Weapon
  • Water Bow: Probably the best options, as it gives a chance of multiple attacks per turn.
  • Other Bow: Other options will still work fine.
Offhand
  • Thnarrs Accordica: Increases the number of interfusion targets by 1 and therefore increases damage.
  • Throwing Knives: Provides a Vigorflow compatible swift action attack 3 times per battle. Note that the Vigorflow Damage is not doubled when flanking with the Throwing Knives, only the base damage.
  • Hurlaxe: Provides a Vigorflow compatible swift action attack twice per battle, and also shreds armor.
Head
  • Crystalline: The Gem Eye improves stunt chance, which is nice with a water bow. The legs are also nice.
  • Wolftouched or Crowtouched: Also worth considering for the swift action melee attack, but it may be difficult to use if you are trying to stay at a safe distance. You'll most likely want Long Reach to better make use of Peck or Bite.
Mystic: Arches
The Arches mystic offers a balance of support and damage capabilities. The Arches ability itself can be used both defensively, to prevent enemies from being able to reach you, or offensively, to lower enemies' avoidance and lock them in place in areas where they will take damage. The combination of Arches and Naturalist provides reliable use of the Treecall action, a great support ability that allows you to move yourself or an ally within sight range to an interfused tree. This can be used to position your allies much more aggressively before pulling them back to safety, moving yourself into a better position as a swift action, or even moving across normally impassible gaps.

There are two main choices of abilities for damage output: Splintersalvo (from Elementalist) and Meteor Strike (which requires a Celestial arm). Splintersalvo can be a bit tricky to use due to the amount of set-up required (multiple wood scenery items) and unusual targeting (center tile must be in between the scenery pieces, with little leeway), but when it works, you can cause a large amount of damage and shred, making any remaining enemies easy targets. The Meteor Strike version of the build can provide more consistent damage, but it does require transforming at least one arm. Typically, magic damage is better when paired with allies that also deal magic damage, so you may want to use the Meteor Strike variation if you have lots of heroes that deal magic damage; otherwise, the Splintersalvo variation may be preferable for the shred effect.

One thing to keep in mind is that, because of the space requirement to use Arches, the effectiveness of this build can be somewhat map-dependent. Especially on indoor maps, it may be difficult to use Arches consistently.

Defining Abilities
  • Arches+
  • Naturalist: Not strictly necessary, but extremely useful for entering grayplane and moving yourself or your allies around.
  • Long Reach: Also not strictly necessary, but also extremely helpful.
  • Elementalist or Meteor Strike: Your main source of damage. Even on the Meteor Strike variation, it may be worth picking up Elementalist at level 6 or 7 for Splintersalvo, but it's probably not a top pick.
Additional Abilities
(roughly in order of recommendation)
  • Aid: A great defensive option to help more exposed party members survive in the thick of it.
  • Openmind: Almost necessary on the Splintersalvo variation if you do not use the Thnarrs Accordica, but still useful otherwise.
  • Wisdom: Can be very helpful for overland efficiency if you get a map that requires many bridges or passes. Extremely helpful in Monarchs Under the Mountain.
  • Long Reach+: A bit of extra reach is always nice.
  • Heroism: Single turn nova damage at a key moment can sometimes make all the difference in a battle.
  • Windwalk: Can be nice if you need to immediately move across the map.
  • Soulsplitting/+: Damage reduction at the cost of scenery health. Probably better with Openmind.

Upbringing
  • 0.1, 0.4, or 0.8 Potency: 0.1 allows whole number potency at level 6 or level 5 with 1 augment, while 0.4 allows whole number potency at level 7 or level 6 with 1 augment. In practice, 0.1 may be difficult to obtain, so 0.2 is probably fine, but 0.4 will outperform it at higher levels. 0.8 Potency (obtainable from MUtM rescuee) allows whole number potency at level 5.
  • Accuracy: Try to get at least 5 accuracy, but more may be better.
  • Retirement Age: Only useful if you are planning on using them as the parent mystic in All the Bones of Summer, in which case you may want +3 to +6. Otherwise, retirement age bonuses are not needed on mystics at all.
  • Rough order of preference for remaining stats: Dodge/block, Stunt, Speed, Charisma, Health, Recovery Rate, Tenacity, Bonus Damage

Primary Weapon
  • Firling Wand (Splintersalvo variation): Useful for repeated use of Splintersalvo in the same area, but sometimes you will want to destroy the scenery, so make sure you have another weapon.
  • Bone Spear (both variations): Provides +1 potency, which increases the pin range on Arches. Also good for Meteor Strike damage.
  • Elemental Wand or Staff (Splintersalvo variation): Also good choices
Secondary Weapon
  • Swan Scepter (Splintersalvo variation): One free interfusion per turn can make it much easier to use existing Wood scenery pieces for Splintersalvo.
  • Dreamer's Crook (Splintersalvo variation): The teleport effect works on any scenery without damaging it, and the positioning is also more flexible than Treecall (but only works on yourself).
Offhand
(only applicable for the Splintersalvo variation)
  • Thnarrs Accordica: Having 3 interfusion slots to work with makes it much easier to use Splintersalvo and Treecall more consistently.
  • Spellshard: If you use Openmind, the Spellshard provides a bit of extra damage and pin range on Arches.
  • Skeletal Arm (R) (Omenroad): +2 Warding, +2 Spell Damage, +2 Potency. Extra pin range on Arches and +4 damage on Splintersalvo. However, you will not be able to use Relationship Shrines or use a two-handed weapon like the Dreamer's Crook.
Armor
(lots of room for personal preference)
(Splintersalvo Variation)
  • Ramblerunic/Fablerunic (DLC: AaS): Less spell damage than the gowns at tier 2, but stunt chance is helpful.
  • Embergown/Ravenwing: The extra spell damage and warding of the gowns is a nice bonus.
  • Hillthroft/Mountainthroft (DLC: AaS): Extra potency means extra pin range and damage.
  • Heatherdrab: If you started with the Embergown but can't afford to upgrade to the Ravenwing, the Heatherdrab has the same offensive capabilities but more armor than the Embergown.
  • Sparebolting/Haleclate (DLC: AaS): Highest armor option.
(Meteor Strike Variation)
  • Hillthroft/Mountainthroft (DLC: AaS): Extra potency means extra pin range and damage.
  • Dustydrab/Heatherdrab: Balanced defenses with both armor and warding.
  • Sparebolting/Haleclate (DLC: AaS): Highest armor option.

Wings
  • Crow Wings: +1 speed, +10 dodge are both helpful. Fly may be worth taking on level-up, but it's probably not as useful as on some other builds.
  • Hawk Wings or Drauven Wings : +1.4 Speed. Since you will most likely want to move with Treecall when possible, the small increase in speed as compared to the Crow Wings is probably not worth it.

Tail
  • Fox Tail: Speed, dodge, and stunt chance are all helpful.

Ground Pet
  • Critter: The +12 accuracy from the critter is extremely useful for making sure enemies are actually pinned by Arches. Do not underestimate the value of going from 95% to 100% chance to hit. It's not as big of a deal for Splintersalvo and Meteor Strike since both of those have accuracy bonuses, but it still helps.
  • Duck: You generally want to avoid even being attacked, but extra block and dodge can save you at those rare times when you are.

Shoulder Pet
  • Drauven Bird: A modest +5 accuracy, but it helps.
Mystic: Arches: Theme Variations
Splintersalvo Variations
Since none of these options will have huge effects, and many points will be very similar to the Mystic: Spiritblade: Theme Variations section, I will just highlight a few options here. The main difference to keep in mind as compared to the Spiritblade section is that if you will most likely not want to transform an arm unless you also have Openmind, as transforming an arm means giving up the Thnarrs Accordica.

Beartouched
Beartouched is a good choice for the +1 health from the Bear Tattoos. You may also want to transform the legs for +1 health and -0.3 speed each as the speed penalty is not that bad for this build. Make sure to avoid the Inhabited hook.

Child of the Hills
The legs (+1 armor and -0.5 speed each) will offer some extra protection, and the steep speed cost is not as big of deal on this build.

Crystalline
The +6 Stunt of the Gem Eye is nice, and the legs provide a total of +10 block at the cost of 0.2 speed if you transform both of them. Transforming the left arm gives shield functionality and additional stunt chance, but I would not consider it without Openmind since that would mean giving up the Thnarrs Accordica. If you do have Openmind, it's still probably not worth giving up the Spellshard.

Meteor Strike Variations
As you need to have the Celestial theme with at least one transformed arm, additional options are limited. You may want to consider transforming both arms to unlock Falling Stars, which can occasionally be useful if you want upfront damage on a smaller number of enemies. I do not recommend the Celestial legs, but you may want to use the Crowtouched legs (or transform them mid-campaign based on warding and health breakpoints).
Mystic: Ignite
One of the simplest builds in this guide, the Ignite Mystic is nonetheless a valuable addition to your team. Ignite mystics are capable of dealing either moderate damage to several enemies or relatively high damage to a multi-tile enemy at relatively long range. Since Ignite/Ignite+ is a single, non-turn ending action, you can use both Ignite+ and Fireleash on the same turn. For this reason, it's very useful to have a wing upgrade skill such as Fly, allowing you to move every other turn with a swift action. Long Reach is also very helpful both for the initial range of Ignite+ and for the range of Fireleash. Keep in mind that Fireleash cannot reach more than 10+Long Reach tiles away from the mystic, so you may not be able to use the normal full range of Fireleash away from you if the interfused blaze is already far away. This build also potentially leaves room for support abilities, such as Aid or Wisdom.

Defining Abilities
  • Ignite+
  • Long Reach: Not strictly necessary, but very nice.
  • Fly or Talon Dive: Not strictly necessary, but very nice.
Additional Abilities
(roughly in order of recommendation)
  • Heroism: Single turn nova damage at a key moment can sometimes make all the difference in a battle.
  • Aid: A great defensive option to help more exposed party members survive in the thick of it.
  • Wisdom: Can be very helpful for overland efficiency if you get a map that requires many bridges or passes. Extremely helpful in Monarchs Under the Mountain.
  • Spiritblade: Depending on your party composition, it may be worthwhile to pick up Spiritblade at level 6 or 7 if you get the chance. It's probably better to use the Spiritblade base If you want to focus on Spiritblade attacks, though.
  • Long Reach+: A bit of extra reach is always nice.
  • Windwalk: Can be nice if you need to immediately move across the map.
  • Nimble Nature: Decent bonuses, but nothing build-enabling

Upbringing
  • 0.1, 0.4, or 0.8 Potency: 0.1 allows whole number potency at level 6 or level 5 with 1 augment, while 0.4 allows whole number potency at level 7 or level 6 with 1 augment. In practice, 0.1 may be difficult to obtain, so 0.2 is probably fine, but 0.4 will outperform it at higher levels. 0.8 Potency (obtainable from MUtM rescuee) allows whole number potency at level 5.
  • Accuracy: Try to get at least 5 accuracy, but more may be better.
  • Retirement Age: Only useful if you are planning on using them as the parent mystic in All the Bones of Summer, in which case you may want +3 to +6. Otherwise, retirement age bonuses are not needed on mystics at all.
  • Rough order of preference for remaining stats: Dodge/block, Stunt, Speed, Charisma, Health, Recovery Rate, Tenacity, Bonus Damage

Primary Weapon
  • Petriglass Wand: The water stunt effect means you may get another Fireleash after warding has already been burned through (or at least after flanking has been set up). Also provides immunity to corruption tiles.
  • Water Wand: Almost exactly the same as the Petriglass Wand; it's just missing the corruption immunity, which isn't usually a huge deal.
Secondary Weapon
Since you'll almost always be attacking with the primary weapon, you'll want something with other utility, but it's not super necessary.
  • Dreamer's Crook: You'll usually want to keep your distance from enemies, but this is a great way to move long distances when you need to, and can also be used to cross gaps.
  • Bone Spear: Provides +1 Potency, which improves Aid and may allow you to eke out an extra tile of range on Ignite+ if needed.
  • Cyclone Fork: +1 Speed is nice for overland movement and keeping up with your allies in combat.
  • Sojourner: Depending on the map layout, walking through scenery may provide more effective speed than the Cyclone Fork.
Offhand
  • Spellshard: Potency improves both damage and Ignite+ range.
  • Skeletal Arm (R) (Omenroad): +2 Warding, +2 Spell Damage, +2 Potency. Effectively adds +1 range to Ignite and +4 damage to Ignite and Fireleash. However, you will not be able to use Relationship Shrines or use a two-handed weapon like the Dreamer's Crook.
  • Gem Arm (L): If you are using the Crystalline Gem Eye, you may also want the left arm for the shield effect and +6 Stunt.
  • Ice Shield: Shield functionality and +1 warding
Armor
  • Ramblerunic/Fablerunic (DLC: AaS): The extra Spell Damage and stunt chance are both helpful.
  • Hillthroft/Mountainthroft (DLC: AaS): Potency helps with range as well as damage, but defenses are low and it is expensive to upgrade.
  • Embergown/Ravenwing: The Spell Damage of the gowns is nice.
  • Heatherdrab: If you can't afford upgrading the Embergown to the Ravenwing, the Heatherdrab has the same offensive capabilities but more armor than the Embergown.

Wings
  • Crow Wings: +1 speed, +10 dodge are both helpful. This also gives access to the upgrade ability Fly, which provides short range swift action movement and +25 dodge once every other turn.
  • Hawk Wings: +1.4 Speed. The extra speed may not be worth giving up the +10 dodge of the Crow Wings, and Talon Dive is also probably not quite as good as Fly, but it is still a fine option.

Tail
  • Fox Tail: Speed, dodge, and stunt chance are all helpful.

Ground Pet
  • Critter: The +12 accuracy from the critter is extremely useful for making sure your attacks actually connect. Do not underestimate the value of going from 95% to 100% chance to hit.
  • Duck: You generally want to avoid even being attacked, but extra block and dodge can save you at those rare times when you are.

Shoulder Pet
  • Drauven Bird: A modest +5 accuracy, but it helps.

Other Transformations
  • Celestial: The main benefit here is the Star Hair, which gives attacks a 25% chance to blind enemies, meaning you can basically ignore them for one turn if they only do one attack. I don't recommend the arms or legs on this build since the Spellshard is very useful and you will be trying to avoid using your regular movement as much as possible.
  • Crystalline: The +6 Stunt of the Gem Eye is nice, and the legs provide a total of +10 block at the cost of 0.2 speed if you transform both of them. You may also want to transform the left arm for the shield functionality and additional stunt chance, but it's not necessarily worth giving up the Spellshard.
  • Beartouched: Not my top choice, but +1 health of the Bear Tattoos could spare you from needing to make a mortal choice. The legs add more health, but your movement speed will become very slow especially as you age.
Mystic: Spiritblade: Overview and Abilities
Spiritblade provides a fantastic opportunity for coming-of-age children of heroes, new recruits, and low tier legacy heroes to make meaningful contributions in combat, but it's not just a way to make low level characters mechanically relevant among mythwalkers; they make formidable mythwalkers themselves with the right allies.

The basis of this build is using interfused blazes to grant your allies extra attacks with Burning Arrow and Blazing Sword. Therefore, you want to pair Spiritblade mystics with heroes that are capable large amounts of damage with weapon or theme attacks (it cannot be used to trigger interfusion attacks). In my opinion, the best options are Broadswipes warriors (either kind), Vigorflow mystics, and especially Ember Arrows Through Shot hunters.

Spiritblade mystics can dramatically improve the damage of a Broadswipes warrior using hit-and-run tactics, and they can make hit-and-run tactics possible with Vigorflow mystics. To do this the ally would move into position to attack, the Spiritblade mystic(s) would grant them attacks with Burning Arrow or Blazing Sword, then the ally could retreat using their own movement if that area is still not safe.

Ember Arrows Through Shot hunters synergize particularly well with Spiritblade mystics due to their long range attacks. On relatively open maps, this means that it's possible to attack many enemies even if they are spread out. For this reason, a single hunter and multiple Spiritblade mystics can work together to produce a huge number of attacks against any enemies within range and line of sight of the hunter.

You will also need some reliable way of starting blazes, which could be the Ignite ability, a hero with a torch or the Fire Chicken, or a warrior with the Raider ability.

Since the only key ability for this build is Spiritblade+, there is a lot of room for variation with the remaining abilities, and I will not list every possibility. You will want to keep both of your arms human with most themes, but two of the most interesting support options require transforming an arm: either the left Sylvan arm for Invigoration, or the right botanical arm for Entangle.

For a whole-team focused guide on using Spiritblade mystics, see AngusOfTheDandelion's guide here. Also thanks to AngusOfTheDandelion for additional suggestions for this guide, including uses of Elementalist, Openmind, Arches, Naturalist, more advanced strategies with the Thnarrs Accordica, and the Spiritblade Vigorflow Sylvan mystic.

Defining Abilities
  • Spiritblade+
Additional Abilities
(roughly in order of recommendation; the actual value of each ability will depend greatly on the other aspects of the build)
  • Ignite: If you don't have a hero with a torch in the party, Ignite can be a good way to produce an interfused blaze with good positioning.
  • Long Reach: The extra range increases the distance that allies can be away from the interfused blaze for Burning Arrow and Blazing Sword to work.
  • Covering Fire: If you use the Fire Chicken, this can be a great defensive option, especially because enemies avoid walking through blazes when possible.
  • Heroism: Not as big of a deal as for some other builds since the main actions are already non-turn ending, but it can still be helpful.
  • Long Reach: The extra range increases the distance that allies can be away from the interfused blaze for Burning Arrow and Blazing Sword to work.
  • Aid(+): A great defensive option to help more exposed party members survive in the thick of it. It is most useful on battles where your party does not start right next to enemies.
  • Wisdom: Can be very helpful for overland efficiency if you get a map that requires many bridges or passes. Extremely helpful in Monarchs Under the Mountain.
  • Elementalist: The most important part of Elementalist for this build is that it prevents interfused blazes from burning out when they are not on debris tiles. This is mostly useful when you are planning on using multiple Spiritblade mystics in one party as it is usually not that difficult to get decently positioned blazes on debris if you only need one or two, but it still improves reliability. Splintersalvo may also be useful for attacking and clearing enemy cover.
  • Openmind: If you do not use the Thnarrs Accordica, this can be very helpful to avoid needing to use Withdraw. It also makes it much easier to use the passive bonuses of Spiritblade.
  • Ignite+: Allows you to produce an interfused blaze even on tiles without debris, but without also having Elementalist, it will burn out before the next turn.
  • Fly or Talon Dive: Allows you to move a bit every other turn without using your main actions.
  • Arches(+): A good control option if you are close enough, and it will increase the chance of being able to use one of the Spiritblade passives. This abilities usefulness is especially variable depending on play style.
  • Mark Prey: If you are using a variation that does not often use your swift action, this can be a good option to reliably set up flanking on an important enemy.
  • Naturalist+: It's a steep investment, both in terms of abilities and action economy (at the beginning of battles), but Naturalist+ allows you a renewable source of blazes through burning plants (fire will spread onto plants even without being destroyed first). This turns Wild Grasp into a swift action, which allows you to recover an action point if you stunt with a water weapon providing more uses of Burning Arrow and Blazing Sword, so Stunt is useful on this variation. Treecall may also be helpful.
  • Bard: +5 stunt chance and cheaper recruitment can be nice.
  • Windwalk: You won't generally want to move very often, so being able to move a long distance with a swift action can be helpful.
  • Long Reach+: Probably not important, but may be nice.
Mystic: Spiritblade: Details
Upbringing
  • 0, 0.1, 0.4, or 0.8 Potency: You really don't need large amounts of potency for this build, but it can be helpful for Aid, Invigoration, and Ignite range. 0.1 allows whole number potency at level 6 or level 5 with 1 augment, while 0.4 allows whole number potency at level 7 or level 6 with 1 augment. In practice, 0.1 may be difficult to obtain, so 0.2 is probably fine, but 0.4 will outperform it at higher levels. 0.8 Potency (obtainable from MUtM rescuee) allows whole number potency at level 5.
  • Speed: You don't want to move very often with this build, but when you do, it's nice to be able to move farther. Also helps overland efficiency.
  • Charisma: In addition to building relationships and many event rolls, Charisma also improves the speed of building river bridges and mountain passes, so it is especially valuable with Wisdom.
  • Dodge/Block: Improving the chances of staying alive is always nice.
  • Retirement Age: Only useful if you are planning on using them as the parent mystic in All the Bones of Summer, in which case you may want +3 to +6 (Although I should note that I definitely don't recommend using a Spiritblade mystic as the parent in AtBoS). Otherwise, retirement age bonuses are not needed on mystics at all.
  • Rough order of preference for remaining stats: Health, Warding, Recovery Rate, Tenacity, Bonus Damage, Accuracy, Stunt

Primary Weapon
Since you will almost never be attacking, I'm considering "primary" weapons to be ones that provide benefits when you end your turn holding them and "secondary" weapons ones that provide benefits on your turn, but you can have both from the same category if you want.
  • Night Shard: Extra block and dodge are nice.
  • Dreamer's Crook: As much avoidance as the Night Shard at tier 1, but it requires both hands. You'll usually want to keep your distance from enemies, but this is a great way to move long distances when you need to, and can also be used to cross gaps.
  • Sojourner: As much avoidance as the Night Shard at tier 1, and it allows walking through scenery, but it requires both hands.
Secondary Weapon
  • Bone Spear: Provides +1 potency, which is helpful for Aid, Invigoration, and Ignite range.
  • Swan Scepter: One free interfusion once per turn is helpful if you have other swift actions, although not nearly as impactful as for Vigorflow mystics.
  • Cyclone Fork: +1 Speed is nice.
Offhand
  • Thnarrs Accordica: Having an extra interfusion to work with can reduce the chance of needing to spend actions on withdrawing. It also makes it easier to use the passive bonuses of Spiritblade. You can even sometimes effectively get a free Withdraw (only from the farthest away interfused target) if you switch to a two handed weapon before the end of your turn while over your normal interfusion limit (tip from AngusOfTheDandelion).
  • Spellshard: +1 potency for Aid or Ignite.
  • Ice Shield: Shield functionality and +1 warding is a decent defensive boost.
  • theme arm (Sylvan or Botanical): Depending on your play style, these may be top choices. Discussed more in the Theme Variations section.
Armor
  • Dustrydrab/Heatherdrab: A decent amount of armor and warding and fairly cheap to upgrade.
  • Sparebolting/Haleclate (DLC: AaS): The high armor is very helpful, and spell damage is not useful that often, anyway.
  • Witchingsheaves/Kestrelwing (DLC: AaS): Speed and dodge are helpful, and if an attack does get through, Witchveiling may save you, but that only helps if you do not get one-shot.
  • Hillthroft/Mountainthroft (DLC: AaS): The extra potency is useful for Ignite range, Aid, and Invigoration, if you rely on those, but it has low defenses and is expensive to upgrade.

Wings
  • Crow Wings: +1 speed, +10 dodge are both helpful. This also gives access to the upgrade ability Fly, which provides short range swift action movement and +25 dodge once every other turn, which may be worth considering.
  • Hawk Wings: +1.4 Speed. The extra speed may not be worth giving up the +10 dodge of the Crow Wings, and Talon Dive is also probably not quite as good as Fly, but it is still a fine option (and some themes are not compatible with Crow Wings).
  • Drauven Wings: Same base stats as the Hawk Wings, but the upgrade ability (if you are interested in it) is a bit harder to use.

Tail
  • Fox Tail: Speed and dodge are both helpful.

Ground Pet
  • Fire Chicken: The ability to start fires without any conveniently located debris tiles can improve the reliability of Spiritblade, but you may not need it very often. The fire tile immunity itself can come in handy, and the upgrade ability Covering Fire is a good defensive option as long as enemies can see other heroes (and therefore will not usually be using the Search ability), as enemies usually avoid attempting to walk through blazes.
  • Duck: You generally want to avoid even being attacked, but extra block and dodge can save you at those rare times when you are. This is especially helpful against enemies that can make it to your back line from off-screen, like Pilots and Ragers.
  • Shadowcat: If you have a swift action available, setting up flanking and shredding enemy warding isn't a bad way to use it, but this is probably not as strong as the Duck or Fire Chicken.

Shoulder Pet
  • Drauven Bird: The +5 accuracy doesn't really help but it doesn't hurt either, and the upgrade ability Mark Prey may be useful.
  • None: If you typically use your swift action on other abilities, you may not want Mark Prey in your upgrade pool.
Mystic: Spiritblade: Theme Variations
Like most other aspects of this build, transformations are not instrumental to performance, but there are still some options for extra benefits. I don't recommend transforming any arms unless otherwise noted (since triggering another character's attack will nearly always be more effective than using your own in this case), but the build will still work fine if you do. I think my top picks would be Sylvan followed by Shadow, Beartouched, and Crystalline, with Botanical being somewhere in the mix. Keep in mind that some themes are not mutually exclusive and legs can often be mixed. Here are most options, in alphabetical order:

Beartouched
If you don't know what else you want for this character, Beartouched is a good choice for the +1 health from the Bear Tattoos. You may also want to transform the legs for +1 health and -0.3 speed each if you are able to manage the loss of speed. Make sure to avoid the Inhabited hook.

Botanical
Transforming the right Botanical Arm provides Entangle, which is a swift action that can be used once per turn to move an enemy or ally, making this an interesting support option. The base range for both initial interaction and movement from the initial tile is 3.1, both benefit from Long Reach, and the movement range additionally benefits from Sharpshooter (although Sharpshooter may not be worth a whole ability in this case).

The legs (+0.3 speed and -0.2 health each) are probably a good choice .

Child of the Hills
The legs (+1 armor and -0.5 speed each) will offer some extra protection, but the speed cost is fairly steep.

Crowtouched
You will likely already have the wings if you are using a compatible theme, but you can also have other Crowtouched aspects if you like. The Crow Head provides a swift action attack (blinding on stunt) that will likely only very rarely be useful. The legs (+0.6 warding and -0.2 health each) may be worth taking, and are compatible with many other builds.

Crystalline
Since stunt is not particularly useful on this build, the main reason to choose the Crystalline theme would be to transform the legs for +5 block each (at the cost of -0.1 speed each).

Elmsoul
The Elmsoul legs (+0.6 armor and -0.4 speed each) are similar to the Child of the Hills legs, but those have a somewhat better exchange rate between armor and speed than the Elmsoul ones. The Elmsoul Hair also offers +10 recovery rate, but that's compatible with Child of the Hills (and Sylvan) anyway. On the other hand, Mark of the Horn is compatible with Elmsoul, but not with Child of the Hills or Sylvan, so that presents an option for +0.5 warding and some charisma and tenacity.

Mortificial Enhancements
The legs give a little extra speed at the cost of some block (+0.3 speed and -3 block each), and they are compatible with any other themes, as long as you get one of these first.

Shadow
Extra speed is nice for repositioning and overland efficiency. It's probably better to let a leg transform along with the eyes instead of an arm. The legs themselves only affect the amount of health regained from Harvest kills, so consider using a compatible leg from another theme.

Stormtouched
The primary interest in Stormtouched for this build would be transforming the legs to gain access to Thunder Stomp. It may be of limited utility since you will not likely be within range of enemies very often, but it can be nice to have the option available, although it does also decrease block by 5 per leg. If you do use the Stormtouched legs, I recommend transforming both of them in order to increase the range. These legs are compatible with any other themes.

I do not recommend using the Stormtouched head on this build.

Sylvan
Transforming the left Sylvan arm provides Invigoration, which is essentially a less potent version of Aid, but it can be used twice per battle as a swift action by default. Like Aid, Long Reach increases the interaction range of Invigoration. Also like Aid, it is most useful in battles where your party does not start right next to enemies.

The Sylvan legs (+0.5 speed and -5 block) may be a good choice if you are typically able to stay back out of danger and want to make the most of times you do move. They are also beneficial for overland efficiency.

As suggested by AngusOfTheDandelion, it's possible to do a hybrid Spiritblade/Vigorflow build if you transform both arms or just the right arm (with abilities Spiritblade+, Vigorflow+, and Openmind), primarily playing like a Spiritblade mystic, but still being able to deal damage yourself with Witherbolt when appropriate. You may want additional accuracy (from Upbringing/the Critter) if you use this option.

Wolftouched
Like the Crowtouched head, the Wolf Head provides a swift action attack that will only rarely be useful. The legs (+0.5 speed and -0.3 armor each) could be a decent trade, but the Shadow eyes are likely preferable.
28 Comments
Artemis 3 Jun, 2024 @ 6:35am 
Kind of wish Bone Spear wasn't the answer to 90% of builds
psionusoid  [author] 1 Mar, 2024 @ 10:32pm 
(2)If you are able to grab Battledance at level 7 (after getting the theme attack upgrade), that can definitely be powerful, though. If you're doing an omenroad run where you can get more than 7 abilities, I imagine something like Zealous Leap+, Long Reach+, Broadswipes+, Battledance+, Claw/Frenzy+, Nimble Nature would be pretty scary.
psionusoid  [author] 1 Mar, 2024 @ 10:32pm 
@Noizeslut: (1) Battledance is actually mentioned in the "Zealous Leap Broadswipes" warrior. It's not in the swift attack version since without Zealous Leap, Battledance would mostly only come into play when you don't have to move, which does not happen very often, in my experience. In the Zealous Leap version, I think it would still be pretty difficult to fit into one of the five starting skills, as you'd have to sacrifice Zealous Leap+, which would make Battledance less usable, Long Reach, which would greatly reduce the number of enemies you could hit, or Broadswipes+, which would greatly reduce the amount of damage you would deal. You'd probably be fine starting with Battledance instead of the Broadswipes upgrade, but keep in mind that until you get the theme attack upgrade ability, you'll likely be doing more damage from each of the broadswipes+ hits than from the main theme hit.
Noizeslut 1 Mar, 2024 @ 5:05pm 
I really don't know why battledance isn't mentioned at any point here, you only need one slot and there's really no need for a scorpion tail at that point, can just take wolf touched and frenzy as you see fit. It can depend somewhat on what you're going for but if you want to get more water stunts, a fox tail and battledance+ is going to serve you way more than a scorpion tail, since you need more hits with a water weapon to increase the chances of a stunt in the first place.
psionusoid  [author] 28 Jan, 2024 @ 12:15pm 
@Sly-Scale: Yeah, that's a good point. Enemies can still find you if they use the search action (which they don't really do if other heroes are visible) or if they need to walk through fire to get in range of another hero, but being hidden in a blaze is a lot safer than being hidden without it.

I'll add some more notes about it when talking about the fire chicken/covering fire, thanks!
Sly-Scale 28 Jan, 2024 @ 12:23am 
It's worth mentioning that Covering Fire is very reliable as a source of Hidden. Since most enemies avoid walking into blazes, and since they have to bump into you to reveal you, using Covering Fire to stay out of trouble is a solid move. Just mind the bigger enemies that get forced through more blazes, or any enemies who can only melee your heroes from inside a blaze.

That said, that Critter accuracy is really just so hard to pass up. Maybe with an accuracy upbringing you could go Fire Chicken and get away with it, but you better have everything to gain from the free invisibility.
JessHorserage 2 Dec, 2023 @ 5:03am 
Yes, also, good to know.
psionusoid  [author] 26 Nov, 2023 @ 2:08pm 
@JessHorserage: Age is reset when you recruit legacy heroes into a new campaign (although it typically depends on legacy tier), so any hero can be in an arbitrary number of campaigns. Is that what you are talking about?
JessHorserage 26 Nov, 2023 @ 1:56pm 
Not what I meant, @psionusoid, I meant for, multiple campaigns.
psionusoid  [author] 25 Nov, 2023 @ 2:03pm 
@っLunauticalっ: Battledance can definitely work with the Zealous Leap Broadswipes warrior; however, I don't usually find it to be a huge improvement over using the Scorpion Tail sting as the non-turn-ending action. I think it would be more valuable if you already have an upgraded theme arm attack, though, and it would be very valuable if you don't have the scorpion tail.

Water stunts can only refund one AP per turn, but the others can work multiple times.