Guns of Icarus Online

Guns of Icarus Online

641 ratings
WAT DO: A Guide on What to Do for Almost Anything
By Hypoxaemia
This comprehensive guide includes concise text, annotated images and educational diagrams on what to do in nearly any situation. Whether it's trying to make your ship loadout in 10 seconds or what tools to take when your captain is out for a smoke, this guide will probably have you covered.
2
5
   
Award
Favorite
Favorited
Unfavorite
Getting into and Making a Match
Just click Play lol

If you want to play with your friends, add them to your Friends List by left-clicking on their name->Add to Friends List, then click Invite Friends to Crew. Proceed as normal!
In the Lobby
-
-
-
Changing Loadouts
Character Loadout:

Went into the match with the wrong loadout and people are flaming you for taking only the mallet as an Engineer? Leave the match, change your loadout, and rejoin using the Resume button on the Main Menu.


Went into the match with the wrong class and people are flaming you for being a 4th pilot? ADD SOMEONE FROM THE MATCH AS FRIEND, Leave the match, change your class, and FIND THE MATCH IN THE CUSTOM GAMES MATCH LIST, and click the match to rejoin with your changed class.

-
-
-

Ship Loadout (NOTE: SHIP LOADOUTS CANNOT BE CHANGED IN A NOVICE MATCH):
Engineering Tools and Kits
GUNNERS SHOULD NOT HAVE FIRE EXTINGUISHER OR CHEMICAL SPRAY, because:
a) it makes you useless at actual repairs
b) you can't fix your own gun and
c) You can use Heatsink ammo to fireproof your own gun
-
-
-
Unless your Captain wants you to take a specialty loadout:
ALWAYS have at least 1 Standard Kit onboard


Use the Spyglass by left clicking on enemy ships.
Gunner Ammo and Kits
UPDATE: Lochnagar is changed so it is apparently OP on the Gatling and useless on everything else. Other ammo choices remain the same.
-
-

LOL didn't read (for Gunners/Engineers)
-
-
-
-
-
-
-
-
-
-
-
-
-
-
-
-
-
-
-
-
-
-
-
-
-
-
EDIT for Minotaur: This gun rotates the ♥♥♥♥ out of the enemy ship but the bullet travels very slowly, so you'll probably want to grab Lesmok for easier shots. Some players take Greased for more rotatos-as far as I know, no one has established a clear optimal ammo yet.


Thank you Wundsalz and friends!
Pilot Tools and Kits
-
-
-


t
Ship Building for Dummies
  • Every ship has a Main side/sides.
  • Each side needs to work on its own. It needs to have a combo.
  • For a side to work on its own, it needs a certain combination of guns.


There are 3 types of combinations:

  • Fast Killing: At least 1 Piercing Gun (Gatling/Hades/Mercury), at least 1 Explosive Gun (Mortar/Banshee Light Flak/Hwacha/Artemis/Heavy Flak/)

  • Disabling: Any combination of Flechette (Light and Heavy Carronade), Shatter (Artemis, Hwacha) and Fire (Flamethrower)

  • Hybrid: Most sniping guns can do both killing and disabling. Some guns have secondary/tertiary functions (Gatling and Carronades can disable with accurate aiming, Heavy Carronade can break armor sort of ok)

When you set up a combo:
  • The ranges of the guns must overlap.
  • The guns need to be able to turn enough to shoot at the same target.

Ships that are 1 gun focused:
  • Goldfish

Ships that are 2 gun focused:
  • Pyramidion
  • Squid

Ships that are 3 gun focused:
  • Junker
  • Mobula
  • Galleon

Ships that are 4 gun focused:
  • Spire


Gun Arcs (CAPTAIN I DON'T HAVE ARC NO ARC NO ARC Now I have arc-never mind NO ARC ARGH)

UPDATE: In patch 1.4.1, the Heavy Carronade received vertical arc nerfs. The upwards arc is now 20, the downwards arc is now 10 (nerfed from 30/15.)
UPDATE 2: A recent patch overhauled the Heavy Flak so it has more shots and shoots faster but does slightly less damage. Still has the same role though.


TL;DR

DOING ANY OF THE FOLLOWING BUILDS IS AN OPEN INVITATION FOR ENEMIES TO WRECK YOU SO HARD, YOU WILL GO INTO A CORNER AND CRY YOURSELF TO SLEEP

Ship
The Loadout
The Problem
Pyramidion
2 Front Flaks
No Piercing damage to expose hull for the Flaks
Pyramidion
2 Front Mortars
See above, and also no you will not be able to ram down the enemy armor 100% of the time
Pyramidion
2 Front Gatlings
1 Gatling+1 Carronade is a better ramming build, because the enemy will be unable to dodge your ram vertically without a balloon. Also, broken balloons transfer damage to Hull, thus increasing the target size
Pyramidion
Front Harpoon+Front Flamethrower
The front harpoon is off-center and will just drag your ship everywhere but towards the direction you want. Triple flamethrower can be done on the Pyramidion and is better than this.
Goldfish
Front Heavy Flak
Pure support, your ally needs to be in on the plan with heavy armor piercing, otherwise you can never kill anything. However if you try really hard you can probably steal secure some kills for your team.
Spire
Front Harpoon
You are a fragile ship and you're going to pull IN enemies? Seriously? There are better YOLO Spire builds out there, such as Mortar/Gatling/Gatling/Hwacha or Gatling/Gatling/Gatling/Lochnagar Heavy Flak or Flamer/Flamer/Flamer/Carronade
Spire
Mercury Field Gun in any slot that is not Slot 2
The Mercury can't rotate at all. It will be useless because it wont be aimed at the main target. If you want Double Mercury, take the Mobula and have 2 Mercuries on the same side (not the top slot), or take a Junker.
Any ship
Gat/Flak combo
Gat/Mortar is a far superior choice for close range, and Hades/Flak far superior for mid range
Any ship
Mercury/Flak combo
Hades/Flak far superior for mid range, Mercury/Artemis superior for long range
Any ship
Harpoon(s) mounted anywhere but the front (Except Galleon top left side)
It will just pull your ship everywhere except towards the direction you want.


"But vyew, some high-level players stomped me with one of these stupid builds!"
They're just trolling you.


Metaships: Pyramidion
NOTE: This are by no means the only builds that are good. I encourage you to experiment. These builds are for when you don't know what to do, you have 10 seconds, and just want a easy ship that will definitely work. That is why I didn't include some niche counterpicks or some of my personal favourites.


Pyramidion
NOTE: Slots 3 and 4 are just recommendations, you can change them to whatever seems to be most appropriate to the situation. E.g. on Desert Scrap you may want to get some Mine Launchers for point defense.

Metamidion Classic
Premier close range killing ship. Get on an enemy, stay on them, ram if you must. Always works. Previously the top tier ship.
  • Slot 1: Gatling
  • Slot 2: Mortar
  • Slot 3: Light Carronade
  • Slot 4: Banshee
-
-
-

Ramming Build "Retardmidion"
Very good against fragile ships with big exposed balloons: Mobula, Junker, Spire, Goldfish. Bad against other Pyramidions.
  • Slot 1: Gatling
  • Slot 2: Light Carronade
  • Slot 3: Flamethrower
  • Slot 4: Carronade
-
-
-

Medium Range Metamidion
Reliable medium range bombardment and killing because the Pyramidion can maintain distance by moving backwards/forwards. Be sure to not get too close, otherwise your Hades and Flak will be within their minimum range.
  • Slot 1: Hades
  • Slot 2: Light Flak
  • Slot 3: Light Carronade
  • Slot 4: Flare Launcher

-
-
-

Double Hades
  • Slot 1: Hades
  • Slot 2: Hades
  • Slot 3: Light Carronade
  • Slot 4: Flare Launcher

Great balls of fire. Overwhelm the enemy with a rain of thermite and napalm. Don't get too close or you lose the majority of your damage due to being within arming range. The difference between the Double Hades and the Medium Range build is that the Medium Range build has the potential to do a fast kill.

-
-
-

Sniper build
It's a sniper build. Less firepower than other sniper builds, but can reposition easily and has decent armor and hull.

  • Slot 1: Mercury
  • Slot 2: Artemis
  • Slot 3: Gatling
  • Slot 4: Mortar

-
-
-


Metaships: Goldfish
NOTE: Slot 3 is just a recommendation, choose whatever you think is appropriate.
EDIT: As of Patch 1.4.1, with the introduction of Pilot Stamina that buffs ship maneouverbility, and nerfs to the Pyramidion's mobility, the Goldfish has displaced the Pyramidion as the top tier ship.

Hwachafish
Reliable disabling and supportive killing power. If you are good, you can combo the right Gatling with the front Hwacha to drop enemy armor and then instakill with the Hwacha in a 1v1.
  • Slot 1: Hwacha
  • Slot 2: Gatling
  • Slot 3: Light Carronade or Flamethrower

-
-
-

Blenderfish
Classic ship. Highly mobile balloon popper that can 2-shot enemy balloons and camp them down to the ground. Very effective against any ship that is not a Pyramidion. Great for killing Junkers and pesky Squids.

  • Slot 1: Heavy Carronade
  • Slot 2: Banshee or Flamethrower
  • Slot 3: Flamethrower, Banshee or Gatling
-
-
-
Lumberfish
Sniper support, can pop enemy balloons in 3 shots from 1.5km away. Mobility of the Goldfish allows for fast repositioning to get better or unexpected angles on the enemy. Just don't get caught alone or by a close range ship because you won't be able to CQC at all. WARNING: LUMBERJACK HAS A MINIMUM RANGE/ARMING TIME. IT DOES NO DAMAGE IF YOU ARE TOO CLOSE. BACK THE ♥♥♥♥ UP.
-
-
-
  • Slot 1: Lumberjack
  • Slot 2: Light Carronade
  • Slot 3: Flare Launcher


Flakfish
HA HA, no. See the DEFINITELY NO ships in the previous section.


-
Metaships: Junker
Metajunker
The infamous metajunker, undefeated during the Sky League tournament. Combines incredible medium range killing and disabling power of the trifecta Artemis/Hades/Artemis combo on the left with the backup close range Gat/Mortar killing power on the right. Don't let balloon poppers get close to you or you are in trouble. Previously God Tier after Triple Artemis Junker got nerfed.
  • Slot 1: Artemis
  • Slot 2: Gatling
  • Slot 3: Hades
  • Slot 4: Mortar
  • Slot 5: Artemis
-
-
-


Triple Artemis of Annoyance (Classic)
So good it was hit with the nerf bat 2 years ago because every match was 4x Triple Artemis Junker. Still pretty good as a long range disabling ship. Position well, have decent gunners and you will break everything on the enemy ship. You will have trouble piercing enemy armor though, which is where your teammate comes in-or you can just use the Metajunker.
  • Slot 1: Artemis
  • Slot 2: Gatling
  • Slot 3: Artemis
  • Slot 4: Mortar
  • Slot 5: Artemis
-
-
-


Dueling Junker
Double close range sides, if you think you will only be fighting in close range. Use the Junker's superior turn rate to continuously strafe around the enemy.
  • Slot 1: Whatever you want
  • Slot 2: Gatling
  • Slot 3: Gatling
  • Slot 4: Mortar
  • Slot 5: Mortar
-
-
-


Anti-Balloon/Anti-Squid
Good against anything that's not a Pyramidion. Nearly a hard counter to Squids.
  • Slot 1: Banshee
  • Slot 2: Flamethrower
  • Slot 3: Flamethrower
  • Slot 4: Light Carronade
  • Slot 5: Light Carronade
-
-
-


Sniper
It's a sniper build. LIke the sniper Pyramidion, but is still effective in close range when using the close range side.
  • Slot 1: Flare Launcher/Whatever you want
  • Slot 2: Gatling
  • Slot 3: Mercury
  • Slot 4: Mortar
  • Slot 5: Artemis
-
-
-
Metaships: Galleon
NOTE: Slot 6 is a backup gun and you can change it to whatever you want. Chances are the pilot will be the only one with time to shoot it.


Metagalleon
A very common and reliable build with a long range left side and a close range right side. You can use double Hwachas on the right instead of one Hwacha and one Carronade.
  • Slot 1: Heavy Carronade
  • Slot 2: Lumberjack
  • Slot 3: Hwacha
  • Slot 4: Heavy Flak
  • Slot 5: Hades
  • Slot 6: Flare Launcher/Light Carronade
-
-
-

Gentleman's Galleon
2 Lumberjacks so your gunners don't miss. Hades for piercing so your teammate can kill them. Right side is still close range for backup. Sort of a support ship.
  • Slot 1: Heavy Carronade
  • Slot 2: Lumberjack
  • Slot 3: Hwacha
  • Slot 4: Lumberjack
  • Slot 5: Hades
  • Slot 6: Flare Launcher/Light Carronade

-
-
-

Classic Sniper
You can solo kill an enemy from long range. Right side is close range for backup. Equivalent to other sniper ships in terms of killing power, but due to a lack of Artemis doesn't have as much disabling power. Note that the Galleon can only strafe to control distance while attacking the target while the Mobula and Spire can move straight towards or away from the target. The reason this one doesn't have a Lumberjack is for the Heavy Flak insta-kills.
  • Slot 1: Heavy Carronade
  • Slot 2: Heavy Flak
  • Slot 3: Hwacha
  • Slot 4: Heavy Flak
  • Slot 5: Mercury
  • Slot 6: Flare Launcher
-
-
-

Lion Gun OP
Lion Gun OP. Ideally the Gunner should use both of the Hwachas (Engineers should not use the Hwachas) on one side and just keep alternating between them to double the fire rate.

  • Slot 1: Hwacha
  • Slot 2: Hwacha
  • Slot 3: Hwacha
  • Slot 4: Hwacha
  • Slot 5: Gatling
  • Slot 6: Light Carronade
-
-
-

Dueling Galleon
Close range dueling Galleon. Basically the Galleon equivalent to Gat/Mortar.

  • Slot 1: Hwacha
  • Slot 2: Hwacha
  • Slot 3: Heavy Carronade
  • Slot 4: Heavy Carronade
  • Slot 5: Gatling
  • Slot 6: Light Carronade
-
-
Metaships: Mobula
Sky PillowMobula
NOTE: Slots 4 and 5 are backup guns of your choice.

30 Second Kill
More DPS than the Metamidion with 2 Gatlings. You should be able to 1 clip kill any enemy ship as long as the mortar is fired only when the enemy armor is down.
  • Slot 1: Gatling
  • Slot 2: Gatling
  • Slot 3: Mortar
  • Slot 4: Artemis
  • Slot 5: Artemis


-
-
-

Mid Range
Double flaks for huge mid-range killing power once the enemy armor is down, plus the flaks reload so fast your gungineers are unlikely to miss the window.
  • Slot 1: Light Flak
  • Slot 2: Light Flak
  • Slot 3: Hades
  • Slot 4: Artemis
  • Slot 5: Artemis

-
-
-

Sniper
One of the two optimal sniping builds. Effective versus other sniper ships because the Mobula is a vertically short ship and is therefore hard to hit at long range. Additionally the Mobula can bob up and down to throw off enemy shots.


  • Slot 1: Artemis
  • Slot 2: Artemis
  • Slot 3: Mercury
  • Slot 4: Flare/Mine Launcher/Banshee/Gatling/Carronade/Flamethrower
  • Slot 5: Flare/Mine Laumcher/Banshee/Gatling/Carronade/Flamethrower

-
-
-

Four Gun Builds


A unique feature of the Mobula is the ability to use four light guns on the same target if the ship is turned to the correct angle (use the little spikes attached to railing in front of the pilot to aim). This requires the Pilot to man the gun above him by using a little parkour trick: if you look up and jump, you can man the top gun from below (SKIP TO 3:21):


The disadvantage is, of course, the requirement for all four crew members to be communicating and coordinated, and for the pilot to be confident in both piloting the ship stably and shooting when needed.
-
-
-

20 Second Kill
Even faster.

  • Slot 1: Gatling
  • Slot 2: Mortar
  • Slot 3: Light Flak/Mortar
  • Slot 4: Flare/Mine Launcher/Banshee/Artemis/Carronade/Flamethrower
  • Slot 5: Gatling


Artillery
A build that flings an unreal amount of mid range killing power at enemies. Double Hades to melt enemy armor, Artemis to annoy them by disabling their components, and a Light Flak for the kill shots.


  • Slot 1: Artemis
  • Slot 2: Hades
  • Slot 3: Light Flak
  • Slot 4: Flare/Mine Launcher/Banshee/Artemis/Carronade/Flamethrower
  • Slot 5: Hades

Metaships: Spire
Spire

Sniper
The other optimal sniping build. Maximum long range killing power. Mine Launcher for defence.
  • Slot 1: Heavy Flak
  • Slot 2: Mercury
  • Slot 3: Artemis
  • Slot 4: Mine Launcher

-
-
-

Lumberspire
Lumberjack keeps enemies near the ground and away from you while you melt them with the Hades and Flak. Positioning is key.
  • Slot 1: Lumberjack
  • Slot 2: Hades
  • Slot 3: Light Flak
  • Slot 4: Flare Launcher


YOLO Spire
Use the Hwacha to disable enemy guns so they can't shoot back while you strip their armor with the double gatlings and kill them with the mortar. 30 second kill or bust.
  • Slot 1: Hwacha
  • Slot 2: Mortar
  • Slot 3: Gatling
  • Slot 4: Gatling


-
-
-

Metaships: Squid
Squid

NOTE: Slot 3 is a backup/running away gun of your choice. Unless you're one of those people who flies the Squid backwards.

Remember that you should have at least 1 Squid on your team during a Crazy King match so the Squid can sprint around the map and capture or contest points that are far away from each other.

Classic Squid
The most annoying build. Constantly pop enemy balloons and set fires to all of their stuff. While you may not be able to kill a ship by yourself, the enemy will be nearly completely helpless. Extremely hard to deal with for Galleons, Spires and Mobulas.

  • Slot 1: Flamethrower
  • Slot 2: Light Carronade
  • Slot 3: Mine Launcher


-
-
-

Kill Squid
A true dogfighter. If the enemy ship is squishy like a Spire, you will have a good day as you kill them in one strafing run. However it may take time to learn how to bring the right mortar into arc at the right time. Substitute the Mortar for Banshee for easier use.

  • Slot 1: Gatling
  • Slot 2: Mortar
  • Slot 3: Light Carronade

-
-
-
In the Match: The HUD
EDIT: Yes this is outdated but some of this is still in the new UI

HELP ME VYEW IT'S SO COMPLICATED :(

THANKS VYEW :)
Crew Positions and Responsibilities
Pyramidion
-
-
-
Goldfish
-
-
-
Junker
-
-
-
Galleon
-
-
-
Mobula
-
-
-
Spire
-
-
-
Squid
Engineering: Things to Do

Engineer Jobs:
There are 3 types of Engineer. Which type you are depends on where on the ship you are assigned.

Main Engineer/Dedicated Engineer (In charge of the most components, or the most important ones)


Locations:
  • Pyramidion Lower Deck
  • Junker Rear
  • Goldfish
  • Squid (the one that is not manning guns)
  • Galleon Top Deck

Priorities (High to Low)
  • Repairing (70% to 95% of the time)
  • Repairing Hull
  • Repairing Balloon
  • Repairing Engines
  • Repairing Side/Backup Guns
  • Spotting/Calling out enemies (10%)
  • Shooting (10%/when not repairing/if the opportunity for a kill/disable arises)

Vyew's Handy Pro Tips
  • Always be moving. Don't loiter around 1 component too long, because there will always be something else to fix.
  • Prioritize components in that order above-but be flexible. You can try tanking your Hull in an emergency, but without Engines you will die eventually because you couldn't run away.
  • Ask for help from the other Engineer(s) on your ship if you are overwhelmed. Usually this will be when all components you are in charge of are broken.
  • Don't get distracted by shooting.
  • Learn your parkour: https://www.youtube.com/watch?v=xK9hOU92chE


_________________________________________________________________
Gungineer (Half Shooting, Half Repairing, can be a buff kit engineer)


Locations:

  • Pyramidion Top Deck Balloon Side (Balloon/Top Left Gun/Top Right Gun)
  • Junker Front (Hull/Front Gun
  • Squid (the one that is manning guns) (Hull, overlap with main engineer)
  • Galleon Lower Deck (Heavy Guns and Turning Engines)
  • Spire (Top Deck Front Gun, Top Side Gun, Hull, Main Engine OR Lower Deck Heavy Gun, Lower Deck Side Gun, Balloon, Turning Engines)
  • Mobula Sides (1 Engineer on each side, All components on that side)


Priorities (High to Low)
  • 0/100 Repairing/Shooting when not being shot at/no return fire/nothing to repair
  • 60/40 Repairing/Shooting in combat
  • 90/10 Repairing/Shooting in a emergency
  • Repairing the closest components
  • Helping the Main Engineer in emergencies (E.g all Engines down, Hull down)

Vyew's Handy Pro Tips
  • You should be shooting lots (depending on the ship) to add DPS to your ship, but guess what, if your Hull is flashing red, FIX IT. You can't shoot if you're dead.
  • Help the Main Engineer if it's obvious they are overwhelmed. Ships are defeated when their Engineers are overwhelmed.

_____________________
Buff Gunner

(Basically a Gunner, but with a Buff Hammer and only 1 ammo)

Locations:
Wherever a Gunner would be. Buff Gunners are replacements for Gunners and are only used if increasing damage is worth more than the utility

Priorities:
You're a Gunner in an Engineer's clothes. Shoot mostly, buff your own gun, with a side of buffing other components if you have time.

Vyew's Handy Pro Tips
  • Make sure you keep your own gun buffed, and take the most effective ammo for it.
  • Even if you are just a "better" Gunner, your heart is still slightly Engineer. Help repair in an emergency.
Gunning: Things to Do
Vyew's Handy Pro Tips:

SHOOT STUFF.

  • No seriously
  • You SHOOTING STUFF may save your ship's life far more effectively than a Pipe Wrench on the hull
  • Focus on shooting, the crew is counting on you to output damage and disables

SHOOT THE RIGHT THING.
Different guns have different damage types. Since this is a tl;dr guide, I won't go into specific details, instead I'll just give you this easy way to remember what to shoot what with:

IF THE GUN SHOOTS BULLETS: Shoot it at the enemy Hull (not the Balloon, which is the round thing above or below the Hull)

IF THE GUN IS A SHOTGUN: Shoot it at the Balloon.

IF THE GUN SHOOTS EXPLODING THINGS: Shoot it at the Hull.

IF THE GUN IS A FLAMETHROWER: Shoot it at everything.


STAY ON YOUR MAIN GUN


  • 100% of the time, as a Gunner you will be assigned to the most important gun on the ship
  • Engineers handle the secondary guns
  • SO STAY ON IT.


FIX YOUR OWN DAMN GUN (TAKE PIPE WRENCH)


Engineers have priorities, and they are busy. Make their job easier, and make your job funner, by fixing your own damn gun so you can keep shooting.


USE THE RIGHT AMMO

  • Lesmok only for long range
  • Greased only for close range
  • Burst is useless on weapons that do not have an AoE (Gatling, Mercury, Carronades) because 50% increase of 0 is still 0, and will only decrease DPS when used on those weapons. Burst does not increase damage. Read its description.

Example of correct ammo use:

Lumberjack-
Lesmok for Long Range (does not decrease damage)
Burst or Normal for Medium Range (more shots=more margin for error, and the ability to pop 2 enemy balloons in 1 clip/magazine/cartridge/container for ammunition)
Greased for Close Range (extremely high DPS)
Lochnagar when too close for Greased (Instakill balloons, may save your life)


COMMUNICATE


  • Many guns have crappy arcs (how much they can turn) in certain directions.
  • Communicate with your captain when you are losing arcs.
  • As the least busy crew member on the ship, you need to be the main spotter of enemy ships. Use the Spyglass by left clicking on enemy ships.

Have mic? Press X to talk to your crew. No mic? Press V to open up the Signals interface on the middle left of the screen (you'll see what I mean).
Piloting: Things to Do
NEVER DO ANYTHING ALONE
  • Don't charge in to 1v2 enemy ships. You're gonna die.
  • Don't leave your teammate to die alone. They're gonna die, then you're next.
  • Don't bail on your teammate if they aren't bailing too. You're both gonna die.
  • Focus the same target as your teammate/Keep the other ship off your teammate so they can 1v1 an enemy in peace. This means that both of you don't die. Legit NO NEWBIES I HAVE EVER SEEN do the split 1v1 properly. Just stick to focus fire guys.

  • FOLLOW YOUR TEAMMATE (unless you are pulling a flank). So you don't get ganked.
  • If your teammate is about to die, don't rush in, because they will be dead by the time you get there.


DO WHAT YOUR SHIP IS BUILT FOR
  • STICK TO THE RANGE THAT YOUR SHIP'S GUNS ARE FOR.
  • Don't mix and match ranges (example: Mercury/Mortar)
  • Don't duel a close range ship with sniper guns, because close range guns severely outdamage long range guns.

DECIDE IF YOU WANT TO KILL OR DISABLE.
What do I mean by disable? It means doing any combination of the following:
  • Popping Balloons
  • Breaking Components
  • Burning Everything

Oftentimes you can do both killing and disabling by incorporating ramming or sniping out components, but remember which focus your ship has.

What do I mean by killing? It means that your ship has a combination of Piercing and Explosive guns so you can quickly break armor, then go for the kill with Explosive weapons.

IF YOU KEEP MOVING THE SHIP, YOUR GUNNERS WILL MISS EVERY SHOT
  • Projectiles shot from guns inherit momentum from the ship, just like Tribes: Ascend.
  • Turn the ship right while your gunners are shooting and all of their shots will be flung to the right.
  • If you want your gunners to accurately snipe an enemy ship, stop your ship.

COMMUNICATE
See that (commander) next to your name in the scoreboard? That means you need to COMMAND. Have a mic? Press X to talk to your crew, press C to talk to other captains on your team to coordinate strategies so no one dies alone.

No mic? Press V to open up the Signals interface on the middle-left of your screen (you'll see what I mean.) Press B when your cursor is pointing at an enemy to put some crosshairs on it for your crew.


STOP GETTING OFF THE HELM FOR NO REASON

NEVER GET OFF THE HELM UNLESS:

  • Repairing Junker balloon (look up from helm)
  • Repairing Galleon balloon (half second walk)
  • Rebuilding Pyramidion hull (ONLY EMERGENCIES)
  • Shooting Spire guns on the top deck in emergency (Mine Launcher) or when sniping
  • Shooting or buffing Mobula top deck center gun (look up and jump)

I keep seeing newbie pilots jump off the helm, walk halfway across the ship, shoot a gun for 2 seconds, doing peanut damage, and then walk back WHILE IN THE MIDDLE OF COMBAT. WTF GUYS???

Maintaining control of your ship 100% of the time is extremely important. All ships have a lot of inertia so you need to start your turns before the enemy completes theirs. This is especially important if your ship can really only use front guns (LOOKING AT YOU PYRAMIDION PILOTS.) I keep seeing pilots get off the helm to shoot at a passing Hwacha Goldfish instead of turning the ship, resulting in the Goldfish completing its turn way before the Pyra and getting a free barrage that breaks everything. Seriously? If you only expose the front of the ship to the Hwacha, only the stuff at the front gets broken.

Additionally you need to be on the helm to use pilot tools in order to dodge stuff (rams and Hwacha) or counter enemy rams (Kerosene/Moonshine prevents your ship from being knocked off target, Impact Bumpers reduces impact damage by 25%.)

STOP GETTING OFF THE HELM.


LEARN HOW TO TURN FAST
If you want to turn fast, set speed to 0. This way the turning engines can work completely in opposite directions because they wont be trying to also move the ship forward. Related to this...

THIS DIAGRAM.
If you want to turn onto a ship that's going past you, don't just press D and hope for the best. Reverse the ship while turning so you get arcs sooner. Credit to mystery man on forums

-
-
-


KNOW THE GAME MODES THAT AREN'T DEATHMATCH
If the game mode is King of the Hill or Crazy King, guess what, it's NOT A DEATHMATCH. Get to the objective(s) and help your teammates hold them.

King of the Hill:
  • Maps: Labyrinth and Desert Scrap
  • 1 Hill in the center of the map that you must capture by killing enemy ships inside it, then holding it until it is controlled by your side.
  • You must be below the flashing balloon to capture the point.
  • Do not leave the hill.


Crazy King:
  • Maps: Anglean Raiders, Raid on the Refinery, King of the Flayed Hills
  • Multiple hills around the map, but only 1 at a time is active (for a set time)
  • Points move in alphabetical order (that's ABCDE for you, not ACDBE or BAEDC. Seriously.).
  • You must be below the flashing balloon to capture the point.
  • Move with your teammates. Do not get distracted by fighting for a point that is already lost or almost changing, you can just try and get the next one.
  • Do not fight enemies between points, unless you are trying to delay them.
  • If you are a slow ship (e.g. Galleon, Spire) start moving to the next point BEFORE your fast teammates/fast enemies.

Glossary/Vocabulary
Call Outs and Slang


Arc: Turning radius of a gun.
No arc: Call out when gunners cannot turn their guns enough to shoot the enemy. "No arc, turn ship port side."

Blenderfish: Goldfish with a front Hellhound Heavy Twin Carronade.

Burning engines: Call out for when the Pilot is using Kerosene or Moonshine to increase engine thrust at the cost of damaging the engines. "Burning engines, please repair."

Camp: The act of taking a defensive position in an advantageous location. "Let's camp our spawn point." The act of having the crew repeatedly repair a single component. "Camp the Balloon please."

Clawing: Call out for when the Pilot is using Pheonix Claw to increase turning rate at the cost of damaging the engines. "Clawing, watch engines please."

Chem Spray Abbreviation for Chemical Spray.
Chem: Call out/Abbreviation for the act of fireproofing a component with Chemical Spray. "Please chem the balloon."

Disable: Breaking enemy components, but not killing. "Disable their engines with the Artemis."

Dust Storm: Call out for incoming dust storm on Battle on the Dunes and Desert Scrap. "Dust storm! Keep everything up if you can."

Dunes: Abbreviation for Battle on the Dunes. "Oh god dunes again."

Fire Ext/Fire Exting: Abbreviation for Fire Extinguisher. "Please take Spanner/Mallet/Fire Ext."

Engi: Abbreviation for Engineer.

Ext/Exting: Abbreviation for the act of extinguishing a fire. "Need ext at lower deck."

Goomba stomp: The act of one ship pushing an enemy ship into the ground or structures by attempting to decrease altitude while above them.

Helium: What Americans call Hydrogen. They are wrong.
Hydro: Abbreviation for Hydrogen.

Hydrogen Uppercut/Shoryuken: Vertically ramming an enemy ship from below using Hydrogen.

Metamidion: A Pyramidion with a front Gatling and Mortar.

Powder Monkey: Level 1 Gunner. General term for noob.

Raspberry: [Duck] clan call out for enemy armor broken and hull exposed.
Red/Hull strip/Hull stripped/Hull down: Call out for enemy armor broken and hull exposed.

Rep: Abbreviation for repair. "REP THE HULL."

Spanner: What Americans call the Wrench. Which is actually a Spanner.

Spot: Call out for the crew to take out their Spyglass and left click on enemy ships to mark their location on the HUD and on the map. "Spot the Spire North-West, behind the arch please."

Wrench: What Americans call the Spanner (as in "monkey wrench"). Actually refers to the Pipe Wrench, unless you are an American, in which case the Spanner is the Wrench and the Wrench is the Spanner.


Map Landmarks:


Candy Mountain: The spiky mountain in the south eastern region of Northern Fjords (Map Grid D2)

Canyon Entrance: The biggest gap leading into/out of the canyon on Canyon Ambush.

Leviathan/Juggernaut: The giant crashed ship on the Western side of Battle on the Dunes. (Map Grid A3)

Pocket: The cloud-free area east of the canyon entrance on Canyon Ambush

Ribs: The large rib-like wreckage on the Eastern side of Battle on the Dunes. Also re-used on Duel at Dawn. "I'm going to flank them from the ribs."


If you didn't read any of the above
THIS IS A GAME ABOUT TEAMWORK. COMMUNICATE WITH YOUR CREW AND OTHER CAPTAINS. LISTEN TO ORDERS FROM YOUR CAPTAIN. IF YOU DON'T WORK IN THE TEAM, YOU DON'T HAVE FUN, YOUR CREW DOESN'T HAVE FUN, YOUR TEAM DOESN'T HAVE FUN, AND YOU WILL DIE, OVER AND OVER AGAIN.

Questions? Put them in the comments below and I will try and get back to you ASAP. I may also add some more sections and high quality MSPaint annotations if I feel like it.

Shameless self-promotion: My Engineering Parkour and Tricks video guide (well worth 9 minutes of your time, you can watch it during Lobbies of Icarus!)
https://www.youtube.com/watch?v=xK9hOU92chE

If you want to check if I'm in-game, you can go to Community->Meet our Community Ambassadors since I'm a Community Ambassador. Or you can just add me as friend in-game because I can't stop you from doing that. Feel free to send me questions, though it may take me some minutes to respond depending on how much I'm tryharding ;)

If you're new and you need a good and reliable crew member, you are welcome to send me an invite or cry for help in Global chat. I may just show up and lend a hand ;)
Changelog
12/06/2018: Fixed suicidal builds table

12 December 2014: Kidding, not really going to bother with a changelog xD However, I will say that I implemented all of Wundsalz's feedback today. Plus an extra bunch of annotated pics about standard crew positions and responsibilities.

Week of 14th Nov: Finally finished the metaships section. Had to use Internet Explorer because Chrome doesn't allow me to type anything inside a guide.

Week of September 10th: Actually getting views so decided to clean up the suicidal builds section with a SEXY TABLE WOW THIS TABLE IS DAYUM GOOD. Added a changelog. Added gun arcs. Added a glossary.

Sometime in August: Published this guide
131 Comments
Hypoxaemia  [author] 16 Apr, 2022 @ 4:21pm 
@artimits it was not my idea, iirc there was (is?) a clan called Gentlemen (?) who only played power position camping sniper builds in tournaments and would regularly have matches go on for like 30+ minutes
artimits 3 Apr, 2022 @ 2:05pm 
your gentleman's galleon build still proves useful even in competitive matches and against alliance ships, truly a visionary man
Hypoxaemia  [author] 15 Dec, 2020 @ 4:12pm 
@GregariusGood catch, fixed, don't know if any of these builds are still meta though!
Gregarius 29 Nov, 2020 @ 11:48pm 
"Metagalleon" build slots missing, and "Gentlemen's Galleon" is missing slot 4.
Freezeburner20 24 Apr, 2019 @ 10:15am 
yeet
Nerdhector 23 Apr, 2019 @ 6:45am 
@Freezeburner20

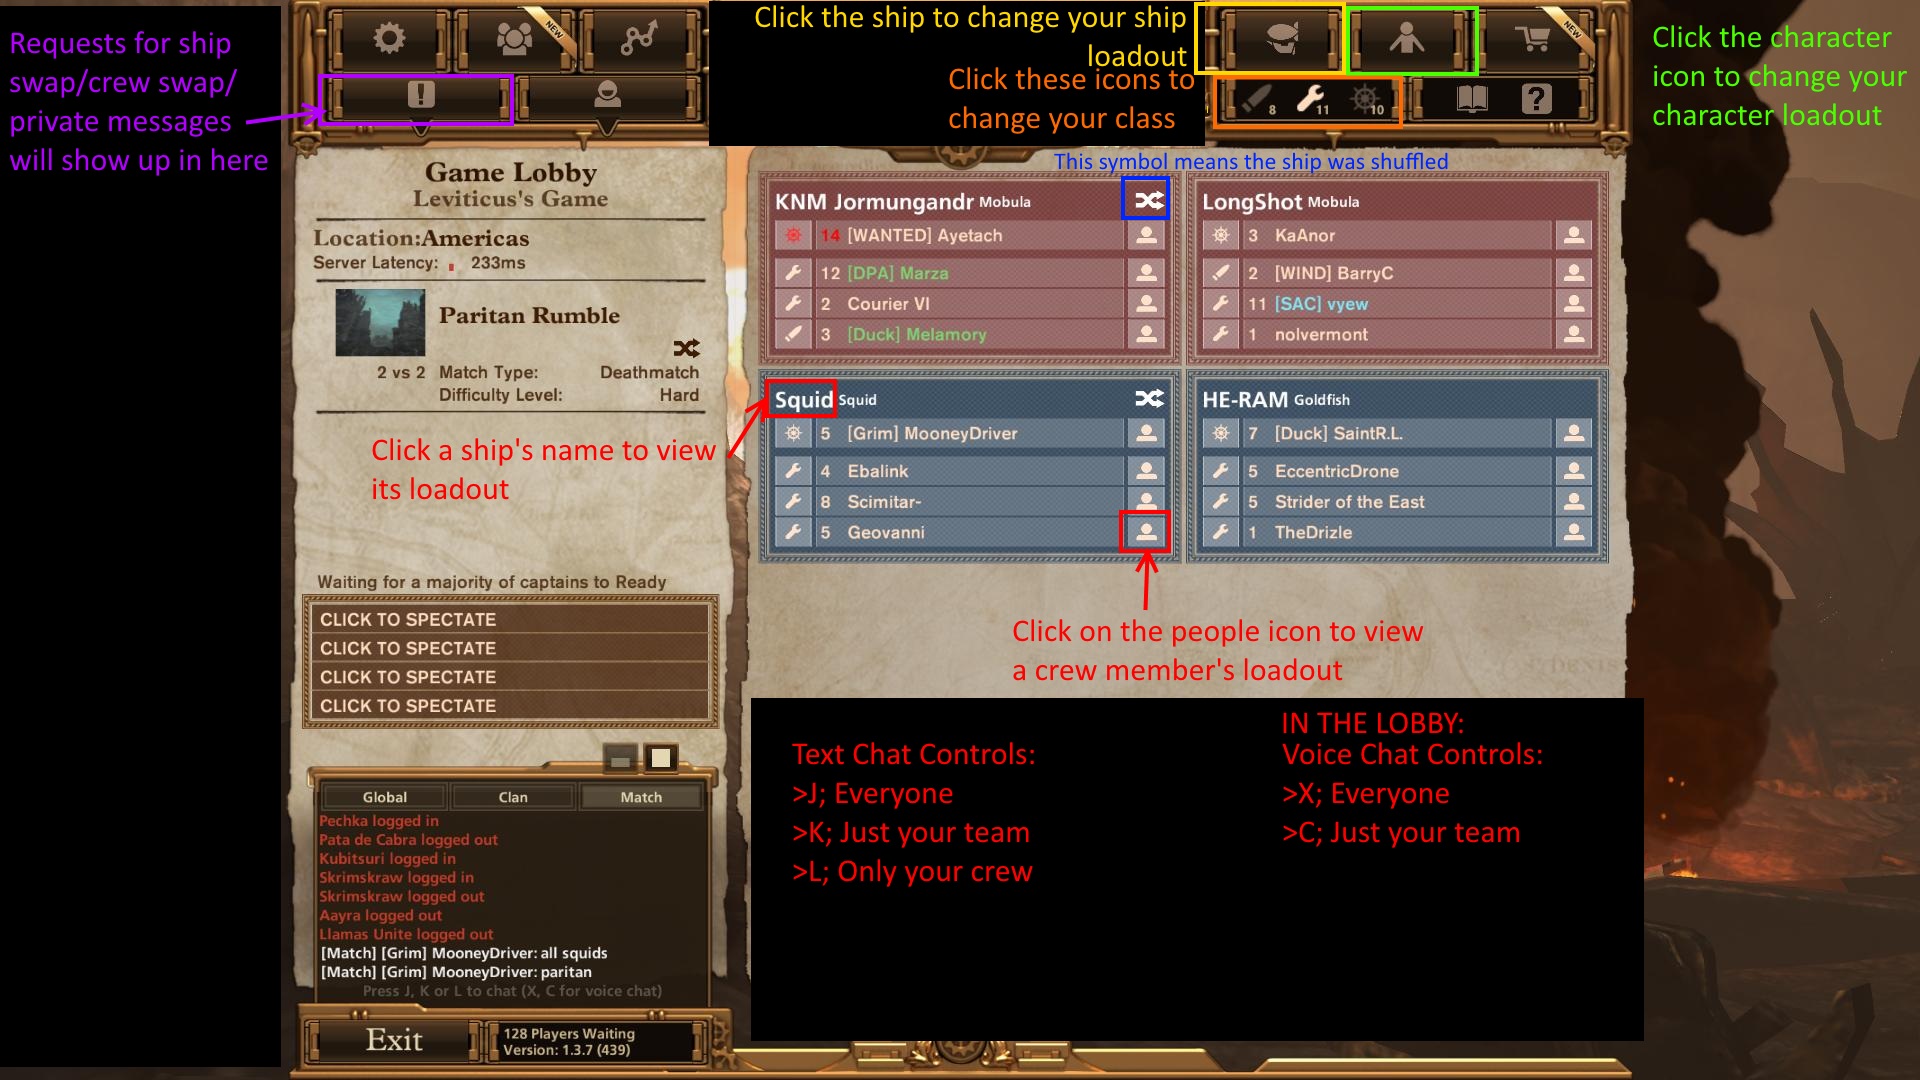
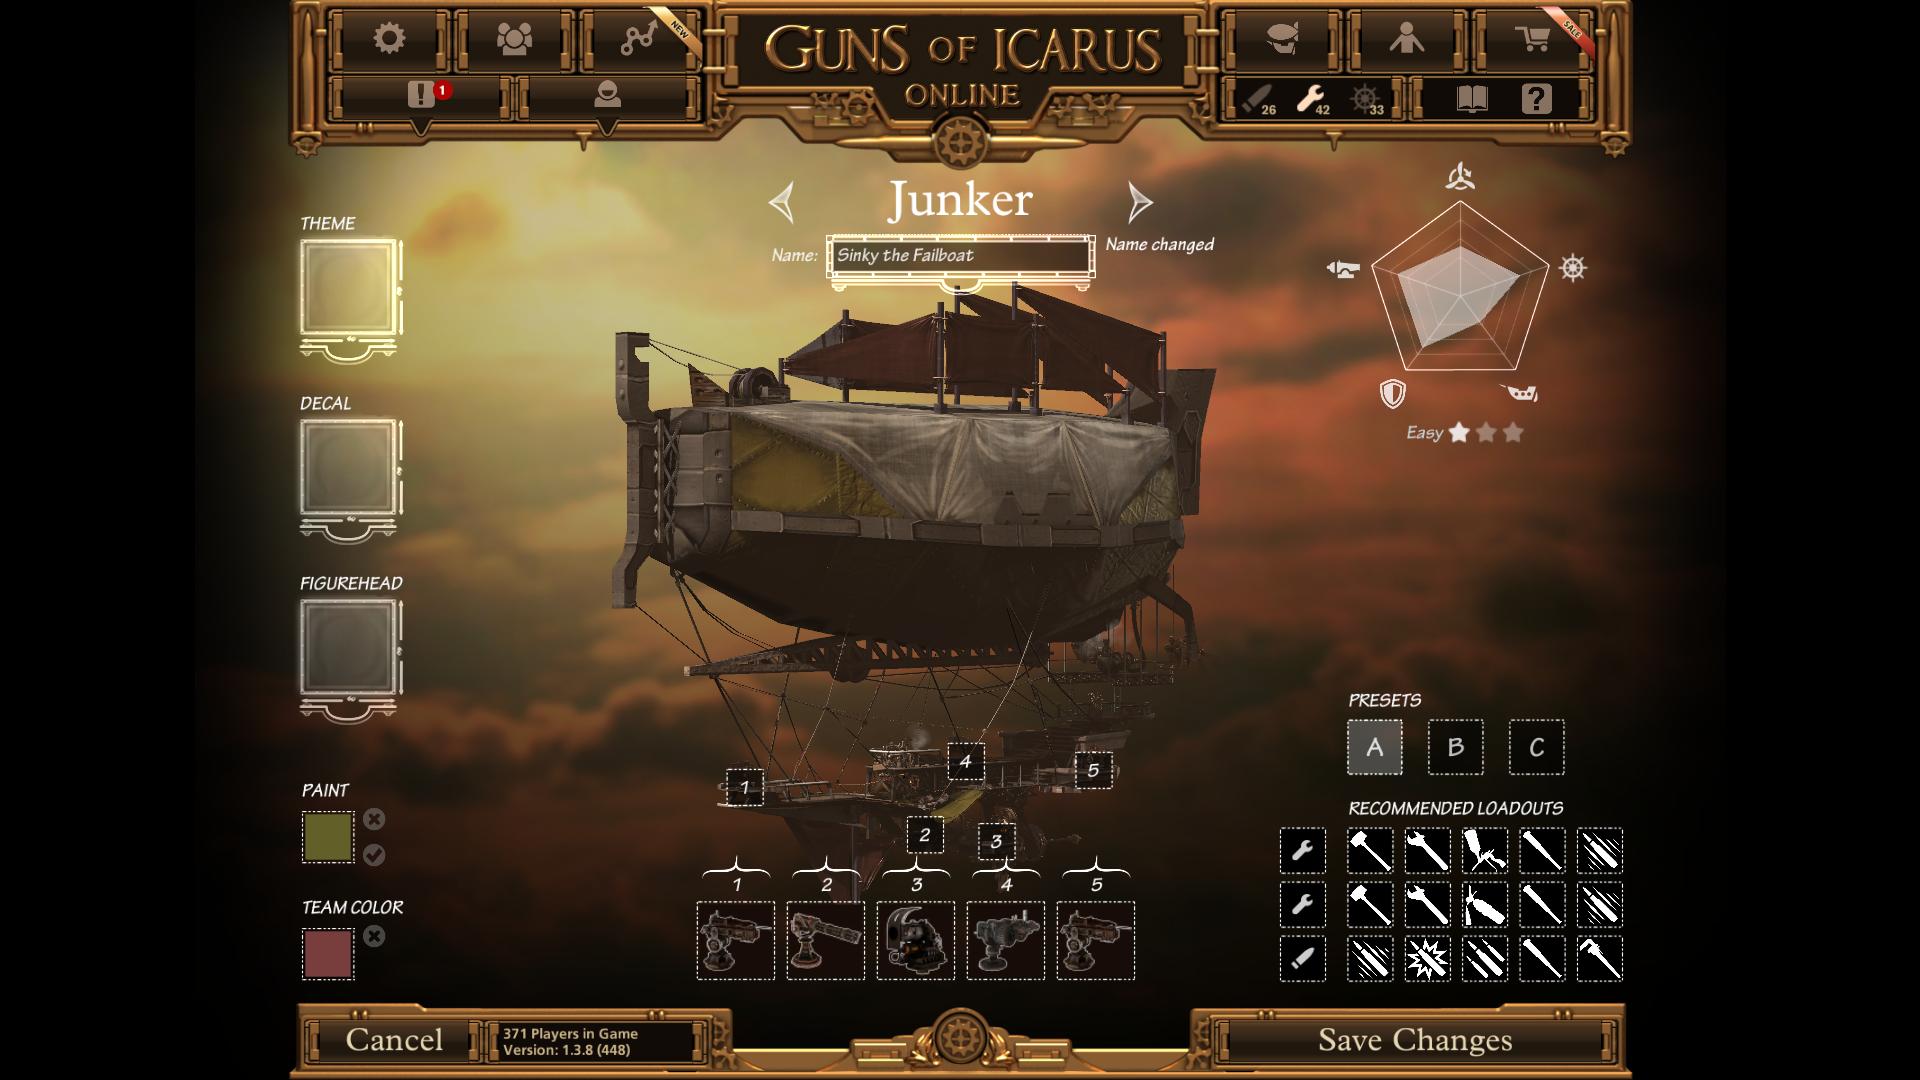
You can play by yourself either in the new Racemode, in Pirate Deathmatches or if you own Alliance in Coop matches. You will always have to pilot though.
Freezeburner20 4 Apr, 2019 @ 11:22am 
Thanks
Hypoxaemia  [author] 31 Mar, 2019 @ 9:10am 
@Freezeburner

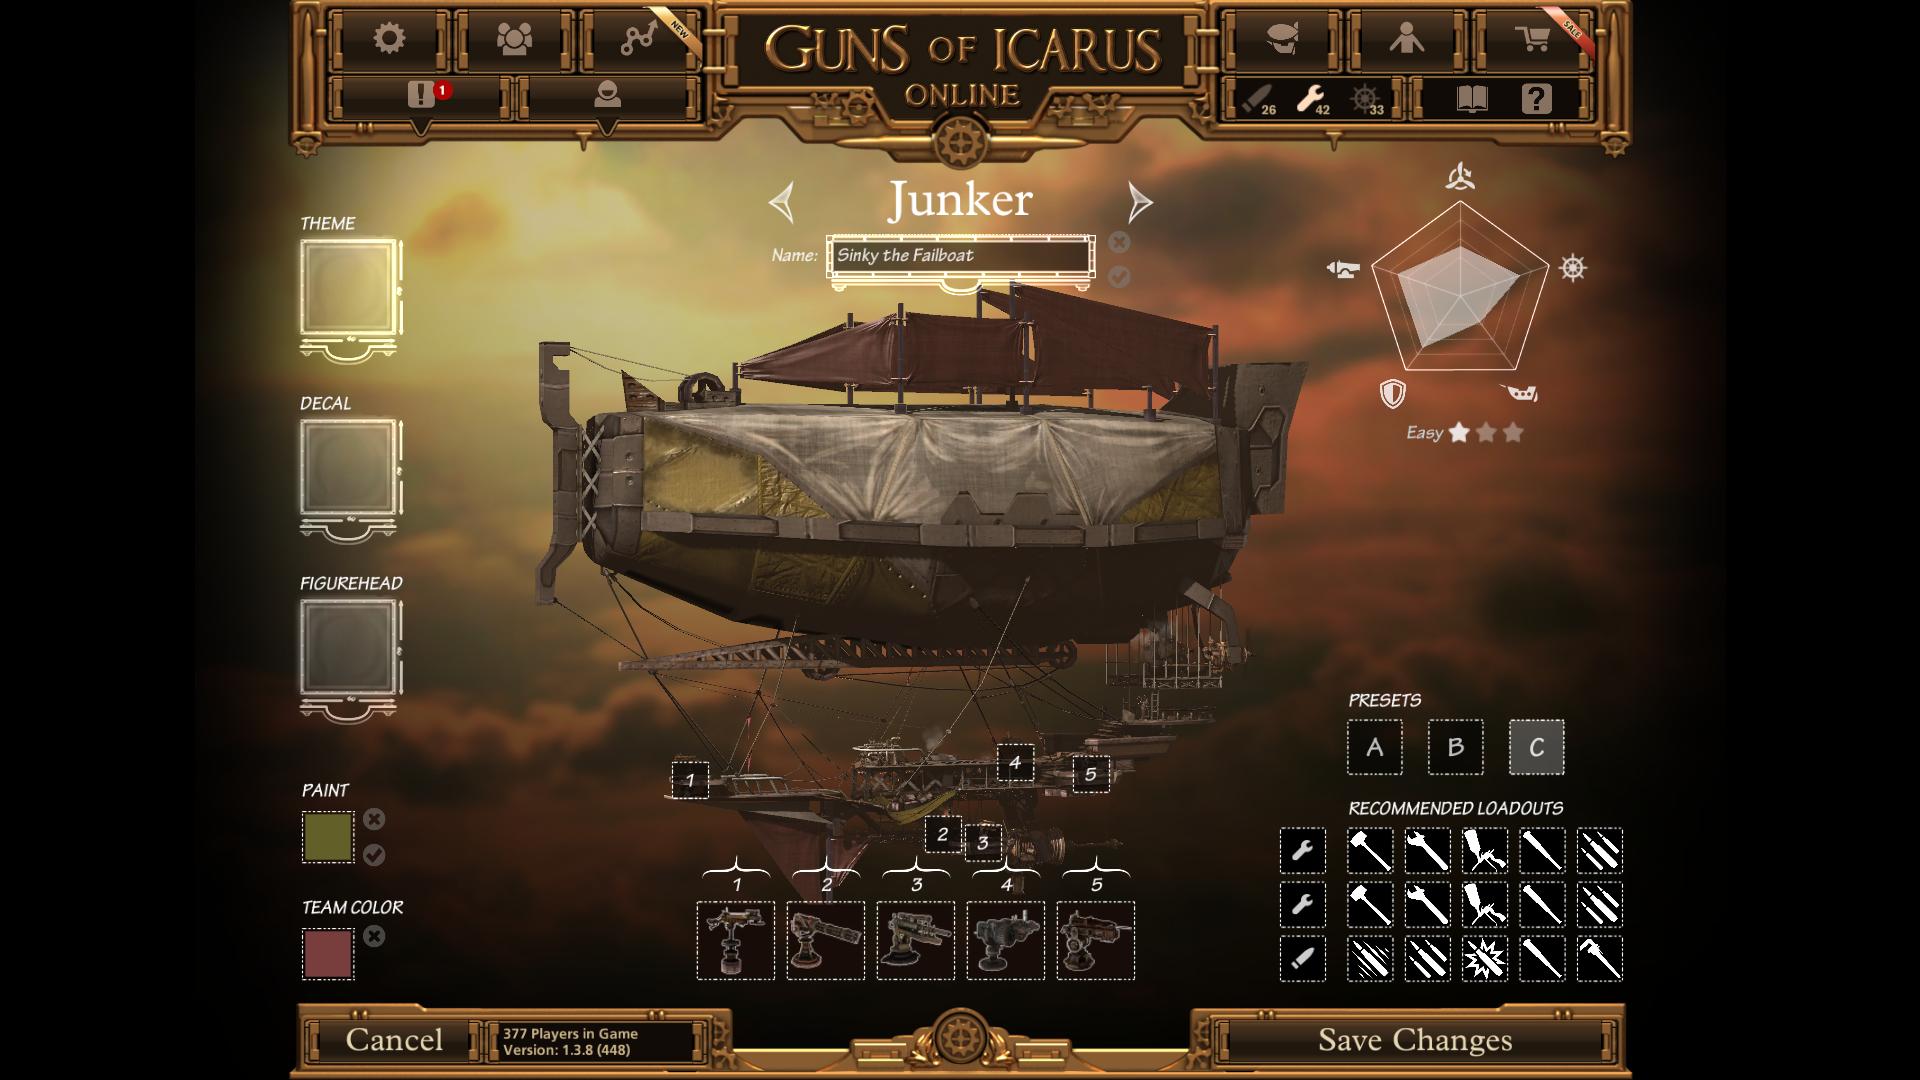
Nope, you need a minimum of one other player on the opposing team to start a match even if everyone else are bots. I think Guns of Icarus Alliance can be played solo with a team of bots though (take me with a grain of salt I haven't played in ages)
Freezeburner20 26 Feb, 2019 @ 8:37pm 
So, I know this is probably an obvious question, but can you play by yourself?
Zwphyr | #SaveTF2 17 Feb, 2019 @ 7:00am 
thank you for the amazing tip's this will be a huge help for other new player's to the game including myself especially since i'm am learning the rope's as captain and trying the other classes this was a great help happy sailing