Shadow Gambit: The Cursed Crew

Shadow Gambit: The Cursed Crew

34 ratings
In-Depth Character Guide
By ElCid
Ahoy, matey! This guide contains a full breakdown of each character, with detailed explanation of their abilities, including tips and tricks for each one. Now let's get this party started! Shiver me timbers!
3
2
   
Award
Favorite
Favorited
Unfavorite
Differences from other Mimimi games
Those who are already familiarized with other Mimimi games will spot many similar characteristics and mechanics, but there are a couple of differences and quality-of-life changes:

☠️ Missions are (mostly) limited to three man-parties.

☠️ Carrying bodies is now MUCH faster, even for characters that do while crouching. However, characters now make noise when dragging bodies.

☠️ All characters now have the same amount of health, as well the same movement speed.

☠️ While there are no characters capable of carrying two bodies at once (like Mugen in Shadow Tactics and Hector in Desperados III) there many new ways to dispose of bodies.

☠️ Characters can now upgrade their abilities over the course of the game by gathering a resource called Vigor, which is gained by completing missions.

☠️ Any character can now knock down enemies by throwing bodies from high ground directly onto the victim.

☠️ Characters no longer have collision boxes while hiding in bushes, which means that moving characters around inside them will longer push each other out.

☠️ All characters have access to a Flintlock Pistol, which only carries a single bullet. When playing on the Cursed Difficulty, players will start the mission with an empty pistol. Every map will have a handful of crates which will contain bullets. Much like in previous games, guns have the highest noise radius, and are usually last minute resorts.

☠️ Characters can no longer heal in battle, however, if a player character is killed, they can be revived within a time frame; each subsequent revive reduces the duration of this timer.

☠️ If a character "permanently" dies during a mission (can't be revived anymore), the player will have to carry the body of the crew member through the Tear to finish the mission. In addition, a character dying during a mission no longer is an instant fail.

☠️ During daytime missions there is no longer a "dark area" of the viewcone; only by obstacles and different height (thanks for the reminder, Lady Neravin).

☠️ Being detected and ringing the alarm is A LOT less punishing than in Mimimi's previous games. Characters have enough tools to run away from enemies and hide from danger even if they're discovered. In addition, when reinforcements show up from bases, they'll return once the alarm goes off instead of permanent patrols.
General Tips
Mastering Shadow Mode
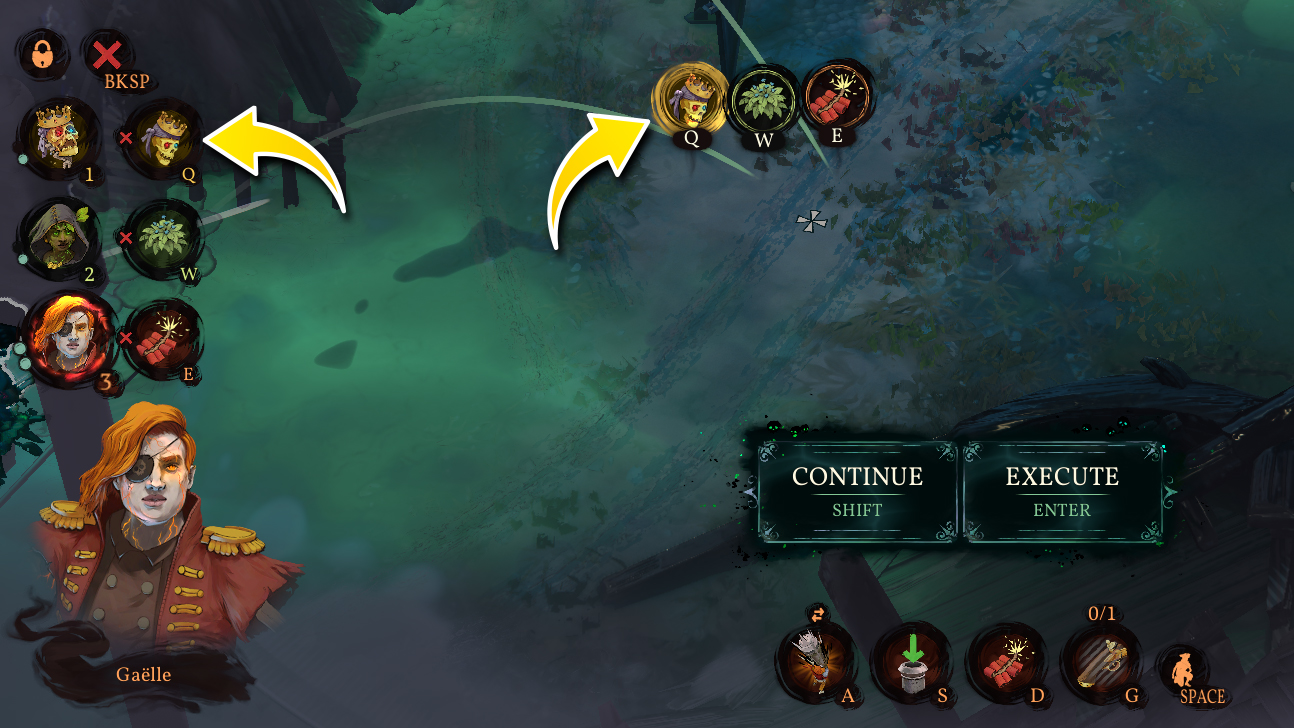
In Shadow Gambit players can now select specific moves to execute while in Shadow Mode without executing all of them. Simply click the specific abilities with your mouse while the Shadow Mode screen and they'll be highlighted; when you exit Shadow Mode (through pressing Shift again) only those skills will activate. This means the player doesn't have to hit all character-specific keybinds to execute Shadow Mode.


Line of Sight is everything
Mastering how to get out of enemies' line of sight is key. This tends to be overlooked (even though it's stated in-game), but (for the most part) enemies can't see characters who are crouching behind bushes; not just inside them. Players can use this to their advantage and sneak past enemy lines or hide bodies with all characters that drag while crouching.

Accidental Death Corpses Exploit
Enemies killed in accidental deaths will not trigger the alarm if their bodies are found by other enemies. These corpses can be retrieved by the player and used to lure other enemies away from their positions, by throwing those bodies in their cone of view; even if the lured enemy was not present during the accidental death, the AI will (usually) identify as such, and just investigate without ringing the alarm.

Gaëlle is the best character to do this luring strategy since she can shoot enemies from long distances with her Fire Kanol.

In some rare occasions enemies will actually ignore bodies killed in accidental deaths, however.

Quick Drop Corpses
This is also stated in-game but I can't stress enough how useful it is.

Using the space bar to crouch while holding a corpse will instantly drop them on the ground, which is actually faster than Ctrl+Click. This can often save you from enemies who are about to spot the character while carrying a corpse, as long you and the enemy's body are within the dark side of the viewcone.

Crouch Dragging
All characters (except for Suleidy, Toya and Pinkus while possessing an enemy) will drag bodies while crouching, meaning the player can effectively move bodies around within the enemies' dark area of the viewcone without being detected.

This is especially effective to cancel lengthy dying animations from other abilities (i.e. killing an enemy with Teresa's Iron Judgement and grabbing their corpse with Afia to interrupt its lengthy animation).

Halting while climbing
When climbing ladders and ivies, clicking on the character will stop them on their tracks. By clicking again where you want to go, the character will resume climbing.

This can be useful for positioning and for certain precise ambushes. Care should be taken, though, as enemies below the character will still be able to see them on the ladder or ivy if within the cone of view.

Track & Water Stepping Luring
In many maps, characters will leave footsteps if walking on sand, which can be tracked by enemies, who will follow, by running, and investigate the area; this won't trigger the alarm.

There are also various places with water (such as coasts). Stepping on water will create noise (larger radius if running). This can be used to bait enemies as the noise will get their attention, and they'll check the source of the noise and investigate.

Only Acolytes and Kindred can be lured in these two manners; all other enemy types will briefly be distracted, but won't bother to move.

The player can purposely use tracks and step on water to their advantage, and lead enemy into ambushes or traps. Suleidy and Mr. Mercury are both exceptional at this due to their ability to hide from enemy sight.

Body Luring
Using enemy's bodies (whether dead or tied up) to lure other enemies can be an effective strategy; they will slowly walk towards their ally and untie them. However, unlike in Desperados III, the alarm will trigger as soon as the enemy approaches the their tied ally, rather than only after untying the victim.

In addition, if luring a tied up foe, the enemy who does the untying will be oblivious to ANY sounds, so, for example, if two enemies go investigate a tied enemy at once, the one who is untying won't react if the player attacks the other one within the sound radius.

Body luring even works against the Commissarius and the Prognosticar, being the only means to actually move them out of position; it won't work against the Iudex, though, who will instantly ring the alarm upon spotting a body.

Split Patrols VS Luring
When the player splits enemy groups, they will still react together when affected by lure or distract abilities. For example, say there is a patrolling group with two Acolytes and one Commissarius. If the player uses Suleidy's Wander Dust on one of the Acolytes to drive him away from the group, and then uses Gaëlle's Firecracker on the other Acolyte and the Commissarius, the wandering Acolyte will still turn around even though he wasn't within the radius of the Firecracker.

Jumping Takedowns
Jumping takedowns is an effectively (and very fast) way to dispatch of enemies. All characters can perform one as long they're right above the enemy in another platform, which will pop a red skull icon when mouse-overing the enemy when at the ledge.

However, if the victim is within another enemy's line of sight when attacking, the player WILL be detected. However HOWEVER, if the player grabs the corpse before the other enemy's viewcone passes through, they will not be detected. This requires proper timing, but it's incredibly useful, especially with characters that crouch while picking up bodies.

Minimalist Badge Tips
The Minimalist Challenge Badge (don't use any distractions) is one of the most difficult badges to achieve because not being able to use distractions greatly limit how players can disrupt enemies.

However, there are certain abilities and actions that can, in fact, distract or lure opponents without failing the badge, because they don't actually count as distractions for the Minimalist Badge. These are:

  • Enemies spotting footsteps on sand;
  • A guard spotting a dead / unconscious body;
  • Noise created by walking on water;
  • Noise created by dropping an object (such as boulders or crates);
  • Noise created by dragging corpses;
  • Noise created by dropping bodies from high ground.
  • Noise created by shooting an enemy with Gaëlle's Fire Kanol;
  • Noise created by emerging from The Below with Mr. Mercury's Anchor Up;
  • Noise created by shooting an enemy with Teresa's Iron Judgement.
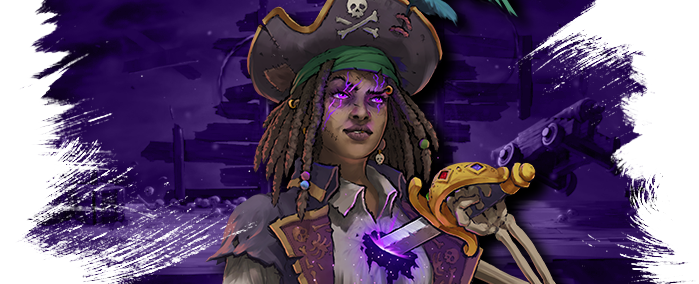
Afia Manicato

The Navigator - Afia is the newest crew member aboard the Red Marley, and serves as unwavering moral compass for the ship and the crew. Her biggest ambition is to find the legendary treasure of Captain Mordechai to make a name for herself.

As the protagonist, Afia has a balanced kit and can fit in most team compositions at ease thanks to her versatility, mobility and flexibility.

Unlike Mimimi's previous protagonists, Hayato and Cooper, she doesn't have a coin-tossing distraction ability (which has been given to another character), but has an unique set of skills that makes her very valuable in any mission.

Afia can climb ivies / ladders, but cannot swim. She also carries bodies while crouching. Her archetypes are Infiltrator and Killer.

Strengths
✔️Good mobility. Upgrade unlocks one of the best teleport skills in the game.
✔️Reliable kill setups.
✔️Can briefly freeze enemies.

Weaknesses
❌Mobility has some glaring limitations. Upgrade only has a single charge per mission.
❌Slow melee kills.
❌No means to actually distract enemies.


Afia's Melee has a long attack duration, with 5 seconds. While she's a Killer archetype, this actually hurts her potential and requires the player to be more careful with their approaches, as a long dying duration means more time Afia is vulnerable to be spotted by enemies.


Blink is versatile tool in Afia's kit that can be used both offensively and defensively. She performs a quick warp across time-space through a small distance. She is completely invincible while performing Blink and cannot be seen by enemies even if teleport right in front or through them.

This ability is an excellent mobility tool that can be used to close gaps or to quickly hide inside bushes. While the horizontal range is low, the vertical range is surprisingly high, and allows her to reach areas that would be otherwise difficulty for most other characters; the caveat is that she can only perform vertical Blink from high to low ground (not the opposite).

If Afia's Blink connects with an enemy, she'll stab them. This has a lengthy animation (5 seconds), so make sure to use it when there are no enemies within sight. Afia can also Blink from lower to higher ground when targeting an enemy.

By upgrading Afia with Vigor at the Red Marley, she unlocks the Grand Blink, which has double the range of regular Blink and has no range restrictions (meaning she can go through walls and other obstacles), but can only be used once per mission.

Both Blink and Grand Blink have a non-lethal option, which makes Afia very valuable when doing Badge Challenges where enemies must not be killed. In addition, both abilities have cooldowns independent of one another.

Ability
Range
Noise Radius
Attack Duration
Cooldown
Blink
8.0
5.5
5 seconds
5 seconds
Grand Blink
17.0
5.5
5 seconds
8 seconds (single use)


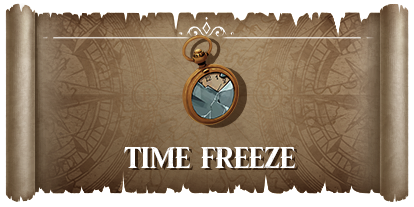
Time Freeze is an incredibly useful tool that does exactly what it suggests: it stops the enemy's in their tracks. This ability is great to set-up certain ambushes in Shadow Mode, or to simply follow up other distraction abilities to make the target move as little as possible.

Enemies can be frozen at any given time, even while attacking. Time Freeze is a fantastic panic button in case things go south and the player is detected, as using is on an enemy that just discovered a character (and moving said character from their line of sight) can prevent an alarm from ringing.

Time Freeze has 5.5 seconds duration on Acolytes and Kindred, but 2.75 seconds on all other enemies.

Range
Effect Duration
Cooldown
12.0
5.5 seconds (default)
10 seconds
Toya of Iga

The Ship‘s Cook - He prepares tasty, soul infused meals for the undead crew. Toya is a master in the arts of battle and cooking, always eager to challenge himself both in the kitchen and the field. He also makes a mean octopus carpaccio.

Toya's kit borrows a lot from Shadow Tactics: Blades of the Shogun and he's more or less meant to be a tribute to said game. He is a ninja from the Iga clan, same as Hayato, and shares a few quotes with him. In addition one of his abilities is directly inspired by Yuki, another character in Shadow Tactics.

His abilities have nearly perfect synergy, and he's the only character in the game with a global teleport move, which gives him unmatched mobility (with a caveat).

Toya can climb ivies / ladders, and can swim. He also carries bodies while standing. His archetypes are Position Changer and Killer.

Strengths
✔️Nearly global mobility. Has a teleport that can get him in and out of danger.
✔️Reliable kill setups and skill synergy.
✔️Can distract entire groups of enemies.

Weaknesses
❌Mobility has some glaring limitations.
❌Teleport attack is slow.
❌Distraction is reliant on his own position.
❌Gets outclassed by other characters who can do what he does better and faster.


Toya, alongside Suleidy, is one of the only characters with a short duration melee attack, with 2.5 seconds duration, which makes him an excellent assassin to take down enemies as quickly as possible.

If using Toya on the team, he'll probably be your main killer because of his faster melee speed.


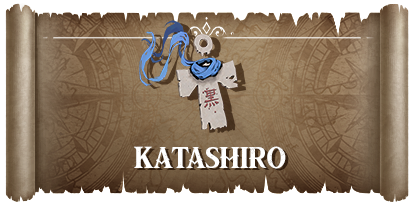
Placing down Katashiro has no duration, and it'll only disappear if Toya casts it somewhere else.

Katashiro can be pinned down to any living target, including knocked down enemies and Pinkus while possessing with Peruse Mind. Most notably, it can be pinned down to an unconscious target, loaded up on Gaëlle's Kanol Recall, shot, and Katashiro will be carried alongside it.

In addition, Katashiro makes no noise when placed, and doesn't trigger any enemy reactions; Toya can even pin it on Prognosticars without causing them to retaliate.

The only major drawback is the incredibly low range Katashiro has for placement, which limits how Toya can employ it.

Whenever Katashiro is placed anywhere, be the ground or an enemy, Toya gains access to his...


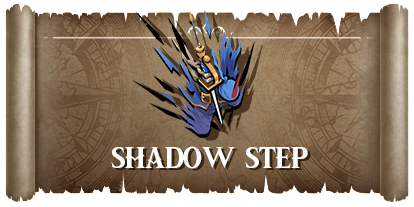
Shadow Step is a teleport with unlimited range; Toya will always teleport to Katashiro no matter how far, and he can even activate it when climbing ivies/ladders, while swimming and even from inside houses.

Toya is also completely invulnerable while performing Shadow Step; even if detected, enemies will only be able to damage him once he's about to deliver the final blow.

Upgrading Toya makes so whenever he uses Shadow Step, Katashiro will appear on Toya's original's position instead of disappearing. This further improves Toya's mobility, which is key in missions with Badge Challenges to solo stages.

While the attack portion of Shadow Step looks really cool and flashy, its duration is incredibly lengthy, with whopping 5 seconds. This makes certain ambushes with Toya ridiculously risky as he is exposed for way too long. A good way to circumvent it is to use Shadow Step mainly as a movement skill:

For instance, say you want to bait an enemy outside of others line of sight:
  • Drop Katashiro on the path the enemy will take to reach Toya.
  • Use Bird's Call to bait them.
  • Wait until the enemy gets PAST Katashiro's damage radius, then teleport.
  • Finish the enemy with a regular melee attack.
Not only this method is significant faster (2.5 seconds faster), it allows for the player to immediately pick the body to hide.

Shadow Step can also be used defensively by preemptively placing it somewhere safe and going for an assault. For instance, say the player wants to invade a base, and they have Gaëlle and Toya in the team. Toya can drop Katashiro in a safe spot, have Gaëlle shoot Toya where he can flank the enemy, strike, and teleport back.

Range
Attack Duration
Cooldown
Unlimited
5.0 seconds
10 seconds


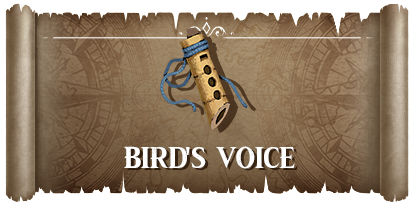
Those who played Shadow Tactics will instantly recognize this ability from Yuki. However, Toya's Bird's Voice has a significantly larger radius.

The most common use of this ability to place Katashiro on the ground, luring an enemy with Bird's Voice to its position, hiding and using Shadow Step once they approach.

Toya can use this draw the attention of his targets, which will lure Acolytes and Kindred, but won't work on Commissarius and Iudexes (although they will be briefly distracted). Lured enemies will slowly walk towards the position where Toya used the ability.

Multiple enemies can be lured by Bird's Voice at the same time, and whistling a second time while they're still investigating will cause them to sprint towards the location. If the enemy is too far away from Toya, as in needing to go around and take a longer route to reach it, they will not bother to walk.

If whistling while inside a bush, enemies will slowly approach the bush and take a few seconds to check it; when they do, they'll be focused on the bush, and their view cone will be reduced drastically. However, they will also spot characters inside bushes as soon they enter them.

Noise Radius
Cooldown
10.0
10 seconds
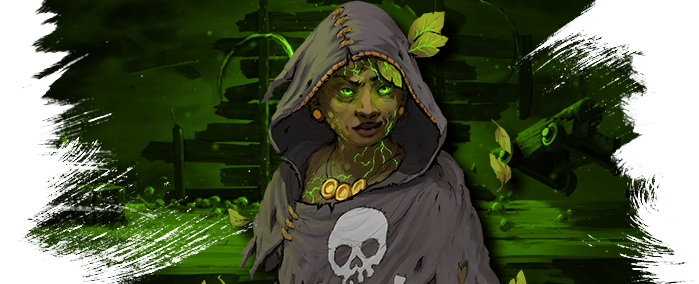
Suleidy

The Ship Doctor - Suleidy takes care of the Marley‘s skeleton crew and makes cures for nasty soul sicknesses. She‘s also deadly with a blade. The soul infused plants Suleidy grows in her sick bay help her research the mysteries of the Curse.

Suleidy is a character with incredible utility, being able to create hide spots. This alone makes her one of the best characters in the entire game, and makes her fit into every single team composition.

Suleidy can climb ivies / ladders, and can swim. She also carries bodies while standing. Her archetypes are Position Changer and Body Hider.

Strengths
✔️Can create hiding spots on demand.
✔️Fast melee attacks.
✔️Second best body hider in the game.
✔️Can move enemies out of position without creating noise.
✔️Only character in the game capable of splitting patrols and guards talking to each other.
✔️Can solo the vast majority of stages.

Weaknesses
❌Can only create one hiding spot at a time.
❌No mobility skills.


Suleidy, alongside Toya, is one of the only characters with a short duration melee attack, with 2.5 seconds duration, which makes her an excellent assassin to take down enemies as quickly as possible.

Due to how the rest of her kit functions, she's actually a better killer than Toya as she is able to quickly dispose of bodies with her Cover Seeds.

If using Suleidy on the team, she'll probably be your main killer because of her faster melee speed.


Possibly one of the best abilities in the entire game, Cover Seeds gives Suleidy the ability to spawn bushes at will, providing on demand cover while also disposing of any bodies.

This ability makes Suleidy one of the most valuable characters in the entire game as the player doesn't need to worry about carrying bodies around and look for places to dump them.

Suleidy can only have one bush active at all times; if she throws a new seed, the old one will instantly dissolve. However, enemies that have been disposed won't re-appear when she spawns a new bush. In addition, the bushes she creates have unlimited duration.

However, Suleidy is unable to spawn a bush too close to a living enemy (unless they're unconscious), but there is a way to do so that'll be discussed later.

Cover Seeds are perfect to exploit enemy's line of sight and not only create hiding spots wherever the player wants, but also limits the enemy's vision by extending the stripped area of their viewcones, which allows players to approach more easily.

Lastly, spawning a bush within an enemy's line of sight (the solid area) will briefly distract them for roughly 2 seconds.

Range
Cooldown
10.0
5 seconds


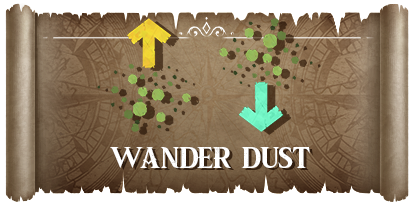
A powerful tool that gives Suleidy nearly unmatched utility. Wander Dust sends the enemy away on a straight line to the opposite side they're facing. The pathfinding is not perfect, though: if an enemy clashes with a wall on an obstacle on their way, they might be stuck in place.

Wander Dust will only work on Acolytes and Kindred; other enemies, namely Commissarius and Iudexes, won't move an inch, but will be briefly distracted by turning away to the opposite direction.

Upgrading Suleidy gives her access to Wander Dust, Reverse!, which pulls enemies towards her location. This is can be combined with Cover Seeds and allows players to more easily lead a single enemy towards traps.

Wander Dust is the only ability in the game that can split patrolling groups; the victim will walk away while the other enemies will stand still looking towards their ally's trajectory. Once the effect wears off, they'll resume patrolling; this is a great opportunity to strike the isolated target as he won't have gazes over him.

The strategy above also works when two guards are standing still talking and one of the them is a Commissarius and the other an Acolyte; normally the player can't lure an Acolyte if they're talking to a Commissarius, but with Wander Dust, it is possible.

Using Wander Dust on an enemy to make them leave their position and then throwing Cover Seeds on their original spot allows players to put living enemies inside bushes. This can make certain ambushes a lot safer.

Range
Cooldown
10.0
5 seconds
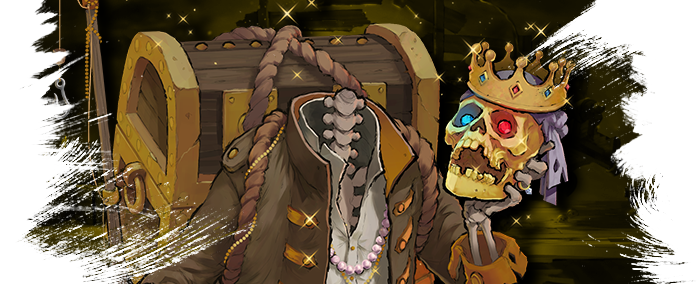
Quentin Aalbers

Treasure Hunter - Quentin doesn‘t like to share his treasures which makes his role on the
Marley a bit peculiar. Luckily for Quentin, peculiar fits right in with the rest of the bunch. Don‘t touch his chest if you value your fingers.

Quentin is a support-type character who specializes in interacting with the environment from and also capable of drawing enemy attention. He has incredible synergy with Gaëlle and Teresa, which will be discussed more below.

Quentin can climb ivies / ladders, and can swim. He also carries bodies while crouching. His archetypes are Position Changer and Body Hider.

Strengths
✔️Can activate objects and pull allies from afar.
✔️Best body hider in the game.
✔️Can move enemies out of position without creating noise.
✔️Can distract entire groups of enemies.

Weaknesses
❌Limited offensive capabilities.
❌No mobility skills.
❌Slow melee attacks.


Quentin's Melee has a long attack duration, with 5 seconds. Given the nature of his kit, this isn't much of a problem since he specializes in isolating enemies to draw their attention. However, ideally, the player may want to use a character with a faster melee kill such as Suleidy or Toya to seal the deal.


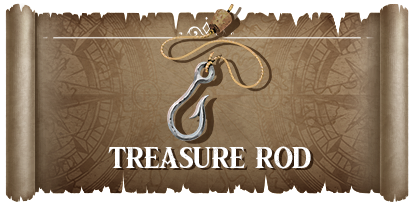
An incredibly versatile tool and the highlight of Quentin's kit. The Treasure Rod allows him to interact and pull a variety of different things, ranging from enemies' bodies, allies and even items. He can also interact with certain abilities of other characters.

Quentin's Treasure Rod can be used for:
  • Pulling bodies inside his treasure chest.
  • Pulling allies to his location.
  • Triggering objects that can lead to environmental kills (dropping crates and boulders, activating cannons, etc.).
  • Rolling down ladders.
  • Blowing out torches.
  • Opening ammo crates.
  • Pickpocket enemies (thanks for the info, Janus Jax).
  • Pulling certain items such as his Golden Head, Teresa's Iron Judgement's soul-bolt and Toya's Katashiro.

The biggest appeal of the Treasure Rod is being able to pull bodies. Quentin can instantly dispose of bodies (even unconscious ones) and stuff them on his treasure chest. Knocked down enemies don't even need to be tied down to be pulled. This makes Quentin one of the best characters in the game to hide corpses, even better than Suleidy.

Quentin's ability to pull allies gives him great flexibility to move characters around; he can even use it on characters who are dead, making him, alongside Gaëlle, the best "medics". Speaking of her, Quentin pairs exceptionally well with Gaëlle, as she can shoot him to higher ground, and he can in turn pull her up (there is even an achievement for that).

The only drawback of the Treasure Rod is its inability to interact with items and characters who are at a much higher ground than him.

Range
Reel-in Time
Cooldown
12.0
2 seconds
5 seconds


Those who played Mimimi's previous titles will recognize this ability as being similar to Mugen's Sake Bottle and McCoy's Doctor Bag.

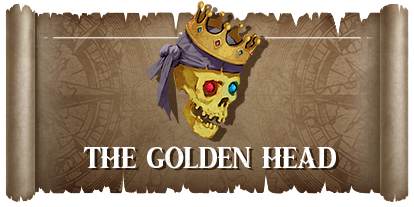
However, one exceptional, key difference is that The Golden Head glows during the night and becomes a small light source, which makes Quentin very powerful during night-time missions.

Only Acolytes and Kindreds will be drawn towards The Golden Head; all other enemy types will be briefly distracted, but won't bother to move.

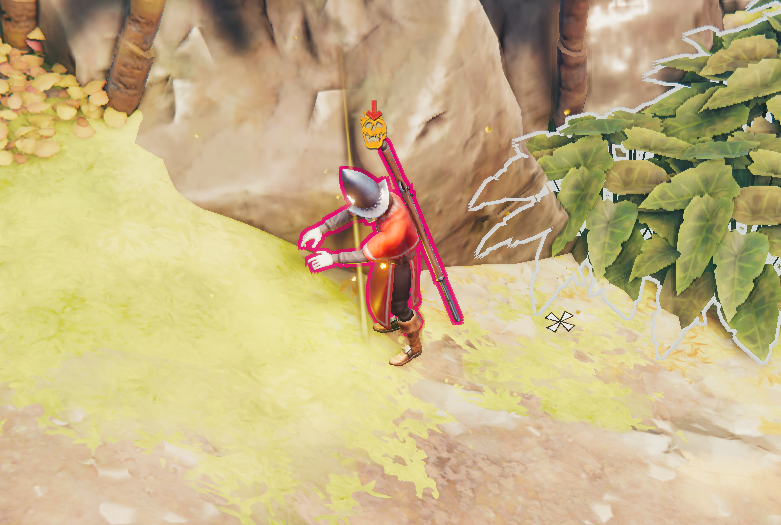
If an enemy picks up the skull, they'll take it with them back to their original position; Quentin can only retrieve it by knocking down or killing the enemy, or by pickpocketing it (as shown by the hand icon that will appear if the player mouse-over the enemy).

Enemies are completely vulnerable and oblivious to anything when picking up The Golden Head (noted by the a skull icon appearing above their heads), so even if the player enters their cone of view or make any noise, the enemy won't react at all.

If Suleidy throws her Cover Seeds on top of The Golden Head after an enemy has spotted it, they'll resume the march and go back to their post. The same happens if Quentin fishes the head with his Treasure Rod before the enemy reaches it.

If Gaëlle uses her upgraded melee, Load Kanol, while an enemy is holding The Golden Head, it'll fall where they stand instead of being carried alongside the corpse.


This ability is only available by upgrading Quentin with Vigor Skill Points. The noise created by the Cackling Cockle is constant, meaning that patrolling enemies that walk within its radius will be drawn.

This ability is useful in situations where Gaëlle is not present in the party (thus and the player needs to draw multiple guards. The only drawback is that, compared to Gaëlle's Firecrackers, the Cackling Cockle has much lower range.

The Cackling Cockle can be combined with The Golden Head to draw enemies through long distances and extended periods of time.

Only Acolytes and Kindreds will be drawn towards the Cackling Cockle; Commissarius and Iudexes will be briefly distracted, but won't bother to move.
John Hughes Mercury

The Shipwright - also known simply as "Mr. Mercury", he's always scurrying around, hammering some ghost nails back in place or scrubbing the deck or chatting with his pet fish, Sir Reginald. No one really knows what he‘s on about with the “turtles”, though.

Mr. Mercury specializes in ambushes and catching opponents offguard. He's the best character in the game to exploit enemies' blind spots while unnoticed. However, due to the nature of his kit, he doesn't work very well in maps with vast differences in terrain height.

He is the only character in the game who can simultaneously kill an enemy and dispose of their corpse with a single ability (although Gaëlle can do the same in a different way).

Mr. Mercury can climb ivies / ladders, and can swim. He also carries bodies while crouching. His archetypes are Infiltrator and Body Hider.

Strengths
✔️Can hide indefinitely underground and becomes completely undetectable. Upgrade allows allies to be hidden as well.
✔️Third best body hider in the game.
✔️One of the best mobility in the entire game.
✔️Can infiltrate enemy lines better than any other character.
✔️Can distract small groups of enemies.
✔️Can solo various stages.

Weaknesses
❌Teleport and distraction relies on terrain height.
❌Slow attacks.


Mr. Mercury's Melee has a long attack duration, with 5 seconds. Rare are the moments where you'll actually approach normally and use his regular melee instead of his other abilities, however.


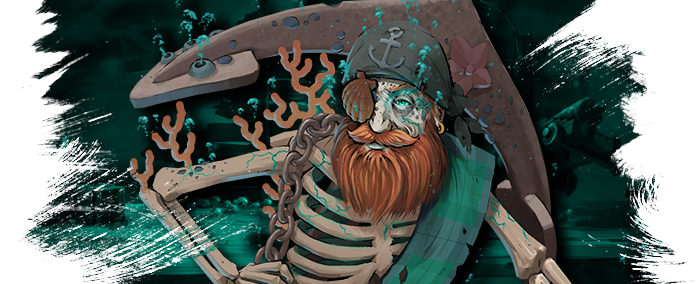
This is one of the most unique abilities in the game. Mr. Mercury can literally dive into "The Below", the dark depths of the ocean, at any time, and remain hidden for unlimited amounts of time. He cannot be detected while at it.

Using this ability over an enemy's body will send it to The Below, disposing of it while simultaneously hiding Mr. Mercury too.

Mr. Mercury can emerge back to the surface with...


Anchor Up allows Mr. Mercury to return from The Below. The caveat of this powerful ability is that Mr. Mercury can only emerge within the same plane height; this means that the player can't emerge on higher or lower ground (for example, dive on the ground and attempt to emerge in a platform above).

Nevertheless, Anchor Up is an extremely powerful ability which allows Mr. Mercury to move around the map undetected and exploit blind spots. Despite the flashy animation when he emerges, he won't be detected if using within the stripped area of the enemy's viewcone or while inside a hiding spot.

Anchor Up can be aimed directly at an enemy, which has a larger noise radius, but will instantly kill the enemy and hide the body. This ability has a non-lethal version that will knockout the enemy instead of sending them to The Below.

Range
Noise Radius
Attack Duration
Cooldown
12.0
2.0 (5.5 when attacking)
5 seconds
5 seconds


Mr. Mercury's pet fish who he met in The Below after dying. He serves as a distraction tool, and similarly to Anchor Up, can only be used within the same plane height.

Sir Reginald can be used even if Mr. Mercury has submerged into The Below with Anchor Down.


This ability is only available by upgrading Mr. Mercury with Vigor Skill Points. Simply put, this allows Mr. Mercury to hide allies into The Below with him after using Anchor Down.

He can hide can hide an unlimited amount of characters (so during the final mission he can actually hide the entire crew. Much like Mr. Mercury himself, his allies can stay hidden for unlimited amounts of time, even after Mr. Mercury has emerged back to the surface.

This ability makes Mr. Mercury key in missions with Badge Challenges where the player can't use hiding spots (bushes or inside buildings); diving into The Below doesn't count as a hiding spot.

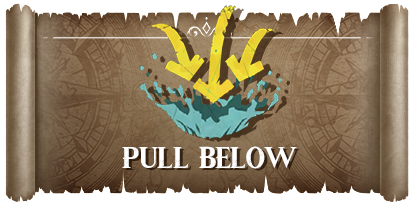
One VERY powerful aspect of Pull Below is the ability of Mr. Mercury to frame-cancel other character's animations. This makes him exceptional when paired with characters that have long melee animations (such as Afia). The possibilities are limitless.
Gaëlle le Bris

The Cannoness – Whatever weapons and cannons need tending to on the Marley, Gaëlle is here to fix, fire and maintain them. She also writes poems on the side and reads them to those who are willing to listen.

Gaëlle can be considered the "gentle giant" of Shadow Gambit, in the same vein of Mugen from Shadow Tactics and Hector from Desperados III.

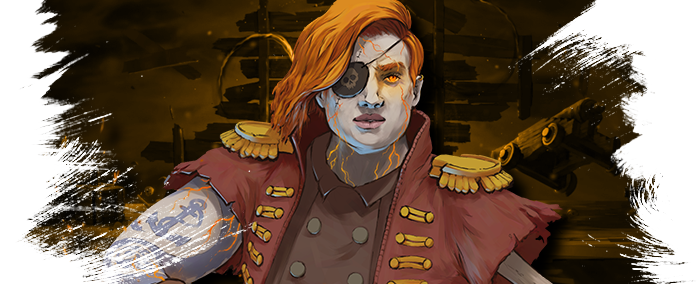
Once upgraded with Vigor Skill Points, Gaëlle becomes a powerhouse and easily one of the best, if not the best character in the game.

Gaëlle can't climb ivies / ladders, and can't swim. She carries bodies by "loading" them inside her cannon, and can freely move around and use abilities while at it. Her archetypes are Position Changer and Infiltrator.

Strengths
✔️Can shoot allies and enemies from high distances.
✔️Upgrade gives her the best and fastest melee attack in the game.
✔️Best distraction ability in the game, capable of displacing entire groups of enemies; even better when upgraded.
✔️Can distract small groups of enemies.
✔️Can solo various stages.

Weaknesses
❌Offensive ability only knocks down opponents.
❌Slow default melee attack (until upgraded).
❌No mobility skills for herself.
❌Relies on Quentin for certain setups that involve displacing the entire team.


Gaëlle's Melee has a long attack duration, with 5 seconds. Unlike other characters, however, she is able to stuff enemies inside her cannon and carry them around; if knocking out an enemy, Gaëlle will completely skip tying them down and stuff them inside the cannon instead.

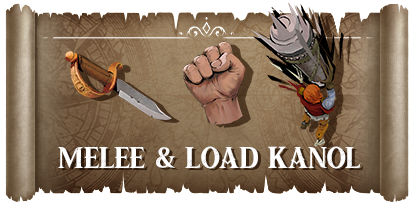
Upgrading Gaëlle completely changes her approaches, and replaces her regular melee attack with Load Kanol, which, as the name suggests, instantly loads enemies in her cannon without requiring to take them down first.

Load Kanol makes Gaëlle the best killer in the game because its attack duration is the shortest in the game (2.2 seconds), which is even faster than Toya and Suleidy's (2.5 seconds).

Gaëlle is the only character in the game who can carry corpses without making noises and without preventing her from using other abilities. This also allows her to climb ladders and enter buildings while carrying bodies.


Gaëlle is able to also load her cannon with allies, which vastly expands how players can tackle content by shooting them to places they otherwise couldn't.

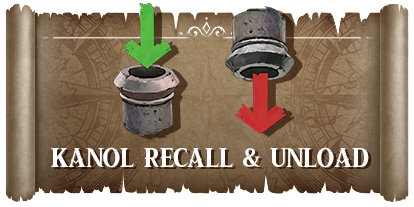
When using Kanol Recall, Gaëlle will shoot a rope from inside the cannon and pull them inside it. This ability has the second highest range in the game (after Toya's Shadow Step) and can be used as long the character is within Gaëlle's line of sight (meaning she can't recall characters who are behind walls or other obstacles).

Gaëlle can only carry a single character (or enemy body) inside the cannon; if Gaëlle is already carrying someone, she's unable to drag another enemy normally. The player can empty the cannon at any time they want, which will drop the character (or enemy corpse) at her feet, or shoot them instead.

Gaëlle can't use Kanol Recall on characters who are swimming. She can, however use it on characters who are climbing ladders / ivies and even on characters who are dead, making her, alongside Quentin, the best "medics".

Range
Attack Duration
1000.0 (!!!!!)
2.5 seconds


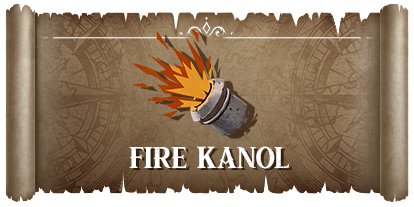
This is the bread and butter of Gaëlle's gameplay and the most unique thing about her. After loading an enemy (or player character) inside her cannon, she can shoot them in a large arc.

Enemies shot by Gaëlle won't die on impact, no matter how high they're shot from; shooting them inside water won't count as a kill either (I assume this is a bug). This makes her perfect for Badges in missions where you must not touch hiding spots but still needs to hide bodies (i.e. "Prepare for Trouble" at Twins of Nerechtemeresch).

If Gaëlle shoots the corpse of an enemy that was killed in an accidental death directly or near other, living enemies, they won't ring the alarm (even if knocked down by it).

As aforementioned in Quentin's section, he pairs exceptionally well with Gaëlle as she can load him up, shoot him to higher ground, and he can pick her up with his Treasure Rod.

While this ability has no cooldown, shooting anyone will prevent Gaëlle from loading her cannon for 5 seconds (this includes her upgraded melee).

Pinkus's Peruse Mind has an interesting interaction with Gaëlle's Fire Kanol that'll be discussed in his section.

Range
Noise Radius
17.0
4.0


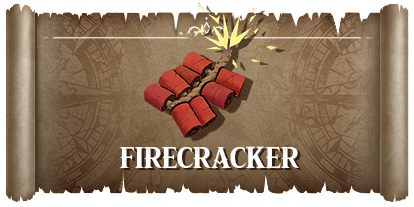
This is easily one of the best distraction / lure tools in the game, especially when upgraded (which increases its radius). It has great range, large radius, and the cooldown is short enough that players can use it again by the time enemies are about to leave from investigating.

Range
Noise Radius
Cooldown
12.0
6.0 (8.0 when upgraded)
12.5 seconds
Pinkus von Presswald

The Quartermaster - Pinkus keeps the Marley‘s books and oversees rations and supplies. Besides that, Pinkus usually cherishes a good smoke while he misappropriates the aforementioned books as his personal memoirs.

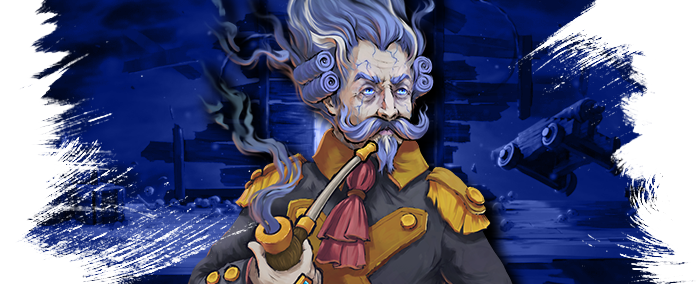
Pinkus is the "spy" type character that exists since the old days of Commandos. In an unique twist, he's able to possess his enemy and take control of their body. He's the only character capable of directly infiltrate enemy lines.

Pinkus can't climb ivies / ladders, and can't swim. He also carries bodies while crouching. His archetypes are Spy and Infiltrator.

Strengths
✔️Can possess enemies and control their movements.
✔️Capable of directly infiltrating enemy lines without being detected.
✔️Can distract small groups of enemies.
✔️Can solo various stages.

Weaknesses
❌His ability to possess enemies has glaring limitations.
❌Very reliant on enemy positioning to make the best of his possession.
❌Slow melee attack.
❌No mobility skills.
❌Loses control if alarm rings while possessing an enemy and can turn on allies.


Pinkus' Melee has a long attack duration, with 5 seconds, which is the same as his ability to possess enemies. Because of this, and how his possession works, rarely are the times where you'll want to use his melee attack.


The core of Pinkus' gameplay is his ability to possess other enemies and take control of their bodies. Using it counts as knocking down an enemy, and whenever Pinkus leaves the body, the enemy will fall down unconscious and tied.

By default, Pinkus can only possess Acolytes and Kindred. By upgrading him with Vigor Skill Points, he can possess any enemy in the game, including the Prognosticar (but they must be "startled" first). This makes Pinkus the character who is mostly reliant on his Vigor upgrade alongside Teresa.

The caveat of possessing an enemy is that Pinkus has a range, in relation to the position where he possessed the enemy, where he is allowed to move around with the body. He is unable to cross these boundaries and must possess another body or abandon the current body to progress.

Enemies Pinkus possess will have, by default, a single shot of their respective firearms. If Pinkus shoots another guard, others will be alerted and Pinkus will have an exclamation point over his head for around 10 seconds. Any guard that spots him while still having this icon will automatically attack him.

Abandoning a possessed body won't kill them; instead they'll fall down unconscious and automatically tied down; if other enemies spot the body, they'll ring the alarm and untie their ally.

If moving Pinkus outside of the range of his possession with certain abilities (i.e. Gaëlle's Kanol Shot, Quentin's Treasure Rod), he'll automatically leave the body.

In Gaëlle's case, if she shoots Pinkus while in possession near other enemies, the alarm will ring once they investigate the body, which will make Pinkus lose control of his host temporarily; this will not happen if the player shoots him outside of the enemies line of sight while still within their hearing radius (such as inside a bush).

If Pinkus does anything suspicious while possessing an enemy, the other enemies will notice him and eventually ring the alarm; if Pinkus' host is killed, he'll be forcefully expelled out of the body. However, if the alarm rings and Pinkus' host is still alive while still possessing, he'll lose control of the body temporarily and the guard will walk around, and will even attack other player characters if spotted on sight.

The list of actions that will make enemies suspicious towards Pinkus are:
  • Attacking other enemies (obviously).
  • Blowing out torches or lamps.
  • Interacting with objects that lead to environmental kills (boulders, crates).
  • Interacting with certain mission-specific items.
Walking on water will actually distract guards, but they'll not detect Pinkus (even if the player steps on water right in front of them; I believe this might be a bug). This is effective to draw certain enemies away or lead them into traps.

Pinkus is able to carry bodies while standing during possession, however he is unable to crouch. Still, he can still do the "quick drop" by pressing the space bar.

One of the most notable things about possessing enemies is that Pinkus can go through doors that are otherwise locked for other characters without requiring the key.

Pinkus cannot use Peruse Mind on knocked down opponents (including enemies stunned by killing Custodes). Also, if he possesses a Kindred while the other one is still alive and the timer runs out, Pinkus will be forcefully "exorcised" and the alarm will ring.

If Teresa has her Vigor Upgraded unlocked, Pinkus can retrieve the soul-bolt from her Iron Judgement while possessing an enemy.

If Pinkus possesses an enemy during night missions who is carrying a torch, he'll keep the torch as a light source. Additionally, Pinkus can pick up Quentin's Golden Head while possessing (but it'll not be returned to Quentin).

Patrolling guards that stop to talk to one another have a special interaction with Peruse Mind. If Pinkus possesses one of those guards, the other one will take notice after a while and get suspicious. However, if Pinkus appears before them using that possessed guard, they'll identify as the ones they were talking to previously, and stop searching around.

Even while possessing an enemy, Pinkus will still be detected by Prognosticars if he uses any kind of ability on them. He'll still blend if he doesn't do anything directly, however. If Pinkus is discovered by a Prognosticar while possessing another guard, he'll not break his possession nor the Prognosticar will alert other guards, even if he's within their line of sight.

Certain characters can force Pinkus out of his possessed body with specific abilities, such as Mr. Mercury's Anchor Up or Toya's Shadow Step. Firing the Flintlock Pistol with any character will also work.

Control Range
Noise Radius
Attack Duration
24.0
3.0
5 seconds


Similarly to Aiko in Shadow Tactics and Kate in Desperados III, Pinkus is able to distract his opponents while possessing another enemy by striking a conversation with them, making them turn around to him. However, unlike in previous games, this will not last forever.

The duration of Converse is much lower when used on Commissarius and Iudexes.

Pinkus is only able to use Converse when possessing an enemy.


Those who played Shadow Tactics and Desperados III will recognize this from being exactly like Hayato's Stone and Cooper's Fake Coin.

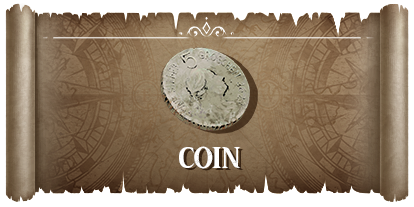
This ability is pretty straightforward and simple to use. While not being able to lure opponents, it can be used to pull their attention away from the player, but it can also be used for setups (i.e. drop Quentin's The Golden Head and toss the Coin so the enemy looks in the direction where the head is).

For some reason, Coin and Converse share the same keybind, and the player can swap between them freely by clicking the icon.

Noise Radius
Cooldown
3.5
9 seconds
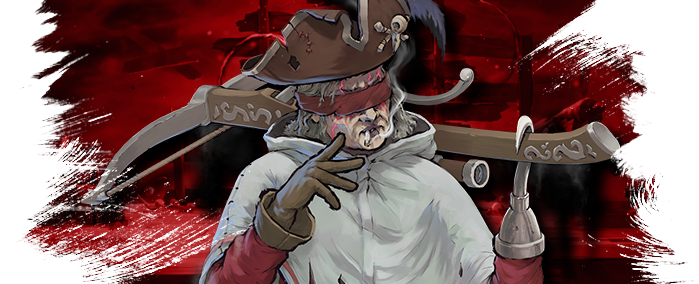
Teresa la Ciega

The Sharpshooter - Teresa lives in the crows nest, casting her burned eyes towards the horizon. Teresa‘s sight can spy ships through stormy weather and find the smallest details on a crime scene. Her shots never miss. A true sharpshooter.

Teresa is the sniper of the group, much like Takuma and Dr. McCoy who came before her. The key difference is that she technically has infinite ammunition, which will be discussed further below. However, out of all characters in the game, she's the most dependent on team composition; she must be built around it.

Teresa can't climb ivies / ladders, and can't swim. She also carries bodies while crouching. Her archetypes are Sniper and Killer.

Strengths
✔️Can shoot enemies from very long distances.
✔️Can blind a single enemy, limiting their viewcone.

Weaknesses
❌Sniper shot makes huge noise and makes easy to ring the alarm.
❌Only has a single shot, and the bullet must be manually recovered from the enemy body.
❌Slow melee attack.
❌No mobility skills.
❌No means to actually distract enemies.
❌Extremely reliant on team composition to make the best of her abilities.


Teresa's Melee has a long attack duration, with 5 seconds, which is the same as his ability to possess enemies. However, she'll rarely, if ever, be required to stand in the frontlines.


The core of Teresa's gameplay is her ability to shoot over long-distances, which makes her key in stages with lots of high ground and that feature plenty of Iudexes.

In some ways, Teresa is better than the snipers from previous games, but offset in much worse ways. While she has no ammunition count, her "bullets" (the "soul-bolt" she fires) must be retrieved manually by the Teresa, which kinda contradicts her gameplay of sticking to one place and shoot bullet after bullet. In addition, shooting an enemy has a noise radius around the victim, which means enemies can detect sniping a lot easier.

One of the best pairs for Teresa is Quentin, since his Treasure Rod can retrieve the soul-bolt from Iron Judgement directly. Gaëlle can also fulfill this role by shooting Teresa directly on the place where her soul-bolt is. Because of this you will, undoubtedly, always want to bring Quentin (and/or Gaëlle) along whenever you send Teresa to a mission.

The Vigor upgrade makes so that any character can now pick the soul-bolt, and it will automatically send it back to Teresa, which makes her synergy with Quentin even more valuable.

Once she's upgraded, Teresa can also be paired with Pinkus. After taking control of an enemy, Pinkus can pick up Teresa's soul-bolt from a further distance than Quentin. Care should be taken, however, to not shoot Pinkus accidentally while he is possessing the enemy. (thanks, DustHunter)

Iron Judgement also has a non-lethal version which will knock down enemies.

Range
Noise Radius
Dying Duration
35.0
7.0
5.8 seconds


This ability allows Teresa to blind enemies from afar. Very handy in situations where you can't really kill enemies yet because it'll trigger a chain reaction of alarms.

Unlike Iron Judgement, Ashen Judgement has infinite uses; the player doesn't have to retrieve the bullet.

The duration of the blind is lower when used on the Iudex.

Range
Duration
Cooldown
35.0
5.0
10 seconds
Yuki
The Twilight Corsair - Yuki was a thief born in Feudal Japan. During one of the adventures with her companions, a tragedy happened where she was shot by a Black Pearl and became an undead.

Yuki is a character exclusive from the "Yuki's Wish" paid DLC. For those familiar with Mimimi's previous games, Yuki is one of the playable characters from Shadow Tactics: Blades of the Shogun. She returns to Shadow Gambit: The Cursed Crew with an improved and deadlier arsenal.

Since Yuki's original kit was more or less given to Toya, she got brand new skills that now make use of Kuma, her pet tanuki, who originally belonged to Takuma, another character from Shadow Tactics. Her gameplay revolves around manipulating enemies into walking towards her Tripwire Trap using Kuma and Tanuki's Parade.

Yuki is notable as her Melee and Tripwire Trap will instantly disposes of bodies, similarly to Mr. Mercury's Anchor Up. Any enemy she kills, including those who were previously knock down, will have their bodies instantly replaced by a wooden log. This wooden log can't be interacted with and won't distract enemies. Enemies killed by Yuki through accidental deaths (i.e. throwing boulders or shooting cannonballs) and from jumping takedowns won't have their bodies replaced, though.
Trivia: those who know Naruto or who have seen other depictions of ninjas in Japanese media will recognize this as being then "Kawarimi no Jutsu", but it's actually based on a real-life technique of the same name used by ninjas where they'd use mannequins or dummies to misdirect their targets into mistaken those as them.

Yuki can climb ivies / ladders, and can swim. She also carries bodies while crouching. Her archetypes are Position Changer, Body Hider and Killer.

Strengths
✔️Instantly hide bodies upon killing enemies.
✔️Can lure multiple enemies at the same time.
✔️Can potentially lure enemies indefinitely.
✔️Pairs exceptionally well with Suleidy, Toya and Quentin.

Weaknesses
❌Slow melee kills.
❌Very setup dependant.
❌Has no mobility skills.
❌Can't unlock Vigor Upgrades.
❌DLC-exclusive.


MELEE
Yuki's Melee has a long attack duration, with 5 seconds. While she's a Killer archetype, this actually hurts her potential and requires the player to be more careful with their approaches, as a long dying duration means more time Yuki is vulnerable to be spotted by enemies.
Those who played Shadow Tactics will notice that Yuki's lethal melee briefly shows an afterimage of Mugen, a character from the same game, who became a sort of father figure to her. The sword she carries in her back belonged to him.


TRIPWIRE TRAP
Yuki throws a trap that arms itself where the player throws, while simultaneously placing an exact trap at her feet. The traps are connected by a rope, and activate once the target walks through it, shooting sharp darts on the victim.

The trap cannot be placed directly on enemies, and only one target can be hit by it at a time. The position of the trap will always take in consideration Yuki's own position, and the player can control the length of the trap by putting it closer or farther from her.

Yuki can only have one trap active at all times. If the player uses it again somewhere else, the original trap will disappear. The player can also manually pick the trap up.

Placing the trap causes no noise and will not distract enemies if used within their viewcone.

Tripwire Trap also has a non-lethal version which will knock down enemies by shooting small rocks on them instead.

Range
Dying noise Radius
Dying Duration
TBA
TBA
5.8 seconds


TANUKI PARADE
Yuki can use this ability to distract one or more guards into following Kuma to his location, no matter where he is. This ability will completely ignore the target's limit walking distance, meaning that even if Kuma is placed very far away, enemies will still walk towards his location; however, there is a duration of how long the guard will walk.

Unlike in Shadow Tactics, guards won't be distracted by Kuma himself, and will return back to their posts the moment they reach him, even if they still have a lot of time remaining.

Tanuki Parade will only lure Acolytes and Kindred. Other enemies such as the Commissarius and Iudex will be briefly distracted, but won't bother to move.

This ability can be combined with Suleidy's Wander Dust and / or Quentin's The Golden Head in order to displace enemies to cover long distances.

If Yuki has not deployed Kuma or made him return to her, and uses Tanuki Parade, enemies will instead walk towards Yuki herself, for unlimited duration. This essentially allows players to lure enemies anywhere as long Yuki doesn't deploy Kuma. There is no duration or distance to how long and how far you can lure enemies this way. Some cool things you can do with this:

Building Luring
Players can lure enemies inside buildings by entering them with Yuki. The player can exit and reenter buildings to keep enemies in loop.

Ladder Glitch
Using Tanuki's Parade, players can potentially lock enemies who are climbing ladders by using Gaëlle's Kanol Recall or Mr. Mercury's Pull Below on Yuki while she's luring them. These enemies won't be able to move, won't react to noises and can't detect the player (even if they walk through them).

Luring abilities such as Yuki's Tanuki Parade and Suleidy's Wander Dust will make them resume their climbing; other abilities, such as Afia's Time Freeze and Zagan's Hedron of Constriction, will freeze them in place and cancel the climbing animation, which will result in them resume back to their patrol.

Range
Duration
Cooldown
TBA
TBA
TBA


KUMA
Yuki can send Kuma to anywhere she wants within the radius, and he'll stay there indefinitely. Yuki can move Kuma around with the keybind once he's out, and holding the keybind will cause Kuma to run back to Yuki, no matter where she is. The player can also manually pick Kuma up with Yuki, like when picking up bodies or items.
Zagan
The Mad Apostate - Zagan is a zealous scientist and former Inquisition member who shot himself with a Black Pearl "for science". Zagan betrayed the Inquisition in order to find the very thing that fuels their powers: the Holy Flame.

Zagan is a character exclusive from the "Zagan's Ritual" paid DLC. He's a playable Prognosticar who has his own spin on the kit.

Zagan can't climb ivies / ladders, and can't swim. He also carries bodies while crouching. His archetypes is Killer.

Strengths
✔️Can disable enemies both short and long.
✔️His abilities have very long range and are not affected by by terrains and other obstacles
✔️Can heal self.
✔️Has an "anti-detection" passive tool.

Weaknesses
❌Slowest melee attack in the game.
❌Has no mobility skills nor distraction tools.
❌Lacks a jumping takedown.
❌DLC-exclusive.


CATATONIC GRIP
Zagan's melee is the only attack in the game capable of putting enemies in a perpetual stunned effect, much like the one triggered when killing a Custodes.

This attack is technically classified it as a non-lethal takedown, but enemies cannot be "awaken", and will be ignored by other enemies unless they spot Zagan using it. This even affects the Kindred.

Catatonic Grip is notable for being the slowest melee attack in the entire game, with 7.7 seconds of dying duration. It also heals Zagan back to full life whenever used.


DARK EXCISION
This ability functions similarly to the same attack used by enemy Prognosticars, where he'll channel energy and kill the target from a long distance. The catch is that using this ability deals one point of damage to Zagan, however, he can heal back up by using Catatonic Grip.

Zagan also has a non-lethal version of this skill that instead knocks enemies down. This version also inflicts self-damage to Zagan.

If a victim is detected while Zagan is using Dark Excision, the guards will run towards Zagan's position.

Dark Excision is disabled when Zagan is at 1 healthpoint.

Range
Dying noise Radius
Dying Duration
Cooldown
12.0
6.0
5.0
15.0 seconds


HEDRON OF CONSTRICTION
This ability allows Zagan to freeze enemies, similarly to Afia's Time Freeze. The difference is that this ability will hold enemies indefinitely until the player commands Zagan to do anything else. Once the player moves Zagan, the enemy will still be paralyzed for 6 seconds. The infinite hold only works on Acolytes and Kindred; on Commissarius and Iudex it'll last for 3 seconds.

The paralyzed enemy won't be seen as suspicious by other guards, and their field of view will also be frozen, meaning other characters can freely walk through it without being detected. In addition, if using this ability on an Acolyte that is part of a patrol, the other enemies will turn to their ally and won't move (but they won't be paralyzed).
An interesting "trick" you can pull is to bait a group into investigating a body, and use the Hedron on one of the Acolytes while they still have the yellow question mark on their heads. This will cause the entire group to turn to the frozen Acolyte while still having the question mark on their heads; this will make those enemies completely oblivious to any noises, essentially allowing you pick the off without having to worry.

One interesting aspect of Hedron of Constriction is that it's the only ability in the game that can prevent Kindred from resurrecting each other. If you put one of the Kindred in hold and kill the other, the paralyzed Kindred won't react unless he's released from the hold.

This ability has a passive effect. If enemies detect Zagan, Hedron of Constriction will trigger automatically on the target. This effect's cooldown is shared with the active effect, and will last 6 seconds even if the player has Zagan immobile when he's detected. Only one enemy can be afflicted by this passive effect at a time.

When spotted by an enemy Prognosticar, Zagan won't be put in danger. Instead, he and the other Prognosticar will face off in an eternal battle, clashing their powers, without one ever overpowering the other. Zagan will be completely immobile and won't be able to do anything, so will the enemy Progonosticar. The only way to break this cycle is to kill the enemy Prognosticar with another character, of if Zagan himself is killed by another enemy.

Range
Noise Radius
Duration
Cooldown
12.0
0.0
6.0 seconds / 3.0 seconds on Commissarius and Iudex
10.0
(Personal) Tier List
Disclaimer
I'm actually not very fond of tier lists because they don't really help define much.

This is just my PERSONAL ASSESSMENT AND OPINIONS from over 100 hours of playing this game, based on characters I had more fun and / or had more success with. Your own list will probably be different from mine, and that's perfectly okay!

I will say this now: ALL characters are viable and can effectively clear content. So if your favorite is on a lower tier, don't get angry at me, please.


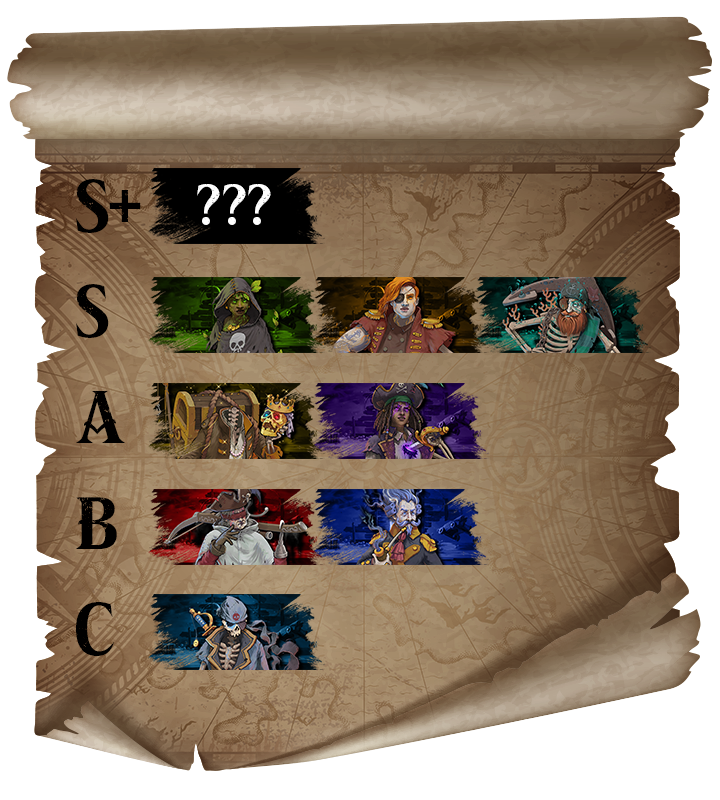
S+ TIER
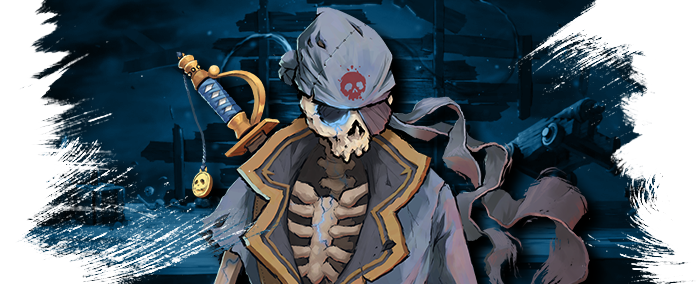
Virgilio takes the uncontested top spot since he's essentially all characters in one, able to swap between character kits at will (and will even inherit any Vigor Upgrades the player has obtained). So yeah, he can pretty much solo any mission in the game.

He has a pretty funny interaction with Gaëlle, where you can load an ally with the Kanol with Gaëlle (or Virgilio), then load said character with the other character. Very cool shenanigans. I'm glad they didn't fix this glitch.

He's unlocked once you finish the game and achieve 85% Overall Progression.


S TIER

Suleidy

Her ability to create hiding spots on demand with Cover Seeds makes her extremely valuable in any team and any map. Combine that with her fast melee speed and ability to displace enemies (even those in patrols), and Suleidy can actually solo nearly all maps.

----------

Gaëlle

She becomes a powerhouse with her Vigor Upgrade (I actually recommend getting it as soon as possible), as it makes her melee attack the best in the entire game, allowing her quickly dispose of enemies while simultaneously picking their bodies. The fact she can move around normally and use other skills while carrying bodies on her cannon is a huge plus.

----------

Yuki
Her ability to potentially lure guards infinitely with Tanuki Parede is ridiculously powerful, especially in Night Missions. While her Melee Kill is slow, the added effect of instantly disposing of bodies is amazing.

With her trap and melee, she can effectively kill two enemies at once with proper planning. She pairs exceptionally well with Suleidy and Toya.

----------

Zagan
Being capable of freezing enemies infinitely with Hedron of Constriction opens so many possibilities; he's arguably the best character in the game to halt enemy patrols. The passive effect that automatically triggers when you're detected is great too.

The fact that his abilities are unaffected by terrain and height makes him ridiculously versatile on pretty much any map. And him being the only character that can take on Prognosticars without dying easily makes him one of the best in the game.

His only drawback is the painfully slow Melee, the slowest in the game; but on the other hand it's non-lethal and catatonic enemies won't trigger the alarm.

----------

Mr. Mercury

His ability to sneak into enemy backlines is unmatched. While he lacks the utility of Suleidy and Gaëlle, he can solo a lot of maps by simply being slippery and avoiding enemies altogether.

His only drawback is how his teleport through The Below can only be done in the same plane height. For that reason alone I'd probably put him on A Tier, but I still think he's extremely powerful and deserving of S Tier.


A TIER

Quentin

Treasure Rod is absolutely amazing and one of my favorite abilities in the game. Being able to activate traps and objects from afar completely changes how you approach obstacles.

The Golden Head and Cackling Cockle open a lot of paths, and allows him to isolate key targets better than any other character. I'd place Quentin in S Tier for night missions because of The Golden Head becomes a source of light and allows luring enemies that otherwise couldn't be baited normally.

The problem with Quentin is his lack of offensive abilities; he is not very self-sufficient and relies on other characters, especially due to his slow attack speed.
----------

Afia

Time Freeze is a fantastic ability and I feel that a lot of players sleep on that (myself included). It can actually prevent the alarm from ringing if the enemy has detected a character and you freeze them right before they alert other guards.
Blink might be underwhelming due to its laughable range, but at least it gives Afia some mobility, and it's vertical range is actually surprisingly high, which makes Afia more flexible for high ground ambushes.

Grand Blink is amazingly broken, since it has massive range AND ignores walls, but it requires a lot of planning since the player only has a single use of it per mission.


B TIER

Teresa

She fits a very specific niche of being used in maps with lots of high ground and filled with Iudexes. Other than that she feels pretty underwhelming, and her over reliance on Quentin / Gaëlle to more easily retrieve bullets limits her teambuilding.

On top of that, her Iron Judgement has massive sound radius, which can really hurt her sniping capabilities.

----------

Pinkus

His ability to infiltrate enemy backlines is amazing (but not as good as John's), but his possession having a range limits what he can do, and makes his gameplay feel slow and too meticulous as you go from host to host (a bit too boring for me, personally).
In many cases it's easier to simply lure an enemy and kill them, especially since characters have so many ways to distract and engage with their various supernatural abilities.

If not for the range limitation of his possession and his Converse having a duration instead of being infinite like in previous games, I'd probably rank him on A Tier. Still, he's super fun to use.


C TIER

Toya

First of all, I don't think Toya is a bad character at all. He's actually one of my favorites solely based on his design, and his kit is super fun to use. However, he's greatly held back because other characters can do what he does a lot better.

The only thing that would make Toya among the best is his 2.5 second melee, which Suleidy also has. Bird's Voice is good, but it's vastly outclassed by Gaëlle's upgraded Firecracker.

Katashiro's placement has laughable low range, non-existent height range and the attack portion of the teleport takes forever, which makes easier to actually run behind the enemy and use a regular melee attack.

So my whole point is: why use Toya when you can use other characters? That said, he still is a viable character and can actually solo plenty of stages.
Enemy Types
Acolyte
These are your typical guards, like the Guards in Shadow Tactics and Cowboys in Desperados III. They are the most basic type of enemy, and can be distracted and lured.

Commissarius / Magistratus
They function much like Acolytes, except that they cannot be lured, only briefly distracted. There is no difference between the Commissarius and the Magistratus except for their clothing.

Iudex
They function similarly to Straw Hats in Shadow Tactics and Ponchos in Desperados III, but are always stationary, and have the longest viewcone of all the enemies in the game. They cannot be lured, but briefly distracted, and even so the duration of distractions used on them is even lower than the Commissarius.

Prognosticar
These are a new enemy type. They're powerful inquisitors infused with the power of Maiden's Fire. In a way, they're the spiritual successors to Samurais in Shadow Tactics and Long Coats in Desperados III, as they cannot be taken down in traditional means and require setups.

Any direct assault or use of a distraction ability against Prognosticar will result in them binding the player character, using their holy powers to paralyze the victim. If the gauge completes, the character dies. When the player selects an ability that will alert the Prognosticar, an exclamation point will appear before his head.

The attack unleashed by the Prognosticar has global range; for instance, if Toya attaches Katashiro on a Prognosticar, runs to the opposite side of the map, and uses Shadow Strike, the Prognosticar will proc his attack before Toya even teleports.

However, the Prognosticar is completely vulnerable while channeling the hold and can be killed by any attack. They're focused while channeling and won't do anything else if other characters approach.

They're vulnerable to environmental attacks such as pushing boulders or firing cannons.

Kindred
These are new enemy type, but they act similarly to regular Acolytes. The catch is that the Kindred will always be found in pairs, and are linked together; players must kill both Kindred within a small time frame (around 7 seconds), otherwise the other will revive and ring the alarm.

If one of the Kindred is killed, the other one will remain still and suspicious, with a question mark around his head, which marks the revival timer. If only one of Kindreds are killed his body cannot be interacted with (carried, Quentin's Treasure Rod, etc.).

However, there is a funky interaction with Gaëlle's Load Kanol; if the player uses it on one of the Kindred and shoot them on water while the other is alive, the drowning one will continuously respawn to the surface.

Kindreds bodies can't be picked up until both are dead; same applies for knocking them down, as there'll be no icon to tie them. Even if one of the Kindred is hit by Mr. Mercury's Anchor Up, an attack that instantly dispose of bodies, they'll still rise up after the timer is over (until the other is killed). The same applies by trying hide their bodies with Suleidy's Cover Seeds.

Custodes
These are a new enemy type, but they technically can't even be considered enemies since they don't attack and can't be interacted with (distracted or lured), and they cannot be possessed by Pinkus.

Killing a Custodes will open a tear through which the player party can exit the mission when all objectives are completed.

When killed, Custodes unleash an energy force radius around them that incapacitates all enemies within a radius.

Bellguards
They're Acolytes or Commissarius with giant bells attached to their backs. If they detect a player, instead of immediately attacking, they'll pull the bell from their backs, slam it into the ground and ring it. This alarm trigger will reach more guards than usual in the surroundings, and will also alert reinforcements from inside buildings.

Ignacia
She fundamentally functions like a Prognosticar. She can only be killed through two actions.
22 Comments
Senok el Tirun 30 Jun @ 12:05pm 
Two things about Zagan:
- Hedron of Constriction only works as a passive, when the DC isn't active. if you used it, the passive effect won't be available until it's ready again.
- If you wish to fight against a Prognosticar, don't use any ability on him, as the Prognosticar would catch you, like all the other characters. To "immobilize" them, the Prognosticar should spot Zagan first, and initiate the attack against him.

One more thing, what I noticed (on Legend difficulty) about the enemy "reinforcements" - they have a "number". If after the Alarm the extra guards ran out, and you eliminated said guards, then no more guard will come out of the same room. There can be more than one such station within some garrisons though.

One more thing: Catatonic Grip, just like the Hedron of Constriction doesn't "kill", therefor very useful against Kindreds - neither of them raises an alarm, if the enemy see the effected soldiers. Pretty useful from nearby bushes!
AGuyLikeGaston 10 Jun @ 8:01pm 
I think Pinkus also pairs exceptionally well with Gaëlle in certain missions. You can possess a guard near a landing spot, then launch Pinkus up high, either on top of a cliff or over fortress walls, within range of his possession radius. Now he's deep into enemy territory and already in disguise
Gacsam 7 Jun @ 4:55am 
"So my whole point is: why use Toya when you can use other characters?" Upgraded Toya can be quite good since he can run into a viewcone, Shadow Step right before he's noticed, then Shadow Step back and continue the run.
Minigold07 20 May @ 7:47am 
Toya can throw his Katashiro from great heights. This means that he can freely travel bewteen a high area and a low are as long as the Katashiro has anything to land on. No ladders/vines needed.
jpxfrd 7 Jul, 2024 @ 12:50pm 
No idea if anyone will read this but can anyone tell me where you can actually see Afia's archetype in game(or anyones after they have been revived)? I'd really just like to see it myself in game. I don't know why but it's something that really bugs me...
dj8472 15 Jan, 2024 @ 5:13am 
Zagan's catatonic grip can disable kindred, it wont alert the other and they won't try to revive them
ElCid  [author] 9 Jan, 2024 @ 2:51pm 
@Velorien without a single doubt. Spy-type units are extremely powerful in Stealth Strategy titles. But Gaëlle, Suleidy and John are just so ridiculously OP that it diminishes Pinkus abilities a bit. I still love using him, though.
Velorien 9 Jan, 2024 @ 8:43am 
While doing a Pinkus solo mission on the Isle of Penance for the badge, I discovered that the fact that each possessed body is a free gunshot is actually extremely powerful. Pinkus is capable of depopulating entire forts on his own just by shooting the most inconvenient enemy, ducking into a building until the suspicion counter is done, and then grabbing a new victim while the guards' locations are still disrupted by the alarm.
Ertxx 1 Jan, 2024 @ 2:02pm 
in the enemy types part of coarse
Ertxx 1 Jan, 2024 @ 2:01pm 
you could also make a part about the final boss because she has some propertys