Project Warlock

Project Warlock

Not enough ratings
How to: Kick Satan's Arse - Single Life Mode Guide
By [GTH]
[UPD. 18.09.2024] Have fixed the disappeared images bug. Enjoy!

The guide covers the basic advice to follow throughout a whole Single Life Mode run, the extremely strong magic build, list of important secrets, and strategies to follow during every boss fight.
2
2
   
Award
Favorite
Favorited
Unfavorite
Introduction
Having completed Single Life Mode three times successfully and tried different builds in the process, I've decided to share my thoughts and experience with other people to help them to beat the mode the legit way.
General Tips and Advice
Before we discuss the build that I find to be the strongest and the most optimal in the game, let's hit the high points to remember and follow throughout a run.


Probably, the most crucial thing to keep in mind. Leveling the character in the game is strongly tied to finding the secrets as they contain experience boosters and, what's more important, weapon leveling boosters(which are almost exclusively located at the secret areas). Without upgrading the weapons and the character, Single Life Mode will be, obviously, almost unbeatable.

Even extra lives are of great value because they give you one stat upgrade point and restore your health.

I haven't done the math, but it seems to me that the secrets of the first world's stages are the most "generous", they have loads of experience boosters and weapon leveling boosters. The secrets of the latest worlds mostly contain ammo and health packs.

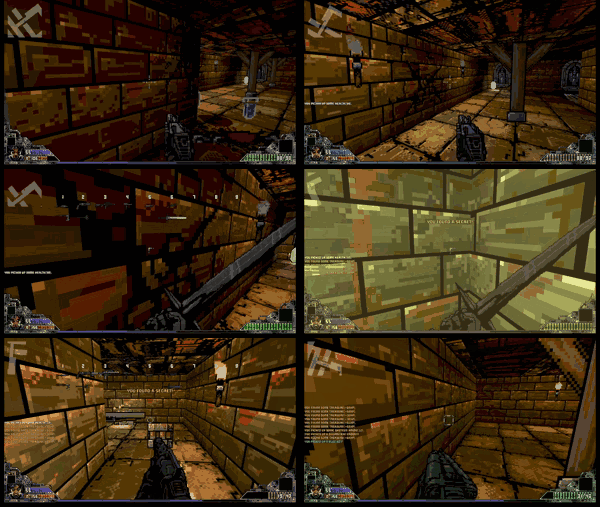
The stages of the first world are of pretty simple structure, and the secrets there are easily locatable even without the guide, just run around and press action button on the walls. The maps are pretty small, so it won't take much time of yours.

Take it as a rule to never leave the stages in the first world without finding all of the secrets and never leave the stages of the second and the third world without locating at least half of the secrets. As for the fourth and the fifth world, you're going to be buffed enough to ignore the secrets there completely.


Learn to think on your feet. You basically aren't allowed to stand still on this difficulty as it'll result in an instant death, either from being crowded by melee enemies or from being hit by enemy projectiles. Constantly strafe, watch out for your surroundings and hide behind the walls from projectiles.


Though it might be not so important in the middle game and later, carefully peaking around the corners is the best way to explore the stages in at least the first two worlds. Speaking especially of the second world, if you rush in a new room without checking it out first, you might fall into a death trap with charging yetis or flamethrower troopers.

The best guns for peaking out would be either UZI for it's ability of stunlocking an enemy to death or either of two shotguns because of their capability to one shot almost every enemy.


Though you may wish to avoid a fight to decrease your risks, I highly recommend you to never avoid an enemy (except for some rare occasions). More enemies killed = more experience gained. Simple math.


The portals that aren't hidden aren't our case, they usually contain the keys that are required to get to the exit. I'm speaking about the secret portals specifically. Some of them are shortcuts, and we just discussed why you shouldn't skip levels and enemies, the others can be actual d-move deathtraps (like the secret portal in Egypt that takes you to the room full of golems who immediately attack you and take about 200 HP from you just the moment you teleport there).


TNT is a troll weapon, seriously. It works on contact, because of it at least three of my runs were finished because an enemy spawned/came across the corner right in front of me and I just one-shotted myself.


Be smart about using your supplies. Don't pick up big health packs when you're 95/100 HP, don't pick up UZI ammo when you're 80/90 bullets, don't use rocket launcher to kill a small spider and don't waste revolver bullets on a giant mecha. In other words, use your ammo wisely and save greater supplies for later if you aren't in a great need.


This tip results from the previous. The barrels may contain experience boosters, ammo and health packs. Don't underestimate their value and always break them.


The first world is basically the hardest part of the game on this difficulty. At this point, you don't have the strong weapons, you aren't capable of acquiring the core elements of the build and your stats are low. Moreover, because of all these reasons, the bossfight of this world is also the hardest in the game.

Yet, it's manageable. You may and will probably lose some runs in the beginning while getting used to the difficulty, but don't give up so early. If you're capable of getting through the first world, you're capable of getting through the whole game, believe in the Me that believes in You.
The Build

The build I offer to you is focused on using Storm Rage spell. The main idea of the build is to kill packs of weak enemies with Spirit Stealer and pick up mana orbs dropping from them because of Soul Collector perk to constantly have mana bar full to be able to permanently cast Holy Guard on yourself and deal with large packs and strong enemies using Storm Rage spell.

You complete the first world the usual way, the build starts to shine right after the first boss is killed. This is the point when you acquire Storm Rage spell and buy Spirit Stealer axe. From now on, your gameplay changes dramatically. You deal with smaller groups and weak enemies with your axe and just annihilate all the strong mobs and big crowds with Storm Rage.

Even if you prefer safer playstyle based around gun usage, this build will still be very strong as you'll always be able to cast Holy Guard shield on yourself when in need, and Storm Rage will help you get through the hardest encounters in the game and skip two later bosses completely.


These are the upgrades I find essential to get. The other ones are not as optimal/useless/make a weapon even worse.

Auto Loader Shotgun is essential in the beginning of the game in this mode. It allows you to deal with hordes of tough enemies in a matter of seconds and, what's more important, it's essential to be able to kill the first boss fast enough before he kills you in his final form, thus this upgrade should be acquired ASAP.
Spirit Stealer is the bread and butter of the build. Don't underestimate melee weapons' range, it's pretty long on it's own, and Spirit Stealer gives you additional width to all of the attacks. Having acquired it, I used it most of the time, changing it to other weapons only to kill strong long-range enemies. It's damage is high enough even without putting points into Strength, but if you get lucky and Student gives you some Strength point, it'll become even stronger.
Flak Cannon allows you to make two shots before reloading and changes bullets for fire pellets that add DoT damage to your attacks. The most important thing is that Flak Cannon, like all other fire weapons, prevents stronger multi-stage enemies from transforming, instead they turn into a pile of ash upon their first health bar is being done.
Heavy Bolter is one of the strongest weapons in the game. The damage is colossal, the attack speed is insane. Once you acquire it, UZI becomes an absolutely unoptimal weapon to use.
Super Sonic Rocket Launcher basically turns your Rocket Launcher into a railgun. The attack speed is extremely fast and the damage is, obviously, one of the highest in the game among the other weapons. Use it to kill strong enemies like mechas or Incubuses in the late game.
Railgun turns your Laser Gun into Railgun. Wait... Works just like Super Sonic Rocket Launcher but with lower attack speed and has enemy pierce effect instead of AoE. Another "juggernaut"/boss killer weapon.

Firelance is a weapon of insane damage and pin-point accuracy, the problem is that it consumes all of your ammo momentarily upon usage. But it's still a very decent "juggenaut" killer weapon. The only optional to pick weapon I wish to highlight.


Storm Rage is basically the best spell in the game and the core of the build. Unlock book is located in the first boss's arena. It creates a lightning bolt turret with insane damage that shoots nearby enemies. The turret has auto-aim, it sees through the walls and is able to pierce them through, thus preventively clearing out the whole room full of enemies.
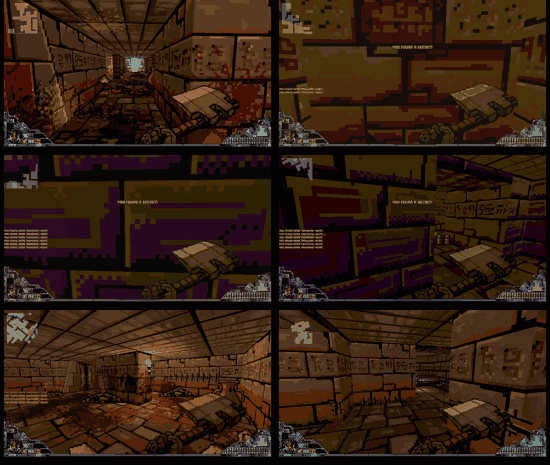
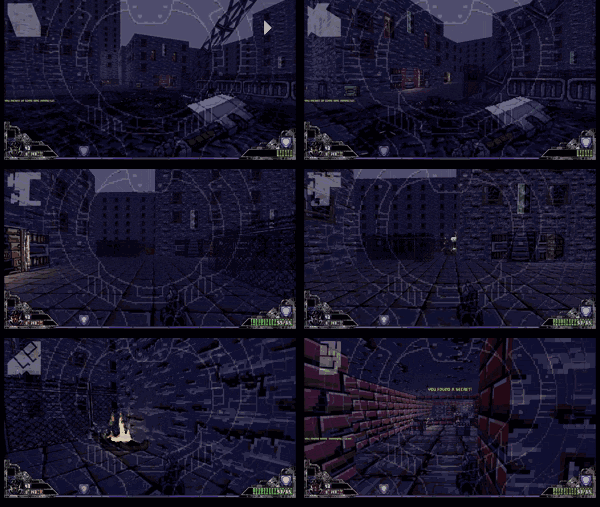
Holy Guard is the second essential spell for our build. Unlock book is located in E3M3. Be sure to constantly cast it on yourself.
Sammoner is an optional spell but it's really nice to have. Might be pretty helpful and save the day in a critical situation when you're out of ammo and surrounded by strong enemies. The most optimal ammo to generate is RPG rockets.


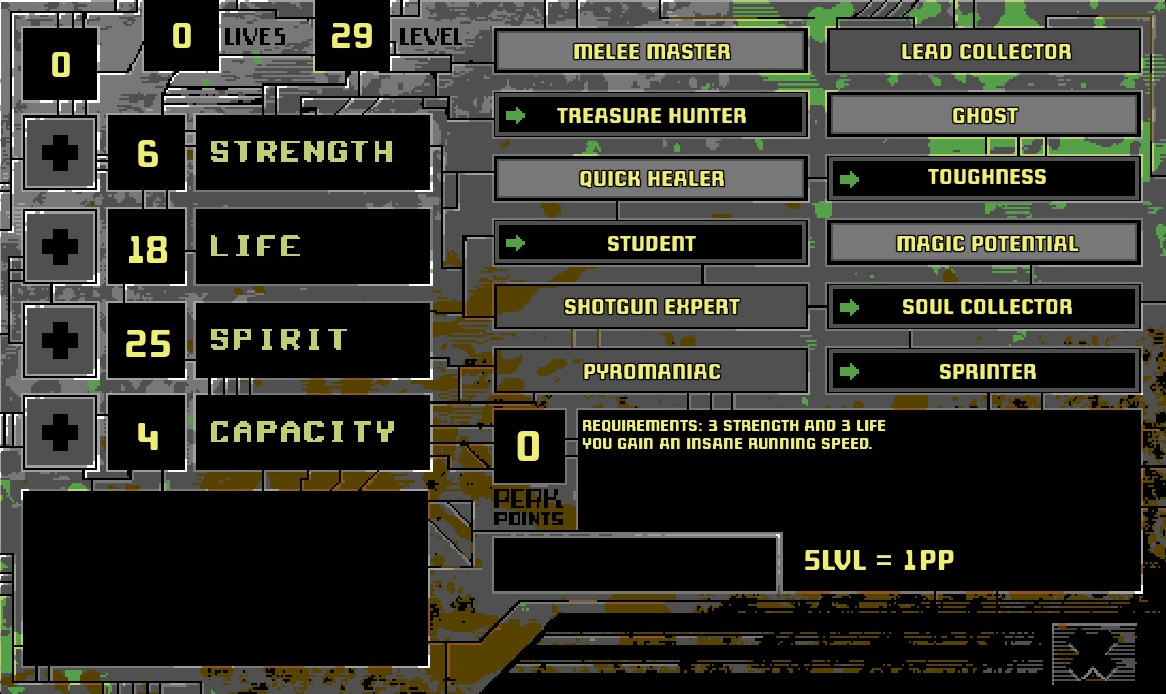
This is the approximate build you should aim for.


The order of increasing different attributes should be the following:
  • At first, you should put all your points into Life until you get at least 250-300 HP (Toughness' 30 HP bonus included).
  • Then you put all your points into Spirit, it's our main stat for the build. It increases your mana pool, Holy Guard's shield strength, Storm Rage's damage, length, and decreases it's mana cost. Thanks to Holy Guard, Spirit not only increases our damage, but it also increases our vitality as it makes Holy Guard stronger, thus compensating some points that could've been invested into Life.
  • You can optionally put some points into capacity before the final fight to ensure you have enough bullets for it.

Let's discuss the perks in their sequential oder.

Student
Gives you a random stat whenever you level up. Should be acquired first so that you get as much additional stats by the end of the game as possible.
Toughness
The most important perk in Single Life Mode. Not only you get 30 additional health points, the 20% enemy damage decrease is the game changer that helps you to stay alive throughout the whole run.
Soul Collector
Makes enemies drop mana orbs upon death. Extremely important for the build. Combining it with Spirit Stealer gives you a stable mana replenishment source.
Treasure Hunter / Magic Potential
Choose either one of these. The first increases enemy ammo and health packs drop chance, the second allows you to bank more mana from Spirit Stealer and Soul Collector combo.
Sprinter
Though it's not essential, Sprint is a great perk for the build. Allows you to just run into a crowd of enemies without receiving any damage, spawn a lightning orb, and pick up mana orbs dropping from enemies.
Important Secrets
There are three notable secrets that contain weapons you're supposed to get later.
These may be huge power spikes for you.


E1M8
Having cleared the main hall, go to your right. In the corridor behind the door you'll see breakable wall that leads to a secret corridor. Super Shotgun is hidden in the secret room behind the wall of this secret corridor.
E3M4
There's the corridor with the room with the portal in the left part of the level, this corridor is located behind the red door to the left from the spawn point. Instead of going to the room, go to the right until you face a dead end, there is a secret room. Inside this room there's another secret room with the button to the right. Press it and go back to the corridor to the second room to the right from you. Minigun will be waiting for you in the now-opened secret room behind the column.
E4M2
Having crossed the bridge, turn to the right and you'll see a wall with explosive barrels down the street. Shoot them and open the hidden door. Rocket Launcher is hidden there.
Strategies for Bosses

The first and the second stages are pretty much the same. The sorcerer shoots laser at you, casts meteor rain around himself and summons minions to assist him. You keep your distance not to get caught in the meteor rain, hide behind the walls to avoid laser attacks and shoot him with UZI. When minions get close, you just run to another structure to preserve ammo for the boss.
The third stage is completely different. The boss transforms into a juggernaut and starts constantly performing his rush attack. It's either you kill him instantly, or he'll just destroy you in a few hits. That's why Auto Loader is essential to pick before this fight.


During the first stage the boss is immune to damage. Before he becomes invulnerable, you need to destroy all the tentacles that spawn around him. Strafe to dodge boss's projectiles. Both the boss and the tentacles are immune to magic, but you can still cast Storm Rage to get rid of the minions that he spawns on the arena.
In the second stage the boss becomes vulnerable to attacks. Just run around him to dodge projectiles and fire at him with everything you have.


During the first stage he stands still and shoots projectiles. The first stage is immune to magic. Just strafe and shoot him with Heavy Bolter and either of two shotguns.
During the second stage the head detaches from the body and starts flying around and attacking you. This stage isn't immune to magic, so cast two Storm Rage orbs and he is finished in a matter of seconds.


1) Cast two Storm Rage orbs
2) Try not to laugh challenge


The first three stages are pretty much the same. He walks around chasing you and shoots different projectiles. You should strafe around the buildings scattered across the arena and shoot the boss. The boss is completely immune to magic so save your mana for Holy Guard, permanently have it casted on yourself. Use your weaker weapons like Flak Cannon, Heavy Bolter, Firelance/Flamethrower to preserve BFG, Super Sonic Rocket Launcher, and Railgun ammo for the latest stages. If you run out of ammo for the weaker weapons, run around the map to pick up ammo packs/cast Sammoner to generate rockets.
The fourth stage, Cacodevil, is the strongest. It starts to spawn minions, shoots laser beams at you and casts force wave around himself. Deal with it as fast as possible with BFG/Super Sonic Rocket Launcher/Railgun.
The fifth stage is the time to finish the bastard off. Constantly strafe to avoid tentacles appearing from the ground, don't let minions to surround you, and use everything in your possession to finally finish this fight.
Conclusion
And that's it. Thank you for reading!

I hope you find the guide useful and it'll help you to successfully conquer your journey!

Git gud and gud luck to you!

3 Comments
Danielxen 13 hours ago 
I know but is a good option
[GTH]  [author] 22 Jul @ 8:24pm 
The point of the guide is to help beat the hardcore mode legitimately.
ALT+F4 is not a strategy, it's an abuse of a technical flaw. :gng:
At this point, one can simply unlock the achievement by modifying the savefile if they're not interested in actually beating the challenge.
Danielxen 22 Jul @ 8:11pm 
the best strategy is to exit the game if you see you are gonna die