Warhammer 40,000: Dawn of War II - Anniversary Edition

Warhammer 40,000: Dawn of War II - Anniversary Edition

46 ratings
Cracking open Primarch
By Earthlord
The Dawn of War 2 original campaign's Primarch difficulty can be hard. This guide contains information, tactics, and other bits and pieces to help you excel at Primarch difficulty.
2
3
   
Award
Favorite
Favorited
Unfavorite
Basics of Primarch
Primarch difficulty is hard. Even harder is performing consistently well on Primarch difficulty. This guide exists to provide a lot of relevant information, and help you do better.

There are four difficulty settings in the Dawn of War 2 campaign. Sergeant difficulty is considered the standard difficulty. The other difficulties are produced by modifying how much damage enemies do. Enemy damage is the only difference between difficulties; you face the same number of enemies with the same amount of health on all occasions.
On Recruit difficulty, enemies do x0.66 (2/3) of the damage done on Sergeant.
On Captain difficulty, enemies do x3 of the damage done on Sergeant.
On Primarch difficulty, enemies do x4.5 of the damage done on Sergeant.

This is extremely important. On Primarch difficulty, enemy damage output is massively increased, but enemy durability and numbers don't change. The biggest challenge of Primarch difficulty therefore, is that the enemy will kill your forces extremely quickly. You need to tailor your strategies around this. The most effective way to neutralise the high enemy damage is to kill enemies quickly, with high damage abilities, or from long range where they can't hit back. But in some situations killing enemies quickly isn't enough to avoid taking serious damage. Maybe they have too much health in the first place to kill before your own squads die. In these cases you need other tactics, like abilities that will reduce or prevent the damage you take, or methods of stunning and disabling the enemy to prevent them doing damage.
Campaign Structure
The Dawn of War 2 campaign is split into three major sections, which I will refer to as the early game, the mid game, and the late game.

The early game consists of the first 11 missions; from Stand With Your Brothers to Fire Prism Assault. The early game is characterised by very little choice in where you go and what missions you do; there are never more than two missions available at a time, and you always have to complete the current mission/missions before any new ones will unlock. You are given many of the important accessories of the game as mission rewards here, and you've gained access to five of the six heroes you'll play with before you're halfway through the early game.

The mid game consists of completing the three central campaign objectives (which you'll hear repeated by Gabriel often): gather a pure genetic sample from a primary hive, secure access to Angel Forge, and obtain scans from the Astronomic Array. Each of these three objectives is achieved by completing a series of 4 missions from the beginning of the mid game. Mostly these missions are fixed and will be in the same places, on the same maps, in the same order for each quest line every time you play the campaign. But the first three missions of the pure gene sample quest line may be any mission marked as giving a gene sample, and which gene sample missions are offered to you will differ from playthrough to playthrough. The mid game is characterised by a lot of choice as to where you go and what you do, but ultimately the total set of missions you complete each time you play through the mid game is similar; the main difference is in the order you choose to do them. The mid game does give you a few randomised optional missions, but there aren't many of them. The mid game tends to be the hardest part of the campaign because you are required to deal with powerful enemies at the end of each quest line, but haven't necessarily unlocked the game's best tools yet.

The late game begins once you finish the three central campaign objectives and Gabriel says you have to hold the sector for 2 days until he arrives. From this point on, each day will spawn many more missions than before. You'll see a lot of optional missions which you don't normally see in the mid game, there will be many defensive missions to keep your Strategic Assets secure when defense missions were previously rare, and new missions will spawn as fast as you can complete the old ones. You also gain access to the two superbosses; the Warboss and Avatar in the missions Raid Against the Warboss and The Wailing Doom. The late game contains a lot of missions with really good rewards and will continue spawning missions more or less indefinitely; eventually you are supposed to complete the final mission and finish the campaign. Despite the fact that this section of the campaign sends the most powerful enemies against you, it's actually in many ways the easiest part of the campaign (once you beat the superbosses) because you have access to all your best items and traits.
Deployments and the Planet Map
Days and Deployments

The campaign takes place over the course of in-game days. Some missions are only available for a limited time, and they get closer to expiry each time a new day begins.
Each day you can deploy once, attempting to complete one mission. If you fail or don't perform particularly well, then when you finish the next day will begin. But if you perform well enough on your deployment, you can earn the opportunity for more deployments before a new day ticks over.

While it's preferable to perform well on each mission, it's always better to win the current mission than lose it, even if you performed very poorly. As soon as you deploy, that deployment for the day is already gone. If you outright lose a mission, quit out of the mission, or close the game without winning the mission first, you've still lost the deployment you spent on that mission. You may as well press on and try to win even if you'll get a low score; it's better than not winning and getting no score.

After each mission that you win, you are given a score out of 15 "stars". The 15 stars are broken into 3 groups, with up to 5 stars awarded per category. How many stars you get determines whether you get extra deployments. The categories are
  • Fury - What percentage of the total enemies on the map did you kill? A higher percentage gets you more stars
  • Resilience - How many of your deployed squads got incapacitated at least once? A smaller number gets you more stars.
  • Speed - How quickly did you complete the mission? A faster time gets you more stars.
If you get 12 or more stars, you get a second deployment on the same day. If you get 15 stars, you get two extra deployments that day. If you only earn enough stars for a second deployment during your first deployment, you can still earn a third deployment for the day if you get 15 stars during your second deployment.

There are many technicalities to do with how these stars are awarded. You don't have to kill 100% of foes on the map to get 5 stars for Fury. In almost all cases, 90+% is enough for 5 stars and in several cases, 80% is enough. The exact percentage you need to kill for a given star rating changes from mission to mission; some missions have special conditions where you're not expected to kill as many of the enemies. Also, the Fury calculation is strange in ways I don't understand. The percentage given is not necessarily accurate to the number of enemies actually on the map at the end of a mission. Sometimes you'll get 100% Fury from a defense mission where you only killed the spawned enemies who came in attack waves, despite the fact that there were other enemies scattered around the map too. Sometimes you'll kill everything that attacks in a defense mission yet get far less than 100% Fury.

Resilience does not count how many times a hero you control got incapacitated; it counts how many of your heroes got incapacitated at least once. If your Force Commander was incapacitated 16 times during a mission but no other squads went down, you'd get a 3 out of 4 result for Resilience. Resilience gives 5 stars for 4/4 (no squads went down), 3 stars for 3/4, 2 stars for 2/4, 1 star for 1/4, and 0 stars if all of your squads went down at some point. Losing squad members doesn't affect Resilience at all if the squad leader never died.

Speed, like Fury, is scored on a sliding scale. Some missions will give you 5 stars if you complete them within 20 minutes, some missions will only give you 4 stars for completing them in 6 minutes. You just have to try to clear things reasonably fast; there's not much else you can do.

Obviously you have to perform extremely well to get 15 stars; you need to clear the map very quickly, kill almost everything on it, and never let one of your squads get incapacitated. This is hard and almost never happens. Defense missions are usually the easiest to get 15 stars on because they are by nature over pretty quickly, and Fury (usually) only requires you to kill the spawned enemies who come in attack waves, so the only metric you have to think much about is keeping all your squads alive.

Each star you earn also awards bonus XP, so performing well on as many missions as possible is beneficial for levelling up your heroes quickly. This is especially important in the early game; performing well on the first few missions, though it won't earn you extra deployments initially, will level your heroes faster and can allow you to enter missions a level higher than you would otherwise be, which helps you perform well in those missions, and so on.

Infestation

Once the Tyranids reveal themselves, the planets they are attacking get an Infestation meter. This meter goes up with every day that passes. More deployments per day is therefore beneficial for getting more opportunities to reduce the Tyranid Infestation before it increases, in addition to completing more expiring missions.

Infestation actually doesn't have much effect on the game though. Planets with high Infestation don't send visibly more enemies in Tyranid missions than they would have in the same missions on low Infestation levels (you can check this by playing the campaign through a couple of times and letting the Infestation get out of hand). There are a few graphical changes; on high Infestation the missions you deploy to have a green tint, and the planet map shows denser Tyranid swarms. The main difference Infestation actually makes is to your campaign score. You get less campaign score per day (possibly negative score depending on what you're doing) if Tyranid Infestation is higher. High Infestation at the end of the campaign also changes Gabriel's voice over during the campaign's end cutscene.

Most missions versus Tyranids reduce the planet's Infestation by some amount if you win. Infestation is a per-planet value; different planets have different Infestation levels and if you want to reduce a planet's Infestation level, you need to play missions against Tyranids on that planet.
Strategic Assets
Most maps have Strategic Assets on them. Each strategic asset you capture has benefits, both on the planet map and in giving you extra uses of a special item. You get this special item the first time you capture a strategic asset of the relevant type, and you always get to use these items once per mission even if you don't have any of the relevant asset on that planet yet.
Strategic asset bonuses are per planet. You might have 4 of a particular type of asset on one planet, but that will only help you when playing missions on that planet. Go to another, and the assets don't grant any bonuses.
You can only capture one new strategic asset per deployment. When you do so, three power generators will drop from the sky. Once you've deployed generators at an asset once, you won't be able to deploy any more (even to reclaim an asset whose generators you accidentally destroyed) until you come back on a new deployment. You only ever get 3 new generators (one asset) per deployment. However, this includes defense missions; the generators already in place from having previously claimed an asset don't lose you the opportunity to take a new strategic asset and drop another 3 generators. In a defense mission, it is possible to leave some of your strike force to defend the asset under attack, and send some of your strike force to claim an asset you don't have yet. This is very hard to do successfully while still getting a good score; if you're not very confident, don't try it.
You basically always want to capture a strategic asset any time you deploy to a map with an unclaimed one if you're not on a defense mission. Strategic Assets give you some very strong bonuses that are exceedingly helpful. Most maps have exactly two strategic assets, so for your first few missions you'll be facing a choice of what to get first.

Your ownership of a Strategic Asset is dependent upon maintaining the three generators powering it. In offensive missions the generators are invulnerable, but during defensive missions you can kill your own generators, especially with powerful area of effect abilities like remote detonators, artillery, or orbital bombardment. You'll lose the defense mission and the asset immediately if you do this.

Imperial Shrines (Rosarius)
Shrines grant you the Rosarius accessory, which turns your entire squad invulnerable for several seconds, although knockback still works on you. Rosarius does not make Thule invulnerable, only your infantry squads. Rosarius only works on squads who are alive when it is triggered; a sqad leader who gets revived after the Rosarius starts won't be invulnerable.
On the planet map, Shrines slow down Tyranid Infestation. Each new day, every Shrine you own on a planet reduces the Infestation increase the planet would have suffered by one point.
If you get enough Shrines, they grant bonus experience each time you win a mission.
Typhon is the planet with the most Shrines, with 4. Once you have all the Shrines, you'll get 5 uses of Rosarius per mission on Typhon.

Communications Arrays (Signum)
Communications Arrays grant you the Signum accessory, which allows you to call down artillery strikes. Artillery strikes are the third longest range ability in the game, and do some serious damage and knockback to whatever is caught underneath them.
During defense missions, you are given a certain number of globally deployable Tarantula turrets and cluster mines, and having more Communications Arrays on the same planet increases how many of these you get.
On the planet map, mission briefing screens will display intelligence on the enemy forces if you own at least one Communications Array on the same planet.

Foundries (Locator Beacon)
Foundries grant you the Locator Beacon accessory, which allows you to call down Tarantula turrets. Tarantula turrets have a decent amount of health, but can't move and really don't do that much damage. They work best as a distraction for high damage enemies, rather than attacking your vulnerable squads.
On the planet map, Foundries increase your chances of getting extra deployments when winning a mission. After you've received your performance rating out of 15 stars, each Foundry you own on the current planet will count as if you'd earned an extra star for the purpose of calculating whether you get extra deployments for the day. If you gain control of all 6 Foundries in the campaign, they also lower the requirements for getting extra deployments; you will then be able to get 2 deployments for the day with 11 stars, and 3 deployments for the day with 14 stars.
Calderis is the planet with the most Foundries, with a total of 3. Therefore, it's a good idea to do your first mission of the day on Calderis whenever possible, and make it a defense mission if one is available, so you have the best chance of earning more deployments for the day. You can then use those extra deployments on whatever needs to be done on other planets.

Choice of Strategic Asset
Eventually you want to have all the strategic assets on every map, but early on you have to choose what to capture since you can only drop generators once per deployment. This mainly affects what you'll have in the mid game, since by the late game you'll have most or all of the assets.

The Shrine is always an excellent choice. Rosarius is incredibly powerful, and actually becomes more valuable on higher difficulties because enemy damage output increases dramatically, but the invulnerability still blocks all of it. Shrines slow down the Infestation of planets, but this isn't particularly important since Infestation doesn't affect the game very much.

Communications Arrays are strong with the Signum. Artillery strikes do a lot of damage at long range, which is very helpful for eliminating problems before they happen. However, the planet map mission intelligence the arrays give you isn't always very useful, and is sometimes wrong.

Foundries can potentially be good. Tarantula turrets absorb some damage for you, which is very needed. However they don't kill very much, and because the enemies have such high damage output anyway, the turrets don't last long after the early game. The Foundry's main value is in getting you more deployments per day. However this is not particularly needed until the late game, when missions come faster than you can complete them.

Overall I recommend prioritising first Shrines, then Communications Arrays, then Foundries, because of the relative usefulness of the abilities they grant. Primarch can be difficult, so it's generally more important to be able to perform well inside missions than to get bonuses on the planet map. However, on the first two asset-granting missions of the campaign (Skykilla and Gutrencha) you should get one Shrine and one Foundry, because there is one Artillery in The True Enemy directly after them, and this gives you access to all three strategic asset abilities just before you reach Typhon.
Early Game Missions part 1
Stand With Your Brothers
Takes place on Argus Outskirts
The opening mission and tutorial. You start with the Force Commander and Tarkus, and aren't given any more heroes. Because it's a tutorial, it's impossible for your units to die; if the Force Commander or Tarkus get too low on health, they just stop taking damage. Therefore, focus on throwing grenades at the densest clusters of enemies to finish the mission as soon as possible. Once you reach the mines, destroy the ork guard tower with a grenade immediately, then throw another grenade at explosive barrels near the mine entrance to finish the mission.
For some reason Tarkus gets given 5 new grenades towards the end of the mission.

You get your first introduction to the Planet map after Stand With Your Brothers.
The game starts counting campaign days at this point, but you can't earn more deployments with good performance yet.

Retake the Hamlet
Takes place on Argus Outskirts.
You start with the Force Commander and Tarkus, are given Cyrus almost immediately, and revive Avitus a short way into the mission. Your units can die in this mission, unlike the first one.
The only part that requires any real effort is the final defence against the orks. Sit behind cover and use your grenades and demolition charges to blow up the packs of orks as they approach.
Vaguely irritating detail: because of the order you're given Cyrus and Avitus in, Cyrus will be on hotkey 3 and Avitus on hotkey 4. This is the opposite of the hotkeys they'll be on for the next few missions, during which time you don't get to change your squad order. Probably a good idea to change the hotkeys in this mission to match.

At this point you are given a choice between the next two missions: Skykilla's Raid and Target: Gutrencha. You have to complete both to proceed, but can do them in either order. From these missions onwards you will receive your rating out of 15 stars for mission performance, but can't yet earn extra deployments even if you get enough stars.

Skykilla's Raid
Normally takes place on Argus Settlement, but can also take place on Tangier High Pass.
The objective is to kill Skykilla, an ork stormboy in the north east corner of the map. I consider this mission easier than Target:Gutrencha because Skykilla's main attack is to jump into the sky and land, causing a shockwave. The warning indicator for this appears several seconds before he takes off, making it very easy to avoid. In fact, the indicator appears early enough that you can throw a demolition charge on it with Cyrus, and the charge's 5 second fuse will run out roughly when Skykilla lands. This is a nice way to get some extra damage out of an accessory that's normally not very good in boss fights. Because I find Skykilla easier than Gutrencha, I usually do this mission first so my heroes are a little stronger for the next one.

Target: Gutrencha
Normally takes place on Tangier High Pass, but can also take place on Argus Settlement.
The objective is to kill Gutrencha, an ork boss in the north east corner of the map. Gutrencha mostly walks towards one of your heroes and tries to attack them in melee. He occasionally throws grenades, and when he gets on low health does a shockwave attack that hits in a line pointing away from him. The warning indicator for the shockwave gives you enough time to get your forces out of the way if you move fast. Mostly just try to keep attacking him, and use grenades and other damaging abilities whenever he's moving slowly or not moving to take him down faster.
Early Game Missions part 2
The True Enemy
Takes place on Argus Outskirts.
This mission introduces the Eldar. You deploy with only the Force Commander, Tarkus, and Avitus, then Thaddeus is introduced and joins you early in the mission.
Fun but mostly inconsequential fact; if you command your squads to throw grenades on top of the ridge where Thaddeus drops in before he spawns, you can kill some of the ork gunners before he gets to fight them and speed up his intro.
You get the opportunity to capture a Communications Array. You should do this; you'll never get access to this array again in future missions.
As you approach the mine you'll be confronted with a lot of Eldar guardians. You won't get any supplies until you've beaten the guardians and taken the reinforcement point near the mines. There are lots of enemies to fight up to this point, so you'll definitely need to use grenades, but try to use them efficiently.
To complete the mission you have to beat a Warlock boss. He can be very difficult; he has a variety of high damage attacks. He also has Warp Throw which allows him to do an area of effect knockback on your squads although little damage, which he usually uses at the start of the fight. You can somewhat counter this if you can get him to use it on Thaddeus as he blasts off for a jump. On anyone else the knockback will prevent them dealing damage for a while.
Tarantula Turrets are very useful here because the Warlock does very little damage to them. If possible, you should drop them on the north side of the final area, which is where the Warlock spawns, before he actually does. This will allow you to control how the fight starts, rather than him.
Having Rosarius for this fight is very helpful because the Warlock has a couple of very high burst damage options. Usually he says a line before using one of these; whenever he talks, you should probably pop a Rosarius. This is especially true when a blue targeting circle appears on the ground under one of your heroes; the attack hits too fast to realistically dodge, so you'll probably need Rosarius to handle it.
Using Rosarius, Turrets, and your heroes well, you can take the Warlock fight very cleanly. The mission as a whole is almost impossible to get 15 stars on though; many of the Eldar infantry flee before you can kill them for a perfect Fury score, and the mission's requirements for a perfect Speed score are very tight. Fortunately it doesn't matter; you don't have the ability to deploy multiple times a day yet.

Upon completing The True Enemy, you unlock the ability to travel between planets and can go to Typhon. On Typhon there are two missions waiting for you, both of which must be completed to progress. From now on, adequate performance in a mission can earn you additional deployments per day (although it doesn't really matter yet, since neither infestation on planets nor expiring missions have started appearing yet).

Defend the Array
Takes place on Mount Siccaris, defending the Communications array in the north west against orks.
This is your first defense mission, the only one which is required for campaign completion. You're given possession of this Communications array for free without having to claim it so that you can be tasked with defending it immediately. The final unit which you need to kill to complete the defense mission is an ork infantry squad. Every other defense mission in the campaign will have a vehicle as the boss.
It's possible to leave some of your squads at the array to defend it and send some out onto the map to take the other Strategic Asset on the map, a Shrine, which you are not automatically given control of. This is one of the better missions to try it, because the enemies you're fighting are relatively weak. If you don't take the Shrine now, it'll be some time before you get another chance. However, your heroes aren't particularly strong either; you need to plan well, use your abilities efficiently, and manage squads in two locations at once to pull it off. Don't try it if you're not confident. If you want to try claiming the Shrine while defending the array, I recommend keeping Tarkus and Avitus for defense, and sending the Force Commander and Thaddeus to claim the Shrine. Cyrus with a shotgun can work too. You can't leave three squads at home, because one squad won't be able to win fights efficiently enough to reach the Shrine safely and quickly. Whoever go to claim the Shrine should take stimulant kits with them; the Array defenders can easily reinforce at the array, but the away team won't have easy access to healing. Drop all the turrets you have at the Array before moving out the away team; turrets are much more useful defensively than in pushing through the map.

A Spider Among Flies
Takes place on Typhon Arena.
Reward is Blind Grenades.
The objective is to kill a Warp Spider found in the arena itself to the north. He does his best damage at range, so it's a good idea to force him into melee with Thaddeus and the Force Commander. This can be tricky to maintain though, since he teleports around pretty freely. He summons ordinary Warp Spider squads to assist him during the fight. This is the first time you fight a boss who intentionally brings in additional units you have to deal with. Ideally you use grenades or artillery strikes to take these adds out quickly and reduce the damage they do, but due to their fast teleporting it can be difficult to get an opportunity to damage them that doesn't damage your own units too.
Tarantula turrets are again good, because the Warp Spider is rather slow to kill them.
There is a Shrine and a Foundry on this map. On this mission it's a good idea to take the Shrine, because next time you come back to this map you'll spawn inside the arena, and taking the Shrine then causes you to go to the side of your primary path. Because that mission involves Eldar spawning out of webway gates and coming for you, this can get you surrounded as you try to attack into an Eldar defensive position at the Shrine while reinforcements attack you from behind. This situation is awkward, and completely avoided if you take the Shrine now.

Now you return to Calderis to defend the capital.
Early Game Missions part 3
Why does Steam have such restrictive guide length limits?

The Defense of Argus Gate
The final mission that takes place on Argus Outskirts. You're never coming back to this map again.
Reward is Melta Bombs.
Although the main purpose of this mission is to introduce the Tyranids as the main antagonists of the game, the fight against Mek Badzappa is much harder gameplay-wise. Be aware that you get no supplies at all on this mission, so save everything you have that has limited uses for the Badzappa fight. You'll need it. In making your way to Argus gate at the beginning, use only your energy-based abilities and auto attacks.
Badzappa is best dealt with at range, so it's probably best to bring Tarkus, Avitus, and Cyrus. Feel free to blow all your abilities and resources on fighting him. You can even use Demolition Charges to pretty good effect here, since he sometimes stands still for a while.
You're given the Foundry inside Argus for free once you arrive. This provides you a reinforcement point relatively near the fight.
Once Badzappa is down, move east. To win the mission you only need to reach Thule after the Tyranid Warrior attacks him, not kill it or any of the other Tyranids. Send one of your squads straight to Thule immediately while the others hold position by the beacon, and just sit still until the mission ends. You can make use of the fact that your units are invulnerable in cutscenes here; if you've already commanded a squad to head to Thule, that squad will continue moving to him during the cutscene which shows him fighting off Tyranids, and reach his position safely.

Upon completing The Defense of Argus Gate, Calderis and Typhon start showing a Tyranid infestation level, although you haven't yet been given a mission that reduces it. You return to Typhon to fight some more Eldar.

Eyes of the Eldar
Takes place on Typhon Arena
Your goal is both to kill the ranger Nemerian and to destroy all the Webway Gates on the map. This is the first mission you're given where your objective isn't solely a boss fight. You spawn in the arena and Nemerian is right outside the arena to the south. The webway gates are further south, on the raised platform that's kind of in the centre of the map. Because the arena has a lot of supply crates and there's no real boss, you have an unusually large amount of supplies available for the mission.
Be wary; on this mission Eldar continuously spawn out of the webway gates until they are destroyed. As you move around, you'll have to deal with repeated small attack waves in addition to the standard defenders. If you don't think carefully about your positioning, this can easily get you surrounded, which tends to be difficult to deal with.
Demolition Charges are very good here, because they allow you to destroy the Webway Gates without having to completely clear out the space around them. It can be useful to bring Cyrus for this purpose, but is not necessary.
Generally the mission is entirely infantry, but in some rare cases there will be several Falcons on the map. Avitus with a missile launcher (which you should just have gained access to) or melta bombs, (which were the previous mission's reward) are recommended, just in case.
By the end of this mission you should have both the Strategic Assets on Typhon Arena. If the Shrine was the first one you took, make sure to get the Foundry this time. It's a bit out of the way from the Webway Gates, so it's easy to forget if you just take the most direct route to the objective.

Vengeance for Davian Thule
Takes place on Siwal Ruins.
Completing this mission reduces Infestation by 1.
The objective is to kill a Tyranid Warrior in the north east corner.
Reward is a generic L10 missile launcher.
This is the first mission where Tyranids are the true antagonists. It is possible to find Carnifexes here, and Hive Nodes, so make sure you're well prepared for both. In the early stages of the mission you'll have to fight a lot of Gaunts and Rippers. Cheap area of effect damage is very useful here; grenades, Thaddeus' jump, and the Force Commander's charge are valuable.
The Warrior boss shoots bio-plasma area of effect attacks. A target indicator and voice line warns you when one is about to hit; there's enough time to dodge if you're watching for them. Keeping it in melee is useful, but it jumps around a lot, so you can't keep it locked down in one place. Blind grenades, Thaddeus' jump, and Cyrus' smoke grenades are useful here to stun it, which makes it much less threatening for a few seconds. The Warrior summons Rippers to help out, especially as it gets to low health. The Force Commander's charge is probably the best way to clean them out; it kills them in one hit, can reach lots of them in one use, and doesn't have a harmful area of effect component that threatens your allies, which is important since Rippers are melee units and tend to be right next to your own units.

At this point you are given your first mission on Meridian.

Fire Prism Assault
Takes place on Hab Spire Legis.
The objective is to destroy a Fire Prism roaming on the west side of the map, and destroy several Eldar generators. Some are found on a bridge to the south, some just north of the map's center, and some in the west.
For some reason the devs thought it was a good idea to fight the highest tech Eldar tank as a boss before you'd even reached the mid game.
The map has two webway gates at each location where generators are found, so no matter where you go first, you can expect to get repeatedly attacked by groups of Guardians. It's probably a good idea to save the west buildings for last since the Fire Prism defends them; it's much easier to deal with the Prism if there aren't Guardians attacking you from behind.
Demolition Charges are very useful here; they allow you to destroy Generators and Webway Gates from a bit of a distance, and without having to stay close by for a long time, making it far easier to take down Eldar bastions.
Against the Fire Prism itself Melta bombs are practically required, and Avitus with a Missile Launcher is immensely helpful. Cyrus can use cloak and Melta bombs to hit the Fire Prism before it knows he's there. These are doubly useful because you may find Falcons on this map. In particular, there's usually one to the south near the Foundry. Be aware that Falcons and the Fire Prism will sometimes chase you back to your reinforcement points as you retreat, and they're fast enough that you won't get much respite.
The Fire Prism's main gun knocks your squads over in a large area in addition to dealing damage. This makes it very difficult to use a missile launcher or revive fallen allies if the Prism is targeting you. If possible, it's best to save up several high damage options and use them all quickly upon engaging the Fire Prism to minimise the amount of knockdown it gets to do.

Once you beat this mission, the early game is over. You're given the three main objectives of the campaign (pure genetic sample, astronomic array, Angel forge), you get to make choices about where to go and what missions to do in what order, and the mid game begins.
Mid Game Missions: Prime Gene Sample Consistent missions
Unlike the other campaign objectives, the Prime Gene Sample does not consist of a fixed set of missions which are always completed in the same order. To complete the Prime Gene Sample campaign objective, you must complete any three missions which give a Prime Gene Sample, which unlocks Into the Hive, and then you must complete Into the Hive. Completing this campaign objective rewards you with Davian Thule as a playable Dreadnought. It's a good idea to rush towards completing this objective so that you can start levelling Thule up.

Other than Into the Hive, the missions listed in the Prime Gene Sample section all give Prime Gene Samples. Hand of the Hive Mind and The Killer Serpent always become available immediately upon entering the mid game (after completing Fire Prism Assault). The other missions spawn randomly. You may also see these missions in the end game.

The Killer Serpent
Takes place on Siwal Ruins.
Reduces Infestation by 2.
The objective is to kill a strong Ravener (not a boss, just a stronger than usual Ravener) and destroy 9 Tyranid structures on the map. Most of these are Generators, but importantly there is a Tyranid Hive just south west of the central ridge (almost in the very centre of the map) and a brood nest among the cluster of houses in the north, which continuously spawn Hormagaunt squads until destroyed.
There are also quite a lot of Hive Nodes, the Tyranid static defense structure, which knocks you over with its shots.
Demolition Charges are strongly recommended for this mission, even if you don't bring Cyrus. Tarkus is another good candidate to carry them, as his Tactical Advance and larger squad size give him a better chance of getting in range of enemy buildings.
The Ravener in question isn't that significant. Some melee is helpful against it to prevent it shredding your ranged squads, but it has no important special abilities. It will spawn from out of the ground when you get near its lair (south of the Tyranid Hive), and this initial spawn does knockback and heavy damage. Try to approach its spawn location with only one very durable squad, so you don't accidentally lose anyone.
There are usually a lot of Spore Mines on this mission, so some decent ranged weaponry is critical to beating the mission smoothly.
The Killer Serpent rewards you with Remote Detonators, Cyrus' best accessory. This drastically improves Cyrus' value and your ability to deal with certain kinds of problems, so it's recommended you go here first upon entering the mid game.

Hand of the Hive Mind
Takes place on Argus Settlement.
Reduces Infestation by 3.
The objective is to destroy the Hive and all the Generators on the map, and to kill a powerful Zoanthrope. The Hive is in the far south with the Zoanthrope, brood nests and generators are scattered all over the low ground. There are usually hive nodes with them.
Because Argus Settlement is a small map to begin with, and the objectives are so spread out across it, you're very likely to clear most or all of the map in the process of completing the mission.
The biggest challenge on this mission is the near constant waves of Termagaunts spawned by the brood nests and hive. You must be able to kill these quickly and efficiently, or you won't make progress. Grenades are extremely helpful, and should be used liberally.
Demolition Charges, and Cyrus with Remote Detonators, are extremely valuable on this mission, since you can use them to clear out structures while the rest of your army is still fighting the swarm. Remote Detonators are particularly nice because their large radius makes it easy to wipe out whole clusters of buildings in a single explosion. Either way, you need to prioritise taking down buildings as soon as you're reasonably close to them, since that's the only way you'll reduce the number of gaunts spawning.
The Zoanthrope's main difficulty is the area of effect damage and knockdown its attacks do. Wait to take it on until the rest of the map is clear. This is another place Cyrus with Remote Detonators is helpful; he can get rid of the base the Zoanthrope sits in before the fight starts. Try to deal damage to the Zoanthrope quickly and use Rosarius if you have it; it's pretty easy to lose squads to its attack.

Into the Hive
Takes place on Ladon Swampland.
Reduces Infestation by 3
Objective is to extract a sample from a reclamation pool, then make your way to the extraction point on the west side and kill a Hive Tyrant boss that spawns there.
As you pass some ruins and approach the first Reinforcement Beacon, you'll be attacked by three Raveners. These Raveners appear out of the ground, doing a lot of damage and usually killing squad members if not whole squads. If you retreat the Raveners will keep chasing you and burst out of the ground again in other places, doing their damage again. You know you've killed all the Raveners because Thaddeus has a voice line saying "That was the last of them". There's not much you can do to deal with them cleanly. The best options I've found are to have Cyrus use a Remote Detonator in the midst of the trees just north of those ruins and south of beacon; you can kill some of the burrowed Raveners that way. Alternatively, use a Rosarius as you run through that area, and hope it triggers all the Raveners to unburrow, so you can at least prevent them landing their initial burst damage. Honestly, it may be worth just taking the hits and retreating, since you're pretty near your drop pod and resources are so scarce on this mission.
The mission contains a lot of Spore Mines and quite a few Hive Nodes. Make sure you bring plenty of ranged firepower to kill the Spore Mines safely. Many of the Hive Nodes are on high ground, so bring Demolition Charges. Nothing else deals with them cleanly and comes with enough uses. Other than those, enemies are mostly Hormagaunts and Termagaunts, who should be very easy to deal with.
There is a Shrine to the north. Make sure you grab it during this mission; you'll never get a chance to come back to this map.
You won't get any supplies until you reach the boss area at the end. Try to be sparing with your limited use items.
The boss only spawns when you walk a unit almost on top of the indicated location, so you can go around the edge of the boss area to kill the last brood nest and collect all the supply boxes.
During the Hive Tyrant boss fight you are given Davian Thule in a Dreadnought. He does heavy damage to the Hive Tyrant with every attack, but you have no way to repair him in this mission. Your squads can revive him if he goes down, but he won't have much health when revived. It's best to try to keep the Hive Tyrant's attention off him with Blind Grenades, Tarkus' Taunt, and Rosarius to slow down the Tyrant in killing your other units. If you can keep Thule up and attacking, the fight should be over pretty quickly.
The Hive Tyrant will always drop Rites of Repair.
Annoying fact: If Thule dies during the final battle, it counts as you having lost a squad for the Resilience score, even if all four of your original squads were unharmed.
Mid Game Missions: Prime Gene Sample Random Missions
These are the Prime Gene Sample missions which you won't necessarily see every playthrough. As soon as you complete the third Prime Gene Sample mission and Into the Hive appears, any of these missions which were currently available will disappear, so make sure to complete the missions with the rewards you want.

The Mantis Killer
Takes place on random map.
Reduces infestation by 2
Objective is to kill a Lictor.
The Lictor will pull squad members towards him if you're too far away, so it's recommended to bring some melee power. It also jumps around a lot. Blind grenades are helpful to keep it from doing anything for a bit, as is Cyrus's smoke bomb.
As it gets to low health the Lictor will summon in Termagaunts and Spore Mines. It's a good idea to have some invulnerability and area of effect damage options to use at this point.
The Lictor can poison the ground, creating a green area which will deal damage to anyone standing in it. Try to get out of the poisoned zone.

Thundering Terror
Takes place on Mount Siccaris
Reduces Infestation by 3
Objective is to kill a Carnifex.
Most of the enemies on the map consist of large groups of weak units, like Rippers and Termagaunts, with one or two stronger creatures like Warriors, Raveners, and Zoanthropes in each group. It should be relatively easy to clear to the boss expending nothing but grenades and cluster mines. Assault Jump, Force Commander's Charge, and Tarkus' energy based grenades are all great for clearing things out.
The Carnifex boss does a lot of damage and has a lot of health for someone you may be fighting before reaching level 10. It has a ranged bio-plasma attack that hits in an area, a charge which is signalled by some green arrows on the ground in front of it, and a shockwave attack that hits around itself. Try to save all your best stuff and bring it all to bear on killing the boss as soon as possible. The boss is programmed not to go too far outside the arena. If you lure the boss to one of the canyon exits and stand just outside, it will keep moving out to pursue you, then turning around to go back into the boss area, and you can get a lot of free damage done with ranged attacks without putting yourself in too much danger.

Death Whisper
Takes place on Capital Spire
Reduces Infestation by 2
Objective is to kill a Lictor and destroy some Tyranid buildings.
There is only one Hive on the map, on the high ground in the centre. There are several other emplacements of Tyranid structures, with lots of generators and a few brood nests. Hive Nodes occur frequently across the map, and there'll be a few Carnifexes. You'll face a lot of mid-tier units like Warriors, Raveners, and Lictors, and a couple swarms of smaller units. The boss Lictor isn't very impressive, it only has a bit more health and damage than a normal one.
All the structures and enemies are concentrated around the south end of the map; none of the objectives are in the north.
Mid Game Missions: Astronomic Array
Greenskin Armour
Takes place on Green Tooth Gorge.
The objective is to destroy a Looted Tank piloted by the ork boss Gorwazza.
This map tends to have several other ork vehicles; Wartrukks and Deff Dreads, in addition to the Looted Tank boss at the end. Anti vehicle weapons are highly recommended.
Gorwazza is a pretty difficult boss to take down cleanly. He moves around very quickly, with frequent charge attacks and lots of ranged damage. When you retreat your squads, he's perfectly capable of following them all the way back to the nearest reinforcement point with how quickly he moves.
He also summons some Stormboyz during the fight. Try to kill them quickly with grenades or pre-placed explosives or they'll cause a lot of chaos you can't afford to deal with.
Vehicle stun effects, such as the Power Fist, are nice to have. Cyrus' smoke bombs can be very nice for the same reason.

Greenskin Weaponsmith
Takes place on Tangier High Pass.
The objective is to kill the Ork Mekboy Blitzzagga and destroy several ork bases. There are two ork bases just north of the big central canyon and ridge, and another base south of it. All bases include Waagh Banners, which summon ork infantry, and the southern base includes a Teleporta Platform which can summon ork vehicles. Bring lots of anti building measures, you'll need to clear out these bases reasonably efficiently. Also expect to face some Wartrukks and Deff Dreads. Blitzzagga himself isn't very strong, but you'll probably need a lot of firepower to break into the main base. Ork turrets suppress, detect, and do a fair amount of damage, so try to destroy them first before going after the core buildings.

Rippa-Splitta
Takes place on Green Tooth Gorge.
The objective is to kill the Deff Dread Rippa-Splitta and destroy a large, spread out ork camp.
As the mission's intelligence briefing warns, you deploy in the middle of the enemy camp. More precisely, your drop pod lands on the northern outskirts of the camp, surrounded by orks and a Looted Tank. You should immediately run your squads north (yes, directly past the Looted Tank); there's a Reinforcement Beacon not too far away which you can capture and continue the mission from. It's perfectly reasonable to use a Rosarius or two on this opening section, since you are immediately subject to a lot of damage output. Make sure you don't use the retreat button until you've captured a Reinforcement Beacon; before that your retreats will take you to your drop pod, which is probably surrounded by orks.
Anti building and anti vehicle weapons are useful here; there are a lot of Generators to destroy, several Waagh banners, and a Teleporta Platform which repeatedly spawn ork forces you have to deal with. Rippa-Splitta himself isn't very difficult to deal with; most of the challenge comes from cleanly taking down the large ork bases and efficiently dealing with their waves of new units. This mission is overall very similar to the previous one in terms of the sorts of weapons and tactics you'll find yourself using.

Remains of the Dark Age
Takes place on Techpriest Station.
Reduces Infestation by 3.
Complete this mission to finish the Astronomic Array campaign objective. You also get Orbital Bombardment as a reward.
The mission opens with a long path you have to follow to reach the Array itself. There are several events with large ork forces fighting large Tyranid swarms. Be careful making your way into these. On this path there are few Reinforcement Beacons and long distances between them, so when you lose squad members it will take a long time to travel back to a beacon, refill the squad members, and return to the fight. At the south east corner is a boss fight with a Deff Dread. This, and a Wartrukk in the first fight, are the only times in the mission you'll need anti-vehicle weaponry. The Deff Dread calls down Rok strikes to deal heavy damage in a large area. Once he starts doing this he'll keep doing it repeatedly, so try to kill him quickly at that point.
After that you'll come to a closed gate which you are prompted to open with a console. As soon as you try, a Lictor jumps out and kills one of your squadmates. You can actually avoid this loss if you make sure that only the Force Commander and Thule are anywhere near the console; the Lictor will only get a kill if a squad with disposable members is nearby.
During the part of the mission where you have to hunt down ork Looters, there are quite a few invisible orks on the low ground, and sometimes they'll be able to shoot at you while invisible. Hunt them down and kill them so you don't take lots of damage while walking around.
It's random which ork has the power coupling you're searching for, but in my experience the middle one seems to have it most often.
Once the power coupling is replaced, you get to choose between going to the extraction point immediately or killing the Lictor who attacked you earlier. The Lictor is very effective at getting kills; it fleshhooks your units from long range and pulls them towards it. It doesn't have that much health, but after taking some damage it'll hide in nearby foliage and regenerate. You have to destroy this foliage to properly take it down. Grenades are the easiest way to do this, but you can't destroy any foliage until the voice line plays telling you to do so. After that, start throwing grenades until it's all gone. This works best when you have Tarkus with Master Crafted grenades and someone else with ordinary Frag grenades to clear quickly. One he has no foliage to hide in, the Lictor dies pretty quickly. The main difficulty of the fight is how quickly it kills your squadmates, and that it's virtually impossible to tie up in melee because it jumps around so much.
Mid Game Missions: Angel Forge part 1
Lord of Wraiths
Takes place on Capital Spire.
Objective is to destroy a Wraithlord at the north of the map.
Expect several Eldar vehicles on the way to the boss, as well as several Howling Banshee squads in amongst the more basic Eldar units. If you do this mission late in the campaign, you'll have to fight Seer Councils instead of Banshees. You'll need plenty of anti-vehicle weapons. Remote Detonators are also extremely helpful if you have to deal with Seer Councils, since there's no other easily replenishable way to kill a whole Seer Council squad with minimal loss to yourself.
The Wraithlord itself isn't that scary if you have lots of anti vehicle weapons; just keep hitting it and it will go down. Don't fight the Wraithlord in the centre of the boss area where it spawns. Instead, hit it with something then back up to one side of the boss area, pulling the Wraithlord with you. This is preferable because sometimes the Wraithlord resets to the centre, giving you some free shots while it runs away.
The hard part of the boss fight is that the Wraithlord summons lots of other Eldar enemies to help it. It starts out surrounded by 4 Warlocks, and will bring in more units as its health gets low. Remote Detonators, Artillery, or Orbital Bombardment if you have it, are good choices to clean them out fairly efficiently.

When you complete Lord of Wraiths, you'll start getting Tyranid missions on Meridian in addition to unlocking the next mission in the Angel Forge questline, and Meridian will start registering an Infestation level. The Infestation level Meridian starts with seems to be random, but it'll be fairly high, more than half of the bar.
You will always get a defense mission expiring in 2 days against Tyranids for a Foundry on Spire Golgotha (which is given to you for free). This defense mission consistently sends strong Tyranid forces, and the position of the Foundry is awkward. It is highly recommended that you don't split up to claim the other asset. Sometimes there will also be another Tyranid mission on Capital Spire.
Be aware that you don't get very many missions vs Tyranids on Meridian, and since it starts with a pretty high Tyranid Infestation, it's hard to reduce that Infestation level. You may want to save completing Lord of Wraiths until you're near the end of the campaign so Meridian doesn't have much time to gather more Infestation.

Idranel of Ulthwe
Takes place on Hab Spire Legis.
Your objective is to kill Farseer Idranel, who is found at the south eastern corner of the map. (Although you don't actually get to kill her; she escapes).
You'll likely face some pretty powerful Eldar forces on this mission, including Falcons, Fire Prisms, Seer Councils, and lots of Eldar garrisoned in buildings.
The Idranel boss battle has the potential to be very difficult. She does heavy damage with knockback at long range. You'll have a much easier time if you can keep her tied up in melee, although her melee attacks are also pretty punishing. Stun effects are incredibly helpful in reducing her damage output. Twice in the fight, she disappears and a Seer Council spawns in. Once the Seer Council is dead, Idranel returns and the fight continues. Dealing with these Seer Councils is quite difficult, since they spawn where Idranel was, which was probably right on top of your squads, so you can't use most of the high-power damage options that are best against them. One tactic I've found very useful is to have Cyrus place down a Remote Detonator right in the midst of your forces as or just before the Seer Council spawns, then trigger Rosarius and detonate it. As long as the entire Council is in the blast radius, this kills them all very quickly and easily, while causing no damage to your own units, and lets you get right back to the Idranel fight.

Angel Gate
Takes place on Angel Forge.
Reduces Infestation by 3.
This mission tends to be very long. Your objective is to close Angel Gate, which requires that you first activate a minimum of three power generators and then capture the gatehouse. There are 6 power generators on the map, three on the right hand side of the fortress and three on the left. The fortress is full of orks and Tyranids, mostly infantry (other than an ork Wartrukk on the right hand side), but there are a lot of them and not very many reinforcement points around the map to retreat to. It's often not safe to move depleted squads around on their own to reinforcement points and back, and certainly not through areas you haven't already cleared. There are lots of hidden enemies and events.
There are 6 places where Imperial Guard squads are fighting the enemy. Each squad you find will help during the final battle of the mission, but they don't make that much difference beyond being fodder for the enemy, so there's no need to go out of your way to find them all. If you activate all 6 generators, not just the required 3, you'll be able to get mortar batteries firing during the final battle.
Once you've got at least 3 generators, you can start closing the gatehouse. The gatehouse takes a long time to close, requires a squad to be devoted to capturing it like a strategic asset, and the Tyranids will throw a lot of forces at you in that time. This is one of the most difficult sequences in the game to complete smoothly and without losses. Most of the Tyranids come from outside the fortress through the front gate and, though numerous, aren't too bad. The serious problem is that about half way through capturing the gatehouse, 2 Carnifexes drop directly next to it. It's very hard to kill them without interrupting your capture of the gatehouse. It's worth noting that if you manage to maintain the capture through this fight, then you'll only have to deal with these two Carnifexes. If you stop capturing the gatehouse, then another 2 Carnifexes will drop after the first two die, which you will also have to kill. Once all four Carnifexes are dead, you'll be able to capture the gatehouse from start to finish without more Carnifexes dropping on you.
If you reactivated all 6 generators, you can activate the mortar batteries by stepping a squad outside the gate. (I don't know why they can't just automatically activate the mortars without you having to cross the threshhold first). Do this before you start capturing the gatehouse for a bit of extra firepower against the incoming attackers. It doesn't help against the Carnifexes though.
If you rescued Imperial Guard squads, they will congregate just inside the gate. During the first part of the mission, while Tyranids are spilling in through the gate and you're still activating generators, the Guard are continuously reinforced so you'll always have the squads ready to fight with you when you do the gatehouse defense. The Guard squads don't do much damage, but they can serve to absorb some Carnifex attacks, and will probably get hit by whatever high power abilities you call down on the Carnifexes. Abilities that benefit allies, like Rosarius and Stims, will also work on the Guardsmen.
The buildings on either side of Angel Gate can be garrisoned. The buildings are invulnerable, so it'll take the Tyranids a long time to shoot you out of there if they even have ranged weapons at all. The Carnifexes in particular can't really do anything about you putting your squads in those buildings. Bringing a lot of ranged firepower and sitting in the gate garrisons can be an effective way of taking down the Carnifexes without too much pain, but it requires you to either abandon capturing the gatehouse or somehow protect whoever is doing it from all the Tyranids on the ground.
Important fact: at the end of this mission, you lose access to Tarkus until you complete Secrets of Angel Forge. You also don't get much access to him during that mission. Therefore, make sure that he's not carrying any important items before you start this mission. This will be easier to do if you don't deploy him here.
Mid Game Missions: Angel Forge part 2
Secrets of Angel Forge
Takes place on Angel Forge.
Reduces Infestation by 3.
This is the only mission which reduces Infestation despite never having you fight any Tyranids. At this point, you probably need the extra Infestation reduction, since there aren't many Tyranid missions available on Meridian during the mid game and it starts with a pretty high Infestation level.
The mission has several stages. You start just outside Angel Gate and make your way north east, meeting Tarkus on the way and capturing the Foundry in the top corner of the map. Then, you have a boss battle with an ork Looted Tank. The Eldar attack Angel Gate, you lose Tarkus, and you have to fight all the way to the south western corner of the map where the other Foundry and Angel Forge itself is. The mission ends with a boss fight against Idranel in which you regain control of Tarkus towards the end, wearing Terminator armour. You get your first piece of Terminator armour as a reward for completing the mission.
You'll need a lot of anti vehicle power on this mission; you'll need to destroy the Looted Tank, several Wraithlords, and a Fire Prism on the ground just above the south west Foundry.
When you get Tarkus at the start of the mission, he has all the gear and traits you've put on him so far through the campaign. However, when Tarkus appears in Terminator armour at the end of the mission, he doesn't have any items or traits you might have given him; he's only got the default Tactical Advance skill and the durability of his armour.
After the Eldar break through Angel Gate, they can be found all around the fortress. You only need to make your way directly to the south west corner where Idranel is, but if you want more supplies you can clear out more of the fortress to gather them.
The Idranel fight is quite similar to when you fight her in Idranel of Ulthwe. Her ranged attacks are hard to deal with because they knockback in addition to hitting hard; keeping her tied up in melee is preferable. She calls down psychic bolts which tend to lose you squad members. Stun effects are very helpful. A few times she teleports out, a Seer Council spawns in, and Idranel only returns when the Seer Council is dead. The same technique of having Cyrus drop a Remote Detonator, then using Rosarius and triggering it to rapidly and safely kill the Seer Council works well here. Idranel uses Eldritch Storm as she gets to lower health.
There is one very important difference in this fight against Idranel: when she gets down to about 1/3 health, she vanishes and is replaced by three Wraithlords. She won't return until the Wraithlords are destroyed. At this point Tarkus arrives in Terminator armour to help you take them down, but there are a few voice lines between the Wraithlords spawning and Tarkus spawning. In any case, Tarkus isn't particularly helpful against the Wraithlords, since he has no anti vehicle weapons. The Remote Detonator Rosarius trick also works well against the Wraithlords, but if you don't have enough resources left for that, other anti vehicle tactics will also do fine.
The Idranel fight takes place right next to a Foundry. You can capture this Foundry for a reinforcement point, but this isn't recommended, since it means that retreating won't actually take you out of Idranel's reach. It's probably better to use the Reinforcement Beacon on the high ground above that Foundry, so that you can retreat to somewhere Idranel won't follow if you need to get out of the fight.
Late Game Missions
These missions are only ever accessible in the late game. These missions do not have expiry times, do not get replaced by others, and are always available as soon as you reach the late game.

Raid Against the Warboss
Takes place on Tangier High Pass.
Objective is to kill the Ork Warboss.
Rewards you with a piece of Terminator Armour.
Undoubtedly the hardest mission versus orks in the game, as it should be. This is the only mission where you'll find Looted Tanks frequently. Some strong anti-vehicle weaponry is advised. Cyrus' smoke bombs seem not to work against Looted Tanks. You'll also be facing the full range of ork infantry.
Try to save as many of your resources for fighting the boss as you can. It's probably a good idea to destroy every supply crate on the map before starting the boss fight.
The Warboss has a few area of effect attacks, throws grenades, and fires shockwaves in the direction of your squads. He summons rok storms quite often. The indicator for the roks gives you some time to move out of the way, but you must start moving immediately because the indicator starts small and gets bigger, and the roks can land anywhere in the larger area once they start falling. Teleport, Jump, and Avitus' sprint can be useful to get out of the area of impact more easily.
The hardest part about fighting the Warboss is that he periodically summons large ork forces to aid him, often including high end ork infantry and Deff Dreads. They always enter the map from the passage to the north east of the boss area. It's a good idea to put up a Remote Detonator there at the start of the fight, and blow it up as the arriving army walks over it, and put down a new one as soon as possible. If you can consistently keep this up, you can handle the spawned reinforcements very easily and keep your focus on the Warboss. If you don't want to bring Cyrus, you can use Orbital Bombardments and artillery to try to accomplish the same effect, but their longer charge up time and less consistent application of damage across a wide area makes it a lot harder to take down the whole army as it arrives. Also, the Warboss will likely summon more waves of reinforcements than you have Orbital Bombardments.

The Wailing Doom
Takes place on Typhon Arena.
Objective is to kill the Eldar Avatar.
Rewards you with a piece of Terminator armour.
This is probably the hardest overall mission and boss in the entire game. You fight the Eldar at the peak of their power with all their best technology unlocked. You are likely to die lots in this mission, so do it as your last deployment of a day where score won't matter.
As you make your way through the map, expect Warlocks, lots of Fire Prisms, and the occasional Seer Council, Wraithlord or Falcon. Bring as many anti vehicle weapons as you can without leaving any of your strongest tools behind. It is practically required to save all your Rosarius, Artillery, Orbital Bombardments, and several Remote Detonators for the boss fight. You can use a few Remote Detonators in clearing the map, mainly against Fire Prisms, but need to have several left over. I strongly recommend completing Raid Against the Warboss first so you can go into this mission with two pieces of Terminator armour instead of one; the extra durability makes a big difference and allows you to clear the rest of the map much more smoothly, so you'll reach the boss with more resources to spare. You should open all the supply crates you can get to.
Make sure both the Shrine in the north west and the Reinforcement Beacon south of the arena are taken before starting the fight with the Avatar, so that you have plenty of places to retreat to.
The Avatar has a lot of health, does serious area of effect damage, and repeatedly summons small armies of Eldar with high tier infantry and vehicles to fight alongside him. These reinforcement waves always arrive through the northern entrance to the arena.
The tactic on Raid Against the Warboss of using a Remote Detonator to clean out each reinforcement wave as it arrives is much less effective here because the Eldar waves are spread out over a larger area, and contain more vehicles which may have enough health to survive a single Remote Detonator.
Both Orbital Bombardments should be used against the Avatar. You can try to aim them to catch the Avatar in one of the bombardment beams for some serious damage (this is best done before you bring in your squads to fight the Avatar, since it won't be moving around yet), or use the bombardments to clean out some the Avatar's allied army later on.
The Last Stand
Takes place on The Graveyard of Typhon.
This is the final mission of the campaign. Completing it ends the campaign. The Last Stand is not available as soon as the late game begins when you complete the three main campaign objectives. At that point, Gabriel tells you to hold the sector for two more days until he arrives. The Last Stand mission only spawns after you've moved from one planet to another during that second day.

The mission is overall pretty easy, certainly easier than either of the superboss missions. However, it's long and the hardest part is the boss fight at the end. You don't want to have to redo the entire mission if you fail that fight.

Your first task is to defend a ridge from Tyranids while poisoning a capillary tower. This is trivial; the Tyranids almost exclusively send gaunts, who die very quickly, and you have a bunch of guardsmen helping. Occasionally Tarkus announces the progress in poisoning. This isn't based on time passing; instead, every so often a stronger Tyranid unit (Warrior, Ravener, Zoanthrope, Lictor, etc) spawns. Once you kill that leader creature, Tarkus announces the milestone in poisoning the capillary tower.
After the poisoning completes, a single Carnifex will arrive. You should have no difficulty in killing it by this point in the campaign.

Once you succeed, you head to a second site to repeat the poisoning process. On the way, the two squads you didn't bring in your initial deployment drop to the surface, and you get to control all six for the remainder of the mission. Therefore, you want your other two squads well equipped when you deploy. Note that although they don't appear on your sidebar, hotkeys 5 and 6 will select them.
There are a few spore mines at the second poisoning site. Make sure to take them out carefully. The second defense segment is nearly identical to the first. It's a little more chaotic because you've got a wider front to defend and more squads to manage, but you should still have the firepower to kill everything pretty easily. It's quite reasonable to leave Thaddeus in the back since he can't contribute to ranged defensive firepower and tends to die quickly.
After the poisoning completes and the characters accept that they're going to die here, your squads are inexplicably scattered around the ridge rather than being safe behind the cover you should have put them behind. Reform your defensive line quickly; a new wave of Tyranids will attack soon, including three Carnifexes. You don't actually have to kill these; after a few seconds, Gabriel's fleet arrives and drop orbital bombardment on them.

You now have to make your way to the top of a ruined tower where there's a reinforcement beacon. The Tyranid-infested land on the way isn't scary; there are plenty of brood nests you can kill but don't strictly have to, and you're still fighting almost entirely gaunts. When you grab the reinforcement beacon, Gabriel himself drops in and you get control of him (he can be selected with hotkey 7). Gabriel is annoying because he has three abilities, but only one has a hotkey, which makes him much harder to control efficiently.
Finally, you head to the north east corner and kill a Hive Tyrant boss. This boss fight is the only difficult part of the mission. Although you have virtually every ability in the game and seven squads to fight with, the Tyrant has a lot of health, kills quickly, and it's actually really hard to use your abilities well because seven characters with 3 or 4 abilities is a lot more to keep track of than four characters with 3 or 4 abilities. Gabriel has a skill which gives your whole strike force invulnerability for a long time. This and all your Rosariuses should absolutely be used here.
Other Missions part 1
These missions spawn randomly. They may appear in the mid game infrequently, but mostly they appear in the late game.

To Decapitate the Hive
Takes place on random map.
Reduces Infestation by 3
Objective is to kill a Hive Tyrant boss.
In my experience this mission tends to have huge numbers of Carnifexes. Make sure to bring plenty of anti-Carnifex options if you do this one.
The Hive Tyrant doesn't move around that much, but uses a lot of abilities that do damage in a line or at a distance. It summons some lesser Tyranids, mainly Gaunts and Raveners, as it gets to low health.

Brood Swarm
Takes place on Typhon Arena
Reduces Infestation by 2
Objective is to kill a powerful Tyranid Warrior and destroy the three Tyranid Hives on the map.
The Warrior isn't especially powerful, just a bit more health than normal. You may find a couple of Carnifexes on this map, but the big threat is the continuous streams of Tyranid units sent to attack you. There are lots of Brood Nests in addition to the Hives, and they are all clustered around the southern half of the map. That area is very densely populated with Tyranids over all. You need ways to clear out large swarms quickly. Anti-building tactics are also helpful so that you can get ahead in reducing the number of enemies that get spawned.

Target: Carnifex
Takes place on random map.
Reduces Infestation by 2
Objective is to kill a Carnifex boss.
You may find (surprise surprise) that there are a lot of ordinary Carnifexes on this mission in addition to the boss one.
The boss shoots bio-plasma and charges. Just focus on dodging the damage indicators. Unusually for a Carnifex, it has a ranged weapon. Something worth noting is that around the point of reaching 1/3 health remaining, the Carnifex boss spawns two ordinary Carnifexes to help it fight. Stunning tools work on the boss and help greatly.

Monster of Meridian
Seen on Spire Golgotha
Reduces Infestation by 3
Objective is to kill a Carnifex and destroy Tyranid structures.
The only Hive on the map is in the south west corner, as is the Carnifex boss. There are also a lot of brood nests in the south west area; you'll be under near constant attack by small Gaunt swarms until you've destroyed most of them. You'll either need to head south west immediately to take most of them out and gain enough breathing room to do what else you want, or you'll need to be able to quickly and easily kill the gaunts as they chase you around.
The Carnifex boss has nothing special going on beyond some higher stats and a ranged weapon, but being both a Carnifex and a miniboss means you should take it seriously and deploy some of your better tools to take it down.

Tyrant Alert
Seen on Mount Siccaris
Reduces Infestation by 3
Objective is to kill a Hive Tyrant and destroy Tyranid structures.
As the mission intelligence warns, you deploy amid a lot of Tyranids, and more will be making their way towards you once the fighting starts. There are quite a few brood nests around in addition to a Hive and generators. You will be fighting through a near literal ocean of rippers and gaunts. Because the Tyranid base is so dense, you either start getting advantages quickly or you'll probably die. When you deploy, the Hive is well within range of an Orbital Bombardment, and you should use one on it immediately. You can also drop some artilleries on nearby brood nests. You need to destroy a lot of their capacity for spawning units so that you'll be able to make progress in the mission.
If you survive the first phase of the mission and reach a point where there aren't that many enemies coming to attack you and the Hive Tyrant is dead, you'll probably win pretty easily from there.

Vanguard of the Hive
Takes place on random map.
Reduces Infestation by 2
Objective is to kill a Lictor.
The map is mostly covered in swarms of low power Tyranids with a few mid-level ones. In particular, there seem to be a lot Zoathropes and Lictors.
The boss works much the same as other Lictor bosses; it jumps around, fleshhooks your squad members if you stand at a distance, and poisons the ground. The most important part of the boss fight is that as it gets to low health, it summons some gaunts and a huge number of spore mines. It's difficult to target down all these spore mines before they reach you when you also have a boss to shoot at, so save some powerful area of effect skills to wipe them out quickly.

Devil in the Spires
Seen on Hab Spire Legis
Reduces Infestation by 2
Objective is to kill a Ravener and destroy Tyranid structures.
There are two Hives on this mission, but there's really nothing else particularly noteworthy that doesn't apply to all the other "destroy a stronger unit and clear the map of buildings" missions.

Tyrant of War
Seen on Capital Spire
Reduces Infestation by 3
Objective is to kill a Hive Tyrant.
The standard units spread across the map are mostly low and mid tier Tyranids. There aren't many Carnifexes on this one.
The Hive Tyrant charges, poisons the ground, and summons truly excessive numbers of gaunts as its health gets low. Make sure you've got some stong area of effect damage in reserve for the later stages of the fight.

Raiders on the Run
Takes place on random map.
Objective is to kill a Falcon
The Eldar on this map will likely include Seer Councils and the occasional Wraithlord or Falcon. The Falcon boss isn't that powerful. It moves fairly quickly, so Remote Detonators might be hard to use. It has a charge and a laser barrage ability, but doesn't deal damage particularly quickly overall. Not too hard to kill, especially if you're fully powered up in the end game. As it gets to lower health, the Falcon summons some Eldar infantry; usually Guardians and Banshees, you shouldn't have to deal with Seer Councils during the boss fight.

Stolen Armour
Seen on Green Tooth Gorge
Objective is to kill a Looted Tank and destroy several ork structures.
The ork structures are in similar positions to the mission Rippa-Splitta from the mid game; they're all in the southern half of the map. However you don't spawn near the camp.
There are quite a few generators and lots of Waagh banners on the map. This means there will be consistent waves of orks coming at you; you need to make continuous progress in destroying the banners to lessen the pressure. There is only one Teleporta platform, which does not spawn new vehicles. The Looted Tank is at the Teleporta platform and has noticeably higher health than normal, make sure you've got plenty of anti-vehicle damage output available. Expect there to be a few Deff Dreads, but other than that the biggest threat you'll likely face is the number of ork infantry.

Fearful Evolution
Seen on Capital Spire
Reduces Infestation by 2
Objective is to kill a Ravener.
Expect to face several Carnifexes on this map on the way to the boss. There are quite a few Raveners and Zoanthropes among the Tyranids scattered around the map. There will also be Hive Nodes on the map.
The Ravener boss burrows underground often, and a few seconds later pops up in a different location. Sometimes it summons swarms of gaunts to fight with it, and sometimes as it burrows away two or three Hive Nodes will spawn inside the boss fight area. You'll need to be able to take them down efficiently.

Fury of the Hive Mind
Takes place on random map.
Reduces Infestation by 2
Objective is to kill a Zoanthrope.
Expect to face several Carnifexes on this map on the way to the boss. The map will also have several Hive Nodes on it.
The Zoanthrope poisons the ground and attacks with psychic blasts that I expect would knockback any squad that wasn't in Terminator armour. Periodically the Zoathrope summons some gaunts and vanishes, only returning when you've killed all the Gaunts.
Other Missions part 2
Hive Infestation
Takes place on random map.
Reduces Infestation by 2
Objective is to kill a Lictor.
The map is mostly covered in swarms of low power Tyranids with a few mid-level ones. In particular, there seem to be a lot Zoathropes and Lictors.
The boss works much the same as other Lictor bosses; it jumps around, fleshhooks your squad members if you stand at a distance, and poisons the ground. The most important part of the boss fight is that as it gets to low health, it summons some gaunts and a huge number of spore mines. It's difficult to target down all these spore mines before they reach you when you also have a boss to shoot at, so save some powerful area of effect skills to wipe them out quickly.

Monstrous Might
Takes place on random map.
Reduces Infestation by 3
Objective is to kill a Carnifex.
This mission has quite a few Hive Nodes, the occasional Carnifex, and a much larger than normal number of Zoanthropes. The latter give you may opportunities to disrupt Tyranid forces, especially with Cyrus' snipe.
The Carnifex boss itself is similar to other Carnifex bosses; it has a ranged weapon, shoots bio-plasma area of effect attacks, and can charge. As it gets to low health it summons a large Tyranid army of low and mid-tier units to help; make sure you've got some strong abilities left to deal with it.

Snake in the Grass
Takes place on random map.
Reduces Infestation by 2
Objective is kill a Ravener.
The map features occasional Hive Nodes, and clusters of low and mid-level Tyranid units, with a fair mix between Raveners, Lictors, Warriors, and Zoanthropes. I saw no Carnifexes, but a couple of spore mines.
The Ravener boss burrows underground often, and a few seconds later pops up in a different location. Sometimes it summons swarms of gaunts to fight with it, and sometimes as it burrows away two or three Hive Nodes will spawn inside the boss fight area. You'll need to be able to take them down efficiently. I also found that this particular Ravener boss died incredibly quickly.

Warlock of the Eldar
Seen on Spire Golgotha
Objective is to kill a Warlock boss (named Aurian!)
Expect the map to feature a wide variety of Eldar forces, infantry and vehicles. Every Eldar unit will probably be represented. Of particular concern are a large number of Seer Councils, and some Wraithlords and Fire Prisms.
Aurian himself is quite strong and deals a lot of damage. You will probably benefit from having your squads spread out and engaging him at range so that his high damage area of effect abilities can't hit all your squads at once. Rosariuses are valuable. As he gets to lower health he'll spawn some guardians and grav platforms, but they're much less dangerous than the Warlock himself.

Greenskin Assassin
Takes place on random map.
Objective is to kill an Ork Kommando
The bulk of the mission is peopled by large numbers of ork infantry, lots of Nobz, basic orks, and Lootas with heavy ranged weapons. There will be only a small number of vehicles.
Kommando Bakstabba himself is pretty easy. It's best to bring some melee power, since keeping him in melee greatly reduces his ability to use his preferred ranged weapons. Bakstabba frequently vanishes and reappears somewhere else, although never leaving the boss arena. He doesn't summon any allies during the fight, and his damage output isn't particularly good if you keep him tied up.

Unstoppable Fury
Seen on Typhon Arena
Objective is to kill a Carnifex.
Reduces Infestation by 3.
Expect an emphasis on mid tier units. In addition to gaunts, the mission has a lot of Warriors, and quite a few Zoanthropes, Lictors, and Raveners. There are few or no Carnifexes prior to the boss.
The boss has a ranged weapon and the normal charge and poison abilities for a Carnifex boss. Twice it summons some gaunts and warriors to aid it.

Xeno Incursion
Seen on Siwal Ruins
Objective is to kill a Warrior.
Reduces Infestation by 2.
Enemy forces are mostly Warriors, Raveners, and the occasional Lictor or Zoanthrope. The Warrior boss mostly just jumps around and attacks in melee. It infrequently shoots bio-plasma, and summons a few gaunts to help out. It shouldn't be very difficult.
Defense Missions
Missions to defend Strategic Assets may spawn during the mid game, but are very common in the late game. They can't easily be categorised as all defense missions are named for the asset being defended, but here are some general tips for defense missions against the various races.

General Tips
Defense missions usually consist of 4 waves of enemies, with a 20 second break in between each wave. Most Strategic Assets are positioned such that there are basically two directions enemies can come from. A red arrow shows you where the next attack wave is coming from, but it only appears once enemies start spawning. This makes it difficult to deploy things like Remote Detonators that need long preparation time.
During a defense mission you must both make sure that at no point do all four of your deployed squads get incapacitated, and you must not let the enemy destroy (or destroy yourself) all three of the power generators by the Strategic Asset. If all the generators are destroyed or all your squads are incapacitated, you lose. Your area of effect weapons can damage the generators, so try to fight some distance away from them.
At the end of the final wave there will be a boss unit whose health bar will be shown at the top of the screen. The boss isn't particularly enhanced though, and doesn't have any of the special abilities which bosses in assassination missions have. The boss is usually one of the stronger units the race in question can field.

Against Tyranids
For Tyranids the boss is almost always a Carnifex.

Against Eldar
For Eldar the boss is usually a Wraithlord. In the late game, expect to see a lot of Seer Councils on defense missions. These can cause some serious trouble. Make sure you bring along some tools that are strong against them.
Warp Spiders have a tendency to teleport all over the place like madmen, and can end up behind your defensive line among the generators. It's very difficult to clean them up once they get back there, because you generally need all your forces at the front to deal with the Seer Councils the Eldar throw at you. If you've got Tarantula turrets, deploy all or most of them near your generators rather than in your front lines; this means Warp Spiders won't have a safe haven to attack generators from, and will force them to keep teleporting around and eventually get back into your line of fire without you having to move.

Against Orks
For Orks the boss is usually a Deff Dread in the late game. There is one defense mission versus orks in the early game, where the boss is a Loota squad. In the rare event that you see a defense mission versus orks in the mid game, you may see a Wartrukk as the boss.
Maps: Calderis
Argus Outskirts
This is a special map. It is the sight of four scripted missions: Stand With Your Brothers, Retake the Hamlet, The True Enemy, and The Defense of Argus Gate. Each of these missions take place on independent sections of the map; you can't get from one mission's zone to another's. Stand With Your Brothers takes place in the south-east corner, Retake the Hamlet in the south-west corner, The True Enemy in the north east corner, and The Defense of Argus Gate in the north west and center of the map.
Argus Outskirts includes a Communications Array towards the north east and a Foundary inside the walls to the north west. You have the opportunity to take the Communications Array during The True Enemy and should; you never get another chance. The Foundry is always given to you during The Defense of Argus Gate.

Argus Settlement
Small and built up. There's an arena-like spot on high ground in the north east which is where you usually find bosses. There's a Foundry in the north-western corner and a Communications Array in the south-eastern corner.

Tangier High Pass
Large and pretty rugged terrain. Bosses are usually in the high ground area to the north east. There's a Shrine in the north-western corner and a Communications Array in the south-eastern corner. Something you might not notice is that just slightly north of the Communications Array, past a barricade, is another 2 supply boxes in addition to the three you normally get at a Strategic Asset.

Siwal Ruins
This map is full of desert and rocky ridges, with a ruined courtyard in the north east where bosses are normally found. On the north western corner is a Shrine, and the south eastern corner is a Foundry. A key feature of this map is a ridge stretching most of the way across the map on the northern side. To get around it you either need to go far to the west past the Shrine, or far to the East near the foundry.
Maps: Typhon
Mount Siccaris
Several fairly tight corridors, and lots of walls. Not many wide open spaces. There's a cleared canyon area inside a mountainous wall to the north east. It has only two narrow valley entrances, and is where boss fights normally happen. There's a Communications array to the north west and a Shrine to the south east.

Typhon Arena
In the north is the eponymous arena, a circular basin with three staircases leading down to it. This is where boss fights usually happen. There are a lot of supply pickups in the arena itself. The rest of the map is divided between some bridges and a raised complex of ruins in the west and center, and a path hugging the cliffs over a river to the east. There's a Shrine in the north west just outside the arena, and a foundry towards the south east.

Ladon Swamplands
This is a special map which you only get access to when playing the mission Into the Hive. It's got a swamp region made of fairly narrow corridors which initially runs south to north, then turns and continues from west to east. There's a Shrine at the north east end of the map. A branch splits off from this main swamp region and heads first south, then further east. At the end of the branch is a slightly more open area, where you fight a boss.

Green Tooth Gorge
This map is fairly small, although pretty tightly packed. It's basically split into two halves, one in the north and one in the south, by a gorge that runs east to west in across the middle. There are bridges over the gorge at the centre and the western end. There's a slightly larger region with some low walls in the north east, where bosses are usually found. There's a Shrine at the south eastern corner and a Communications Array in the north western corner.

Techpriest Station
This map is only used in the mission Remains of the Dark Age, where you take control of the Astronomic Array. The map has a lot of features, but most of these you'll encounter in the normal course of the mission. There are no Strategic Assets to take, so you don't have to worry about missing anything. The Array itself is on a big triangle of land covering the north-west half of the map. The south-west half mostly consists of a long path to reach it.

The Graveyard of Typhon
A large map with some ruinous towers rising out of lowlands full of Tyranid brood nests. This map is only used in the final mission of the campaign, so there are no Strategic Assets or other important elements you need to make a point of securing.
Maps: Meridian
Hab Spire Legis
This map is split into two halves by a central chasm with three bridges crossing it. Bosses are generally found in the south east. At almost the centre of the map is an area of low ground with a Reinforcement Beacon, and a side path containing three supply crates on a little circular platform. The western side of the map is mostly the same ground level with lots of buildings. A Shrine is on high ground towards the north east, and a Foundry is next to a bridge in the south.

Capital Spire
This map is primarily composed of three parallel sections stretching north to south. The middle one is higher than the two side paths, and occasional bridges and stairs connect paths to each other. All three paths meet in an east-west pathway to the south, and an open high ground space to the north, where bosses are usually found. There is a Shrine on low ground south west of the boss area, and a Communications Array on the low ground south east of the boss area.

Spire Golgotha
The north east of the map is a built up city area on high ground. As you head towards the south west the ground lowers and becomes a swampy or garbage dump sort of region with lots of Tyranid capillary towers. A cleared space in the north east is where bosses are normally found. There are lots of corridors and bridges with turns and walls separating them. The northern edge of the map is one long straight pathway, but there are few others. There's a Foundry close to the centre north of the map, and a Communications Array in the south east corner.

Angel Forge
This map is very large. It is only used in the scripted mission Angel Gate and Secrets of Angel Forge. Angel Forge itself, represented by a Foundry, is in the south western corner. A little more than half the map centred on that corner is enclosed by huge walls, with three gates in them. One gate is close to the north west corner, one gate close to the south east corner, and the third gate is in almost the exact middle of the map. There is a second Foundry in the north east corner, well outside the fortress surrounding Angel Forge. There are lots of walls and structures across the map, and inside the fortress the ground level changes often. Although the map features two Foundry structures, capturing them does not benefit you on the planet map. These Foundries don't count towards mission deployment calculations. Their only benefit is as reinforcement points and passive regeneration for Thule during missions.
Terminator Armour
By default Tarkus and the Force Commander can equip Terminator armour. Avitus can equip Terminator armour with his Health 2 trait and Thaddeus can equip Terminator armour with Melee 3. There are three pieces of Terminator armour in the campaign.

Aegis of Hurios
The Aegis of Hurios is awarded for completing Secrets of Angel Forge.

Crusade Eternal
The Crusade Eternal is awarded for completing Raid Against the Warboss.

Armour of Azariah
The Armour of Azariah is awarded for completing The Wailing Doom.

What Terminator armour changes
Characters wearing Terminator armour gain big bonuses to health and durability. Wearing Terminator armour prevents Thaddeus and the Force Commander from using jump packs, but the Force Commander can equip a Terminator teleporter commander item. and Thaddeus can always teleport in Terminator armour. If a character is wearing Terminator armour and is not using a thunder hammer and storm shield, they can equip the Cyclone Missile Launcher in one of their accessory slots. Characters wearing Terminator armour cannot equip any grenade-type accessories (Frag grenades, Master crafted grenades, Blind grenades, Melta bombs, or Demolition Charges).
Terminator armour has its own completely independent set of weapons; you can't use Terminator weapons in power armour or ordinary weapons in Terminator armour.
In my opinion you should put Terminator armour on the Force Commander, Tarkus, and Avitus. The Force Commander and Tarkus benefit greatly from the durability, and Tarkus becomes much more capable in melee without having to trait all the way down his melee line for power weapons. Avitus gets lots of value out of terminator assault cannons, which do immense damage and don't require setup. Although Thaddeus does become a lot more durable in Terminator armour, he loses Assault Jump, and the disruption, suppression, and temporary invulnerability of Assault Jump are the main things that make Thaddeus valuable. In Terminator armour he becomes much less useful.
Since durability is the big advantage of Terminator armour, the first piece you get should go on whichever character you rely on to absorb damage for your group, which is probably either Tarkus or the Force Commander.
Heroes, weapons, and traits
Trait points
The Force Commander, Tarkus, Avitus, Cyrus, and Thaddeus are all given to you at level 1, with 5 trait points allocated already which you cannot change. Each time they level up from there, they gain 2 additional trait points. With a maximum of 20 levels, this adds up to 43 trait points in total that each character gets; 5 you cannot choose and 38 you can.
Thule is a bit different. When you are given him after completing Into the Hive, he starts at level 9 with 17 trait points already allocated which you cannot change, and 4 more you can choose. This is the same as the total number of trait points any other hero would have at level 9, and Thule also has a total of 43 trait points at level 20, but there is less scope for you to choose where they go.

Force Commander weapons
The Force Commander can equip bolt pistols, plasma pistols, chainswords, power swords, power axes, power fists, thunder hammers, and plasma guns. In his commander item slot he can equip iron halos (giving an energy shield ability), banners (giving an ability which breaks suppression and heals a little), teleporters, and jump packs. With the Ranged 2 trait the Force Commander can equip heavy bolters, plasma cannons, and missile launchers, but if he does he can't equip a commander item at the same time.
In Terminator armour the Force Commander can equip thunder hammers and storm shields, terminator heavy flamers, storm bolters, assault cannons and power fists. He can equip the Cyclone Missile Launcher as an accessory as long as he's not using a thunder hammer and storm shield. The Force Commander is the only character who can equip every kind of Terminator weapon in the game.
Generally I like to give the Force Commander melee weapons, and thunder hammer/storm shield once he's in Terminator armour, to act as a melee tank and cause trouble for enemies who try to get up close.

Tarkus weapons
Tarkus can equip bolters, flamers, and plasma guns. With Melee 1 he can equip chainswords and bolt pistols, and with Melee 3 he can equip power swords. In Terminator armour Tarkus can equip storm bolters, terminator heavy flamers, and power fists. He can equip the Cyclone Missile Launcher as an accessory.
Generally I'll keep Tarkus using bolters or plasma guns, and a storm bolter and power fist once he's in Terminator armour. Tactical Advance slows him down and melee fighters are almost guaranteed to take more damage than ranged ones.

Avitus weapons
Avitus can equip heavy bolters, missile launchers, and plasma cannons. In Terminator armour he can equip storm bolters, power fists, and terminator assault cannons. He can equip the Cyclone Missile Launcher as an accessory.
Heavy bolters can be nice for suppression, but I think missile launchers are the most versatile option for Avitus generally. His squadmates will still have heavy bolters to provide some extra damage, but the missile launcher doesn't require setup, still deals damage to infantry, and provides an easy source of anti vehicle and anti building if you happen to need it. The plasma cannon is very unwieldy because it requires setup, has a long time between shots, and shots travel relatively slowly so enemies can potentially dodge them. The shots also hit in an area and cause knockback, and will damage and knockback your own units as well as the enemy.

Cyrus weapons
Cyrus can equip bolters, sniper rifles, and shotguns. He can equip flamers with Ranged 2. With Cyrus, choice of weapon is not so much about the damage of his auto attacks as the effect of the special ability he gains from Ranged 1. In general, the sniper rifle's High-Powered Shot ability is usually the best.

Thaddeus weapons
Thaddeus can equip bolt pistols, plasma pistols, and chainswords. Melee 2 allows him to equip power swords, power axes, and power fists. Ranged 1 allows him to equip bolters, and Ranged 2 allows him to equip flamers and plasma guns.
In Terminator armour Thaddeus is only allowed to equip a thunder hammer and storm shield.
I just keep Thaddeus wearing whatever the strongest melee weapon I have for him happens to be. I don't see why you'd ever want to give him ranged weapons; his whole design as a squad is to get into the thick of the enemy, where staying at range is going to be hard.

Thule weapons
Thule only has two weapons in this campaign: Claws or Assault Cannons. When he has claws equipped, Thule also gets to fight with flamers when enemies get close. When he has an assault cannon, he gains the skill Assault Cannon Barrage which does a lot of damage and knockback in a large arc and can quickly kill swaths of small enemies. Whichever weapon he is using, he keeps the Mighty Strike skill which damages and knocks back nearby enemies.
I use Thule exclusively with an assault cannon as long as I have one, because he gets to use both of his abilities. Also, Thule moves very slowly; if he can only fight in melee then his ability to be useful depends on him reaching the fight quickly, which he can't do. Having ranged weapons allows him to be much more useful, and still having Mighty Strike available means enemies still have a hard time overwhelming him.

Donating
Most (but not all) armour, weapons, and accessories can be donated to the Librarium. This permanently destroys them in exchange for giving XP to all your heroes. You want to donate items once you're confident you won't use them any more (i.e. once every character you have is wearing something better). Donating sooner is largely better because your characters get to a higher level sooner which makes missions easier. However, an item always gives the same amount of XP, and gives that same amount to every hero, regardless of when it is donated, how high level your characters are, or how many characters you have. Therefore if you'll soon be given a new character, it's a good idea to hold on to some items rather than donating them until that character joins your group, so they can benefit from the bonus XP too.
Heroes: Force Commander
Force Commander Trait Tree
I actually find the Force Commander to be one of the less interesting squads. I usually build him as a melee tank, with Health 4, Energy 2, and all remaining points in Melee. I'll get Battle Cry first, then the Energy and Health traits that improve charge, get the Orbital Bombardment trait around the time I unlock the accessory, then finish everything else off.

Health 1
A nice trait which makes your charge better. You almost always want this one.

Health 2

Health 3
A strong trait. Charge giving the Force Commander a short invulnerability is very useful and a great tool to have. Note that the invulnerability begins at the end of the charge, not at the start; there's a little yellow light around the Force Commander when it triggers. So you can't charge him into a group of spore mines to safely detonate them, but you can charge him to just in front of a group of spore mines, then run him through them to safely detonate them.

Health 4
A pretty strong trait. Randomness of whether it triggers makes it worse, and ideally you'd never let a squad die and so would never need this, but if you're not confident you can play perfectly it's great to have a chance of the Force Commander getting up again if you mess up.

Ranged 1
The Force Commander's ranged traits are generally not a good idea. His charge skill means he usually ends up in the middle of enemy forces, so it's preferable to have him able to fight in melee. This trait can be nice if you decide to have him stay with your ranged units and provide support, rather than tanking out front.

Ranged 2
It's rarely a good idea to give the Force Commander heavy weapons since he can't equip a Commander item at the same time, reducing his access to good abilities and stat bonuses. If you want heavy weapons for a mission, just bring Avitus.

Ranged 3
Killing more enemies is nice, but the situation where you are most in need of extra power is usually fighting bosses, and this trait doesn't help at all against enemies you can't instant kill.

Melee 1
Pretty much a required trait. Battle Cry is an excellent skill, both improving the Force Commander's melee skill (his chance to do special attacks) and damage buffing nearby allies. You always want this, whether you use the Force Commander for melee combat, support and buffs, or ranged damage.

Melee 2
Nice trait. It noticeably improves the Force Commander's damage output by giving him some area of effect on attacks.

Melee 3
Somewhat helpful for using the Force Commander as a tank, but he doesn't get most of the kills in most fights because you want to use more powerful sources of damage. Also, boss fights are the time the Force Commander is most in need of more health, and this trait won't help against them because they are individual high health units.

Melee 4
Suffers from the same problem as Melee 3 and Ranged 3; the hardest parts of the game tend to be boss fights, where getting kills on standard infantry aren't the highest priority.

Energy 1
Good trait. You always want this one, especially since the Force Commander is always going to have Orbital Bombardment once you unlock it, so another accessory slot is needed.

Energy 2
A very powerful trait. Orbital Bombardment is one of the most powerful abilities in the game, and this gives you two uses of it rather than one. You should pretty much always get this.

Energy 3
On the surface, this trait is very strong since it lets you provide more energy to your allies who use that energy on powerful abilities, Tarkus' grenades and Tactical Advance in particular. However, there's a bug that if you have this trait, when the Force Commander wears Terminator armour he loses the Battle Cry skill entirely. This trait is great if you don't intend to put the Force Commander in Terminator armour, but in general you do want to do that, so it's probably not worth getting this trait. Consider if a more powerful Battle Cry in the mid game is worth losing it totally in the late game.
Heroes: Tarkus
Tarkus Trait Tree

My preferred build is Health 4, Melee 2, and Energy 3. At the start of the campaign I'll get Energy 2 for grenades, then fill out the Health and Energy lines. This turns Tarkus into an incredible support squad who helps get things killed quicker in the early game and massively increases your durability in the late game.

Health 1
Potentially a very useful ability. The main difficulty is that if you're using Tarkus to absorb damage, you probably want Tactical Advance on, which also costs energy, so using this skill to get enemies attacking Tarkus actually reduces how long he'll be able to absorb their shots.

Health 2
Forgettable trait. This isn't the reason you go down the health line.

Health 3
Pretty solid trait. Most traits and equipment in this game only affect the named squad leader, not their unnamed backup, but this one makes Tarkus' squadmates more durable and gives them better weapons. If he's using a ranged weapon, some of them will have plasma guns, and if he's using a melee weapon, they'll have power swords and power axes.

Health 4
One of Tarkus' best traits. Ideally you'd get this trait, use Taunt to force enemies to focus on Tarkus, make him unable to die using Tactical Advance, and use the Force Commander's Energy 3 to keep restoring Tarkus' energy with Battle Cry so he tanks damage forever. This tactic is less good because of the bug with Force Commander Energy 3 (see that trait for details) but can still be used to great effect in the mid game before the FC goes into Terminator armour.

Ranged 1
Tarkus' whole ranged line isn't that great. He was never going to be one of your main damage dealers with his ordinary weapons, and traiting ranged damage takes away from his much better options in other lines.

Ranged 2

Ranged 3
This trait could be good. Unfortunately, it specifically does not synergise with Energy 3, which would have made it similar to Avitus' Energy 3 trait and a great damage buff. So it's not really worth going for.

Melee 1
Not that interesting. Melee Tarkus has some value, but chainswords aren't going to stay on par with the harder enemies. You mainly get this one on the way to Melee 2.

Melee 2
A pretty good trait, especially when combined with Energy 3. It allows for a serious improvement to your group's durability.

Melee 3
Way too many trait points needed just to allow Tarkus to equip any melee weapon other than chainswords. If you want him in melee in the late game, just put him in Terminator armour and use power fists.

Energy 1
Always worth getting. Allowing Tarkus to hold more items gives him more utility, and it's helpful because he's always going to be using Master Crafted grenades until he gets Terminator armour.

Energy 2
Another of Tarkus' best traits, especially in the early and mid game when you don't have that much cheap damage output. Energy based grenades allow you to finish almost every minor fight much more rapidly, and help out in killing bosses faster. This makes you a lot safer in general, because it's best to kill enemies quickly before they do more damage. You usually want to rush this one as soon as the campaign starts.

Energy 3
The third of Tarkus' strongest traits. Tactical Advance is ordinarily just ok, but extending it to everyone is extremely helpful on a difficulty where durability is needed and hard to come by.
Heroes: Avitus
Avitus Trait Tree
I usually give Avitus Health 2, Energy 3, and all other points into Ranged. If you leave him two trait points away from getting Energy 3, then have him wear the Crusade Eternal in the late game (its trait bonus will unlock Energy 3 for you), you'll have enough points to also get Health 2 and Ranged 4.

Health 1
Pretty nice trait. Sprint is more a little bonus than a key utility since it doesn't last long, but it can get Avitus where he's going a bit faster.
Health 2
It's a good idea to give Avitus Terminator armour once you have enough. He benefits well from it.
Health 3
This trait would be nice to have, but your trait points are normally tied up on more valuable things.
Ranged 1
Obviously Avitus' ranged line is criitcal and you always want lots of ranged traits. This is a very good first one.
Ranged 2
The second ranged trait is also great for Avitus. These two will typically be the first things you unlock.
Ranged 3
This trait is good, but not as good as the first two. Once Avitus is in Terminator armour he can't take cover, so this trait loses value.
Ranged 4
This trait is worse than ranged 3, because Avitus doesn't have to set up his weapon in Terminator armour or when using a missile launcher. You can basically get this trait for free just by choosing your gear well. However, it may still be worth putting points into ranged 3 and 4, not for the trait bonuses, but for the passive damage benefit.
Melee 1
Never trait Avitus for melee. He can't fight in melee. His melee traits aren't good. They're a waste of points.
Melee 2
Absolutely not.
Energy 1
You're always going to get this trait because you want as many accessories as possible.
Energy 2
A strong trait. Replenishing energy from kills allows Avitus to maintain focus fire a lot longer.
Energy 3
Among the best traits Avitus has. Focus fire damage buffing allies significantly increases your overall damage output and allows Avitus to remain powerful and useful even in the late game when his individual damage might not keep up with the strength of enemies.
Heroes: Cyrus
Cyrus Trait Tree
Cyrus is potentially the strongest hero in the game, but his damage comes from accessories, not attacks. My preferred build is Health 3, Ranged 1, Melee 2, Energy 3. This means he gets lots of special abilities between his weapon, accessory slots, and smoke bombs on cloak/uncloak. He can use those abilities while cloaked if he needs to, and can operate alone in enemy territory because he can reinforce himself.
I'll them load him up with Cluster Mines, Remote Detonators, and grenades, Melta bombs, or Demolition Charges, and go blow things up.

Health 1
A great trait. Makes it much easier to deploy explosives using Infiltrate.
Health 2
Nice to have. Ideally you'd never have a squad be incapacitated and not need this trait, but in reality you'll probably make mistakes at some point and this helps to recover. Especially in tight situations where reviving is dangerous, this can make cleaning up your mistakes much less painful.
Health 3
A useful trait, allowing Cyrus to operate alone for a lot longer because he can reinforce himself.
Ranged 1
Very useful and almost always worth getting. The special abilities from Shotguns and Sniper Rifles are great. Snipe in particular is amazing against Tyranids; you can insta-kill synapse creatures (mainly Warriors and Zoanthropes) which causes serious disruption among their followers and sometimes gets Tyranids to attack each other. Whenever you see a Zoanthrope it's almost always worth sniping it. Snipe is also good for killing Eldar grav platforms and helping damage bosses, and you can use it to clear out infantry garrisons in buildings, similarly to grenades.
Ranged 2
Pretty inconsequential. Flamers being a ranged weapon but only working at fairly short range, putting you at constant risk of being forced into melee, makes them hard to get consistent value out of.
Ranged 3
Nice to have, but it costs a lot of trait points to get this trait and you usually need the points in other places.
Melee 1
You almost always want this trait. Cyrus benefits greatly from being able to hold more accessories, since they give him most of his firepower.
Melee 2
A very strong trait. Cyrus stuns nearby enemies when he enters or exits cloak. This still affects some vehicles and most bosses, which makes it incredibly good as it can seriously reduce enemy damage output. I have seen it work on Wartrukks and Carnifexes, and it seems not to work on Looted Tanks, Fire Prisms, and Falcons.
Energy 1
This trait is decent, allowing more efficient use of cloaking energy while you stop to throw things.
Energy 2
Pretty forgettable trait, and it's more or less superseded by Health 2, but you're always going to get this one on the way to Energy 3.
Energy 3
One of Cyrus' best traits. It's a nice aid when Cyrus is using grenades, Demolition Charges, or Cluster Mines, but its greatest value is that Cyrus can safely deploy Remote Detonators while cloaked, allowing them to be used safely and aggressively. This ability also allows Cyrus to use his sniper and shotgun abilities while cloaked. You generally want to prioritise Cyrus' Energy traits so you can get this one around the same time you're given the Remote Detonator.
Energy 4
I generally find this trait to be pretty unnecessary. You're going to have the first three Energy traits, so Cyrus will have plenty of energy for cloak, and in Dawn of War 2 energy regenerates pretty quickly when you aren't using it. I prefer to save the trait points and get Cyrus further into other trait lines.
Heroes: Thaddeus
Thaddeus Trait Tree
I generally give Thaddeus Health 3, Melee 4, and Energy 2. Energy 1 is good, but there's no real reason I want Energy 2; Thaddeus just gets more trait points than good traits. His whole value as a squad is built around the disruptive power of Assault Jump, so you overwhelmingly want traits which make it better.
Health 1
Nice trait, more disruptive power for Assault Jump is always good.
Health 2
One of Thaddeus' most crucial traits. No matter what you do, he's never very durable, but this allows him to jump in, get out, and then do something useful again later rather than jump in and die immediately.
Health 3
Not particularly amazing, but you may as well have it since Thaddeus can always use more durability.
Ranged 1
It is possible to trait Thaddeus for ranged damage, but it won't be the centrepiece of your build. None of his traits allow him to equip any ranged weapons in terminator armour, but Assault Jump remains his key ability and you lose it in terminator armour, so you didn't want him in terminator armour anyway. Even if you give Thaddeus ranged weapons, you want him to jump on top of enemies for damage, suppression, and knockback. The ranged weapons are just for extra damage when he's not jumping.
Ranged 2
If you do give Thaddeus ranged weapons, you probably want him to have a plasma gun or flamer; a bolter doesn't do enough damage to justify spending the range trait points.
Ranged 3
Giving Thaddeus stun options may be nice; it gives him more of a utility support role when he's not jumping around. But getting this trait costs enough trait points that you'll probably have to give up one of Thaddeus' other strong traits; Health 2 or Melee 4.
Melee 1
Merciless Strike is useful to have. It allows Thaddeus to do a bit of extra damage after jumping, before he gets out of there.
Melee 2
More versatility is good for Thaddeus, it lets him deal some more damage to lots of enemy types. Because you tend to not get many chainswords in the mid and late game, it allows you to keep him equipped with on-level weapons.
Melee 3
I think there's very little reason to ever put Thaddeus in Terminator armour. You'll get this trait on the way to Melee 4, but Terminator armour takes away Assault Jump. Assault jump damages, disrupts and with Health 1 suppresses enemies. The teleport which replaces it in terminator armour doesn't do any of those things. Assault Jump and the disruption it causes among enemies is most of the value Thaddeus provides as a squad, so while Terminator armour makes him a lot less likely to die mid-fight, it also removes most of the reason for bringing him at all.
Melee 4
Amazing trait. Allowing Thaddeus to perform lots of jumps in rapid succession drastically increases the amount of damage and chaos he can inflict, and the jump invulnerability means he's virtually invincible the whole time this skill is up. You can also mix in some Merciless Strikes for extra damage output, but overall you should be doing at minimum one jump in between each Merciless Strike to keep the invulnerability up.
Energy 1
Always worth getting. The more accessories you can carry, the more tools you have.
Energy 2
Not very interesting. I usually get this trait after I've unlocked all the good ones; at least it gives Thaddeus a bigger energy pool so he doesn't have to wait for energy as often.
Heroes: Thule
Thule Trait Tree
Thule has shorter trait lines and fewer traits than the other squads, but gets the same number of trait points. This means it's viable to get most of his traits in any given run. By level 20 he can have both Health traits, both Energy traits, and three out of the four Ranged and Melee traits. I'll usually give him both Ranged traits and only one Melee trait. His melee power is let down by how slow and cumbersome he is to move around; often much of the fight is over by the time he reaches it.

Health 1

Health 2
One of Thule's best traits and a non negotiable in pretty much any run. He's hard to heal because he has no natural regeneration and stims don't work on him. This trait fixes that problem. Ancient Defender not only massively increases Thule's regeneration, it will stay active until he reaches full health, no matter how long that takes. So if he's actively under attack, he'll just keep regenerating until his health is full even as he takes damage. Sometimes Thule ends up absorbing a boss's attacks while the rest of your force regroups, and he's still alive and regenerating when you get back to the fight.

Ranged 1
Energy generally isn't a big concern for Thule. He normally only has three abilities (Ancient Defender, Mighty Strike, and Assault Cannon Barrage or Charge) so once he starts getting some levels and his energy pool reaches a decent size, you tend to be able to use what you want whenever you want it. This trait is still nice to have though.

Ranged 2
The Assault Cannon Barrage is already good. Making it better is, well, better.

Melee 1
Adding a stun to Mighty Strike is useful, especially since you still get to use it when Thule has an Assault Cannon equipped.

Melee 2
Charge isn't that great. Thule's biggest barrier to being a powerful melee force is his low mobility, and it's good that there's an ability to help mitigate that, but it doesn't actually speed him up that much and it's not always off cooldown. Give Thule a ranged weapon so he can contribute to every fight instead.

Energy 1
Shorter ability cooldowns are always great.

Energy 2
This is a very nice trait, and available with an expenditure of relatively few trait points. Thule is already pretty strong, but allowing him to damage buff his allies makes him much more useful to a team. This is particularly needed since Thule's inability to equip accessories, slow movement, and difficulty of healing put him in a position of having a hard time working with a team. This trait helps to alleviate it. It also synergises really well with his ranged firepower, since Assault Cannon Barrage tends to get lots of kills early and rapidly.
Accessories, Abilities, Supplies part 1
Items and abilities granted by Strategic Assets are covered in that section.

Most of the items in this section when equipped grant an ability which can only be used a limited number of times. However, supply crates are spread over most of the maps on which missions are played. If you destroy a supply crate and click on the item revealed, it will grant you one additional use of all supply-based abilities on your squads. Most supply-based items start with 3 uses when you deploy, and you can hold up to 5 uses at a time. If you pick up more supplies when you already have the maximum uses on an ability available, you aren't granted an additional use. Therefore, ideally you want to consistently use a variety of supply based abilities so that you never hit the maximum on any of them and get full value every time you pick up new supplies.

You can pick up supplies from across the map, through the fog of war, if you've already destroyed the box holding them. It's best to destroy every box you come across, but only click on the revealed supplies to pick them up if you need them. Then, as you move further into the mission, you can pan your camera over to supplies you previously left behind and pick them up when necessary. This is very useful when making your way through a map to the boss might be quite easy, but the boss forces you to go through resources quickly. You can pick up any leftover supplies with your camera and mouse, without your heroes leaving the fight.

Recovery Stimulant Kit
Each use of stimulant kits instantaneously restores some health to all your nearby infantry (not Thule). The healing is applied separately to each living squad member you have; it won't reinforce a squad which has lost members. However, if a squad leader is incapacitated, the stimulant heal will get them back up. Stims don't heal Thule at all. They have a limited range, centred on the hero using the stims. It's fairly large, so as long as your squads are at all close to each other they'll probably all get healed, but if you start splitting up, stimulants won't heal everyone.

When deciding who will hold the stimulants, keep in mind that if that character dies you'll have to manually revive them before you get any more healing. You want the stimulants to be close to the character who takes the most damage so you can heal them. But if that character is the one holding the stims, you'll probably often have them go down and lose access to healing, which isn't good. A lot of people will keep stimulants on the Force Commander, but there is value in having someone else equip them since the Force Commander doesn't have squadmates, so if you revive him using stimulants he's ready to get right back into the fight.

Frag Grenade Pack
Grenades. You throw them and they do some damage in an area. Very useful, because if you throw a grenade at the start of a fight you can kill a lot of enemies quickly and finish the fight much sooner, which puts your heroes at less risk. You basically always want to throw a grenade at any sizeable cluster of enemies if you have some left. Because you throw grenades at a location on the ground, it's possible for the enemy to move away in the time between issuing the command to throw a grenade and when it actually arrives there. Grenades are always thrown by the squad leader, even if another squad member is closer. Consider where the squad leader is positioned when you order throwing a grenade, and how long it'll take them to reach the right position to throw it.

Master Crafted Grenades
Very similar to Frag Grenades, except they do more damage, only Tarkus can equip them, and only once he reaches level 3. Once Tarkus hits level 3, you should take the frags off him and give him the master crafted frags. He should basically never go without them until he gets Terminator Armour, at which point he can't equip grenades any more. Note that Tarkus can't equip both kinds of grenades at once, which means you won't be able to put the Master Crafted grenades on him, even if he is level 3, until you take the basic Frag grenades off.

Demolition Charge Pack
Demolition Charges have a long cooldown because they are designed for stationary targets (buildings). They are extremely useful on missions where you have to destroy buildings that spawn more enemy units, since you only have to get close enough to throw a Demolition charge and the building will almost certainly go down. However, you can throw them at clusters of enemies too. Enemies are programmed to run away from Demolition Charges, which isn't as good as the charges blowing them up, but it means they'll probably spend some time moving instead of shooting, buying you a few seconds where you do damage to the enemy and they aren't doing as much damage back.

Blind Grenades
Don't do any damage, but seriously slow down the movement and prevent attacking from enemies hit by them. These are pretty worthless most of the time, since it's better to just kill the enemies. However, blind grenades are extremely valuable against enemies who have too much health to kill quickly, bosses in particular, and sometimes Carnifexes. Using blind grenades on bosses massively reduces their damage output and makes killing them a lot safer.

Melta Bombs
Melta bombs are specialist anti-vehicle accessories. Unlike grenades you throw them at a specific vehicle, not at the ground, so they don't miss. They deal a sizeable chunk of damage but have a fairly long cooldown; you usually won't get to use 2 melta bombs in fighting one vehicle if it's not a boss, because either you or the vehicle will die before the cooldown is over. Therefore, while they are useful, you need something in addition to melta bombs to take down vehicles comfortably. Melta bombs can also be used on structures, but because the Demolition charge and Remote Detonator exist, there's not much reason to.

Cluster Mines
Cluster mines are like a cross between grenades and remote detonators. Only Cyrus can use them, they have to be planted on the ground and he needs to get very close to the spot in question to put them down. It takes a few seconds after placing the cluster mines for them to arm, at which point any enemy stepping on them will cause them to explode. They do more damage than grenades do, in a slightly larger area. It can be very effective for Cyrus to cloak and place a cluster mine under a tightly packed group of powerful infantry. This will often kill them all, or at least seriously damage them, without much risk to your own forces. When cluster mines explode they will knock back your own squads, but won't damage them.
Accessories, Abilities, Supplies part 2
Remote Detonator
One of the best abilities in the game. Only Cyrus can use remote detonators. He has to first place them down by standing right next to the target position for a few seconds (if he's knocked over, the deployment of the detonator is cancelled). Once a detonator is placed, the ability which previously placed them will cause the existing one to trigger, creating an explosion which covers a very large area with very severe damage. You cannot have multiple remote detonators placed at the same time; you have to detonate an existing one before you'll be able to place the next. You also can't get rid of remote detonators by any method other than detonating them. While Cyrus triggering them is the main way to get a remote detonator to explode, it will also explode if it takes enough damage. This happens sometimes when enemies see it and start attacking it, or if an enemy which does area of effect damage attacks something near the detonator (this happens a lot with the Seer Council ranged attack).
Remote Detonators have enough damage to seriously hurt and sometimes kill high end vehicles, a large enough radius to destroy widely spread groups of enemies, and they can be replenished with supply boxes. Nothing else in the game combines such raw destructive potential and reusability.
Remote detonators benefit enormously from Cyrus having his Energy 3 trait, which allows him to use abilities while cloaked without being revealed; this means he will not be detected while placing detonators, and allows him to safely place them near powerful enemies, then back up and detonate them.
One of the big difficulties with remote detonators is that they will still damage (usually kill) all your own units (except Cyrus himself), and the power generators on strategic assets. This is true for most area of effect weapons, but the sheer range of a remote detonator makes it a special case. Remote detonators are best used where you are pushing into enemy positions so your own squads don't have to get close to the detonator. But if you need to use one in the midst of a fight your heroes are already in, you can use a Rosarius before triggering the detonator so that your units won't take damage from it but the enemy will. When planned properly, this can be a very effective tactic to quickly kill enemies that would otherwise cause a lot of problems. It obviously does not work if Thule is nearby, since Rosarius does not protect him.

Cyclone Missile Launcher
These can only be equipped by a squad who is wearing Terminator armour and not using a thunder hammer and storm shield. Unlike most accessories, you start with 2 uses of this ability and can only store 4. The Cyclone missile barrage has the longest range in the game; it fires a cluster of missiles at the position you target, but these missiles will spread out on the journey and can be blocked by walls, cliffs, and other obstacles on their paths. They will damage your squads as well as the enemy. The ability is extremely inaccurate and it's difficult to get meaningful amounts of damage done at any sizeable range with it. The missile barrage is probably best used at fairly short range (about the Force Commander's charge range or less) so the missiles don't spread out too much, and targeted on a dense cluster of enemies so that you'll get hits. Think of it as something like a larger radius cluster mine that can be fired at a distance. The missile barrage is very effective at destroying garrisoned buildings however, since it does a lot of damage and buildings take up enough space that they are likely to be hit by many of the missiles.

Rites of Repair
Each use targets a mechanical ally and rapidly repairs its health up to full. The only opportunities you get to use this in the campaign are on Thule and strategic asset power generators. The main value of the Rites of Repair is to keep Thule healthy until you unlock Ancient Defender, at which point he can repair himself for free and you don't need the item any more.

Drop Pod
Drop pods have very little value. You target a position, a drop pod lands there (damaging enemies and knocking back both enemies and you) and all your infantry squads near the position at the time the drop pod lands get fully reinforced immediately. The drop pod does not become a reinforcement point in its own right like the one you start missions from, you can't retreat to it and you don't regain lost squad members by being near it. Drop pods offer once off value, which requires all your squads being nearby and not at full strength but not incapacitated. You're probably better off taking something else that helps you kill enemies quicker and helps you avoid losing squad members in the first place.

Orbital Bombardment
The strongest ability in the game by damage per use, although you only get one use per mission (2 uses with Force Commander Energy 2 trait). Only the Force Commander can equip it, but it's so powerful that you should pretty much always bring it. It's a good idea to plan your traits so that you get the Energy 2 trait just before you get the Orbital Bombardment beacon, so you'll always get to use it twice. When you cast Orbital Bombardment, three laser beams shoot down from the sky, one after the other. They are equally spaced around the spot you cast the bombardment; none of them is on the exact position you clicked. All infantry caught in a laser beam are slowly lifted into the sky, and everything inside the beam takes severe damage over time while it lasts. After each beam has lasted for several seconds, it triggers an explosion with a fairly large radius that does heavy damage to everything it hits.

Including the final explosion, orbital bombardment hits a very large area, so it can effectively clear out very big groups of powerful enemies. Several bosses start with an escort of strong enemies nearby; using an orbital bombardment can be a great way to kill most of them and get the boss alone. When the continuous damage of the laser beam is included, orbital bombardment does extreme damage to a single target. It is very difficult to get a specific enemy in one of the beams since none of the beams land at the spot you click, but if you can get a boss to stay in one of the beams for its whole duration, you can destroy a third or more of even the strongest boss's health bar.
Tactics
In most missions, you'll be engaging in one small fight after another, possibly with breaking into a large enemy base or a boss fight later on in the mission. In order to perform well overall, you need to take every fight well.

Your priorities should be to not have any squads incapacitated (not lose any squad members if you can help it), win fights quickly, and use few supplies or Strategic Asset powers most of the time.

The overriding rule of good Primarch tactics is that you want to kill enemies as soon as possible. This is because the longer an enemy lives the more damage they do. Killing enemies as quickly as possible helps keep your squads from getting incapacitated (which gives you a better chance of high Resilience on the mission) and also helps your Speed score.

While you don't want to expend too many limited-use abilities in any one fight, your abilities do exist to help you win fights more quickly and easily. The reason to use your abilities efficiently is so that you'll have enough for the next fight, and the next after that. It's fine to end a mission with no resources left if you used them to complete the mission more smoothly. So when something looks hard, don't be afraid to pull out your powerful tools; it's what they're for. Your job is to evaluate how difficult a particular enemy group is, how much else you'll have to fight in this mission, and what resources you've deployed with, then decide which items to use up in winning this fight.
Energy based skills should be used basically every time they're off cooldown. Resources like limited use grenades should be used if the fight won't be trivially won by energy abilities. Remote Detonators should be saved for contexts where strength or enemy numbers really merit them. Strategic asset abilities should only be used in especially hard cases or for unexpected problems. Orbital Bombardment is usually the highest value ability; it should only be deployed on bosses, huge enemy armies, or I'm-about-to-die situations.

Never split up your forces unless you really, really know what you're doing, have it planned out well, and are confident you can control units correctly in two different locations. Each squad in this game is particularly good at one thing. If you split up, each group will likely be missing the ability to do something important. One or two squads have far less firepower and far less health than four, so when you split up each group will take longer to kill enemies and have a much higher risk of dying. This tends to cascade into even more problems, where one group will have to come and rescue the other one that died, likely having to take on the same enemy force that's really too strong for two squads. Sometimes it's tempting to try to get more things done at once by splitting up, but the many disadvantages of trying to fight in smaller groups mean that it's almost always actually faster to stick together and deal with one problem at a time.
Important Enemy Units part 1
This section describes several generic enemy units that are worth your attention and may require special tactics to beat. This section is not about bosses; see notes on missions for boss tactics.

One of the special challenges of the harder units that are fielded as part of general enemy forces is that you not only need to beat them; you need to beat them efficiently. This is because they are only one part of a mission that may also contain other challenges such as more tough units and a boss. Bosses don't share this difficulty; it's generally fine to blow all your strongest abilities on bosses. But there are scenarios where you might need to kill six Carnifexes in one mission, and a boss at the end. That requires good use of resources.

Seer Council
The Seer Council is quite possibly the single scariest standard enemy in the game. You face them often in Eldar missions; expect them to appear in almost every mission versus Eldar through the late game, and Idranel summons them when you fight her in the mid game too.
Seer Councils are extremely durable (enough to survive more than one grenade), not vulnerable to anti-armour weapons because they're infantry, do heavy damage both in melee and at range, do area of effect damage at range, and knock down your infantry with their leap. They also move reasonably quickly.
In my experience, the true hard counter to Seer Councils is the remote detonator. Remote detonators are good against all manner of enemies, but many of those enemies are also vulnerable to other weapons that the Seer Council is barely affected by. Remote Detonators do enough damage to kill Seer Council squad members on full health, and have enough range to hit the entire squad pretty easily even while they run past. In Eldar missions you should always be looking ahead, and if you see a Seer Council, use a remote detonator to destroy that group of enemies without having to engage it.
Remote Detonators are much harder to use to this effect in defense missions, and versus Idranel. On defense missions you have to place the remote detonator far enough away that it doesn't threaten your squads or power generators, and you often don't have time to do that before the first Seer Council arrives. Cluster mines are helpful here; they'll take away a big portion of each squad member's health if not kill them, and it's ok to have the rest of your army fight a single Seer Council now and then, especially if they have the durability of Terminator armour.
When a Seer Council is summoned into the fight right on top of you, my favourite tactic (as explained in the mission descriptions above for Idranel of Ulthwe and Secrets of Angel Forge) is to place a remote detonator, then use a Rosarius and detonate it. This quickly and easily kills the Seer Council without damage to your own forces. You have to save your Rosariuses for the boss fight to be able to do this, but the ease with which you beat a difficult part of the final fight makes it worth doing. You also have to plan ahead; you can't bring Thule if you're planning to do this (and care about performing well) because Rosarius doesn't affect him; he'll still take damage from the remote detonator.
Cyrus's smoke bombs are very helpful as they seriously slow down the Seer Council, buying you some much needed time.

Looted Tank
The best thing about Looted Tanks is that you face them very rarely. The main places you'll find them are the Greenskin Armour mission in the midgame and Raid Against the Warboss in the late game. They also show up on a couple of late game randomly spawning missions. The main challenge of the Looted Tank is that it moves very quickly once it gets going. Generic anti-armour tactics are good against them; missile launchers, melta bombs, remote detonators. Mainly you want to do lots of damage early on so they don't have much time to start driving around at high speeds and causing trouble.

Fire Prism
Fire Prisms are a bit more common than Looted Tanks but pose similar problems. You'll see them on Fire Prism Assault, Secrets of Angel Forge, and The Wailing Doom. They move very quickly once they get going, so they're hard to catch and hard to target with your high damage abilities. Fire Prisms have an extra threat compared to Looted Tanks; their prism cannon does huge knockback in a big area in addition to damage. This means it's difficult to fire a lot of the best anti-vehicle options. Remote detonators are a great opening to the fight, to remove most of their health immediately. If you want to use a remote detonator against a Fire Prism, it has to be the first move you make; once the Prism takes some damage it'll start moving around at high speed and be almost impossible to hit with the immobile detonator. Terminator armour and Tactical Advance are good to reduce damage and knockback done. You almost always want Avitus with a missile launcher (if he's not wearing Terminator armour) since those don't require setup. Melta bombs are nice as an additional tool. Weapons which stun vehicles (such as power fists) are helpful to stop the Fire Prism moving around for a bit.
Important Enemy Units part 2
Spore Mines
Spore mines have very little health but explode and do serious damage in an area when they die. They float towards their target pretty slowly. Fortunately, you don't face these too often, but when you do you need to pay attention to them to take them down efficiently. The two key rules of taking down spore mines efficiently are to bring more than one squad with decent ranged firepower, and to only have the ranged squads engage the mines. This isn't too hard; most of the spore mines you fight are before you get Thule, at which point you'll pretty much always have at least two of Tarkus, Avitus, and Cyrus. You want to get your ranged squads close enough that they can shoot the spore mines, but no closer. Then make sure your ranged squads stay still and don't move, so that they'll be shooting the whole time as the mines get closer, and you should be fine. You want to have two squads at least working on shooting down the approaching mines so that if the mines get close to one of your squads you can run them away and the others will still be shooting at the same time.
Another option, which can work if you execute it right, is to take advantage of the Force Commander's invulnerability on charge, or Thaddeus' invulnerability on Assault Jump (unlocked by Health 3 and Health 2 traits respectively). If you have these traits, you can try triggering the invuln, then running the relevant squad through the spore mines to detonate them all without doing any damage. Remember that the invulnerability only triggers after the charge/jump is complete; you can't charge or jump directly into the mines, you have to charge or jump to just in front of them, then run in. Make sure to allow some extra space for if the mines move close while you're charging/jumping. This tactic is less practical if there are lots of other enemies around, as it tends to put your squad in an exposed position far away from their allies. However, it works relatively quickly and doesn't require much space to manouevre.

Carnifex
Among the scariest enemies you face in this game. These guys have huge health, deal damage rapidly (often killing full health infantry in two hits), show up fairly often on Tyranid missions, and aren't even bosses. Carnifexes are the Tyranid equivalent of vehicles, but Melta bombs don't work on them. Fortunately, remote detonators and missile launchers still do very respectable damage against them. This is one of the reasons it's a good idea to keep Avitus using a missile launcher even when you don't expect vehicle threats; the anti armour damage option gives you tools to deal with anything armoured that turns up unexpectedly, while a heavy bolter wouldn't be able to do the same. Artillery is also pretty good; a while placed artillery strike can seriously injure or sometimes kill a Carnifex, especially in the early part of the game.
Cyrus's smoke bombs are great against Carnifexes. They already move kind of slow; slowing them down further buys you a lot of extra time to kill them before they start killing you.
As much as possible you want to prevent Carnifexes from getting the opportunity to do damage. This means (obviously) keeping your ranged specialists away from them, but also only allowing your Force Commander or Thaddeus to go near the Carnifex while benefiting from the invulnerability granted by their charge and assault jump. You want to get them out of there before the squad can take damage again. Tarkus's Health 4 trait can be great for absorbing damage versus Carnifexes; as long as he has energy they won't be able to kill him.
There are ranged Carnifexes in the game, but those are almost always bosses. The ones you fight in the normal course of a mission are usually melee.
Technical Details which help you play better
Use hotkeys for abilities
Use hotkeys for squad selection.
Hotkeys massively increase the speed of issuing commands, which makes a big difference when fights can change very quickly. Your mouse should never go near the bottom right of the screen.
If you double tap a squad's hotkey, your camera centers on them.

Although Reinforcement Beacons allow you to reinforce lost members of your infantry squads, the beacons do not cause or increase health regeneration on the squad members who are still living. Your squad members and leaders will regenerate health passively whenever there are no enemies nearby. If enemies are nearby, they won't regenerate at all. This means it's often a good idea to pause for a few seconds after winning a fight before moving on to the next group of enemies; give your squads time to regenerate back up to full health. Health regeneration also applies to enemies when you aren't near them, so enemies you've done some damage to may heal up if you retreat or they get away. This is particularly noticeable on units like Fire Prisms and Falcons, which move fast enough to leave you behind.
Being near Strategic Assets, unlike Reinforcement Beacons, will restore some health to your squads every few seconds whether there are enemies nearby or not. This also applies to Thule. This means it can be worth taking a Strategic Asset mid-fight for the extra regeneration and reinforcement.

The squad panel on the right hand side of the screen during missions represents the health bar of the squad leader, and whether or not they have all their squadmates. You can't see the health of the additional squadmates on this panel. If you select a squad in game, the hit point number shown under their portrait and the green bar over their head is the cumulative health of all squad members. If the squad is missing a member, this number will be capped below maximum because of the missing health belonging to the member you don't have. The health value for a squad shown on the equipment screen from the planet map is the health only of the squad leader, not of all squad members put together. Most of the benefits granted by equipped wargear only benefit the squad leader, not all members of the squad.

You always get all wargear that drops during missions, whether you click on it or not. It's perfectly fine to never click on any wargear that drops in a mission; it'll still be in your inventory after the mission ends. This also goes for wargear dropped by bosses during cutscenes. You also keep wargear from missions you failed or quit.

If you take a strategic asset in a mission, but then fail that mission, you still own that strategic asset (provided the generators didn't get destroyed). This also goes in defense missions if you capture an asset other than the one you're tasked with defending. You can take a new asset during a defense mission but lose the old one, and you'll still have the new one after the mission is over.

Thule does not passively regenerate health at all under normal circumstances. He does regenerate health when next to a Strategic Asset (but not a Reinforcement Beacon). Other than that, use Rites of Repair or Thule's own Ancient Defender ability to heal him.

A hero cannot be damaged by any area of effect ability they themselves cast, even if that ability would kill their allies and squadmates. This goes for grenades, artillery, remote detonators, and orbital strike.

Remember you can rotate the camera with near total freedom by holding down the Alt key. Sometimes the default camera angle is awkward for seeing what you're doing in certain parts of the map. Rotating the camera can help you see and control your squads better.

You can usually press Esc to cancel any dialogue that is playing, except for a few cases where it's unskippable. Although this doesn't skip cutscenes directly, some cutscenes contain events which trigger based on when certain lines of dialogue are said, so cancelling dialogue can cause cutscenes to finish faster if you're impatient. Missions also usually won't end until dialogue is finished or cancelled.
2 Comments
Soy Mutant 21 Sep, 2024 @ 11:49am 
Hey, earthworm!

Have you heard of new campaign mod Ultimate Exterminatus?

I think it would be interesting for you to check out and possibly make a guide!
Brother Arivus 12 May, 2024 @ 9:50pm 
Very helpful indeed, makes me try to allocate points to traits I don't take before. Also I found this Thaddeus build that is utilizing his ranged traits for stun build, the build will take Health 3, Range 3, Melee 2, Energy 1, with Deathdealer(l20 Bolter) and Mail of Immortals armor.

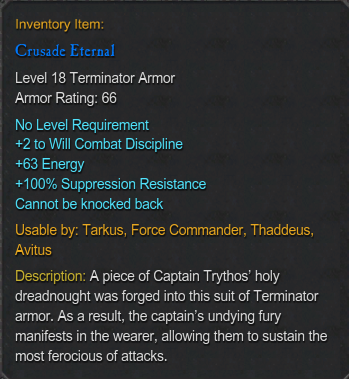
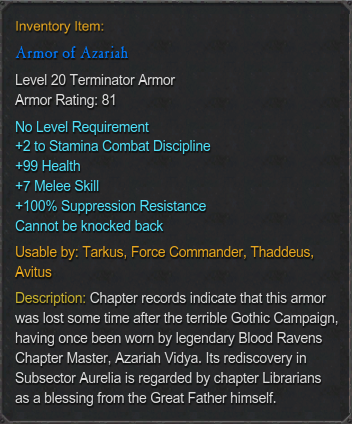
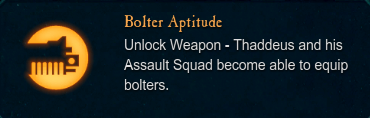
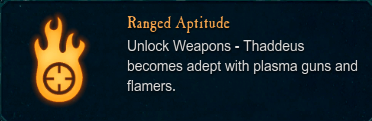
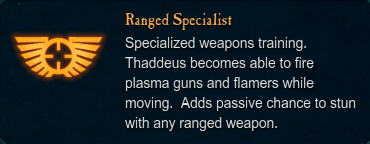
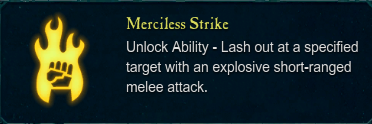
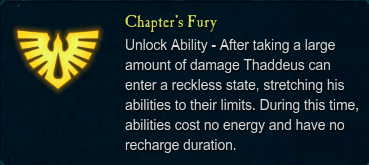
Since the goal of ranged Thaddeus is to stun, and Merciless Assault is a chaos rising traits, no reason to go Terminator with Thaddeus, but his basic attack will have passive chance to stun enemy coupled with the bolter fast attack speed. This build can still be using melee power weapon if mission demand and only lacking in the Chapter Fury for jump spam compared to usual non terminator Thaddeus.