
Install Steam
login
|
language
简体中文 (Simplified Chinese)
繁體中文 (Traditional Chinese)
日本語 (Japanese)
한국어 (Korean)
ไทย (Thai)
Български (Bulgarian)
Čeština (Czech)
Dansk (Danish)
Deutsch (German)
Español - España (Spanish - Spain)
Español - Latinoamérica (Spanish - Latin America)
Ελληνικά (Greek)
Français (French)
Italiano (Italian)
Bahasa Indonesia (Indonesian)
Magyar (Hungarian)
Nederlands (Dutch)
Norsk (Norwegian)
Polski (Polish)
Português (Portuguese - Portugal)
Português - Brasil (Portuguese - Brazil)
Română (Romanian)
Русский (Russian)
Suomi (Finnish)
Svenska (Swedish)
Türkçe (Turkish)
Tiếng Việt (Vietnamese)
Українська (Ukrainian)
Report a translation problem


When you reach the basement level, you'll see the Thief. Speaking with him will start a boss fight. Make sure you're ready before talking to him.
⚠️Before you move another step, take off the stuff you have equipped on Ramus. Or at least, make sure he doesn't have anything important on him.
Fraud Buster - [L1] Defeated the Fake Dragonmaster
After the boss fight, exit the dungeon using a Dragonfly Wing.
I've confirmed two times that you do not need to unequip Ramus before the fight, you can do you right afterwards.
For example:
- Go to the dock and fight the boss
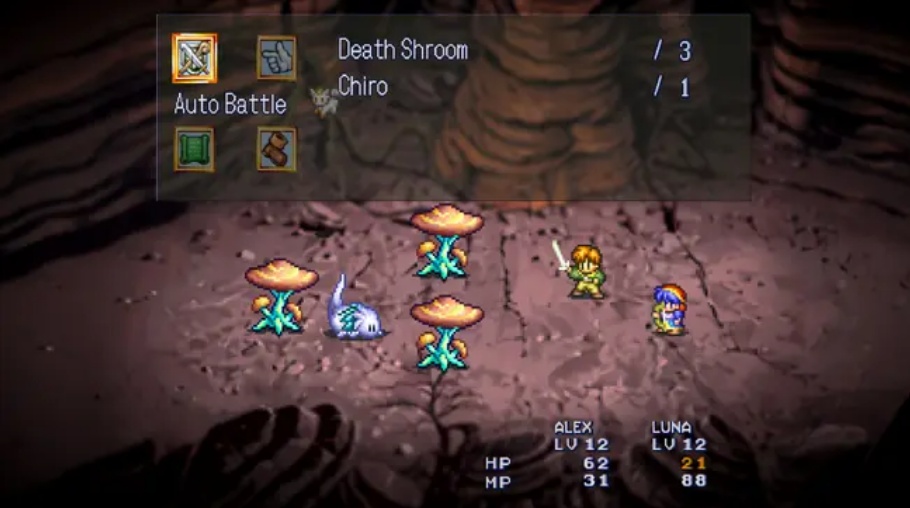
- TIP: Luna can buff your allies twice to do massive damage to the boss before getting diminishing returns!
- Get on the boat
- etc
Instead of:
- Go to the dock and fight the boss
- Get on the boat
- Buy stuff
- Talk to Ramus and Nash and Luna twice
- Go to the deck for a scene
- etc
- etc
- TIP: Luna can buff your allies twice to do massive damage to the boss before getting diminishing returns!