Memoria

Memoria

559 ratings
Memoria: A Very Detailed Step-By-Step Walkthrough & Achievement Guide (w/ Images)
By Ceaseless Duality
This guide is a thorough walkthrough for the game and explains how to get all achievements.
25
2
4
2
2
2
2
   
Award
Favorite
Favorited
Unfavorite
Chapter 1 - Beginning
Fair Warning: Chains of Satinav and Memoria are directly linked. If you haven't played Chains of Satinav, you might not understand a lot of the context in Memoria. Thus, I highly suggest playing Chains of Satinav before Memoria.

Beginning the Game:
If you haven't played Chains of Satinav or Memoria before, then I suggest saying "yes" to an introduction of the game, because I'm not going to explain any of the gameplay mechanics to you.

Whether or not you opted for the introduction to the game, go to the right and enter the clearing.

After the little girl asks for help with her pile of sticks, open the chest in the foreground and pick up the glass bottle.
Use the destruction spell to break the glass bottle, turning it into shards.
Place the shards with the stick fortress, then use the repair spell. Behold, the stick fortress is now in the bottle.

Fahi seems to like it if you say "yes, please" to his offer of tea.

Achievement: Getting the Job Done
Tell Fahi "No, I don't like them" and that will prematurely end the game, but you'll get this achievement before the credits roll.

When you get back to this original point:
Tell Fahi "Yes, I like riddles" then, "I'm ready."

This will lead into Fahi's dream ...
Chapter 1 - Sadja the Tomb Raider
Once you have control of Sadja:

Talk to Rachwan and the Warrior if you'd like, but the main person that you need to talk to is the Magician to learn more about what's going on in this scene. I recommend reading all dialogues.

After talking to the others and inspecting the area, hover the cursor at the bottom-right of the screen and go to the hall.

Inspect the area if you'd like, then hover the cursor around the middle of the screen and go to the battle site.


Pick up the dagger, which is near the monster's hand.Then, use the dagger on Harun's bag, causing the contents to fall out.


Go down the path a bit, and pick up the alcohol, brush, and bandage.

Go back to where the others are and give the Magician the brush.

To the left of Rachwan is some mystery fluid (marked as ???) oozing out of the wall. Use the dagger on the mystery fluid ???, then give the sticky dagger to the Magician.

In the dark room, pick up the dusty silver platter.


Combine the alcohol with the bandages, then use the alcohol-soaked bandage on the dusty silver platter, and it'll become a shiny silver platter.

Try to take the incense bowl and Sadja will cut her hand on the hook. Try to take the incense bowl again, and this time it'll go into your inventory.

Put the shiny silver platter on the bloody hook.

After the guardian crashes through, interact with the staff in the upper-left corner.

To the left, take the dusty silver platter off the bloody hook. Then, use the bandage on the bloody hook, so that it becomes bloody bandage.

Put the bloody bandage with the incense bowl.
Then, use the incense stick on the glowing eyes, which will make it into a smoldering stick.
Combine the smoldering stick with the incense bowl with the bloody bandage, and it'll become a smoking bowl.
Hang the smoking bowl onto the hook.

Go through all the dialogue options with the staff. After Sadja is given the new activation/deactivation spell, use it on the darkness.

Select "free the staff" and end the conversation.

Select the metal ball on the ground behind the guardian's hand.


Directly after, select the ring attached to the small pillar/statue. This will send the metal ball through the ring.
Select the metal ball again, then directly after, select the hole in the ground. This will release the staff.


Pick up the staff.

Use the activation spell on the guardian's hand (which is marked remains).
Once the hand is off the fallen Magician, interact with him to receive some items and dialogue.

Use the deactivation spell on any of the braziers on the walls.
Use the sticky dagger on the sliver of light.
Then, interact with the sliver of light.
This will show outside of the tomb. You can see Sadja's face through a small hole. [When you hover the cursor near it, a back option will show. But don't go back yet.]


Use the activation spell on the guardian. As the guardian, pound on the ground 3 times. A brazier will fall. Pick it up, and throw it at the colonnade.

Achievement: Causing Tremors
Have the guardian pound on the ground until this achievement pops up. I think I pounded on the ground 5 or so more times, but I didn't keep count.

To shut down the guardian, right click. Then, go back to the tomb.

Use the activation spell on the darkness again.

On the right side of the room, there's a door with a hole in it. Interact with the hole.

You'll see the entrance of the tomb. Use the activation spell on the brazier on the ground.


Next, use the activation spell on the guardian. Have the guardian pick up its own arm and throw it at the beetle leg. (The guardian automatically deactivates after this.)
Now, the beetle leg is close to the door.

Combine the staff with the bandage. Then, use that to scoop up the beetle leg.
Use the sticky dagger on the beetle leg, which will make it become a sticky leg.
Put the sticky leg on the beetle that's still on the door.


Come back into the tomb. Notice that there is another hole in the door at the bottom on the left side.
Take the metal ball from the hole in the ground and put it through the bottom-left hole in the door.
Note: Sadja will not actually take the metal ball from the hole when you initially click on it. So, be sure to click on the hole in the ground once, then directly click on the hole in the door after. This gets her to move the metal ball.

This is what it should look like when you've moved the metal ball:


Look through the hole in the door again.
Use the activation spell on the guardian's arm, which is near the door.
With the guardian's arm, select the ornamental arch.
Once it's holding on tight, select the metal ball. This will send the metal ball down the tomb entrance a bit.


Now, use the activation spell on the guardian (not the arm).
With the guardian, select the metal ball. This will cause the guardian to pull hard on it, but it won't be strong enough to break down the door.
Again, use the activation spell on the guardian. Have the guardian select the metal ball, then directly afterward, select "to the hall." This will send the metal ball out into the hall.

Once you've got control again outside the tomb, use the activation spell on the guardian standing next to the metal ball.
As the guardian, select the metal ball.
Right click to deactivate the guardian. Notice that the guardian is still holding the metal ball.
Next, use the activation spell on the Colossus (shown in the image below). As the Colossus, select the guardian, which is standing on its giant hand.


While talking to Rachwan, select "Ruby."
Chapter 1 - Making a Salve for Nuri
Now, we're back with Geron.

Go through all dialogues with Rahi.

Once Geron is back in his home, select the recipe, which is next to Nuri.


Next, pick up the whirlweed plant, which is next to the window.
Put the whirlweed into the birdbath, which is in the center of the room.
Use the knife on the birdbath with whirlweed, which turns it into birdbath with whirlweed juice.
Use the knife on the curtain, which is on the left side of the room.
Then, use the strip of fabric on the pot, which is to the right of the curtain.
Now, use the greasy rag on the birdbath with whirlweed juice.
Use the newly made salve on Nuri.
Chapter 2 - Rahi's Attacked Camp Site & Finding the Mask
Achievement: Chapter One Complete
This achievement automatically occurs upon starting Chapter 2.

During the conversation with Nuri, only 3 options can be selected, so choose which 3 things you'd like to read about.

Examine the rubble to the right, if you want. Then, head down the stairs to the campground.

After the initial scene ends, select Nuri (in the inventory) and have her hide behind the stone pillar that Owlric (grumpy, old guy) is talking to.

Select these dialogues:
"Eleven to fifteen."
"Crocus-colored brooch."
"From the north-east."
"To the north-west."


While the Owlric and Bryda are distracted, go around the clearing.


Use the knife on the barrier. Inspect the chest; it's locked. Go into the tent.

The key to the chest is found under/in the fifth object Geron searches.


Search any of the following objects:
Rug
Pillow
Cushion
Bed
Hammock
Wall hanging
Small Box


Keeping it simple, I found the key in the small box. Pick up the key. Pick up the exotic cucumbers. Use the knife on the wall hanging, and leave the tent.

Try to take the mask from the stone pillar; it's stuck.
Take the wedge underneath the cart. (After this, it looks like your path is blocked, but it isn't.)
Use the key on the chest, then open the chest.
Take the chisel from the chest; the bottle fortress can't be taken.
Go back around the clearing.


Notice the hammer in the bag next to the stone pillar. Seriously, take note of it.
These next actions need to be done quickly or you'll have to try again.
Use the destruction spell on the bottle fortress in the open chest to the right, and while Owlric is distracted, grab the hammer.
If you fail at this the first time, use the repair spell on the bottle fortress, then try again.


Go around the clearing again.
Go back to the stone pillar where the mask is stuck.
Combine the hammer and chisel. Use the hammer and chisel on the mask. Geron will automatically take the mask.

Head toward the entrance of the tent, and Geron will be intercepted by Owlric.

Achievement: Honesty is the Best Policy
Choose these dialogue options while talking with Bryda:
"I don't know."
"It was behind the tent."
"Geron."

The achievement will appear after Bryda stops talking.

Go through all the dialogue with Bryda.
Chapter 2 - Finding the Fifth
Back in Geron's home, go down the stairs to the outside.
Once outside, go to the marketplace.
Examine the Fat Ham Inn, if you wish. Then, go in to the taproom.

Go through all the dialogue options with Jacomo.
Then, talk to Hilda and go through all dialogues with her.

Achievement: Crispy
Select the pork roast over the fire to the left.

SAVE YOUR GAME! Re-loading is needed to get both of the next achievements.

Notice the group of heroes sitting at the table.

Achievement: Nosebleed
Question all 3 "heroes."
When the option is available, choose "Express suspicion."
Then:
"The Thorwalian is lying."
"He isn't hung over."

The achievement will appear when Geron gets kicked outside.

RE-LOAD.

Achievement: Master Detective
Question all 3 "heroes."
When the option is available, choose "Express suspicion."
Then:
"The Thorwalian is lying."
"He wasn't even here."

The achievement will appear when Bryda stops talking.


After Geron is finished talking with Bryda, he obtains a new spell.
Chapter 2 - Mastering "Odem Arcanum"
Use the newly obtained Odem Arcanum spell.
Select the pink magic glow.
After Bryda leaves, feel free to explore a bit. Talk to the merchant and examine random things. This is all optional though.

When you're ready, go back to Geron's home.
Once you're inside Geron's home, use the Odem Arcanum spell again.
Select the magic glow.
There will now be a heap of shards and purple shards in the inventory.
Combine them and use the repair spell on them. This will create a glass box.

Go back to the taproom at the Fat Ham Inn.
Give the charcoal and parchment to Hilda. She'll give Geron a rough sketch.
Notice the wine barrel to the left of Hilda.
Use the destruction spell on the wine barrel. (Poor Hilda.)
Use the wine jar with the leaky wine barrel, then do the same with the glass box.
There is now red wine and a wine bowl in the inventory.
Give the red wine to Jacomo.

Leave the taproom and head to the Academy of Magic, which is to the right of the Fat Ham Inn.
Enter the academy and someone will stop Geron. Choose the only option given.
Use the middle door that indicates "up."

There's a door to the left (Magister's Chamber), a hallway to the right (into the dormitory), and a door to the right (into the library).
Go into the door on the right (into the library).

In the library, on the right side of the room, there's a shadow.


Interact with the shadow, and go through all dialogue.
After all the dialogue, give the shadow the exotic cucumbers. The shadow offers a service.
Then, give the shadow the wine box. The shadow turns it into a fake ruby.

Leave the library, and go into the dormitory.

SAVE YOUR GAME! Again, there are two achievements to be had, and if you want both, re-loading is needed.

In the dormitory, use the Odem Arcanum spell. This will reveal a magic glow on the fourth chest from the entrance.

Achievement: Clumsy Oaf
Get caught 3 times by the student Novice.

RE-LOAD.

Achievement: Masterful Sneaker
Do not get caught at all!
Directions: (refer to the image below for help)
Go to the left side of the room.
Go behind the red curtain.
Go around the second bed on the left side, then turn between first and second bed on the right.
Go to third bed (on the side with the chests).
Use the repair spell on shards.
Use the Odem Arcanum spell, and select the magic glow.
Receive the power accumulator.
Also, take the strange artifact (next to the Novice).
You must go back the same way.
The achievement appears once Geron has left the dormitory without getting caught.


Despite telling the guard that Geron was at the academy to see Owlric, it is completely optional to talk to him. If you wish to, go to the Magister's Chamber. For story development sake, I suggest it.

Next, leave the academy and head to Geron's home, but do not go inside it.
To the left of Geron's home is a pathway, which takes you into the forest; go there.

Don't talk to Bryda yet.
Select the bag at the entrance to the camp site. Geron will receive a magic seashell.
Talk to Bryda only if you want more information on the tasks at hand, but it isn't necessary.
Use the magic seashell on all the stone pillars. At the fourth and final stone pillar (behind the tent), Geron will be able to create a good sketch.

Achievement: Baited
Give Bryda the fake power accumulator before giving her the real one. The fake one looks like a Fabergé egg.

Give her the good sketch, fake ruby, and real power accumulator.
Watch some weird stuff unfold.


Chapter 2 - Sadja the Camper
Note: I'm not sure what would have happened if Sadja gave Rachwan the silver platter, but I was trying to explore for a moment, but when I moved Sadja around a bit, that broke the deal. It seems like it wouldn't make a difference anyway.

Well, time to catch "dinner."

Pick up the wooden logs, pelt, and rope.


Go down the path a bit, and pick some Dandelion flowers.
Put the Dandelion on the flat stone, in front of the tree.
Put the pelt on the flowery meadow (across from the Dandelion).
Use the dagger on the wooden logs, which turns them into wooden stakes.
Then, put them on the pelt, which turns it into a fastened pelt.
Take out the stakes, but the last one won't budge.
Use the rope on the pelt.
Pick up the stick (near the tree), then use it with the tied-up pelt.

SAVE YOUR GAME. Just in case you screw up on this next part.

Pick more Dandelion, and place it near the hole at the end of the path.
Select the bushes with the end of the rope. Keep selecting it until you catch the rabbit.

Achievement: Firun's Disciple
Catch the rabbit on the first try.

Pick up the closed trap.
Take the flints from Rachwan.
Put the stakes on the fireplace.
Use the flints on the wooden stakes.

When you have control of Sadja again, go up the hill.
Chapter 3 - Sadja the Forest Whisperer
Achievement: Chapter Two Complete
This occurs as Sadja begins Chapter 3.

Once you've got control again, on the ground, near Sadja's feet are red berries. Pick them up. I know they're supposed to mark the path, but this is the beginning, so it's irrelevant to mark it here.
At the beginning of this forest, there are three ways to go: up to the right, up to the left, or directly left. All of them say "along the path."

Follow these directions to get the next achievement:
Go up to the right
Go directly left
Go up to the left
Go up the middle (biggest) path


Achievement: Phex Be With You
Find a fox in the forest.


Now go back to the beginning: up, right, right, right.

Achievement: The Journey's the Reward
Go on a path so many times. I think it's about 30 or so, but I didn't keep exact count. It didn't seem like it was more than that.
To get this, just wander around, but just make sure you don't go where you're supposed to go to advance the story. Use the red berries to mark your paths to ensure you don't get lost. To mark a path, simply use red berries on the path.
If you come across a part of the forest where Sadja finds her dagger in a tree, you've stumbled upon the path to advancing the story. Don't freak out, just go back the way you came until you get the achievement.
You can just play it safe and go back forth on the same two paths, if you wanted, but that can get boring.

To advance the story ...

From the beginning of the forest:
Go directly left.
Go down the middle (biggest) path.
Sadja will find her dagger in a tree.
Go up to the right (NOT directly right).


Go down the middle path four times. Suggestion: Mark all your paths with red berries to get back easier later.

You'll get to a monolith. Take the rope with loop on the ground.


Go back to the dagger in the tree: left, right, left, right, right.

Use the rotten rope on the dagger. Of course, pick up the dagger once it has fallen.

Go back to the monolith (up to the right, then down the middle path four times).

Once at the monolith, go up to the left.
On the next screen, you'll want to go left, but there's a thorn bush in the way. Use the dagger on the thorn bush.
Once the path is clear, you can go left.

Finally, Sadja finds the staff, but it's caught in a giant web.


Use the dagger on the shrubs. Combine the shrubs with the rotten rope, and it'll become bundled-up shrubbery. Next, use the flints on the bundled-up shrubbery. Use the fire on the spider web.

Achievement: Level Up
Save the staff from the spider web and giant spider.
The achievement is received once Sadja and the staff stop talking.

On this next screen, there's no where to go but straight ahead.
Next, Sadja will come across a destroyed tent and campfire. There's nothing to do with either though. Press onward.
No, it's not your imagination - the fog is getting thicker.
Go down the middle path twice. Then, go up to the left (not directly left).

Yay! We're out of the woods.


Select the waterfall.
Chapter 3 - Sadja the Rescuer
After talking with the Amazon warriors, the staff requests that you obtain Rachwan's necklace.


Pick up the stone. Use the stone on the small waterfall at the bottom of the screen.
Hover the cursor on the right side of the screen until it gives the option "up." Then, go up.
Use the dagger on the branch. Use the branch on the large waterfall directly behind where you cut the branch.
Go back down and pick up the branch with necklace.
Sadja now has a new spell - the send vision spell.
As the staff instructs, use the send vision spell on Rachwan's necklace.


Select Rachwan (his torso area), the old Amazon, and the rock painting of a campfire. Click on ONLY those three things.

Sadja is given a piece of cloth from the Amazon. Use the send vision spell on it.
Select Rachwan, the Amazon shield (to the left), and the rock painting of a fruit. Click on ONLY those three things.

Use the dagger with Rachwan to undo his ties.
Chapter 4 - Owlric's House
We're back with Geron again. Go through the first two dialogues with Fahi.

Achievement: Chapter Three Complete
The achievement will be received once Geron and Bryda stop talking.

Go through the rest of the dialogues with Nuri.
Geron will automatically go to the academy.
Check the latrines, which cause Geron to talk with Bryda.
Geron will automatically go to Owlric's house.
Select the door on the house twice. It's locked.
Select the window on the left.
Talk to the crows, which are perched on a mannequin in the foreground to the right.
Go through the dialogue with Nuri, ending with asking her to enter the house.


Examine the lockpicks.
Pick up the ruler. Use the ruler on the books. Pick up the lockpicks.

Now in control of Geron again, use the lockpicks on the door. Go into the house.

Achievement: Doombringer
Touch the statue (of supposedly Owlric).

Achievement: Sadist
Repair and destroy the statue 8 times (I think). To do this, use the repair spell on the heap of dust, then touch the statue to break it again.

There's a ladder on the left that goes to the attic. Proceed up there.


Examine the skull, if you want.
Take note of the door on the right side of the room, with a lock. The lockpicks won't work on it.
Pick up the broom, then go back down.
If the statue isn't already in a heap of dust, then touch it to make it so.
Use the broom on the heap of dust, which pushes it over a bit.
Then, take the drawer that's sticking out of the side of the table with the honey on it. Use the drawer on the heap of dust.
Then, use the repair spell on the heap of dust.
If you try to take the key, it'll only wither into dust with Owlric.
Pick up the honey from the table.
Then, pick up the candle in the background. Use the candle on the key in the statue's hand. Once it's covered in wax, take the key.
Use the waxen mold with the honey.

Go back outside.
There's now a shadow on the left side of the house, beneath the window from earlier. Talk to the shadow and go through all the dialogues.
Then, give the waxen mold with honey to the shadow.
Use the knife on the enchanted waxen mold to receive the key.

Go back into the house. Go up to the attic. Use the key on the lock. Go through the door and into Owlric's office.

It's the room Nuri went into earlier.


Select the drawing.
Take the container, then examine the secret compartment.
Look at the studies. Then, select the petrified rat and it'll turn into a heap of dust.
Use the container on the heap of dust.
Use the container with dust on the strange gleam on the floor.
Use the repair spell on the strange gleam.
Pick up the ruby.
Chapter 4 - Sadja the Rachwan Tamer
Into another dream of Sadja again, go through the dialogues.

Sadja will receive yet another spell - to petrify and de-petrify.
Use the petrify spell on the plant (above Sadja's head), then the de-petrify spell on it.

Try to use the mask (left side of inventory) on Rachwan.

Use the send vision spell on Rachwan's necklace.


Select these 3 things ONLY: icy glitter, icicle, and snow.

Put the branch (from inventory) onto the fireplace.
Use the petrify spell on the thorn bush.
Use the flints on the stick on the fireplace.

Once Rachwan moves toward the fire, use the petrify spell on the grass. Then, use the mask on Rachwan.

Select these dialogues:
"Fdan Fasgadan Esplas De Quatan!" (second dialogue)
"Hmurilor Grasz Ferell Goran!" (third dialogue)
"Hll Bemutir Gherul Fellan!" (second dialogue)
"Juntir Quatan Pheluntir Sodan!" (first dialogue)

Quite a short dream ...
Chapter 4 - Fun with Riddles
After waking up rubyless and hearing a mysterious voice, have Geron leave Owlric's office (and prepare yourself for some weird stuff; in fact, now would be a good time to save the game).

Suggestion: SAVE YOUR GAME.

Refer to this image very carefully:


Select each stone head in the order I've put them in the image above and for each say the specified dialogue:
For #1 - "Air"
For #2 - "Ice"
For #3 - "Water"
For #4 - "Earth"
For #5 - "Ore"
For #6 - "Fire"


After the stone heads disappear, examine the being (marked as ???).
Geron will automatically take a book, and then go down to talk with Bryda.

Bryda and Geron go back up to Owlric's office and begin to read from the newly obtained book ...
Chapter 5 - Sadja the Determined
Achievement: Chapter Four Complete
The achievement will appear once Sadja has dialogue options.

Go through the dialogue options with Sadja (which you'll do several times).

Once you have control of Sadja, IMMEDIATELY SAVE YOUR GAME. There are two achievements to be had, and re-loading is necessary to get them both.

Achievement: Renegade
Throw the dagger, staff, and mask into the abyss.
The achievement doesn't appear until Sadja is put into a guest room.

RE-LOAD.

Achievement: Being Kind
Give the dagger, staff, and mask to Xerxes (the air adept).
Again, the achievement doesn't appear until Sadja is put into a guest room.

Try to leave the guest room (to the main hall), but Xerxes will stop you.

Touch the plant that's swaying on the left side of the room.
Talk to the air spirit and choose these specific things for the achievement ...

Achievement: A Knack for Spirits
Get the air spirit to help you on the first attempt.

While talking to the air spirit, choose:
"Play with me!"
"Let's play hide and seek!"
"You hide me from the magicians!"


The air spirit will take Sadja to anywhere she'd like in the place.


I've numbered the locations arbitrarily.
1 = To the main hall
2 = The guest room
3 = Onto the roof
4 = To the observatory
5 = Left window
6 = Right window
7 = ???

First, go to the left window (#5).
Notice (but don't go for) the water kettle to the right and the dagger on the table to the left.
Do these next instructions quickly.
Take the water kettle and put it on the stove. Go out the same window.
Now, from the outside again, go to the right window (#6).
Quickly grab the dagger from the table where the ore adept was once sitting. Go out the same window.

Next, go to the observatory (#4).


There are three horns in the center of the room.
Select the first horn, then the sphere right above it.
Do the same for the next two.

Achievement: Big Brother
Overhear the conversation above.

Leave the observatory.
Go to the spot marked with ??? (#7).

Sadja will talk with the admiral. Go through all the dialogue.
After the scene momentarily goes to Geron and Bryda, then talk to the admiral again to finish up unread dialogues.
After all the dialogues have been read, give the admiral the dagger.
Chapter 5 - Sadja the Spirit Collector
When you have control of Sadja again in the hall with all the dragon statues, there's a dark corner to the right of where Sadja is standing. Examine it. She will take the lamp that causes the darkness there.

At the center of the room is a pathway that leads to the main hall. Go that way.

The main hall: (sorry about the typo)

From left to right, there's a pathway to the guestroom, the ore laboratory, the dragon hall, outside, ??? (underground lake), and ??? (library).

Go to the library, which is the ??? pointing up. Once inside the library, hover the cursor to foreground until it says "to the reading room" and go there.
Once Sadja makes her way to the foreground, talk to Ariarchos. Go through all the dialogue. At some point, he'll give Sadja a drawing.

To leave the library, put the cursor all the way to the right until it says "back," then, go back to the main hall (there's a tiny doorway next to the giant statue).

Once you're back in the main hall, go to the ore laboratory. Sadja will automatically start talking to the ore adept. Go through all the dialogue with him.

Across from the staff on the table (toward the foreground) is a goblet. Pick up the goblet.
Next, touch the staff on the table.
Use the send vision spell with the goblet of the ore adept.


Choose ONLY the following things: ???, broom, and tablet.

Yet again, use the send vision spell on the goblet of the ore adept.
This time, choose ONLY the following things: ores, tea table, and mask.

After talking with the ore adept, give him the ruby (from inventory).
When prompted, choose "Pressure the researcher."
Use the newly obtained activation spell on the magical contraption.
Use the send vision spell on the goblet of the adept, then choose 3 objects (as far as I know, it doesn't matter which ones).

The ore adept will ask for the mask back, but alas, we need it. Use the petrify spell on the ore adept.

Pick up the ??? on the magical contraption. Now, the ??? and ore spirit are in Sadja's inventory.

Leave the laboratory and go to the main hall.
From the main hall, go back to the library, then to the reading room.
Use the ??? on the bookshelf to receive an ice spirit.

Examine all of the runes on the archway (up between the bookshelf and Ariarchos).
Leave the reading room and go out to the center of the library, near the giant ice statue.
In the inventory, use the enchanted ruby on the darkness.
Use the reversed darkness on the stained glass window on the library's floor. Examine the stained glass window (while up close) so that Sadja claims she sees water underneath. Then, use the reversed darkness on it again (while it's still up close); this very important or the next steps will not work.

Go to the main hall, then to ??? (underground lake).

Once at the underground lake, go to the end of the pathway. Use the ??? with the lake to receive a water spirit.

While still at the end of the pathway, behind Sadja (toward the foreground) should be an ornament. Examine the ornament.
Use the drawing with the ornament, then examine the ornament again.

This is how it should look just before examining the ornament for the last time:
Note: If the light isn't shining down on the ornament, then you didn't use the reverse darkness on the stained glass window while the view is close up.

Once Sadja examines the ornament, she'll appear in a secret room. I suspect that it's inside the monument across the lake, but I don't know that for sure.

Sit on the stool.
Use activation spell on the seal; nothing happens.
Use petrify spell with four plants, then use the activation spell on the seal again.

("Weird"? That's all you have to say, Sadja?)

Once the cutscene is over, Sadja will appear back near the lake.
Go back out to the main hall, then to the dragon hall.
From the dragon hall, go into the council hall.


Examine the seal on the right side of the room, and Sadja will enter a secret room again.
Sit down on the stool.
Use the activation spell on the seal.

Once inside the council hall again, use the ??? on the lantern blazing the brightest to receive a fire spirit.

On the left side of the council hall, select the area that says "follow the river's course." This will lead to outside. Then, select "Onto the roof" at the very top.

At the third garden bed from the right is an earth adept. Talk to her.
Despite what the earth adept says, use the ??? on the garden beds to receive an earth spirit.

Achievement: Elementalist
Receive all the elemental spirits.

Suggestion: SAVE YOUR GAME.

Hover the cursor over the giant hole and select "look down."

Sadja will see the captured prince, but also see a hexagon, with the air spirit already in place.

Refer to the image carefully:


Use each spirit on each part of the hexagon as labeled in the image above.
1 = Ice
2 = Water
3 = Ore
4 = Earth
5 = Fire


When all the spirits are placed on the hexagon, it becomes a seal. Examine the seal.
Yet again, Sadja goes to the secret room.
Sit on the stool.
Use the activation spell on the seal.

Momentarily, go through the dialogue with Geron and Bryda.
Chapter 5 - Sadja the Garden Seeker
Sadja is now a new place, near a monolith.


On the left side, there's an area comes up as "monolith" on the rocky wall. Examine it.

Achievement: Seek and Ye Shall Find
Find the Caverns of Fail.

Note: I seemed to encounter a slight glitch while trying to leave the Caverns of Fail. I had to click on the exit a few times before it would work. Maybe I was being too impatient, I'm not sure.

Now, examine the actual monolith (on the right). A seal will appear on the ground. Examine the seal.
Markings will appear on the monolith and a hole will form in the ground.
Use the rope (in the inventory) with the monolith to go down the hole.


Sit on the stone stool.

After the prince leaves, hover the cursor over the plants indicated in the image above. This will get the spirit to lift Sadja out of the hole.

When faced with the prince's servant, choose:
"What are you afraid of?"
"Kill me!"
"Expose lie"
"You can't kill me."
Chapter 6 - The Hunt
Achievement: Chapter Five Complete
This achievement is received after Nuri flies away from Geron.

Once you've got control of Geron, there's no other way to go but into the forest (at the bottom of the screen).

Area map:


From the map, go into the bog.
At the bog, across the river is a brittle rope. Use the repair spell on it. This will cause the rope to tighten and bring the tree trunk to the surface of the water.
Go deeper into the bog (to the right).

Talk with the group leader. Go through all the dialogues.
Go back to the bog entrance.
Go to the left side of the river, then use the destruction spell on the fixed rope.
Next, go into the forest. Then, from the map, go to the rock.

Talk with Sir Wrathling. Again, go through all the dialogues.
Next, use the Odem Arcanum spell. Examine the magic glow.
Geron will go to another part of the area and find the messenger. Talk to him.
Choose, "Send into the moor."
Afterward, it'll automatically go to the area map. Go to into the bog.

Upon arriving at the bog, there will be a scroll right at Geron's feet. Pick it up. Let the messenger sleep.
Leave the bog.

From the area map, go to the section of the woods that is farthest to the right.
You'll know you're in the right place if there's a group leader and a young magician on either side of a tree.
Talk to the group leader, and choose, "Pass on orders."
Leave this area and from the map, go to the waterfall.

Talk with Nuri.
Choose:
"Send Nuri out on a route."
"Start at the tent ..."
"... over the cliff ..."
"... to the river."
"Yes, cause some confusion."


Go back to the section of woods that's farthest to the right.
Select the tree.
Geron will automatically go to where Bryda is.

Go into the tent and attempt to talk with Bryda.


Once outside the tent, take the lamp.
Use the knife on the tent wall to the right. Look inside by selecting the tent wall.
When prompted for a sign, use the lamp on the forest map.

Geron will automatically go to Fahi. He'll also meet the true wielder of the magic that can help Nuri.
When talking with this someone, go through all the dialogues, but make sure to say "I'm ready" last.

*sigh* ... Oh, Nuri.
Chapter 7 - Sadja the Sibling Rival
Achievement: Chapter Six Complete
This achievement is received once another dream of Sadja begins.


Pick up the shuriken. Take the longsword.
Try to take the mace. When it falls to the ground, pick up the mace.
Combine the mace with the scabbard, and it becomes extended mace.
Combine the shuriken with the longsword.
Use the longsword with shuriken on the shield. Pick up the shield.

Use both the longsword with shuriken and the extended mace on the place of impact.
Then, use the shield with the rickety construction.
Hover the cursor above the newly made bridge until it says "up," then go up.
Grab the halberd.

Go back down.
Select the bridge to take the shield from it. Then, take the extended mace (select the rickety construction).
Put the halberd with the longsword on the dangerous construction. Put the shield back to make a bridge again.


Go up, and use the extended mace on the glass case. Take the heavy sword.

Go back down.
Take everything from bridge.
Put all weapons and the shield on the weapons rack.

Pick up the vine, then use it with the weapons rack. Then, select the vine again, and use it on the weapons cabinet.


Select the weapons rack, then the entrance.
Take the staff.

Use the activation spell on the floating crystal.
Go to the outside.
On the next screen, go up.
Once up the stairs, go to the flotation chamber to the right.

Examine the admiral, if you wish.
Go into the flotation chamber.


After talking with Ariarchos and receiving the dagger, pick up the stones.
Throw all 3 stones at the prince. He will create a magic shield.
Talk to Ariarchos. He'll give Sadja a tower key.

Examine the Cleric of Praios to receive a Praios sceptor.
Examine the Cleric of Efferd to receive a belt.
Examine the Cleric of Boron to receive a quill.

Now, use the tower key with the tower door. Enter tower 1.
Go up tower 1.
Examine the blue crystal in the wall.
Go out to bridge 1.
Pick up the ornamental head at the door.
Go back into tower 1.
Touch the crystal again, and go back out to bridge 1.


Go in to tower 2.

Use the ornamental head on the floating crystal. A splinter of the crystal will scatter out and land near the door to the right. Pick up the crystal splinter.
Use the deactivation spell on the floating crystal (in inventory), and it'll become a sleeping crystal.
In the middle of the room is a ladder; go up it.

Once at the top of tower 2, go to the left and examine the floating crystal there. It'll deactivate and the magic shield will weaken a bit.
Again, to the left, go to tower 1.

Once inside tower 1 again, touch the crystal.
Go back out to bridge 1.

Use the belt with the floating crystal on the right.
Touch the floating crystal. This'll cause it to break off.
Now, use the activation spell on the sleeping crystal (in inventory), and throw it over to the tentacles to the right. This'll create a bridge over to tower 2.
Go into tower 2.

Go through the room straight to bridge 2.
On bridge 2, there's a set of tentacles to the right. Use the dagger on the left tentacle.
Then, go on into tower 3.

On the next screen, there will be a set of stairs leading up. Go up tower 3.

Suggestion: SAVE YOUR GAME.


Each thing in the room will need a response.
From left to right, choose: a torch bracket, armor, a statue, shield, and nothing.
Nothing will change until you've answered all of them.

To the farthest left, go to bridge 2.
Touch the floating crystal (it'll be right next to Sadja). Yet again, the magic shield will weaken a bit.
Go back to tower 3, and touch that floating crystal.

Next, go through the window.


Use the dagger to cut the tentacle.
Use the deactivation spell on the main crystal.

.
.
.
.
.
.
.
.
.
.
.
.
.
.
.
.
.
.
.
.
... Once the cutscene is over, click anywhere to continue.


Explore to the right, and pick up the staff.
Farther to the right is a young Amazon. To try to help her, use the staff with the shield on top of her.
Then, use the alcohol (from inventory) on the young Amazon. Then, use the bandage (also from inventory) as well.
Chapter 8 - A Difficult Decision
Achievement: Chapter Seven Complete
This achievement is received once the story goes back to Bryda.

Once Bryda is finished talking, use the destruction spell on the power accumulator.
Next, as Bryda asks, use the repair spell on the mask.
Next, also as Bryda asks, use the activation spell on the power accumulator.

After Bryda leaves, use the send vision spell on Nuri's necklace.


Choose these 3 things ONLY: mountain top, river, and campfire.

After Nuri arrives, use the send vision spell on Nuri's necklace again, and this time choose these 3 things ONLY: Geron, Nuri, and power accumulator.
Next, use the de-petrify spell on Geron.

After you've got control of Geron, go into the burial chamber.
Choose "Tell me everything" if you enjoy story (if you don't, why are you even playing this?).
After talking with the staff (or former staff?), place the mask on the statue to the right, which is labeled as Bust.
Then, choose "Yes, I'm ready."
I think the result would be the same, honestly, but just go with "Bryda should do it."

Geron will eventually be summoned outside. Go back outside.

After talking with Fahi, go back into the burial chamber and pick up the ruby, which is on the right near the Bust statue.
Go back outside and give the ruby to Fahi.

When talking with Fahi, I don't think there are "right" or "wrong" answers, but you should choose according to what's logical.

Go back into the burial chamber. Examine the tomb.
Choose:
"... and despaired."
"She couldn't read."

Note: Some of the other options might've worked just as well, but these were the ones I picked.

Decision time.

When given the decision regarding Nuri, SAVE YOUR GAME. There are two achievements to be had and this requires re-loading.

Note: As far as I know, neither choice is canon. So, choose which one you want to be the true ending last. Personally, I chose to change her back.

Achievement: A Gift Called Freedom
Leave her as she is.

RE-LOAD.

Achievement: Finish Line
Change her back.


Achievement: Chapter Eight Complete.


91 Comments
Theory of everything 21 Apr @ 2:04am 
Thank you for the guide!
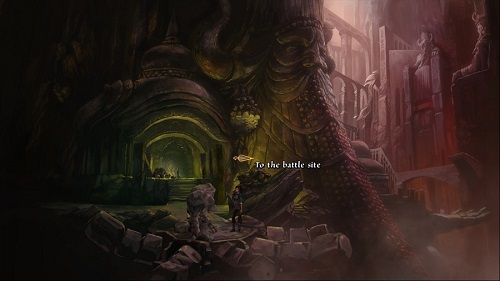
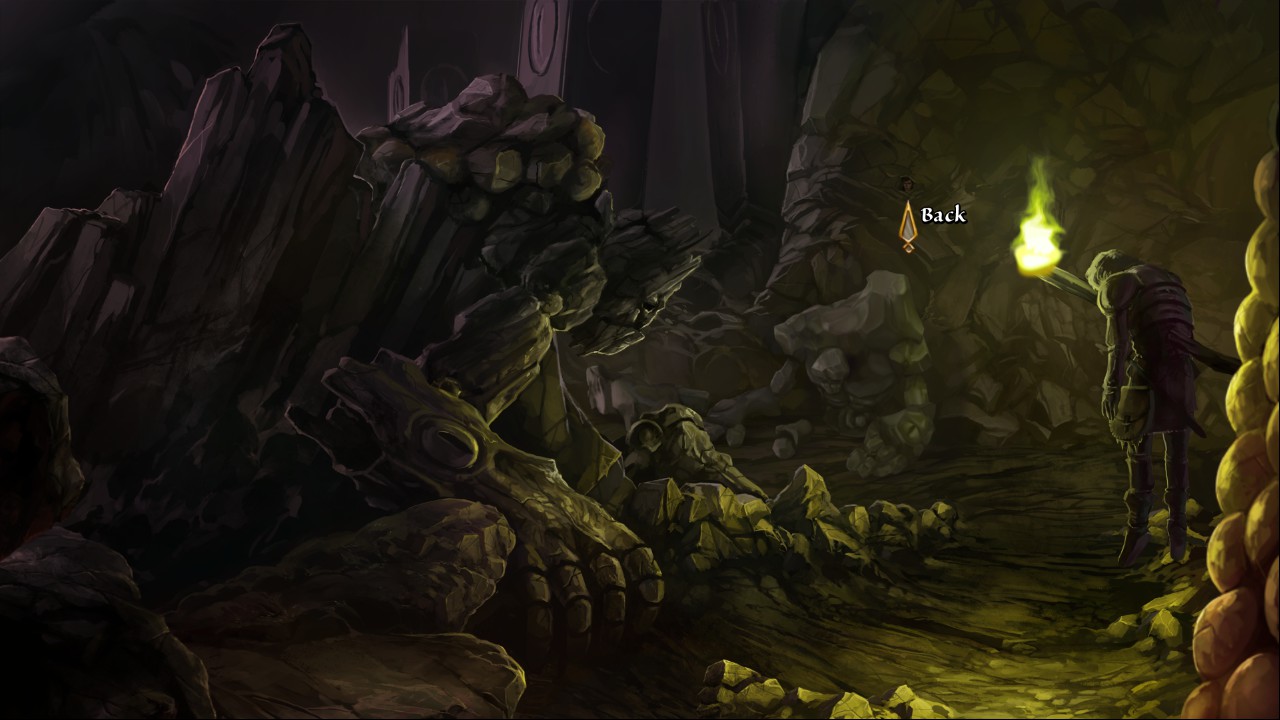
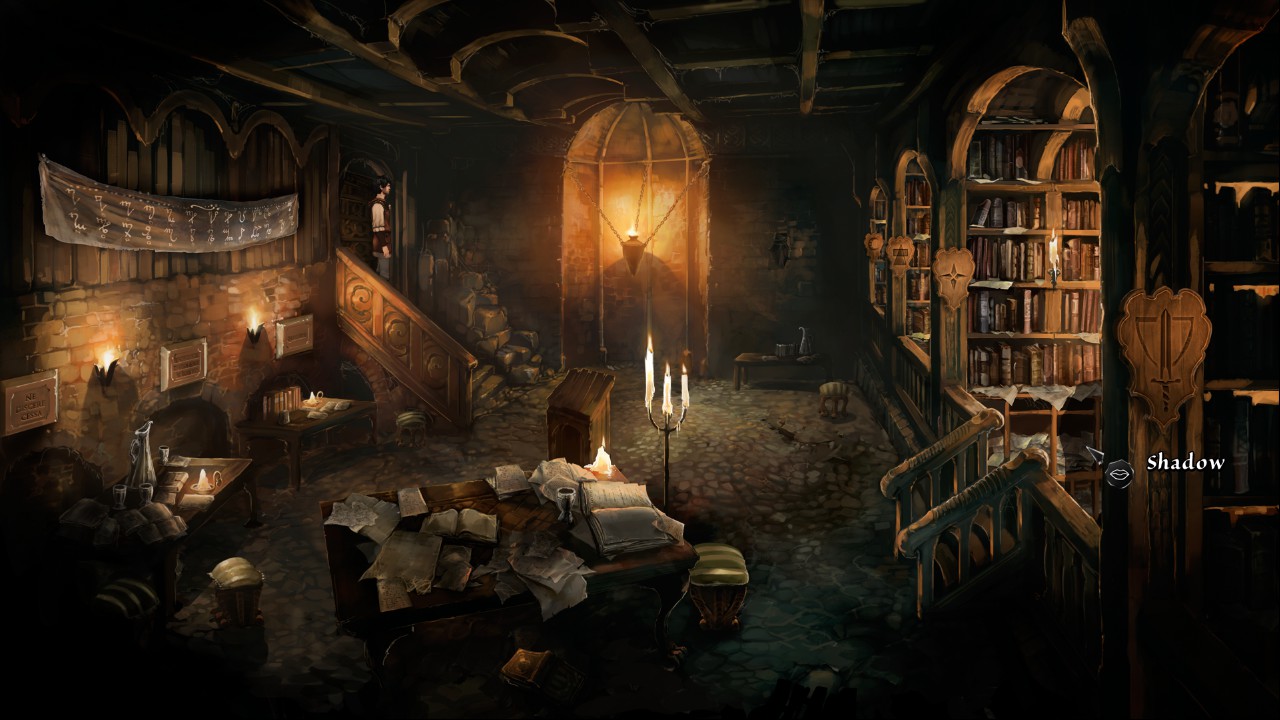
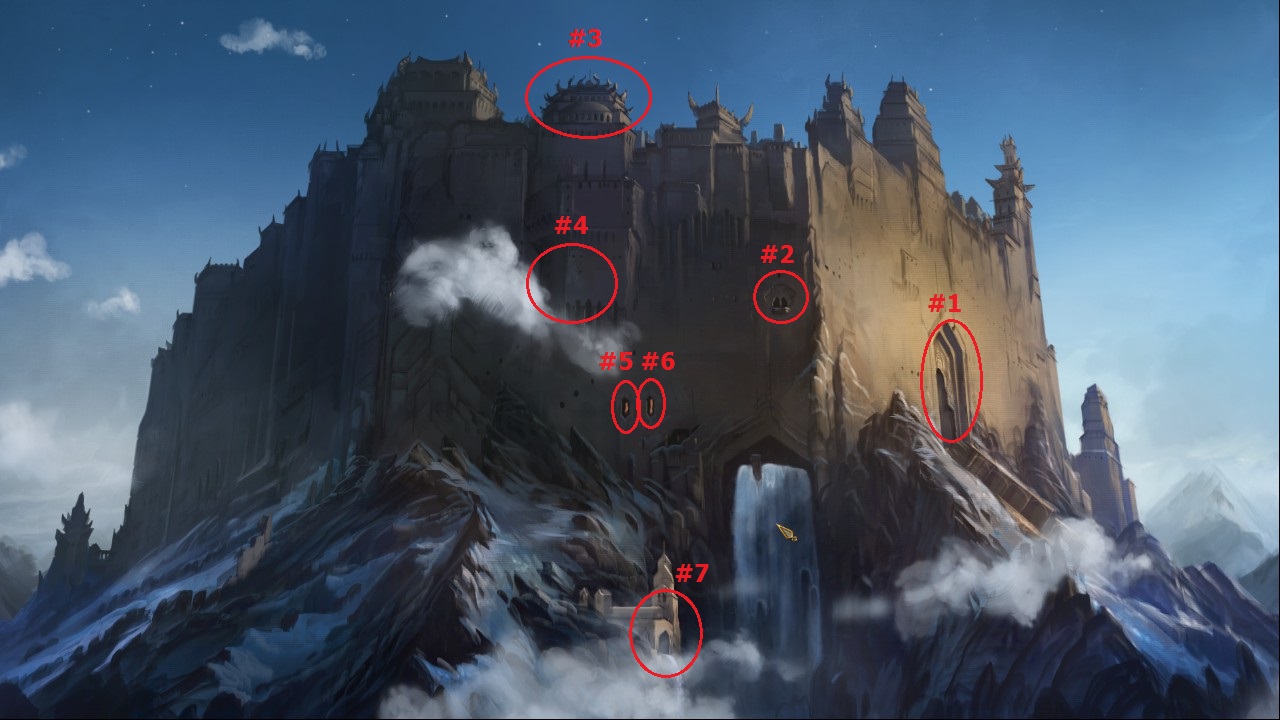
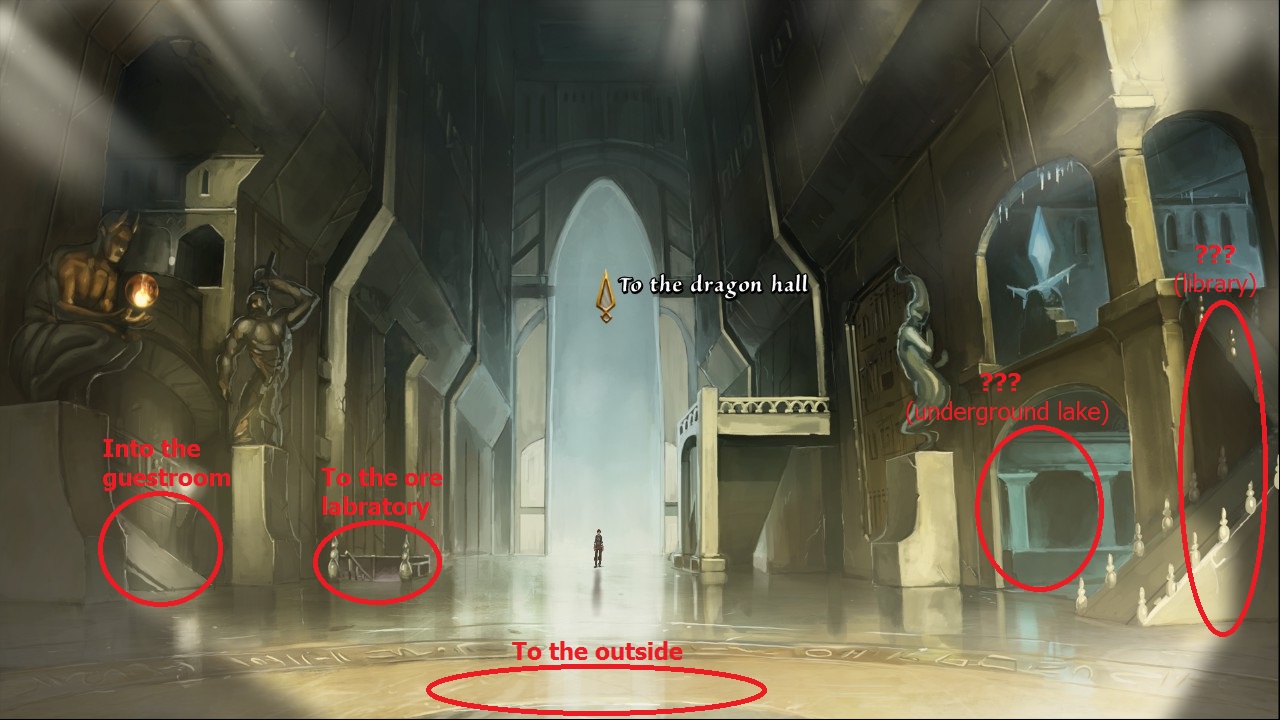
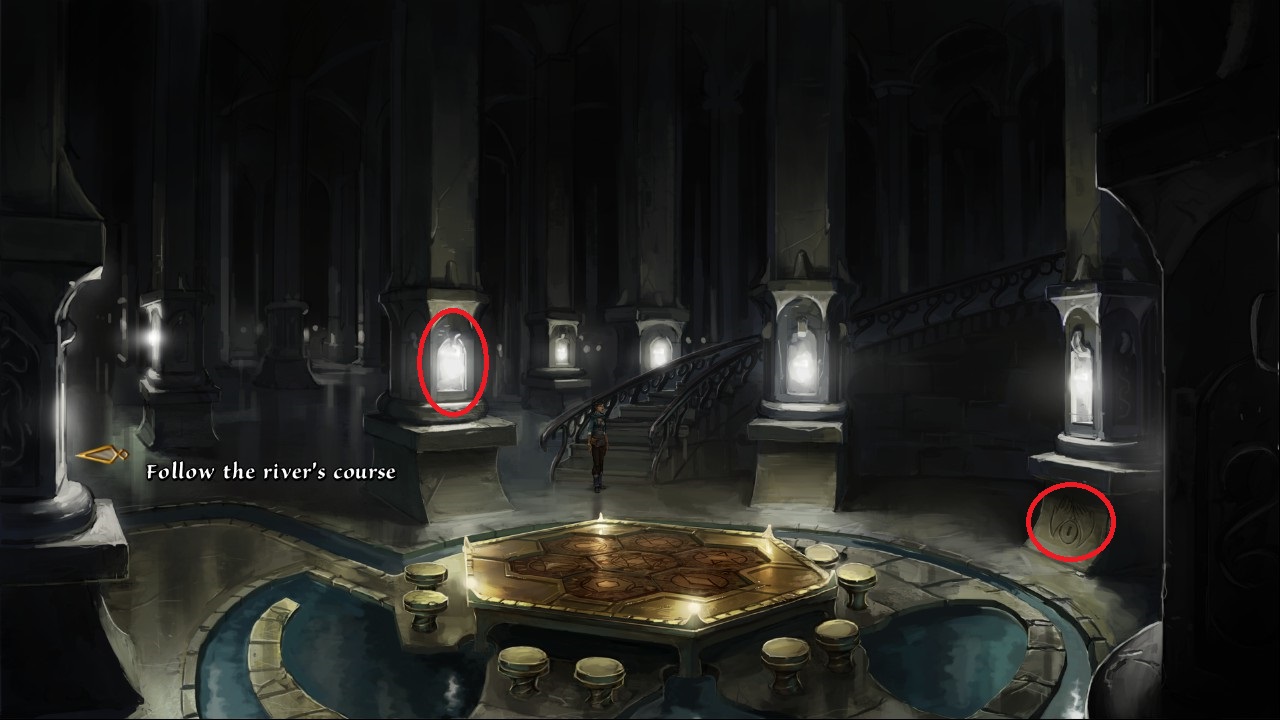
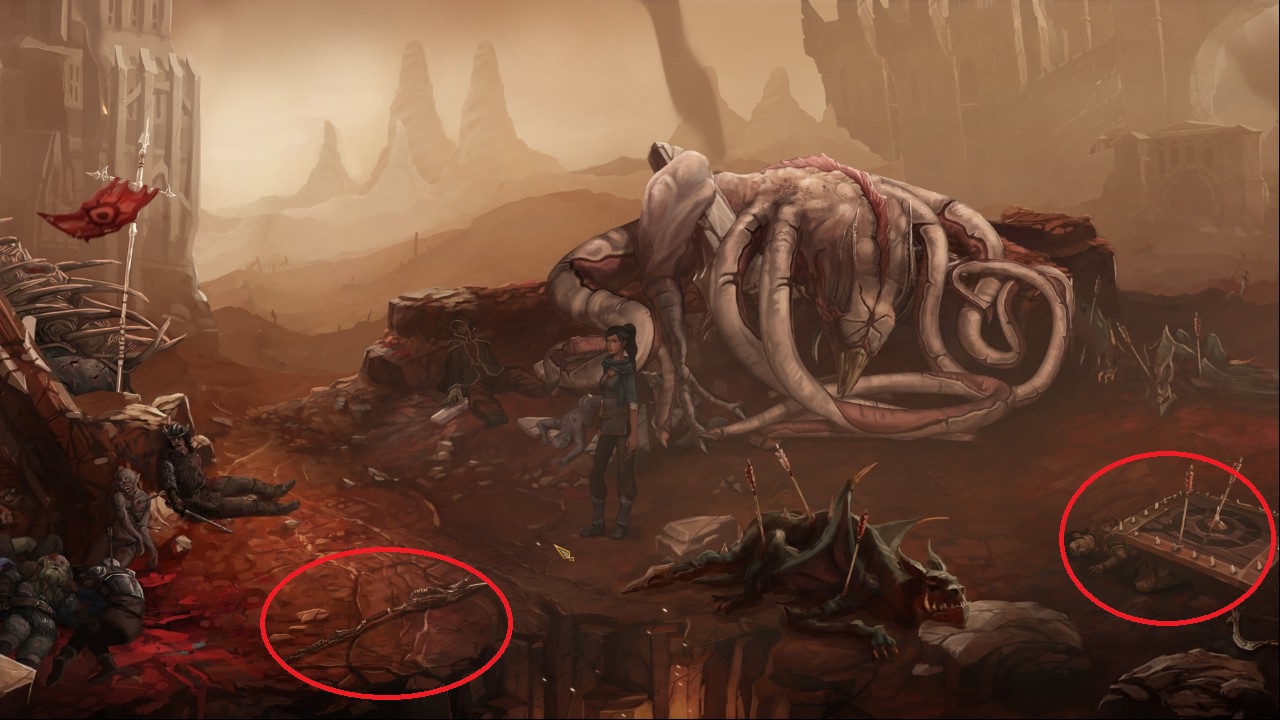
In Chapter 5 - Sadja the Spirit Collector, you didn't mention that one should get darkness from the dragon hall (I was stuck on that one)
chris_shpprd 23 May, 2024 @ 1:23pm 
Great guide! Thank you
SoulEater_yilmaz_durmaz 24 Feb, 2024 @ 10:39am 
<u>Note: Sadja will not actually take the metal ball from the hole when you initially click on it. So, be sure to click on the hole in the ground once, then directly click on the hole in the door after. This gets her to move the metal ball
<\u>
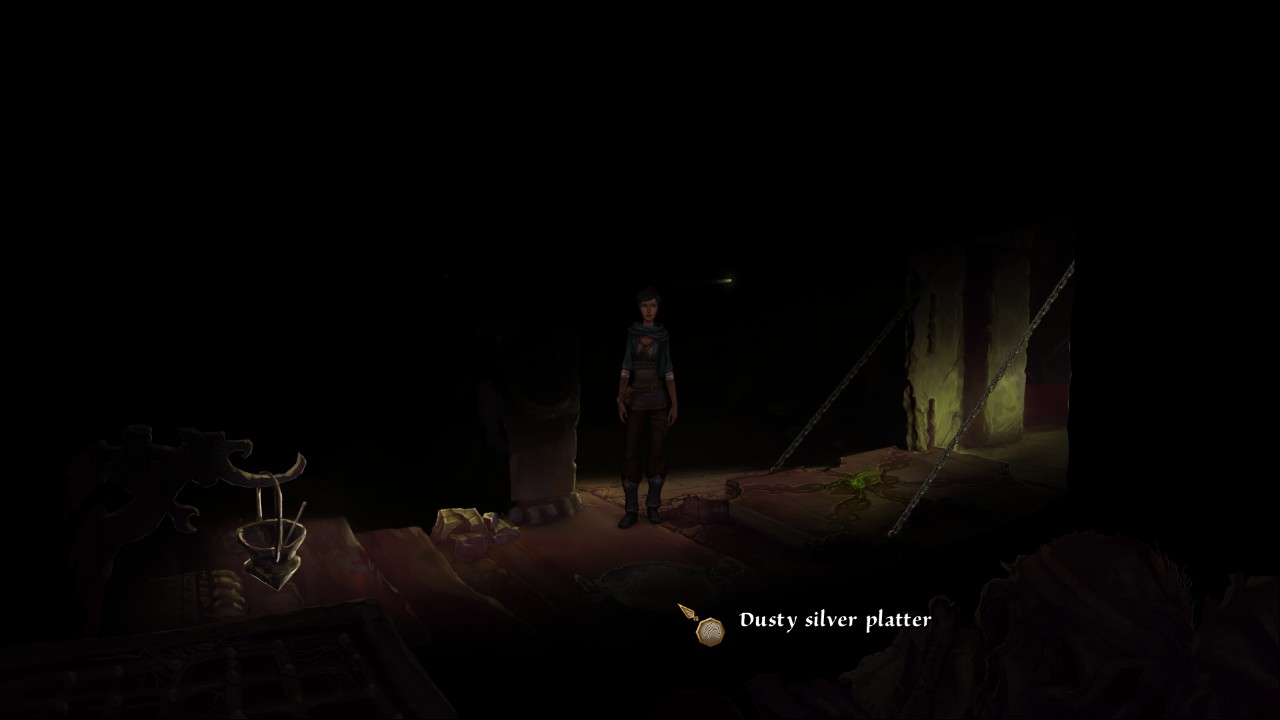
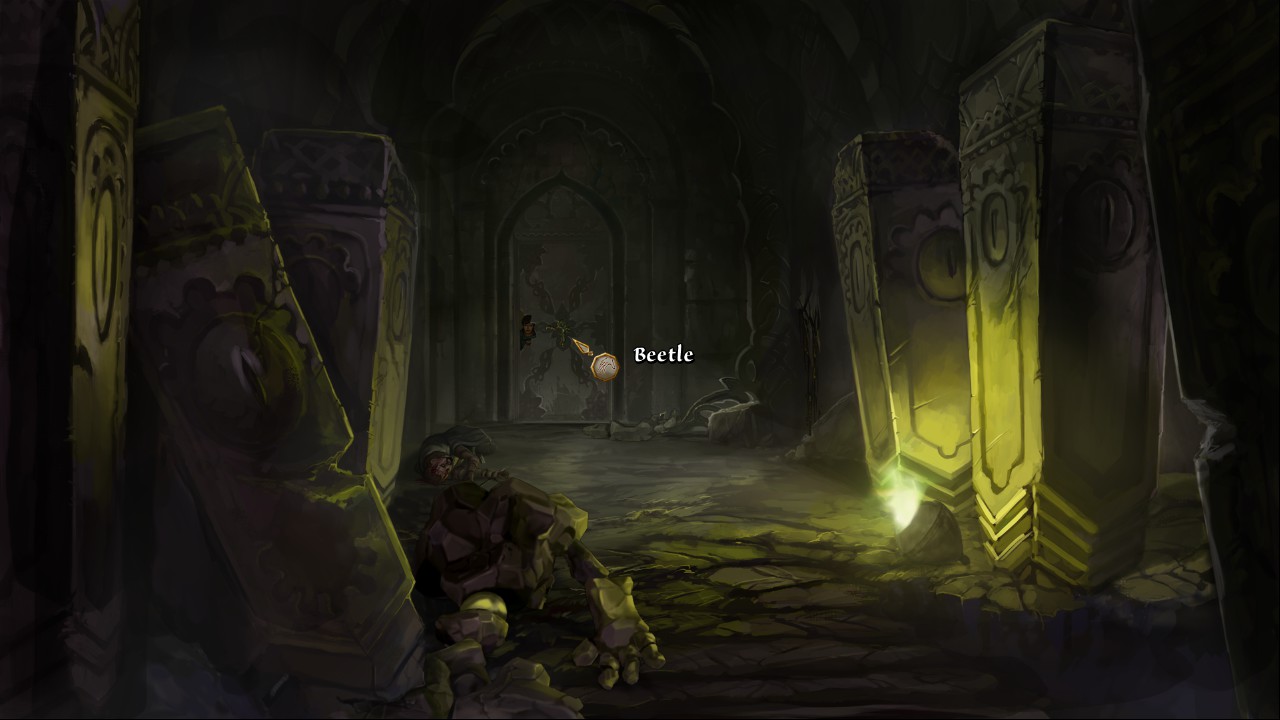
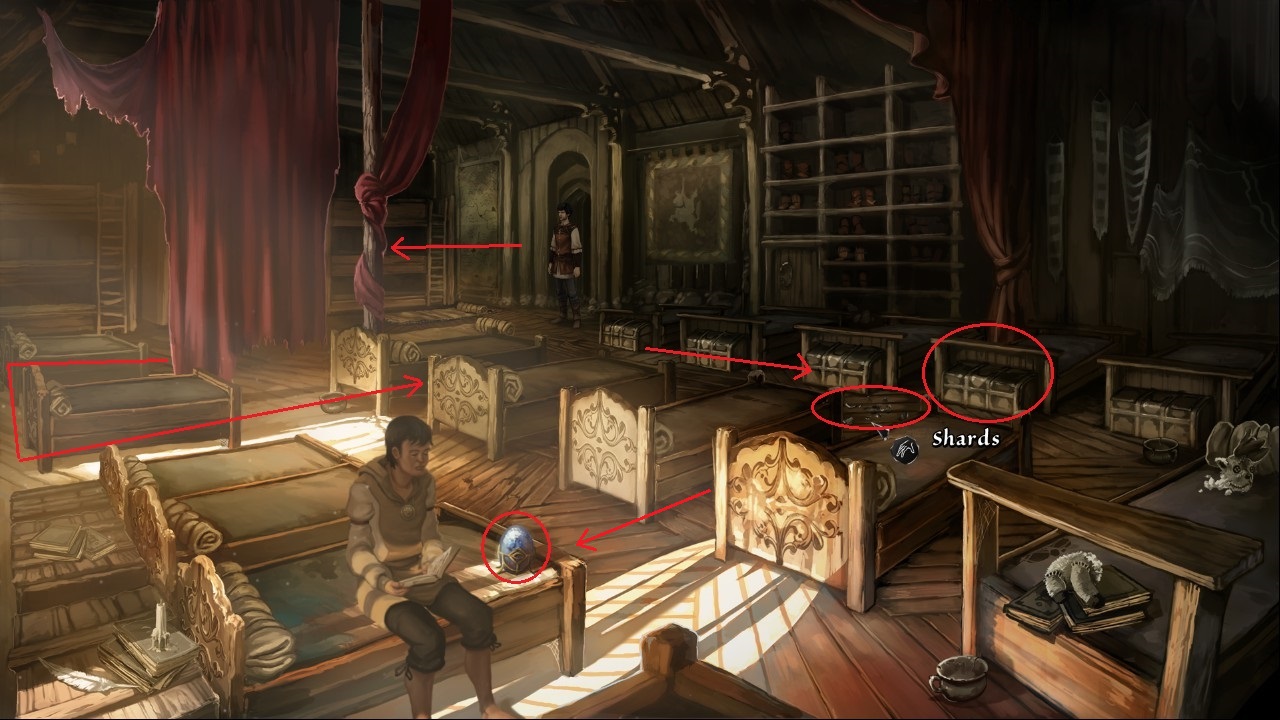
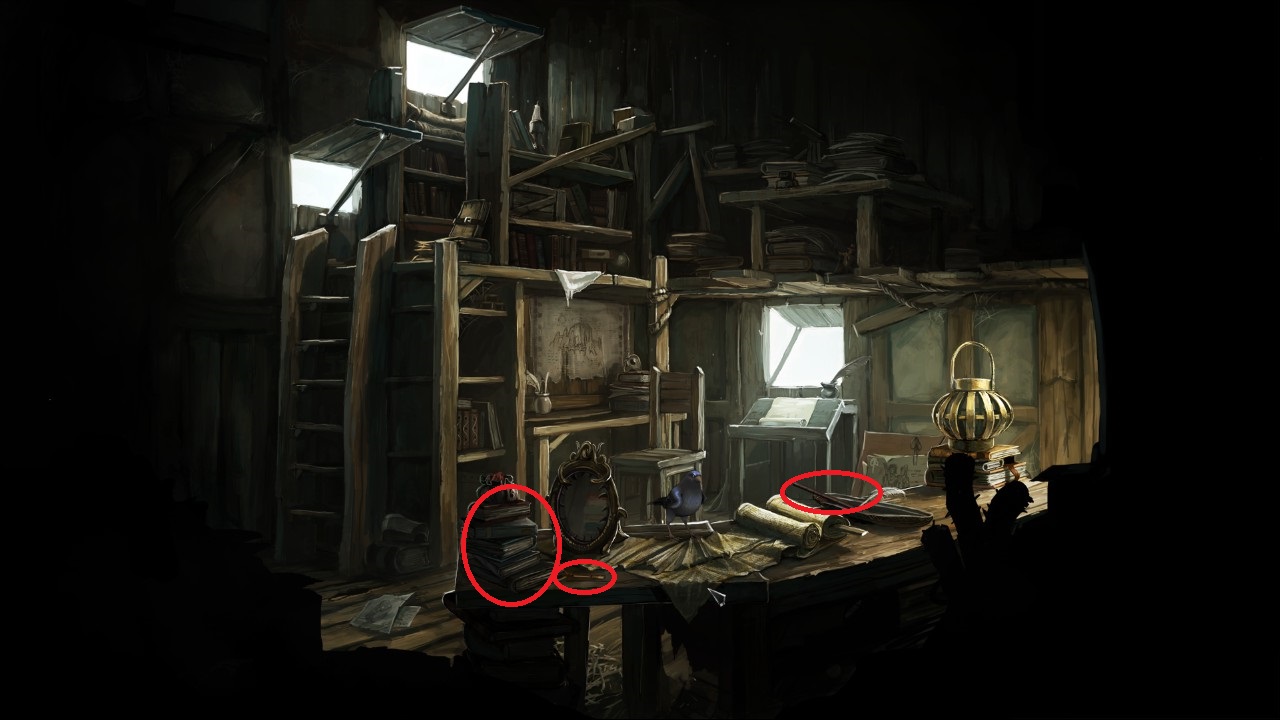
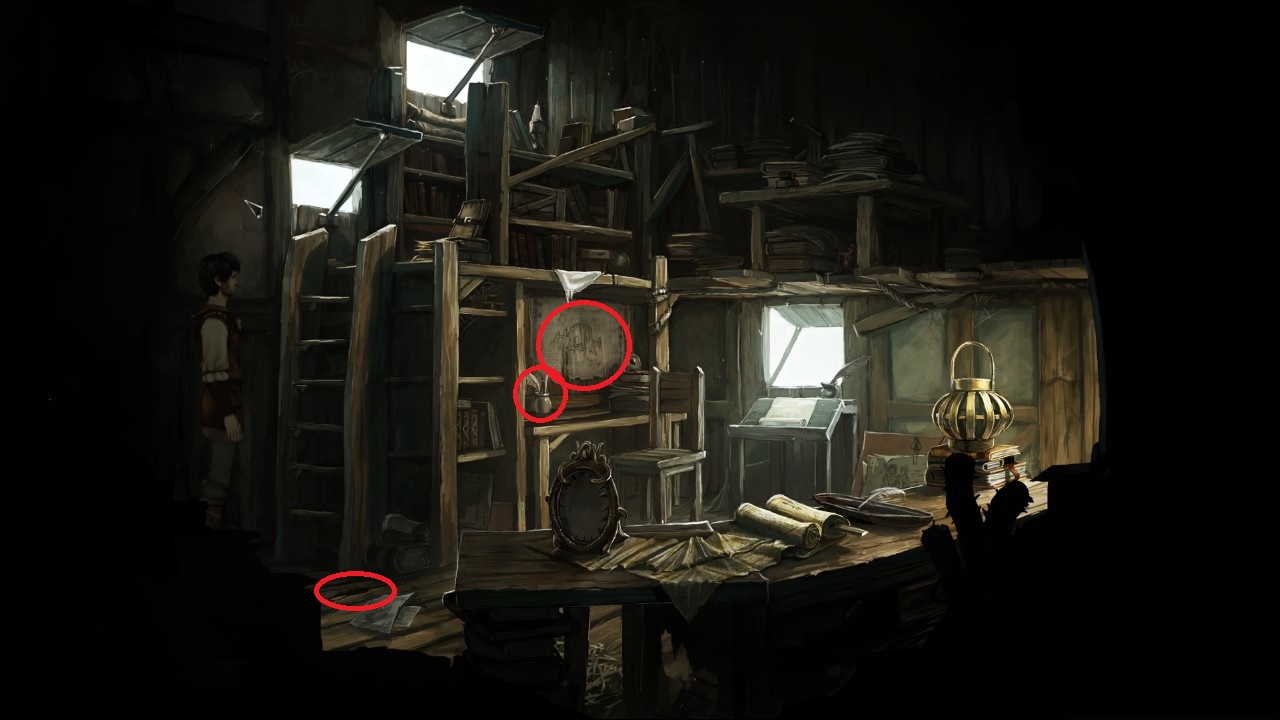
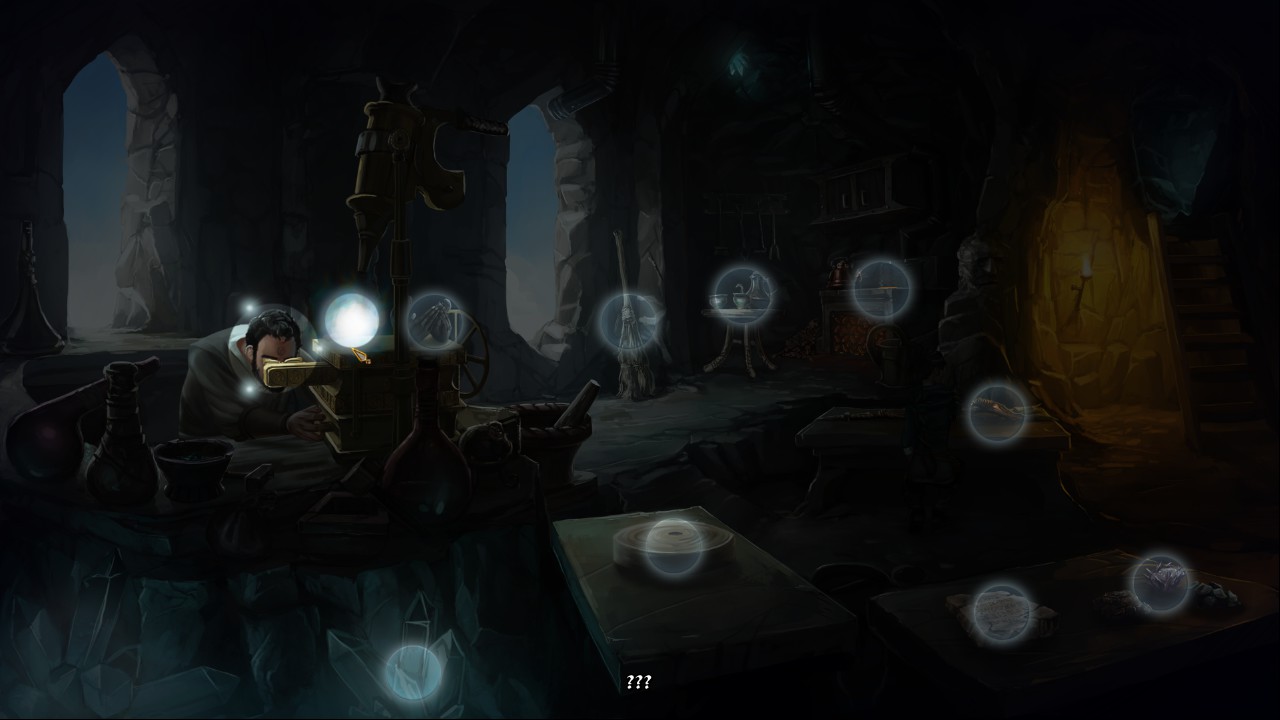
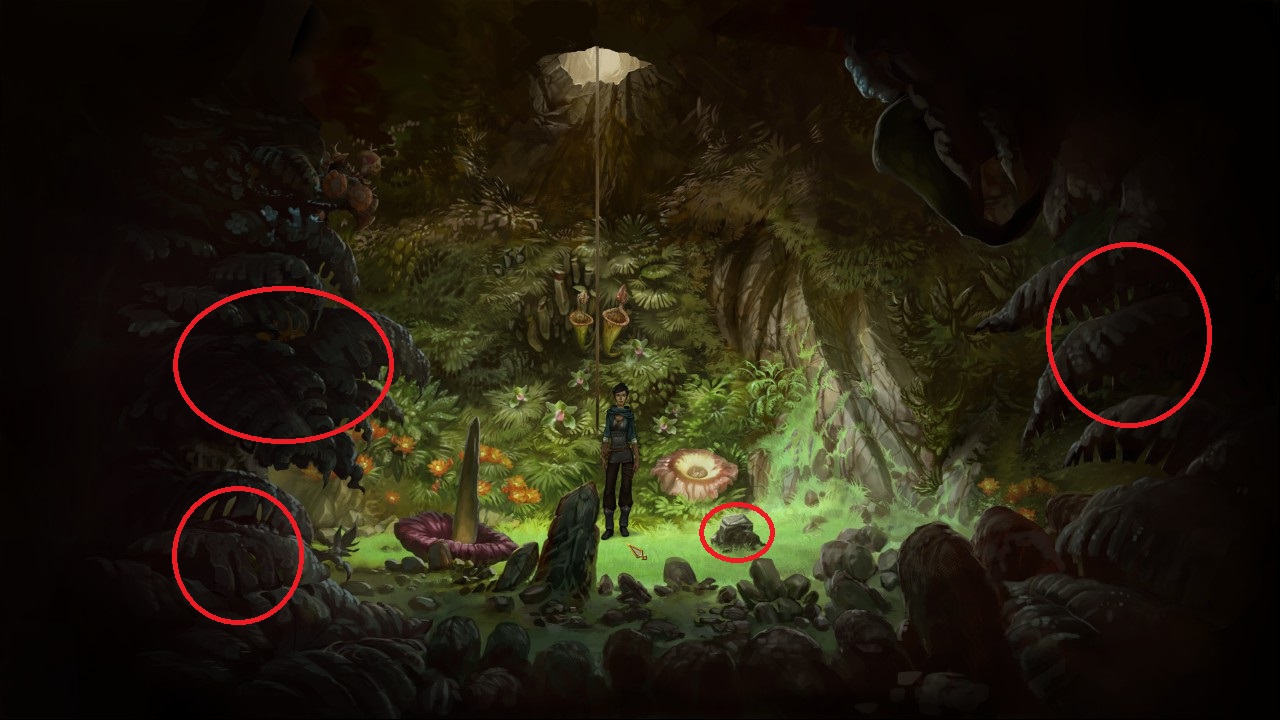
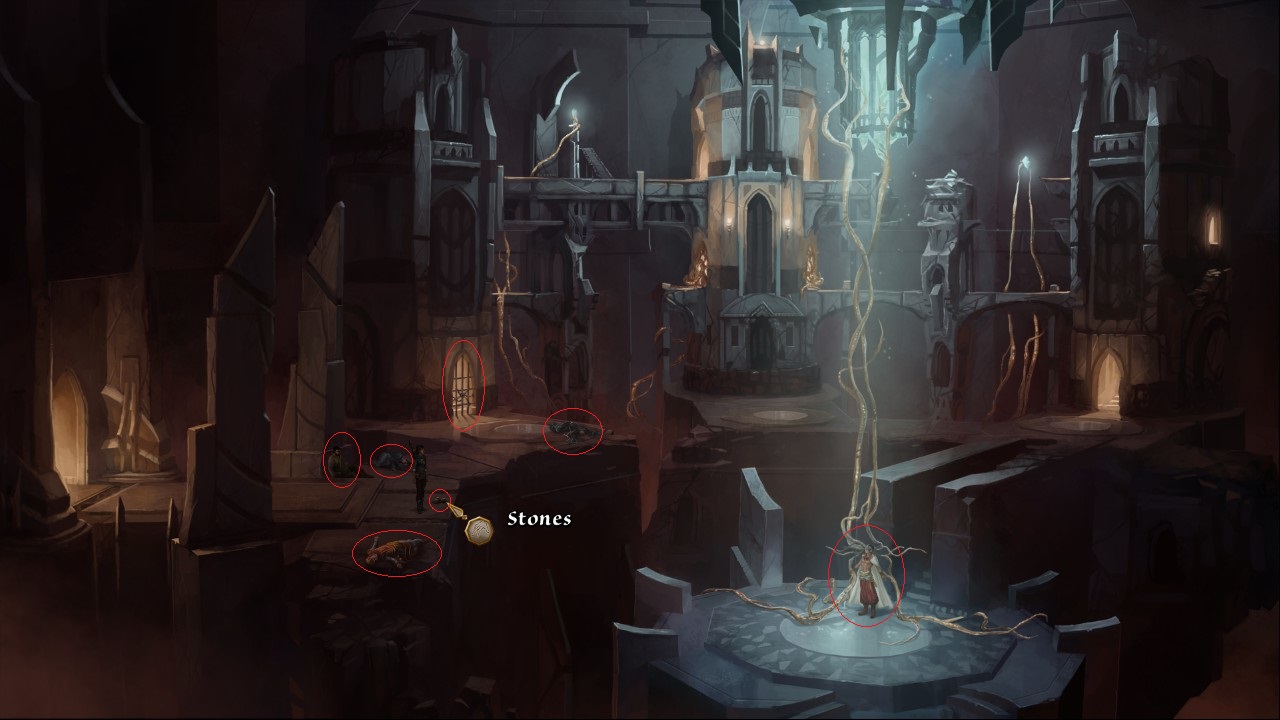
I was stuck and give up playing only for this stupidly simple solution: you can use things without taking them into your bag, and mouse cursor changes if you grab something that way.
Nyuka 17 Jun, 2023 @ 9:50pm 
Very good and detailed guide! Thank you!
increain 20 Oct, 2022 @ 9:11pm 
Thank you for the nice guide!
parmia 19 Aug, 2022 @ 5:53am 
Just did the part with the elementals and I want to add a bit of information that isn't in this overall great guide.

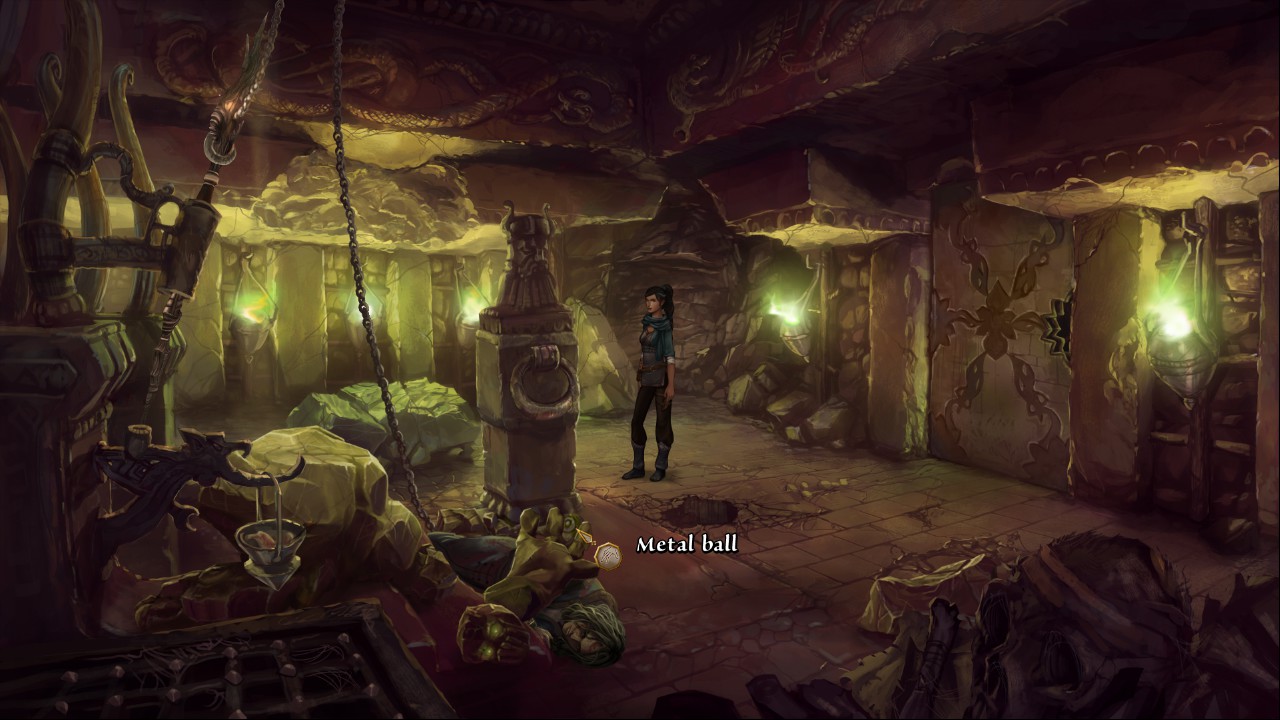
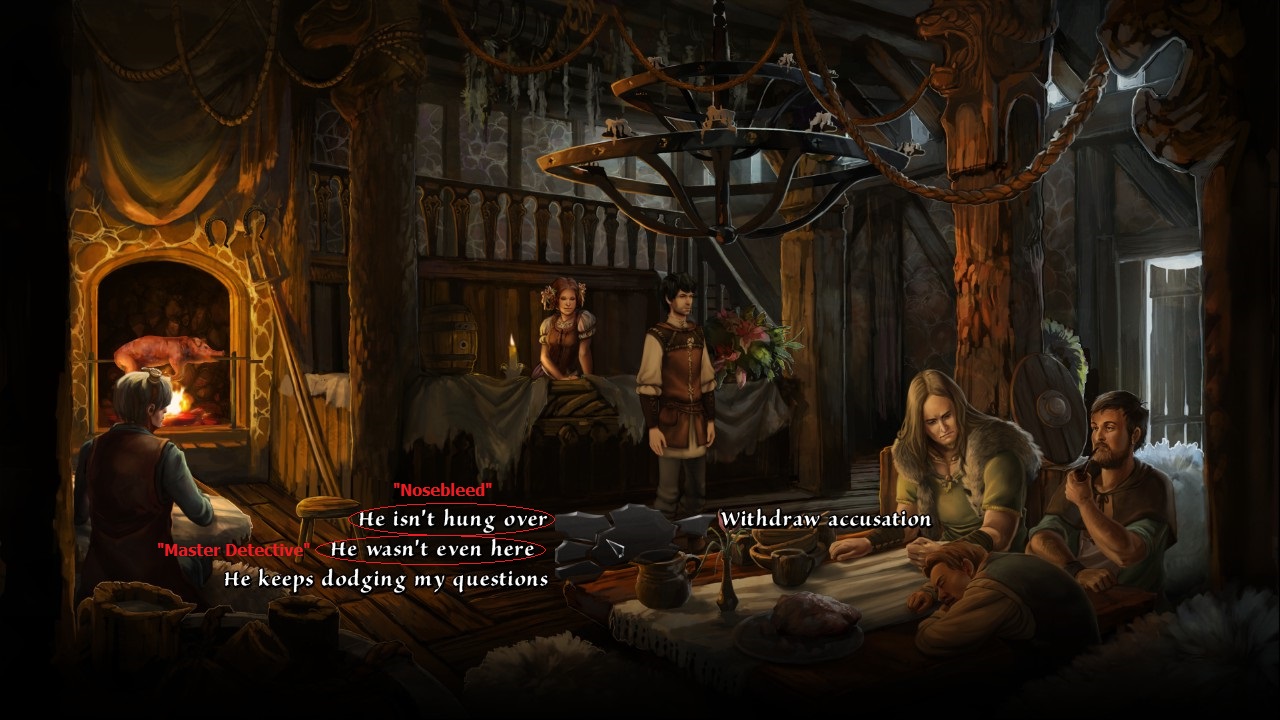
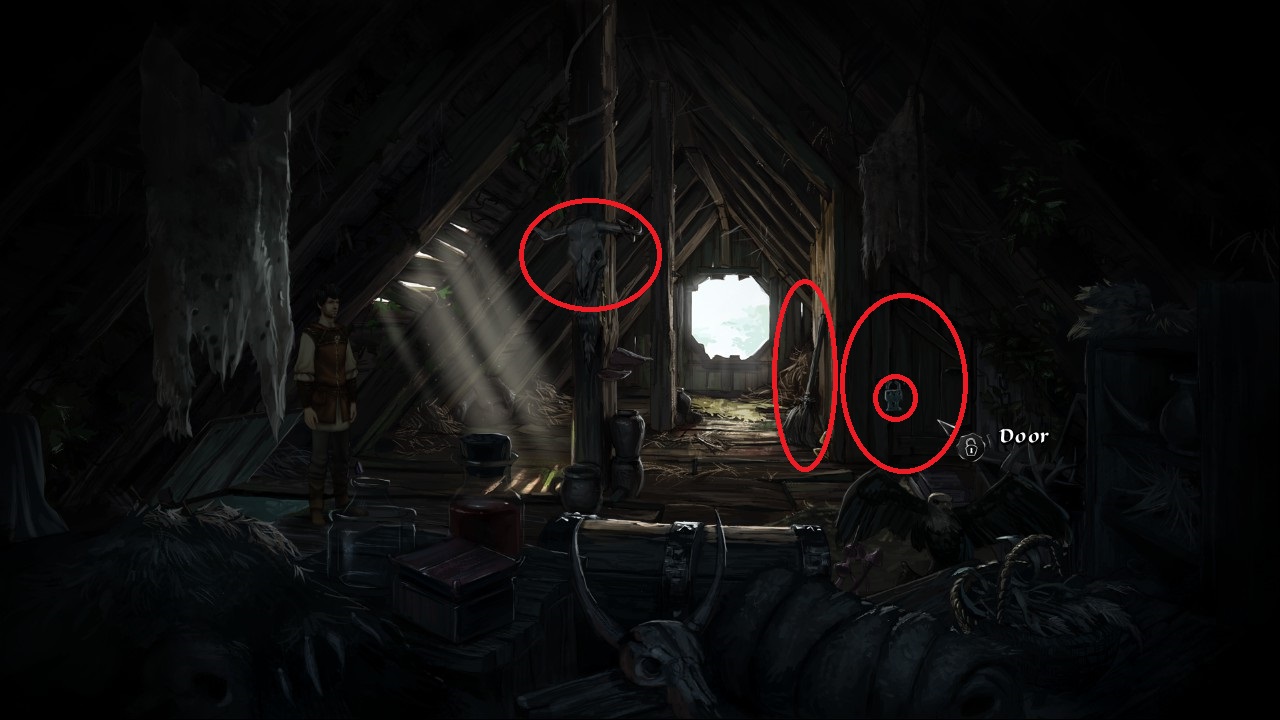
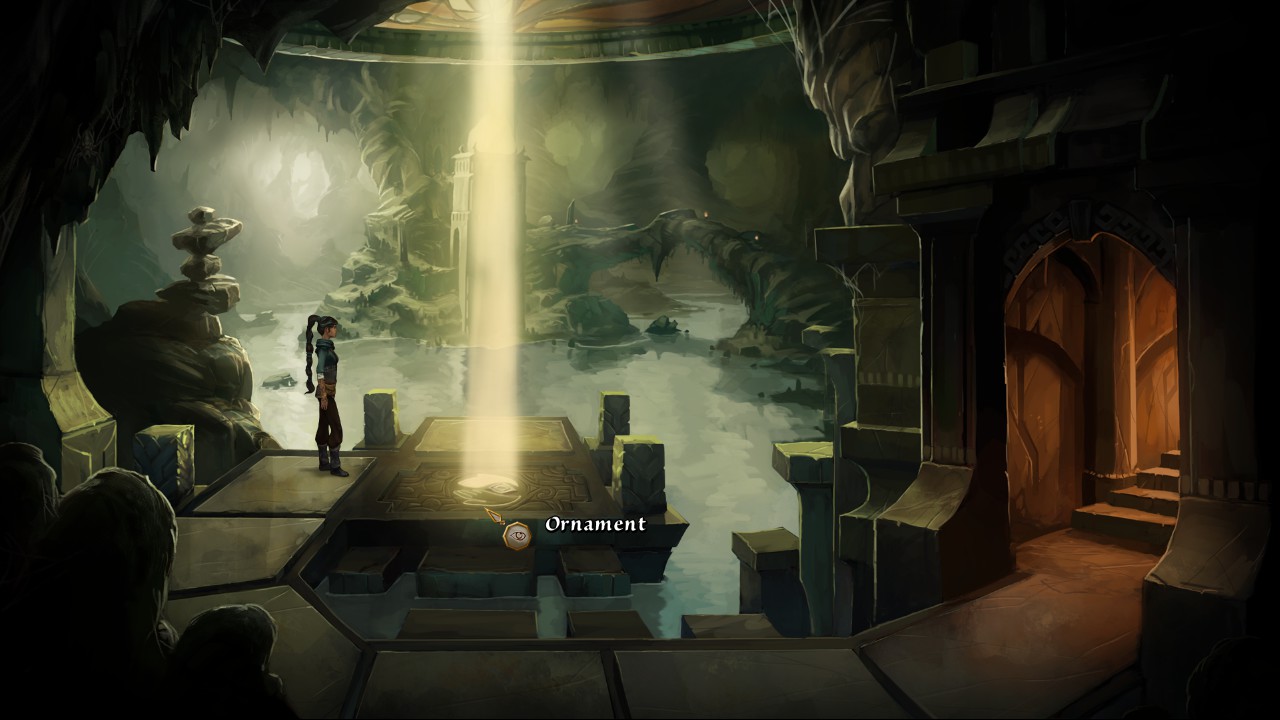
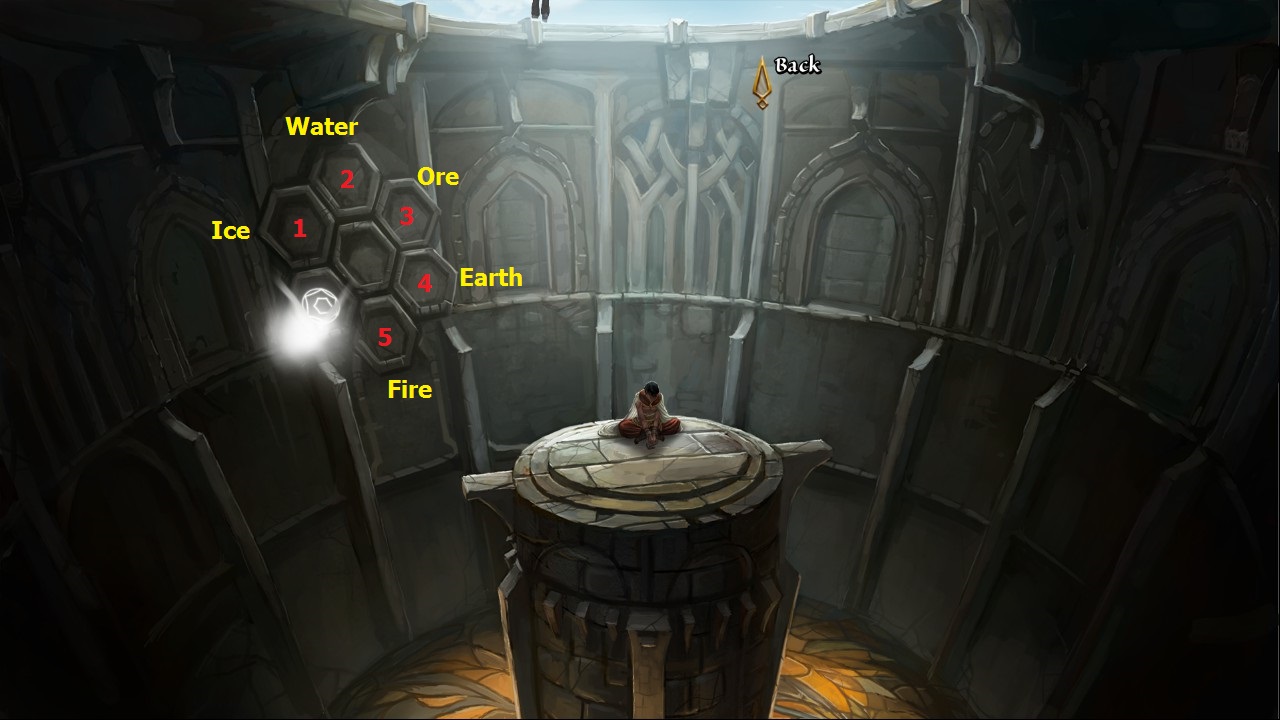
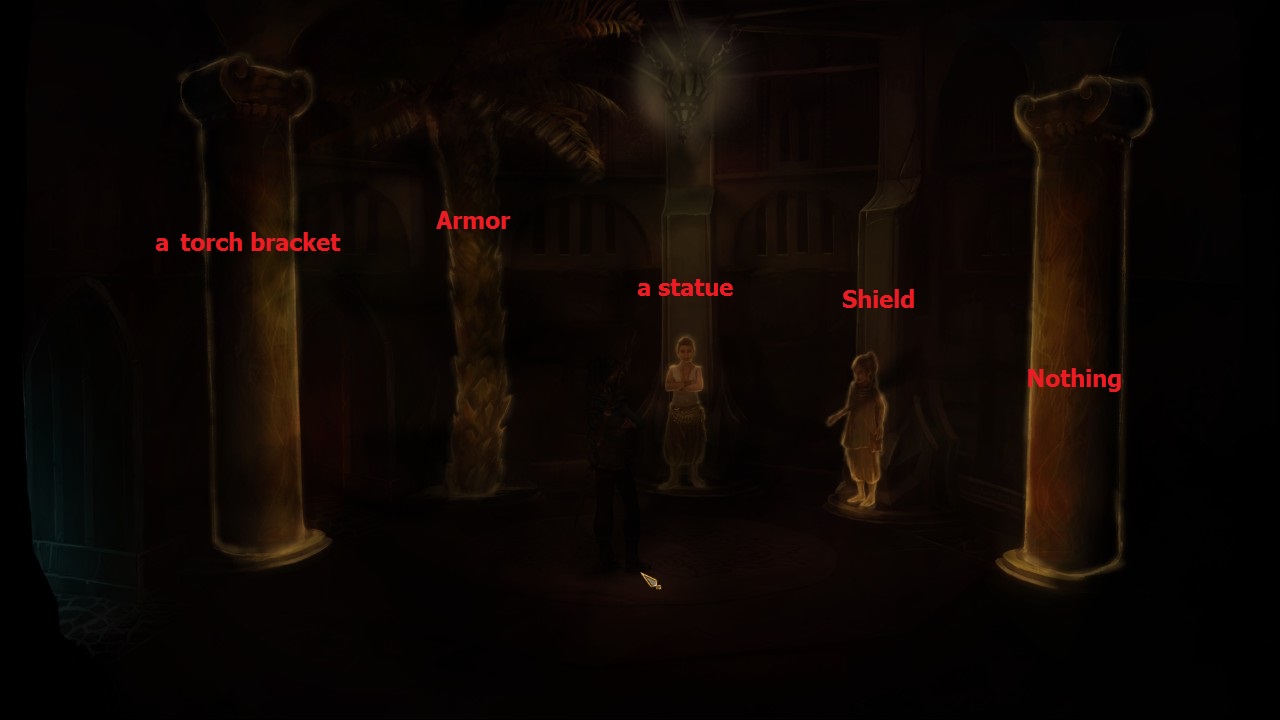
If you go to the room where the admiral was, the table also has hexagons with runes on it. If you remember/draw it irl and compare to the runes in the library, you can do it this way as well. There is logic behind this puzzle as well :)
WiseOfRunes 19 Jan, 2022 @ 2:42am 
thank you
Pacha 15 Nov, 2021 @ 12:44pm 
Thanks for the guide!
rafinnej 27 Aug, 2021 @ 9:45pm 
Excellent walkthrough! Thank you very much
flyscot.val 1 Jun, 2021 @ 9:54am 
Thank you!! Finished the game thanks to you after playing it many years ago without success. Totally loved it and thanks for all the work you put into making it such a pleasure to play. :)