MechWarrior Online

MechWarrior Online

254 ratings
Running Cold: The Comprehensive Guide to Heat - MWO
By GarbageCollector and 1 collaborators
Everything you could possibly want to know about the thermodynamics in the world of MWO.
Edition 1.1
2
2
2
   
Award
Favorite
Favorited
Unfavorite
Introduction
The Mechwarrior Online community is living in a dark age. Ignorance, silence, or worse, misinformation, about the mechanics and technical aspects of the game is rife at every level from PGI's nonexistant, opaque, scattered, or simply wrong documentation, to the most detailed and definitive player-created resources' own errors and shortcomings, and everything in between being propagated without challenge as "wisdom" by the inner circles of the community.

Not sure what I mean? To name a few specifics relevant to the subject of this guide, what is the hottest map in quickplay currently? Those that think they know will say Tourmaline Desert, because that's what the game's interface tells you. Here, even the noobs are usually more correct, because Terra Therma looks, feels, and just seems hotter (and it is). The problem is these people usually decide they're wrong when a veteran tells them so while pointing them to the ambient temperature.

A few other things that might surprise you:
  • Vitric Forge and Sulfurous Rift are actually the same temperature as far as the game code is concerned and like Tourmaline Desert, both are still colder than Terra Therma.
  • The hottest location in the game is actually the inside of Caustic Valley's caldera, despite being just a moderately warm map everywhere else.
  • Heat Containment's bonus isn't 10% of your total heat capacity, despite how it's described.
  • Having your throttle set at anything but zero will reduce both your effective heat capacity and your dissipation rate.
  • Regarding the point above, it doesn't matter if you're actually going anywhere. Being stuck, bumping into a wall with full throttle has the same effect on heat transfer as going full speed over flat ground.
  • On a mech with standard heat sinks, it's actually more effective to have fewer internals and more externals. The reverse is (usually) true for double heat sinks.
  • On cold maps, you can actually cool below 0% on your heat scale, you just don't see it.

There are dozens more things that probably could go on the list, but the point is clear: most people have no clue how this game really works when it comes to the details. If you're among them, it's nothing personal, and you deserve a great deal of credit for simply having clicked on this guide. Ignorance is not a sin in itself, it is in being content with our ignorance that we sin.

A few months back when I started working on this thing I was definitely a serious offender myself. Looking at the first versions of the sections that would become this guide, I am ashamed at what I was planning to proclaim as truth without having verified first. But something in the numbers seemed a little off.

And that's where the rabbit hole started. First I began searching for posts from PGI and found very little. Then I began looking for answers in the community and found a few hypotheses, theories, and occasionally fully-fledged (but unfortunately usually either obsolete or plain wrong) theses on how heat works in this game. After working through some of the answers myself by direct observation, I revisited some of the resources I had previously assumed as correct and found problems with them as well (even my beloved Smurfy.net ). Sure it was a daunting task, but it became clear the only way to really know was to test, retest, and verify everything.

And that's where this age of ignorance ends. MWO needs an enlightenment, a renaissance, founded on true reason and true science unbesmirched by blind faith in tribal knowledge. For this reason, every value and every equation you will find in this guide has been empirically verified to be accurate by multiple trials of appropriate tests and experiments. For brevity, I have not included in the guide a description of the methods used, but if you are curious or want to conduct your own experiments, let me know and I will happily explain how I reached the answers I did. If you find any errors in my work or answers that are not matching with my own, please let me know and we will resolve it. Come, let us reason together. May we bring the light of truth to this dark community.
Section 1: The Fundamentals
○ 1.1 Using this Guide and Overview of Terms ○
Heat management is one of the major ways MWO sits apart from most shooters and one of the fundamental tenets of a skilled pilot, requiring a bit of judgment, discipline, and knowledge of the system's mechanics. This guide is meant to help with the last part and arm you with the understanding you need to fully develop the first two. Most of the equations involved are linear and only require a fairly simple understanding of algebra to understand. Nevertheless, for a video game, I completely understand anyone's aversion to approaching this like a homework assignment. As such, every equation is first presented as a "words version" with following analyses of every term, factor, and result involved. My hope is that no matter how deep or shallow you wish to go into the weeds, everyone can take away at least something from this guide.

Heat transfer in MWO relies primarily on three principle concepts: generation, capacity, and dissipation.

Generation being the creation of heat that can be removed over time, capacity being the capability of the mech to store heat before reaching the threshold of damage, and dissipation being the rate of removal of generated heat.

This guide is laid out into sections to cover these topics individually and indepently as much as is possible. Some select things impact more than one at once however, and these will be discussed in either Section 1 or Section 5, depending both on their relative significance and the importance of having understood information from the three primary sections.

[color=gray]Throughout each chapter you might see asterisks (because Steam's code doesn't support superscript annotations) that denote an editor's note which will be in gray text (like this) at the end of that chapter. These are either less important and more advanced clarifications, notes on methods used to obtain results, or admissions of where I came up a bit short on fully understanding the math.[/color]
[Color=gold]○ 1.2 This Edition ○[/color]
Current Edition: 1.1

I intend to update this guide continuously as more knowledge is gained. I will leave the portions changed or added in the most recent edition in gold text to facilitate gleaning the new information. You can also find a change log at the end of Section 5, with the dates of each edition's publication and the changes made therein, in case readers have not checked back since multiple revisions were made.
○ 1.3 The Heat Management Number ○
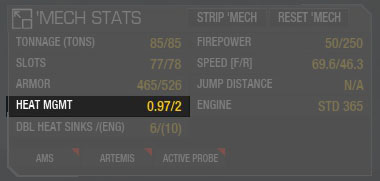
Of the limited information you have readily available to you in the mechlab, one number stands out above all the others. Its title practically announces itself as the condensed summary of everything you wanted to know about your mech's heat characteristics.

So what is this exactly?

I'm guessing about their motivation here, but it seems PGI thought it may be helpful to try and smoosh all the different factors of the complicated system (that they spent considerable effort making this way) into just one number, and this is what they came up with:


Examining the components of this, the first question that comes to mind is why there might be a square root, since almost everything about heat transfer in this game operates on a linear scale. The arbitrary coefficient of 5 seems just as baseless. Secondly, there is no contribution from heat capacity at all. While this might often be the least significant of the three principles, it is variable and does matter. Lastly and probably most significantly, this value assumes you are continuously firing every weapon on your mech at its maximum rate of fire*, which would only ever be relevant for brief moments of a match in just a small fraction of the mechs people tend to use.

Really all of this just results in a terribly inaccurate, imprecise number that gives little to no useful information on your mech's real heat management characteristics that could not have been just as easily surmised by a quick glance at the weapons and heat sink configuration. If anything, doing exactly this and relying on instinct and experience will almost surely give you a better picture than the provided Heat Management value. I strongly recommend ignoring this "stat" completely.

[color=gray]*The game interface's calculations of maximum heat per second for weapons with durations is incorrect. This error and the correct way of computing this is discussed in greater detail in the chapter on weapon-based heat generation.[/color]
○ 1.4 Heat Sinks ○
Heat sinks are the primary tool a player has in adjusting for different loadouts and likely the most significant factor in the global concept of heat transfer in MWO. Unfortunately despite this massive importance, most of the information concerning heat sinks is unavailable in the game and incorrect in third-party sources, even Smurfy.* The empirically verified values for heat sinks are tabulated below:

Type
Heat Capacity (c)
Dissipation (d)
Type
Heat Capacity (c)
Dissipation (d)
IS Internal Single
1.1
.11
Clan Internal Single
1.1
.11
IS Internal Double
2
.2
Clan Internal Double
2
.2
IS External Single
1.2
.12
Clan External Single
1.2
.12
IS External Double
1.5
.14
Clan External Double
1.1
.15


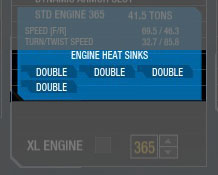
For clarification, an "internal" heat sink is one that is included as a part of the engine, and "external" is anything else. Sinks filling the slots within the engine that become available as your engine size increases are still considered external for the purposes of heat transfer, they just do not take up any critical slots.


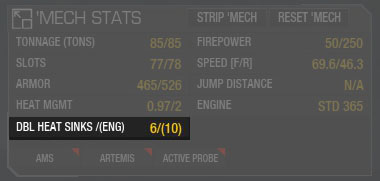
The heat sink configuration of a mech is displayed as External/(Internal).


Having a quick glance at the table shows a few things relevant to the discussion. The most obvious is just how significant an improvement double heat sinks are over their standard counterparts.The only marginal loss from upgrades is found in clan mechs in the way of capacity, but this is far outweighed by the gain in dissipation rate, especially considering the fractional insignficance of changes in capacity due to heat sinks, discussed in much greater detail in the section on capacity.

A second key observation is that internal heat sinks are incredibly more powerful than external ones as long as you have doubles. Most engines that are small enough to not carry the maximum number of ten generally cost little tonnage to upgrade. It may be more prudent to spend more than a ton on a negligible engine improvement if that comes with an extra internal heat sink, as opposed to spending that tonnage on a few external heat sinks.

Comparison across sides doesn't show too noticeable of a difference until you begin considering configurations with many external heat sinks, but it's worth noting here that it is not just the Clan weaponry that generates more heat, but also their lower capacity that contributes to the heat problems that plague Clan laser vomit. While clans do have a slightly better dissipation ton for ton, the lower ceiling on capacity tends to have a more visible impact on the field when it comes to trading alpha strikes.

* [color=gray]Currently, smurfy's weaponlab feature believes that internal standard heat sinks have a capacity of 2.[/color]
○ 1.5 "Ambient Temperature" and E: the Environment Variable ○
You might notice that throughout this guide I will not refer to map-oriented environmental effects as "ambient temperature" even once. This is intentional. The temperature for maps given in degrees at the ready screen of a match does not play any part in the actual mechanics of the game. Each map has its own specific modifier that is applicable for both heat capacity and dissipation effects, sometimes directly contradicting the ambient temperature value for each map during the loading screens.

There are also certain portions of maps where environmental effects are more severe, making the use of a single number for a map's overall ambient temperature inaccurate. As with the Heat Management number, I reccomend ignoring ambient temperature in the future.

The actual values for each map's heat effects are tabulated below:

Cold Locations
E
Neutral Locations
E
Hot Locations
E
Alpine Peaks
-0.5
Canyon Network
0.0
Caustic Valley Caldera
0.8
Boreal Vault
-0.5
Crimson Strait
0.0
Terra Therma Caldera
0.6
Frozen City
-0.5
Emerald Taiga
0.0
Terra Therma
0.5
Grim Plexus
-0.5
Forest Colony
0.0
Caustic Valley
0.3
Grim Portico
-0.5
Hellebore Springs
0.0
Sulfurous Rift
0.3
Polar Highlands
-0.5
The Mining Collective
0.0
Tourmaline Desert
0.3
HPG Manifold
-0.3
River City
0.0
Vitric Forge
0.3
Viridian Bog
0.0

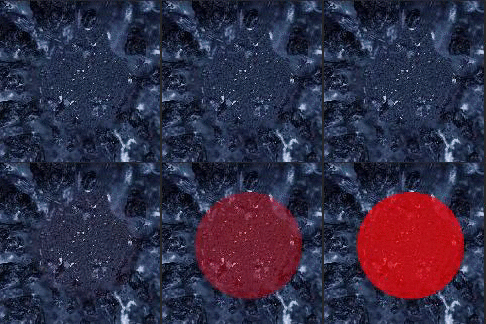
An interesting note regarding the calderas, while Caustic Valley's is constant throughout, the very central platform of Terra Therma is actually the same as the rest of map and therefore comparatively colder than the encircling ring of the caldera. Gifs indicating the approximate hotspots for both Caustic Valley and Terra Therma respectively:

Section 2: Generation
○ 2.1 Weapon-Based Heat Generation ○
The primary way heat is generated is through weapons fire. It's fairly simple, so the basic numbers the mechlab has for each weapons heat value are usually enough. There's only a few nuances to consider.

For weapons that have a firing duration, such as lasers or Clan LRMs, the total heat generated from the weapon gets distributed across that firing duration. The concept is similar to how the damage works for lasers.

Cooldowns work slightly differently for these weapons as well, only starting the timer at the completion of the firing duration. This means that to calculate a weapon's damage per second, or more pertinently, heat per second, these numbers must be combined, giving the following:


The weapon tables available through smurfy[mwo.smurfy-net.de] reflect this, but the calculations done by the game's interface do not. Hence the note earlier about the incorrect HPS values in the Heat Management equation.
○ 2.2 Ghost Heat ○
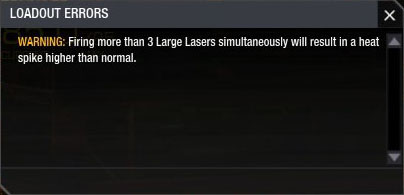
Officially known as Heat Scaling, "Ghost Heat" is the community-given and generally preferred term to describe the increasing heat penalties associated with firing too many of the same (or similar) weapons at the same time. It's a mechanic PGI implemented to try to cut down on boating (carrying oodles of the same weapon) and make the game more balanced. The only note you'll ever get within MWO about ghost heat is a warning message resembling this one:

This statement doesn't really justly cover the topic, given that the range of penalties vary enormously from nearly imperceptible to instant death. There may be a governing equation for how it works, but in this case it is more beneficial to just understand the principles, and look up any specific values that may be needed in the heat tables provided by smurfy, here.[mwo.smurfy-net.de]

While the game explicitly says "simultaneously", in order to prevent exploitation by macros with a 1 ms delay from getting around the penalty, the system actually examines all of what was fired in the last .5 seconds when determining if ghost heat penalties apply. This considers when the weapon began firing, not when it completed firing. This is an important deviation from the chain fire interval in the game, which cycles to the next weapon in the group .5 seconds after the last was fired only if the current weapon has completed firing.

Every weapon has its own penalty factor and limit to the number of them you can fire. Some are linked together with other similar weapons into groups. When firing mixed weaponry from a single group in a total number that exceeds the group's limit, the game will apply the largest penalty factor from among those weapons to determine your ghost heat. In example, if you fire 6 C-ER Small Lasers and 1 C-ER Medium Pulse Laser, the additional ghost heat will be equivalent to having fired 7 C-ER Medium Pulse Lasers.*

Some ghost heat penalties are small enough to be ignored in the right situation. While you may never fire 11 PPCs and live since they implemented this, it may be survivable and even wise to fire 3 Clan Large Lasers and just suffer a small penalty. This is one place where a pilot's judgement is very important.

* [color=gray]The majority of testing supports this, but some minor anomalies have been observed. These will be examined and addressed in the next edition of this guide. Because the deviation from the expected result is minimal, it was decided that holding up publishing for completely verified information on this account was unnecessary.
○ 2.3 Flamers ○
Flamers contribute to generated heat in unique ways both for the mech being hit by them and for the mech firing them.

Flaming an enemy adds heat to the target at a constant rate of 4.5 heat per each second the flame is held on the target. This cannot bring a target's heat beyond 90% of that target's net capacity however, and has no effect after a target has reached this threshold until it once again cools below this point.

The generation of heat that comes from firing the flamer is significantly more complex and likely the most mathematically difficult subject in the game since it involves linearly changing rates and therefore an exponential change in heat accumulation. It may help if you have a basic understanding of calculus, but hopefully with the help of graphs, examples, and general descriptions the principles of the system will still be clear even if you do not.

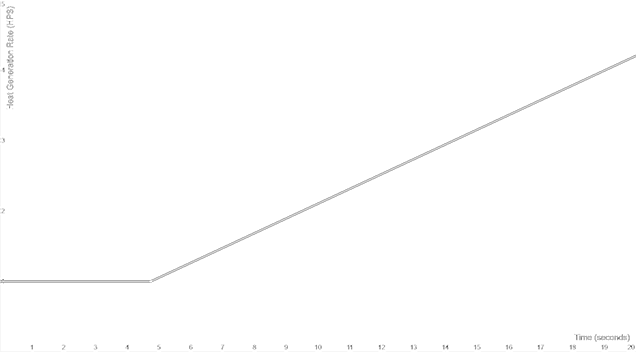
The rate of heat generation from a flamer follows a piecewise function:


The first portion lasts for the first 4.75 seconds the flamer is fired, is a flat value of 1 heat per second. After the flamer has been fired continuously for 4.75 seconds, the rate of heat generation begins increasing linearly at a rate of .035 heat per second per second. In graphical form, this appears like so:


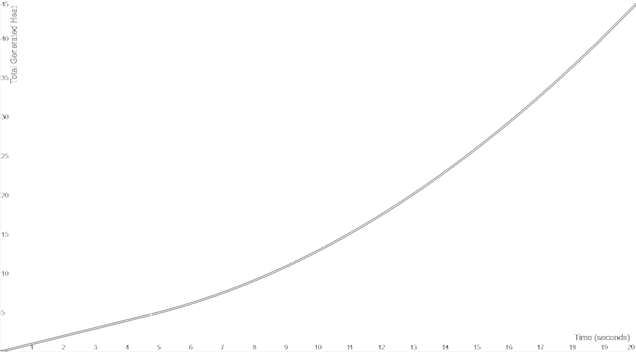
Integrating this with respect to time gives us the total heat generated as a function of time from firing one flamer continuously. Resulting in this function:


Which graphically would appear as:


The next concept concerning flamers to be discussed is the "memory" system. Shortly after the increasing heat generation rate was implemented for flamers, it was found to be easily exploitable with macros that briefly deactivated flamers before 4.75 seconds had been reached. This reset the time variable to 0 before immediately firing the flamer once again, circumventing the increasing penalty. Because of this, the memory system was introduced.

Instead of immediately resetting the time variable to 0 after all flamers on a mech are inactive, flamers return to their initial heat generation rates at the same rate that they increase. This only occurs after a period of 4.75 seconds during which no flamers are fired. If the flamer is again fired before this time has elapsed, it will resume its heat generation from the same position in the function as when it stopped firing initially.*

A more abstract way to think about this is to visualize a slider along the line in the rate graph above. The slider walks up the curve normally when firing, and walks back down after a brief pause when it has stopped firing. In an example: if you fire a flamer continuously for 10 seconds, wait 6.75 (2 + 4.75) seconds without firing, then resume firing again, the flamer's rate of heat generation will now be equal to what it would have been if you had fired the flamer continuously for 8 seconds.

All of the above characteristics describe a single flamer. When firing multiple flamers simultaneously, your total heat generation rate from them will naturally be the sum of all of them. The rates of each do not change directly. However, the effective time of the rate function and memory is tracked across the entire mech, and is only concerned binarily if any flamer is firing. Essentially this just means that you cannot cycle between flamers in a half-on, half-off macro to avoid ever reaching the exponential heat generation range.

Keep in mind that dissipation occurs continuously and usually at a rate much greater than a flamer's initial heat generation rate, meaning you may not see an increase in heat but rather just a reduction in cooling effectiveness until the flamer has been active long enough.

* [color=gray]The official patch notes from PGI state the flamer rate returns to normal based on the heat efficiency of the mech. Noticeable differences in rate changes have not been observed in mechs with different heat sink configurations.
○ 2.4 Jump Jets ○
Jump jets generate heat while being fired. Within the mechlab, each jump jet will display its heat value for that class of jump jet. This is actually given in heat per second, and surprisingly, it doesn't matter how many are equipped and firing on a mech. 1 Jump jet burning results in the same heat per second as 6.

Class
Applicable Mechs
Mass
Duration
Cooldown *
Heat (hps)
V
20t-35t
.5
3.75
1
1.7
IV
40t-55t
.5
3.75
.7
2
III
60t-75t
1
3.75
.55
1.7
II *
80t-85t
1
3.75
.5
2.25
I
90t-100t
2
4.09
.53
3

As will be seen later in the guide, the heat per second from jump jets will fall short of exceeding a mech's net dissipation rate in most cases. As such you may be more likely to observe a decrease in cooling as opposed to an actual rising level of heat on the heat scale.

* [color=gray]These are the values from the mechlab. Experimental results do not concur with these values in the slightest way. The cooldown given is certainly not in seconds, and may be some sort of coefficient to something else, or in some other strange units. It really has almost no relevance to the subject matter of this guide, I just feel obligated to point out that this number is essentially nonsense.

* [color=gray]I refuse to buy a Victor, the only mech that can equip this class of jump jet. As such these values remain unverified.[/color]
Section 3: Capacity
○ 3.1 Net Heat Capacity: Master Equation ○


○ 3.2 Base Heat Capacity ○

Every mech in the game, regardless of any other factors, has a base heat capacity (denoted here as C with a subscript 0) of 30 points. This number cannot be changed.
○ 3.3 Heat Containment ○

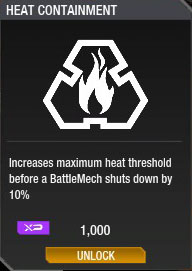
Heat containment (denoted here as Ω) is a basic mech skill you can unlock for a variant to increase that mech's heat capacity.

Unfortunately, while it technically works as described, it only has an impact on the static base heat capacity of 30. No other additions or subtractions to capacity are taken into account for heat containment's bonus, including heat sinks.* Ultimately this means that heat containment only provides an additional 3 heat capacity for any mech with the skill unlocked. Subsequently eliting the mech (unlocking all of the elite tier skills for that variant) and gaining the 2x bonus from basic skills will result in an additional 6 heat capacity.

* [color=gray]This is currently a source of signficant error within smurfy.net 's weaponlab, as heat sinks are taken into account for the bonus in that program.[/color]
○ 3.4 Heat Sink Capacity ○

The total capacity contribution of heat sinks (denoted here as C with the subscript sinks) is found by a weighted sum of both your internal and external heat sinks. This is really just a fancy way to say add them all together, in algebraic terms. In the equation above, n ≡ the number of heat sinks of that type and c ≡ the capacity of one sink of that type.

You can find the correct values for heat sinks of each type in the chapter on heat sinks in Section 1.
○ 3.5 The Heat Scale and Resting Heat ○
The heat scale on your HUD is calibrated to display your current heat level as a percentage of your net heat capacity. This part is fairly straightforward. In example, if your net heat capacity is 56 and you fire one ER PPC, generating 14 heat, your gauge reading will increase by 25%.

The heat scale only changes calibration with a change in net heat capacity, the full terms of which are outlined above. However, both the environment and your current throttle position also impact your mech's effective heat capacity by way of resting heat.

Resting heat (and the resulting effective heat capacity) is defined separately from net heat capacity as it exhibits characteristics of both a change in heat capacity and to a lesser extent, generated heat.

Because the heat scale's calibration does not change, resting heat appears similar to generated heat that cannot be removed. You have probably experienced this before on hot maps as a stable heat level below which your mech would not cool. The same phenomenom is actually taking place on cold maps as well, it is just working in reverse as an increase in your mech's effective heat capacity. This one you may have not noticed. Just like before with the unchanging calibration of the heat scale, if this were represented in the same fashion it would be a "negative" heat level, but our scale's visible range only includes 0-100%.*

While this is likely the most conceptually difficult and convoluted subject in this entire guide, ultimately there is one advantage to the heat scale's fixed, net heat capacity-based calibration. Generated heat for a given mech will always result in the same change in percentage on the scale, regardless of resting heat parameters. This means that the first example of firing one ER PPC and raising that mech's heat level by 25% is true, no matter where it is or whether it's trying to go somewhere. Knowing how much heat you generate with an alpha strike or with other weapon groups is very valuable and universally transferrable to all situations in the game.

The result in a change in resting heat depends both on the current heat level and also the direction of the change. Increases in resting heat result in a step reduction of heat capacity, seen as an instantaneous increase in heat level on the heat scale (if within the visible range), but only if the current heat level is not already greater than this threshold. In examples, if the current heat level is 0% and resting heat increases by an equivalent of 2%, the heat scale will immediately read 2% and the mech will not cool below this unless the resting heat changes again. Alternatively, if the current heat level is 10% and the same increase occurs, no immediate effect will be observed. The mech will continue cooling at the normal rate until it reaches the new minimum threshold of 2%.

Reductions in resting heat do not result in stepwise changes, instead the difference becomes generated heat. In example, if a mech's resting heat goes from the equivalent 5% to 0%, the mech will immediately begin cooling from the heat level of 5% down to the new threshold of 0%.

* [color=gray] You can try this yourself fairly easily: Try firing just one low heat weapon on a cold map while not moving. You likely won't see any heat at all on the gauge because it's still below the visible range consuming only the bonus you're getting from the environment.[/color]
○ 3.6 Effective Heat Capacity: Master Equation ○


○ 3.7 Environmental Effects on Resting Heat ○

The simpler of the two sources of resting heat, the environment reduces or increases your effective heat capacity proportionally to the specific E value for that location. These values can be found in Section 1.
○ 3.8 Throttle Effects on Resting Heat ○

Throttle resting heat (denoted here as K with a subscript thr) always reduces your effective heat capacity proportional to your current throttle setting (denoted here as T with a subscript %, given as % of full throttle). This interestingly is true regardless of actual speed over ground. Being stuck on terrain and actually going nowhere appears to have no effect, so long as your throttle is unchanged. Reverse throttle has the same magnitude of a heat penalty as the forward throttle does for that percentage of full speed (e.g. 60% reverse is the same as 60% forward).

Section 4: Dissipation
○ 4.1 Heat Dissipation: Master Equation ○


○ 4.2 Heat Sink Dissipation ○

The total dissipation contribution from heat sinks (denoted here as D with the subscript sinks) is found by a weighted sum of both your internal and external heat sinks. In the master equation above, n ≡ the number of heat sinks of that type and d ≡ the dissipation rate of one sink of that type.

You can find the correct values for heat sinks of each type in the chapter on heat sinks in Section 1.

Because there is no static bonus for all mechs when it comes to dissipation, total heat sink dissipation value essentially replaces the analogous "base" value from capacity. Accordingly, both quirk and mech skill bonuses use this as a factor and therefore change proportionally with your heat sinks, unlike the way net capacity works.
○ 4.3 Cool Run ○

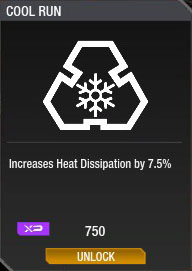
Cool Run (denoted here as η) is a basic mech skill you can unlock for a variant to increase that mech's dissipation rate.

This bonus applies to only the dissipation you gain from heat sinks, before effects of the environment, throttle position, or any quirks apply. This is an important distinction from Heat Containment (discussed in detail in the previous section), as it scales porportionally with an increase in a mech's dissipation from heat sinks instead of being a flat value.

Unlocking every elite skill for a variant doubles the effects of all basic skills, including Cool Run, bringing η to a value of .15.
○ 4.4 Mech Quirks ○


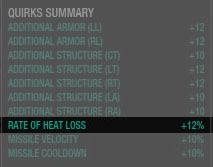
Found somewhat frequently in Light mechs and sparingly elsewhere, there are quirks that improve dissipation rates.

As with cool run, this bonus is based on a mech's total heat sink dissipation before other effects are considered.
○ 4.5 Environmental Effects on Dissipation ○

The environment reduces or improves a mech's heat dissipation rate by its E value. This value for each location can be found in Section 1.
○ 4.6 Throttle Effects on Dissipation ○

Having the throttle in any position other than neutral will reduce that mech's dissipation rate by an amount approximately proportional* to the throttle's position (denoted as T with a subscript %, given as a percentage of full throttle). As with the throttle and resting heat, actual speed over ground is irrelevant. Reverse throttle settings work just as forward settings do, as a percentage of the maximum in that direction.

* [color=gray] This is the main place where I found myself completely stumped while researching this guide. The function does not actually appear to be completely linear, containing a small dip at around 50%-60% throttle before accelerating back up towards 100%. The resulting curve resembles a trinomial function, but may be a piecewise function also. Overall, it remains linear enough that the error from using a linear function is so unnoticeably small in the big picture that I feel it suffices for most player's purposes. This is especially true given that many players do not operate in this throttle range for extended periods of time. Just be aware that if you plan to do your own observations, there's something else happening here, I just do not understand exactly what it is at this time. Any suggestions and insights are appreciated. [/color]
Section 5: Other
○ 5.1 Heat Damage, Shutdowns, and Override ○
Self-inflicted damage, the real underlying reason why heat is important in any way, is a difficult science to disect. Much of the more important mechanics for overheating damage are randomized and the game lacks an accurate gauge to see specifically what is happening in most cases. Because of this, it's fairly difficult to describe overheating in a function, but there are several key things that are known.

By default, mechs have the override switch off. This means when you reach the max heat capacity of your mech, it will automatically shut down and will begin powering back up only after it has cooled below this threshold. It is however possible to flip a mech's override on to prevent this initial shutdown and it is also possible to manually power back up immediately after an automatic shutdown occurs before the mech has cooled below the threshold. Are these actions wise? Unsurprisingly, the answer is sometimes. To weigh the costs and benefits effectively, it's important to have a good grasp of what happens in either case.

While shutdown, all damage from overheating is confined to the CT. All damage from overheating always affects a component's internal structure directly. Although the specific rate is very slightly randomized, the average damage per second the CT receives is roughly .8. The fact this is a flat number means that mechs with less structure will receive a greater fraction of their total health in damage per second and subsequently suffer death from overheating sooner than larger, tougher mechs will. The damage rate while the mech is shut down does not appear to be influenced by the degree the current heat level has exceeded the threshold.

While powered up, damage is inflicted in randomly selected components. Although in itself this is actually better since it may spread the damage out, the rate at which damage is dealt significantly surpasses this small advantage and makes the overall time until death while powered up significantly shorter, as expected. Damage taken is confirmed to be proportional to the degree that the current heat level has exceeded the threshold, but only weakly so. The dominant factor governing how much overheating damage is taken while powered up remains the time spent over the damage threshold, as was the case with being shut down.

Providing a few examples to give a general picture of the magnitude of the numbers, the time until death from overheating in a KDK-1 after firing 9 ER PPCs was ~1 second while remaining powered up, and ~70 seconds while powered down. In a more practical mech, continuously chain-firing C-ER Medium Lasers in an Ebon Jaguar to barely maintain heat past the threshold resulted in survival for only ~10 seconds before the engine was destroyed. This is in contrast to the ~51 seconds it would have survived beyond the threshold if it had been shut down.

The override switch must be activated prior to reaching the heat threshold. Override activated after an automatic shutdown has commenced will have no effect, and the pilot must manually power up to again assume control, which is not an instantaneous process. Automatic shutdowns disable a mech for a minimum of 3 seconds, even if the pilot manually powers back up. This time can be reduced by 33% by unlocking the elite skill for a given variant, but particularly on lightly armored mechs that rely on speed for survival, even this reduced downtime of 2 seconds can prove catastrophic.

While being shut down for an extended period of time is a death sentence for most mechs in most situations, it is equally clear that continuing to operate for more than just a few seconds beyond the heat threshold is just as devastating if not more so. Overall, this serves to highlight how important it is to know how to manage heat, and avoid having to make this choice whenever possible.

That said, your mech's structure is a resource. Pushing it to the limit can often mean victory instead of defeat for yourself or even your entire team. A good pilot knows how to make the most of his or her remaining heat reserve and flirt with the threshold of danger, but there are still effectively hard limits that you will not return from if you cross. The price of exceeding the threshold with override on for any considerable amount of time is very high. Be certain your sacrifice will not be in vain.
○ 5.2 Submergence in Water ○
Partial submergence of a mech in water can improve that mech's heat efficiency. This effect is proportional to the degree the submergence of components containing heat sinks.

The exact math for this effect is very difficult, as mechs have vastly differing heights for their respective components. While it may be possible in the future (and particularly, after the rescale takes effect on 21 June 2016) to establish a database that details the specifics for every single chassis, the scope of this guide will be limited to discussing the principles and general magnitude of the effects only.

Submergence's impact on capacity takes the form of negative resting heat and as such will not alter the scale of your heat gauge. Submergence also improves your dissipation rate as expected.

The general magnitude of these effects, while not extreme, is significant and noticeable particularly for smaller mechs. Testing appears to indicate that the bonus is linear and effectively doubles the benefit of the heat sinks if they were completely submerged. In example, a Kodiak sitting with its legs ~75% submerged in River City gained an effective .75 additional external heat sinks while there was one in its leg, and gained effectively 1.5 additional heat sinks when there were heat sinks in each leg.

Smaller mechs that sit with their entire legs completely submerged and significant portions of their torsos also submerged gain increasingly more substantial bonuses.
○ 5.3 Submergence in Lava ○
Lava is currently present on only one map (Terra Therma). A mech standing partially submerged in lava will experience mixed heat effects and after a short grace period, begin taking damage to its legs.

Lava's most obvious heat effect is its heat generation. Similar to flamers, lava adds heat over time at a flat, unchanging rate up to 90% of the mech's net heat capacity. This rate appears to be proportional to the degree of submergence the mech has in the lava.*

Lava also affects a mech's effective heat capacity through resting heat. Hilariously however, it actually improves this. Due to the nature of negative resting heat, this effect will not be observed unless the mech is able to still cool within the lava. Because lava's heat generation may be overcome by a mech with sufficient dissipation, this is actually still possible. Under these (unusual) conditions it is possible for a mech to experience an increase in effective heat capacity while partially submerged in lava.*

The magnitude of heat generation from lava varies from ~3 to ~4.5 heat per second amongst the spectrum of chassis. The amount of negative resting heat gained from partial submergence in lava appears to be equivalent to what would be gained from submergence in water, in the very few instances where this effect was measurable.

Damage from lava occurs at a flat rate for as long as the mech stays partially submerged, but only after ~8 to ~10 seconds after entering the lava. This grace period and also the magnitude of damage has been observed to be randomly variable in addition to being possibly related to the degree of submergence. The magnitude of averaged damage per second varied from ~.4 to ~1 damage per second to armor, and from ~.6 to ~1.4 damage per second to internal structure in observed tests.

* [color=gray]It is possible the variability in lava's heat generation rate may actually be due to the interference from the alteration in dissipation rate gained from general submergence, as if the lava was actually water. Because these effects are simultaneous, it is not possible to determine precisely which is the case.[/color]

* [color=gray]As mentioned in the first footnote, it is as if the engine only concerns itself with submergence in any fluid for it's typical effects, with the heat generation from lava being just one addiitonal effect layered on top of the effects from submergence in normal water.
○ 5.4 Cool Shots ○
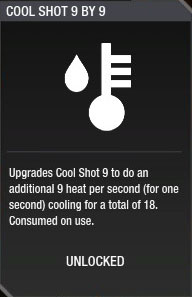
Cool shots are consumables you can equip on any mech you own. They are single use items bought with either C-bills or MC that reduce your heat level. All cool shots give you a large dissipation boost for a brief moment. It's also accurate to think of them as removing the specified amount of heat over their fixed duration of one second, similar to how lasers add heat over their duration, only in reverse.

There are 3 levels of cool shots: 6, 9 (upgradable to "9x9", which actually cools for 18), and 18. You may only equip up to 1 cool shot 6 and up to 1 of the other two cool shots.

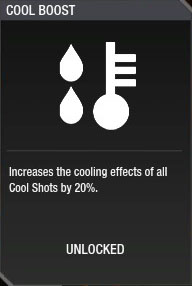
The slightly lesser known detail of cool shots is that they permanently upgradable. Within the pilot skill tree there are consumable skills that can be purchased with GXP to improve the effectiveness of those consumables for all mechs you use them with. This does not change the cost of the consumables in any way and is thus one of the most efficient uses of GXP. There are two upgrades available for cool shots:

○ 5.5 The Hellslinger ○
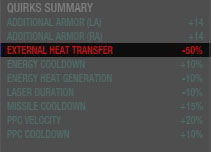
One of the more unusual quirks in the game is the allegedly negative "External Heat Transfer" quirk seen in only the BLR-1GHE Hellslinger. Although owners of this hero mech are rare, its unique effects warrant a special discussion.

It is a slightly confusing if not just plain misleading title, given that the actual effect of this quirk is to halve all E values the mech feels. This also makes it strange that it's considered a negative quirk, since on hot maps this will actually play to your significant advantage. I suppose however that it has to be colored either red or blue, and in fairness there are not only more cold maps than hot but also cold maps are on average more cold than hot maps are hot, ultimately making this more likely to be a downside for you than a benefit at least in Quick Play.

Unfortunately Faction Play does not have many hot maps, and those that are hot fall markedly short of being as hot as Terra Therma or the caldera of Caustic Valley. Even still, the net result of this quirk on Vitric Forge is equivalent to having another free external double heat sink worth of dissipation, which could be significant.
○ 5.6 Loadouts, Dropdecks, and the Environment ○
Most pilots categorize (at least mentally) mechs as cold, neutral, or hot. A cold mech generates so little heat that it is not even worth worrying about, and they always fine. Hot mechs conversely are loaded to the brim with necessary heat sinks and generally rely on burts of combat with punishing alpha strikes, followed by brief cooling periods. Neutral mechs sit somewhere in between with weapons that do not always push them to the limit except in particularly hairy firefights, and accordingly carry only a few heat sinks.

In quickplay the mech is chosen in advance so you have to make the best of whatever map you get. In Invasion however, you have an opportunity to select which mechs you will bring after you know where you will be playing. When hot maps come up (particularly the misunderstood Vitric Forge), there is generally a scramble for everyone to switch to cold mechs. This part is reasonable. However, if those players do not have enough cold mechs, they choose neutral ones instead of hot ones. I believe this is unwise.

If you look back briefly at the master equations for both capacity and dissipation, you will see that the environmental effect is a term, not a factor.

This is important because it results in changing fractional significance depending on the mech's natural heat efficiency. As it is, a mech with a net dissipation rate of 2 heat per second on a neutral map suffers a 25% loss when it is on Terra Therma. A mech with a net dissipation rate of 4 heat per second in neutral environments however only suffers a 12.5% loss. The same principle is true for effective heat capacity.

It may be easier to think of the impact of the environment as lost heat sinks. On Vitric Forge, clan mechs lose the benefit of 2 external heat sinks worth of dissipation. Imagine going into the mechlab and removing two heat sinks from both a neutral, 2/(10) mech that struggles at times with sustained combat, and a 13/(10) laser vomit mech. Which would you feel has lost more of its viability?

This is entirely just my opinion and my interpretation of the numbers. There is a wide array of what could be seen as "neutral" as I've defined it, and so the situation varies. The overall point however, is to show that by the numbers, these things are not nearly as signficant as many people believe.

I have been a part of teams on Vitric Forge where targets were prioritized not because of their location, health, or any other important factors but instead because of only their loadout and the caller's misplaced judgment of how significant the environment was. I have even been that caller, making questionable tactical choices because I did not understand this concept and placed too much value on how cold I expected an enemy mech ran. Worse yet, I have also been a part of teams who will cast blame on people bringing "incorrect" builds to that hot map, following a loss.

Heat efficiency and the pilot's heat management matter. The environment, playing into both of these, matters as well. It does not matter enough however to make a good idea bad or vice versa, and should be seen as just another tool in the box to give yourself the best chance you can at victory.
[color=gold]○ 5.7 Li Song Mechlab ○[/color]
The equations and data presented in this guide is primarily to give readers a point of reference and to arm them with the theoretical foundation of what's actually happening behind the scenes. When the time comes for actually planning out your builds with this information in mind, I highly recommend using Li Song Mechlab to shortcut your calculations and give you the best technical information you can obtain.

This is a standalone, downloadable Java program where you can create and store different mech loadouts with much greater ease than the game's native mechlab or other comparable programs. The UI is intuitive and provides detailed tactical information on your build, including the heat management characteristics. I have been collaborating with Li Song for portions of this guide and for the heat portion of her mechlab program. To my knowledge, this is the only program outside of the game itself that actually uses completely correct and verified heat data.

The program is available for download here:
Li Song Mechlab[emilybjoerk.github.io]
○ 5.8 Methods Used ○
This chapter briefly describes some of the methods used to gather the data necessary to draw the conclusions presented in the guide. It is here to give others a chance to verify my science and conduct their own further research, and also for anyone who is simply curious. If you are neither of these, it may be quite a boring section. For this reason it has been grayed. Feel free to skip ahead to the afterword of the guide.

[color=gray]For measuring parameters that change over time, the majority of data was gathered by video recording and subsequent frame counting. Frame counts were converted by the framerate of the recorded video into seconds. Multiple trials of a variable were always run to guarantee the isolation of the effects being measured for the domain of that variable. Multiple instances of the same trial were usually run and averaged to reduce the impact of measurement error.

For measuring ghost heat levels, mechs with known heat capacities and loadouts that would produce ghost heat were taken to neutral maps. While stationary to avoid the effects of resting heat, the specific weapons were fired. The peak heat observed on the heat scale was converted to heat units. The heat generated from all weapons independently was subtracted from this number to obtain the ghost heat value for that weapon configuration.

A quirkless, unbasiced mech with 0/(10) double heat sink configuration was equipped with two flamers. This was done to immediately nullify the dissipation rate by the flat heat generation of the flamers. Both were fired continuously on a neutral map while stationary. The resulting heat generation rate was logged at every percent and results were graphed. Regression analysis was used to determine the piecewise function.

Net heat capacity was determined both by the observation of peak heat scale values from weapons of known heat, and as a byproduct of determining dissipation rates since all values for that analysis hinged on correct conversions of heat scale percentages to units of heat. It was in this second way that the error with the accepted heat sink information and effects of the heat containment skill were discovered and subsequently corrected.

Resting heat in the visible range was determined by direct observation and percentage conversion to heat units. In the non-visible range, differences from expected and observed peak heat scale values from firing weapons of known heat was determined.

Environmental and throttle effects were determined by regression analysis from scatter plots. A minimum of four trials at varying E values and throttle settings, respectively, were plotted for both dissipation rates and resting heat levels.

Effects of quirks and skills were evaluated by isolated comparison between otherwise identical mechs in identical environments.

Heat damage was estimated by average time to death measured with frame counting across mechs of varying structural integrity and magnitudes beyond the heat damage threshold. Similar time to death analysis was done for the effects of lava, and converted to averaged damage per second.
[color=gold]○ 5.9 Change Log ○
Edition 1.1 - 08 July 2016
  • Created this chapter and a chapter in Section 1 concerning editions.
  • Added recommendation and links to Li Song Mechlab
Further Thoughts
Thank you for reading this guide. I hope the information and opinions contained within answered questions or at least inspired new ones, and I hope reading this will serve you well and help us together move the MWO community towards a smarter whole.

I want to thank the people who have tackled this subject before me. Your work was a monumental help in getting me started and I doubt I would have gone far without it. I also want to thank my buddy razenwing for giving me a hand with some quality assurance and being there to bounce ideas off of, and Li Song for helping me straighten up some of the data I had collected and confirm theories. Lastly, thank you to the people who made this game possible.

Please feel free to add a comment below or contact me directly if you have any questions and further thoughts of your own.


[color=white]Never stop thinking.


43 Comments
voidangel 17 Jun, 2022 @ 3:55am 
So I'm not telling you, or anyone, that they have to like the Heat Scaling system - I'm not even presenting an argument on whether or not it's good. I just wanted people to be honest about why they were against it, and the prevalence of the term "Ghost Heat" demonstrates exactly how much intellectual honesty I got.

As for the heat system overall, there were some tweaks, I think? I want to say flamers, but I don't recall. I stopped playing for a while, then started up again - this guide is still linked on the New Player forums, which is how I came to it. Most of the data is still correct, and thus the conclusions your guide makes are valid. There's a reason it's still stickied - I just wanted people to realize that some of the particulars may be out of date.
voidangel 17 Jun, 2022 @ 3:55am 
Just so we're clear, Heat Scaling is -not- hard to understand, and the objections I'm talking about are and were silly. If people felt that it was too confusing to the newbies, or that there were better ways to fix alpha-boating, fine. Make that argument, and I'll agree or disagree based on the merits presented. But the whole "hur, it's 'ghost heat,' it doesn't make any sense, there's no possible way to explain it,' was a dishonest farce. I thought for fifteen WHOLE SECONDS and came up with "firing certain combinations of weapons, simultaneously, generates a local overload in the cooling system, resulting in cooling inefficiency that shows up on 'mech sensors as extra heat." That explanation is perfectly reasonable in a universe where (literally) impossibly large robots with tons of unnecessary articulation are far tougher than tanks made with the same technology.
GarbageCollector  [author] 1 Jun, 2022 @ 2:59am 
It's possible that every single data point and even the general analysis of strategies is no longer relevant. I haven't played the game in multiple years and have no idea what was changed.

But if we're talking about ghost heat from implementation up to the time I stopped playing, those complaints were very reasonable. The entire system was unintuitive and very poorly described, somewhat easily circumvented in specific cases if you knew how it worked, and generally unhealthy for the overall playerbase's knowledge of game mechanics. The developers could have accomplished what they set out to do in a much more transparent and coherent way. I stand by my words about the system that were written at the time.
voidangel 1 Jun, 2022 @ 1:29am 
P.S. "Ghost Heat" is player slang that started out as an unreasonable complaint about the Heat Scaling system, claiming that it "broke immersion." This was intellectually dishonest obstinancy in service of their dislike of not being able to boat ERPPCs up to their 'mech's heat cap any more, but the slang term stuck. [/soapbox]
voidangel 1 Jun, 2022 @ 1:29am 
The general thrust of this guide should still be accurate, but some of the information is out of date.

For example, the guide still talks about "Eliting" a "mech, for the "X2 bonus." This was from the old, original 'mech skill system, where you'd need to own and grind up 3 variants of the same 'mech in order to get double bonuses from 'mech skills. This entire system was scrapped quite a while ago, and replaced with something completely different.

Additionally, I believe there have been changes to (or bug fixes for) the new skill system's heat dissipation nodes, though it's been a while since it happened.

In short, this is still an excellent explanation of the nuts and bolts of heat mechanics in MWO, but bear in mind that some of the particulars have changed.
The Coal Man 25 Sep, 2021 @ 9:43pm 
Either way, great guide. Its amazing how hard the devs made it to understand the basic mechanics of this game.
The Coal Man 25 Sep, 2021 @ 9:42pm 
Does anyone know if this guide is still mostly accurate?

@smokytehbear Might be worth giving this game another shot. I started playing it when it released and quit when ghost heat was implemented, but its been greatly improved by the new devs and its a genuinely fun experience for a mechwarrior vet now. I still think ghost heat is an abomination though.
Nate Racing 15 Jul, 2021 @ 5:05pm 
@ChaosRifle yes "Elite skills" are no longer a part of this game, but Heat Containment, Cool Run, and Heat Gen are all important skill nodes found in the new system, available in the Operations and Firepower skill trees.
GarbageCollector  [author] 5 Jul, 2021 @ 2:52pm 
@ChaosRifle I haven't actually played in years so I am not sure. Sorry mate.
Chaos 3 Jul, 2021 @ 5:49pm 
3.3 talks about elite skills, is this a thing still since the skill rework? I don't think it is.