
Install Steam
login
|
language
简体中文 (Simplified Chinese)
繁體中文 (Traditional Chinese)
日本語 (Japanese)
한국어 (Korean)
ไทย (Thai)
Български (Bulgarian)
Čeština (Czech)
Dansk (Danish)
Deutsch (German)
Español - España (Spanish - Spain)
Español - Latinoamérica (Spanish - Latin America)
Ελληνικά (Greek)
Français (French)
Italiano (Italian)
Bahasa Indonesia (Indonesian)
Magyar (Hungarian)
Nederlands (Dutch)
Norsk (Norwegian)
Polski (Polish)
Português (Portuguese - Portugal)
Português - Brasil (Portuguese - Brazil)
Română (Romanian)
Русский (Russian)
Suomi (Finnish)
Svenska (Swedish)
Türkçe (Turkish)
Tiếng Việt (Vietnamese)
Українська (Ukrainian)
Report a translation problem


I restarted the game, and got set back a few minutes. So I blew up the bleeder again. CW driving to the tree. Music got weird at some point, CW was afraid, asked If I did this ... apperently heading to the bad ending. But then we ended up in Maray. The good ending again. And then the tilte screen was broken, so I could't quit. Clearly some serious issues going on there.
Nevertheless, great guide, thank you for the thorough notes!
Anyway, just played it again and a much better experience, I think it is incredible how much your brain remembers, even some of the numbers when I needed them my memory dragged up from somewhere.
But strangely, I still went to pieces with the gauntlet, in the end when I got through it was because I was trying to get them back to their starting position so I could follow a walkthrough (last resort) and I accidentally hit on the combination to open the back door.
The only other thing I with Cyan had done is not end the game after the plunger, instead let us go for a wander.
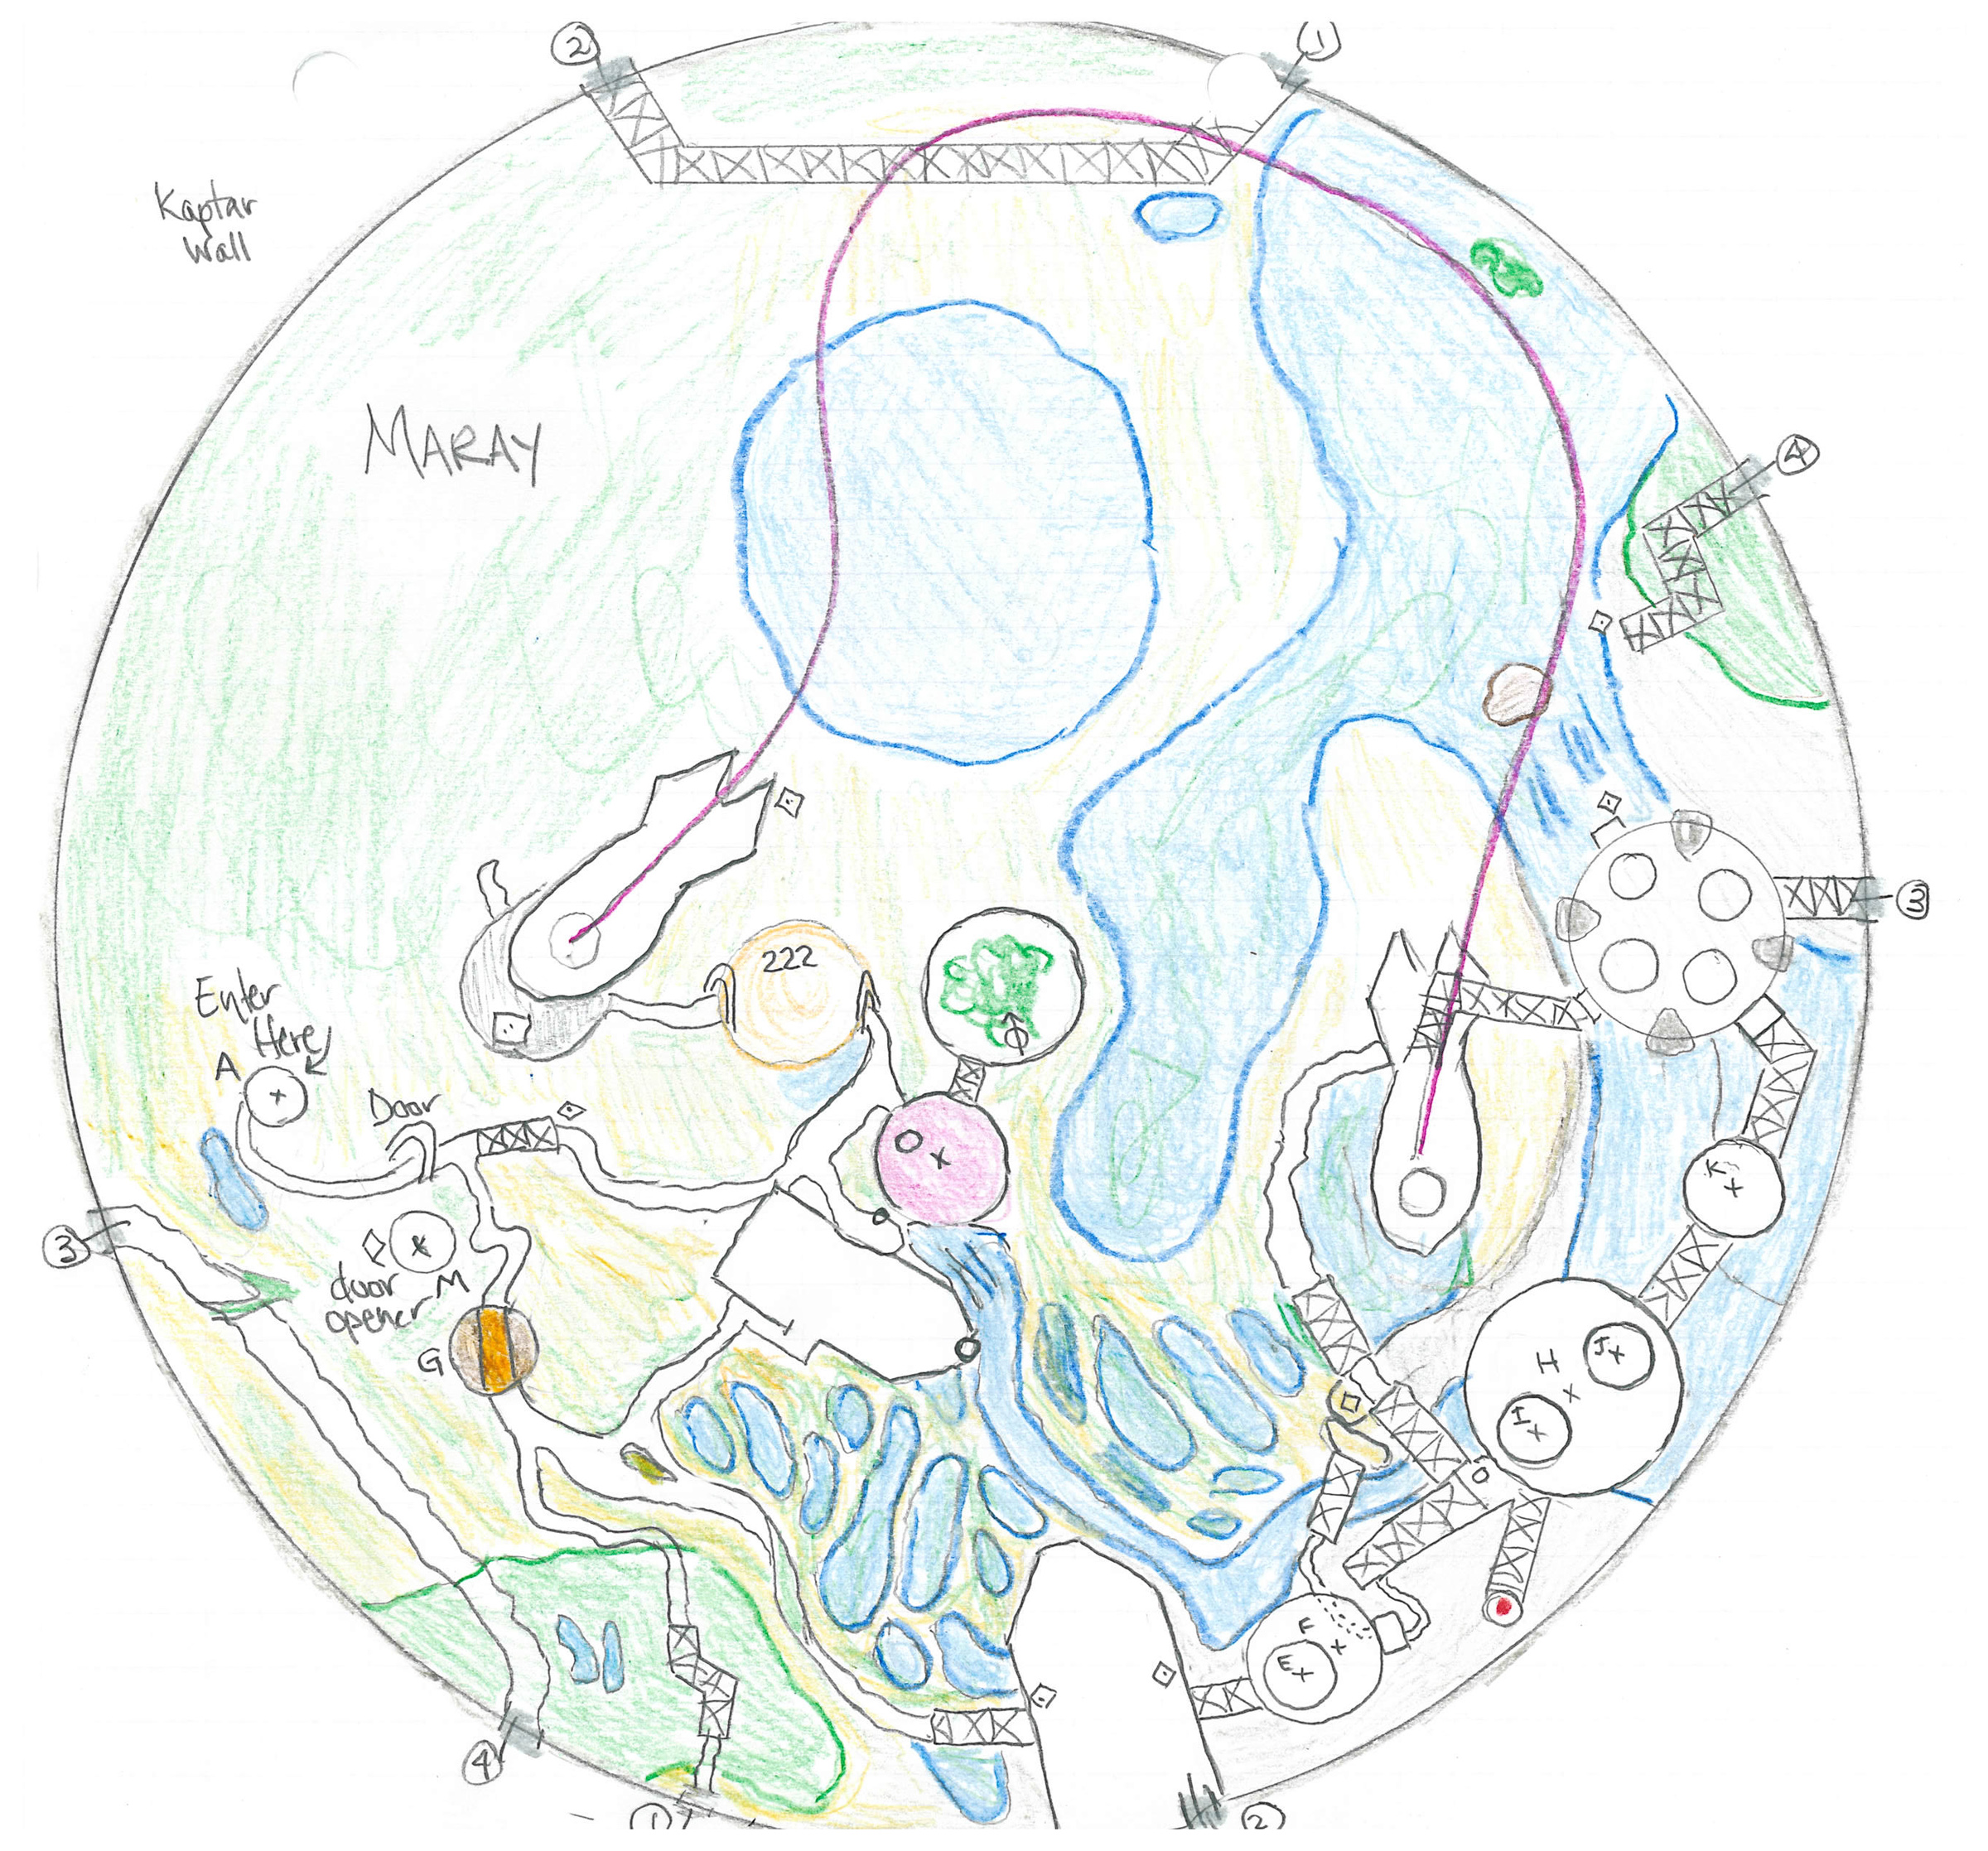
Mayor talks about "karma" where Mofang will get exactly what they decided to unleash on other races. The "remainers" remain to execute that plan.
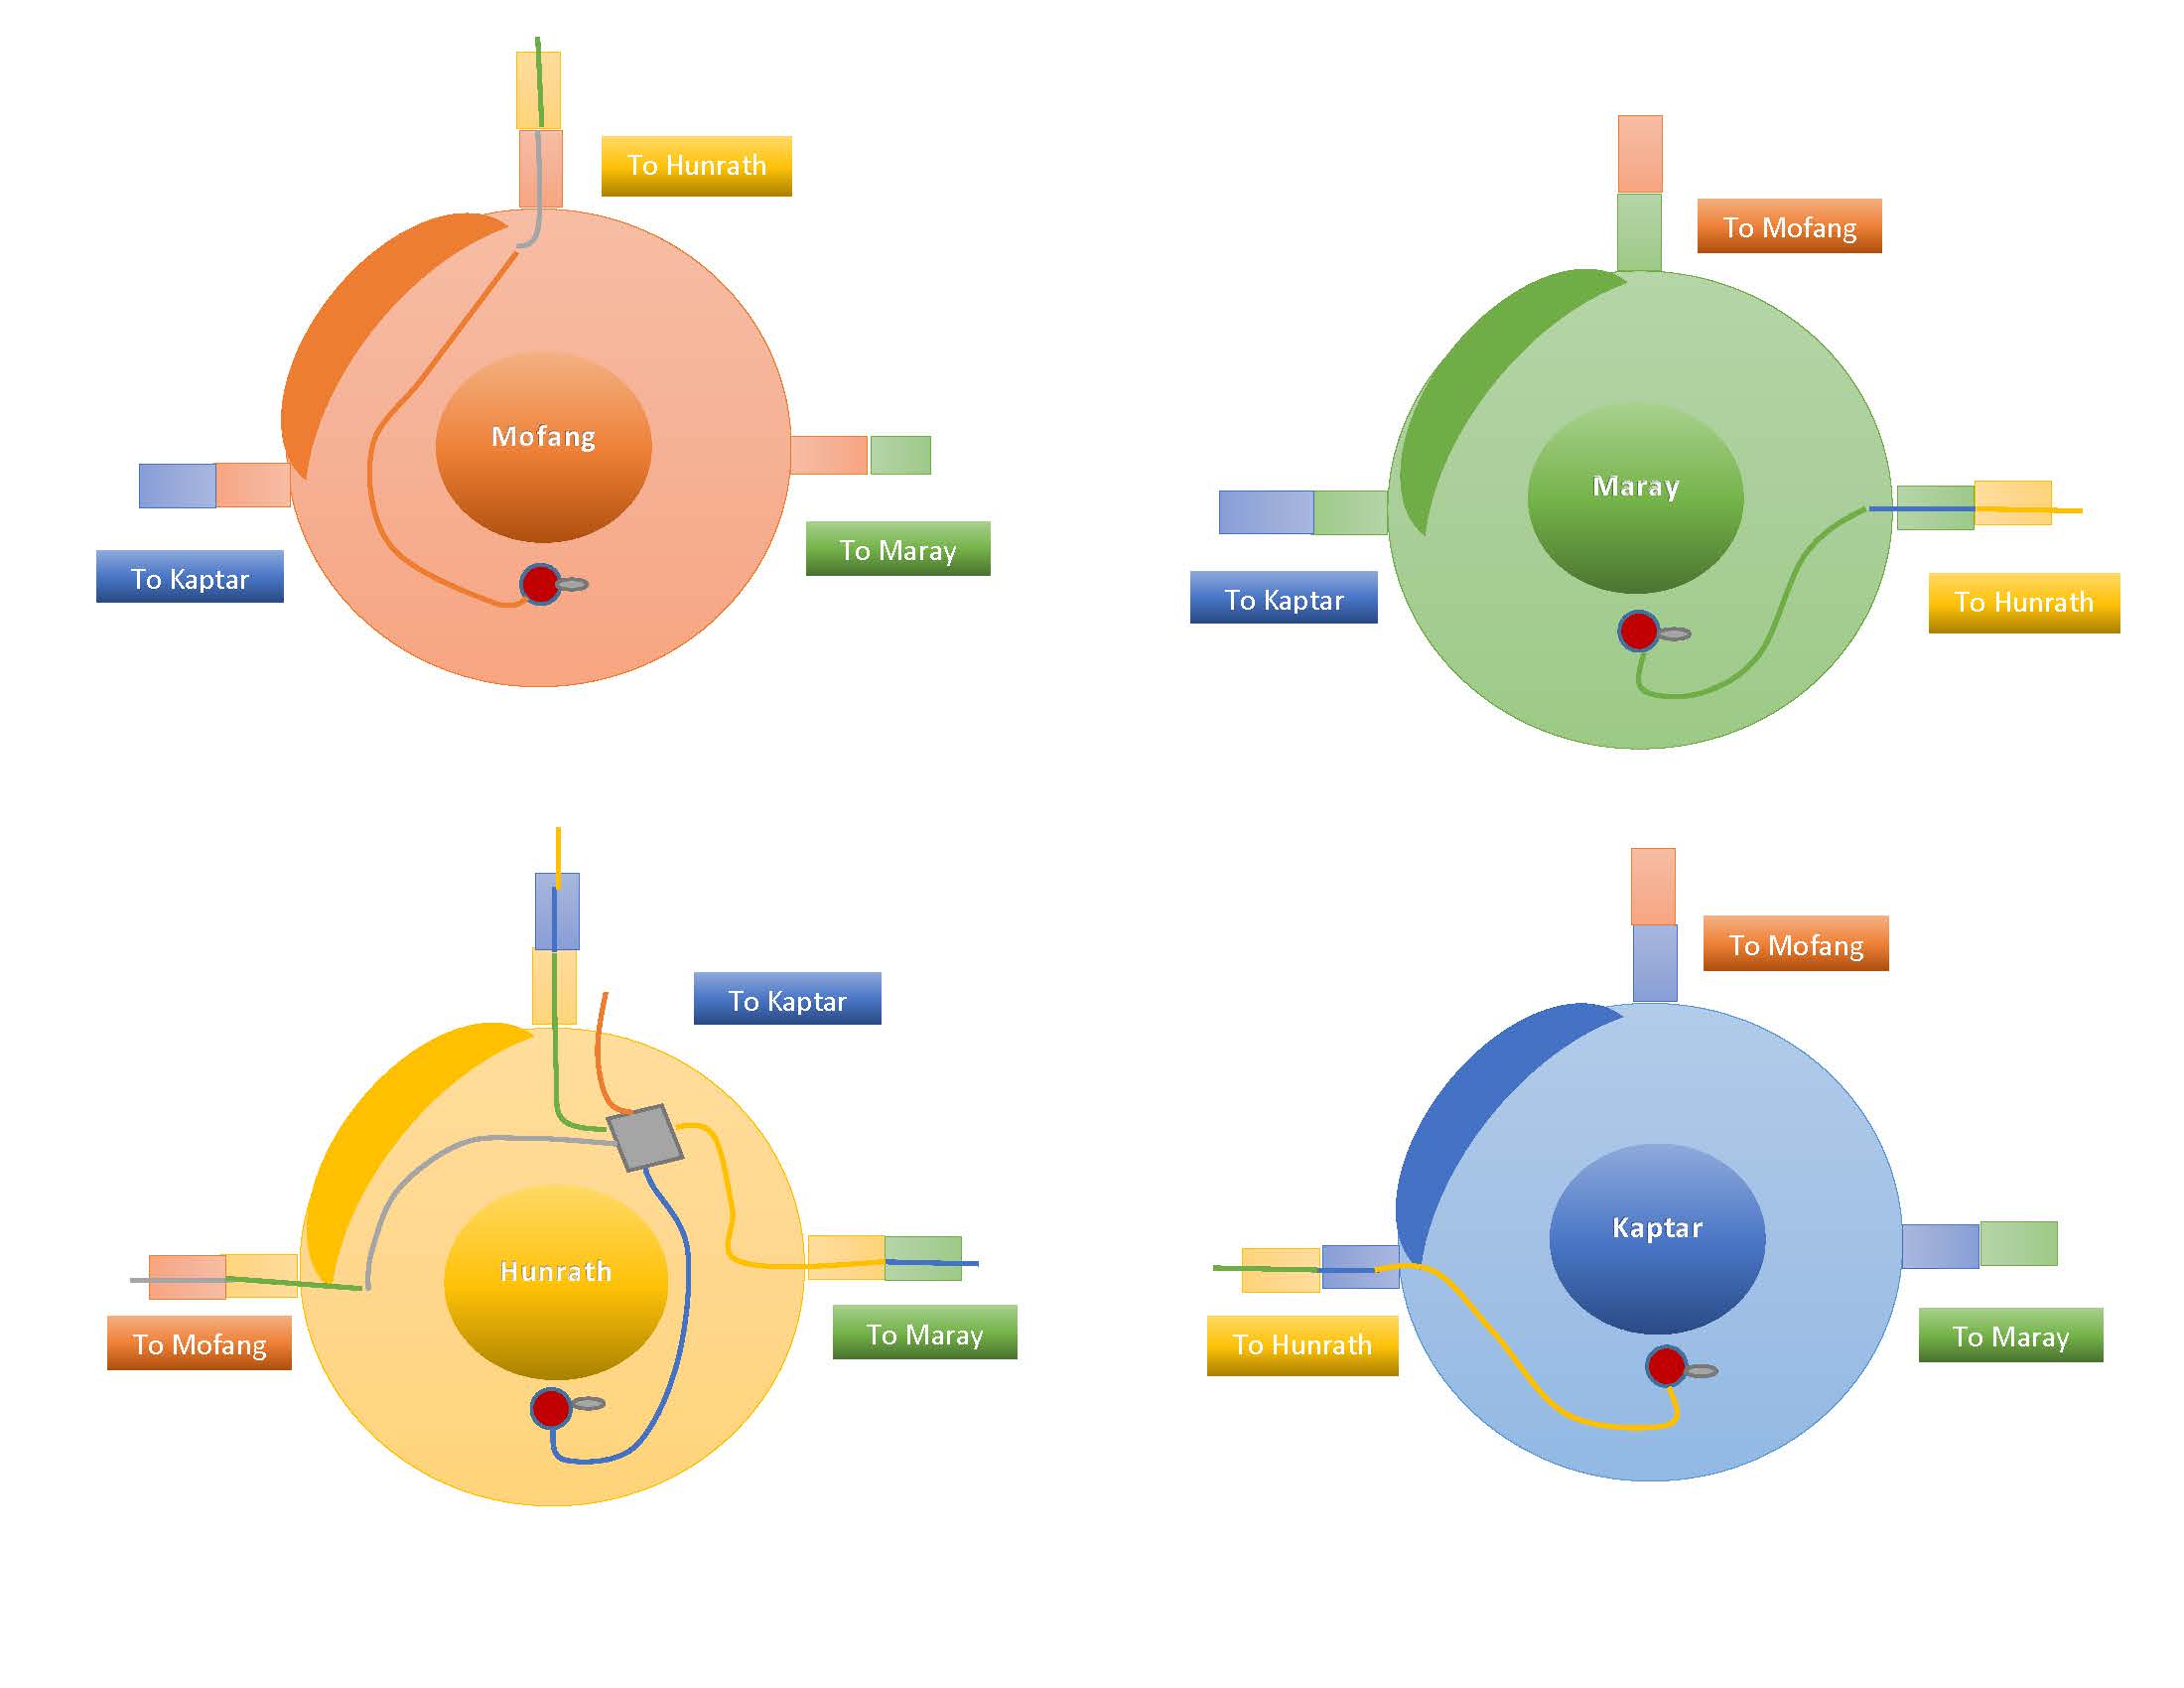
The Mofang have prepared some powerful bombs and were preparing to destroy all other worlds by swapping the bombs there. People prepared the plan: hide (chamber) everyone and the remainers will swap to Mofang and quickly swap back so that whatever Mofang prepared for their worlds would be sent back to Mofang.
Mofang have destroyed their own world with their own hands by trying to destroy others.
Mofang's world was blue and beautiful just like you see from Hunrath. That's why the Mofang sphere in Maray is beautiful and has the spherical plant. But everything else in the Mofang world was blown up and turned into charred radioactive glass.
P.S. On Earth countries build nuclear bombs that can destroy the whole world. That sand blast in the in-game Arizona...
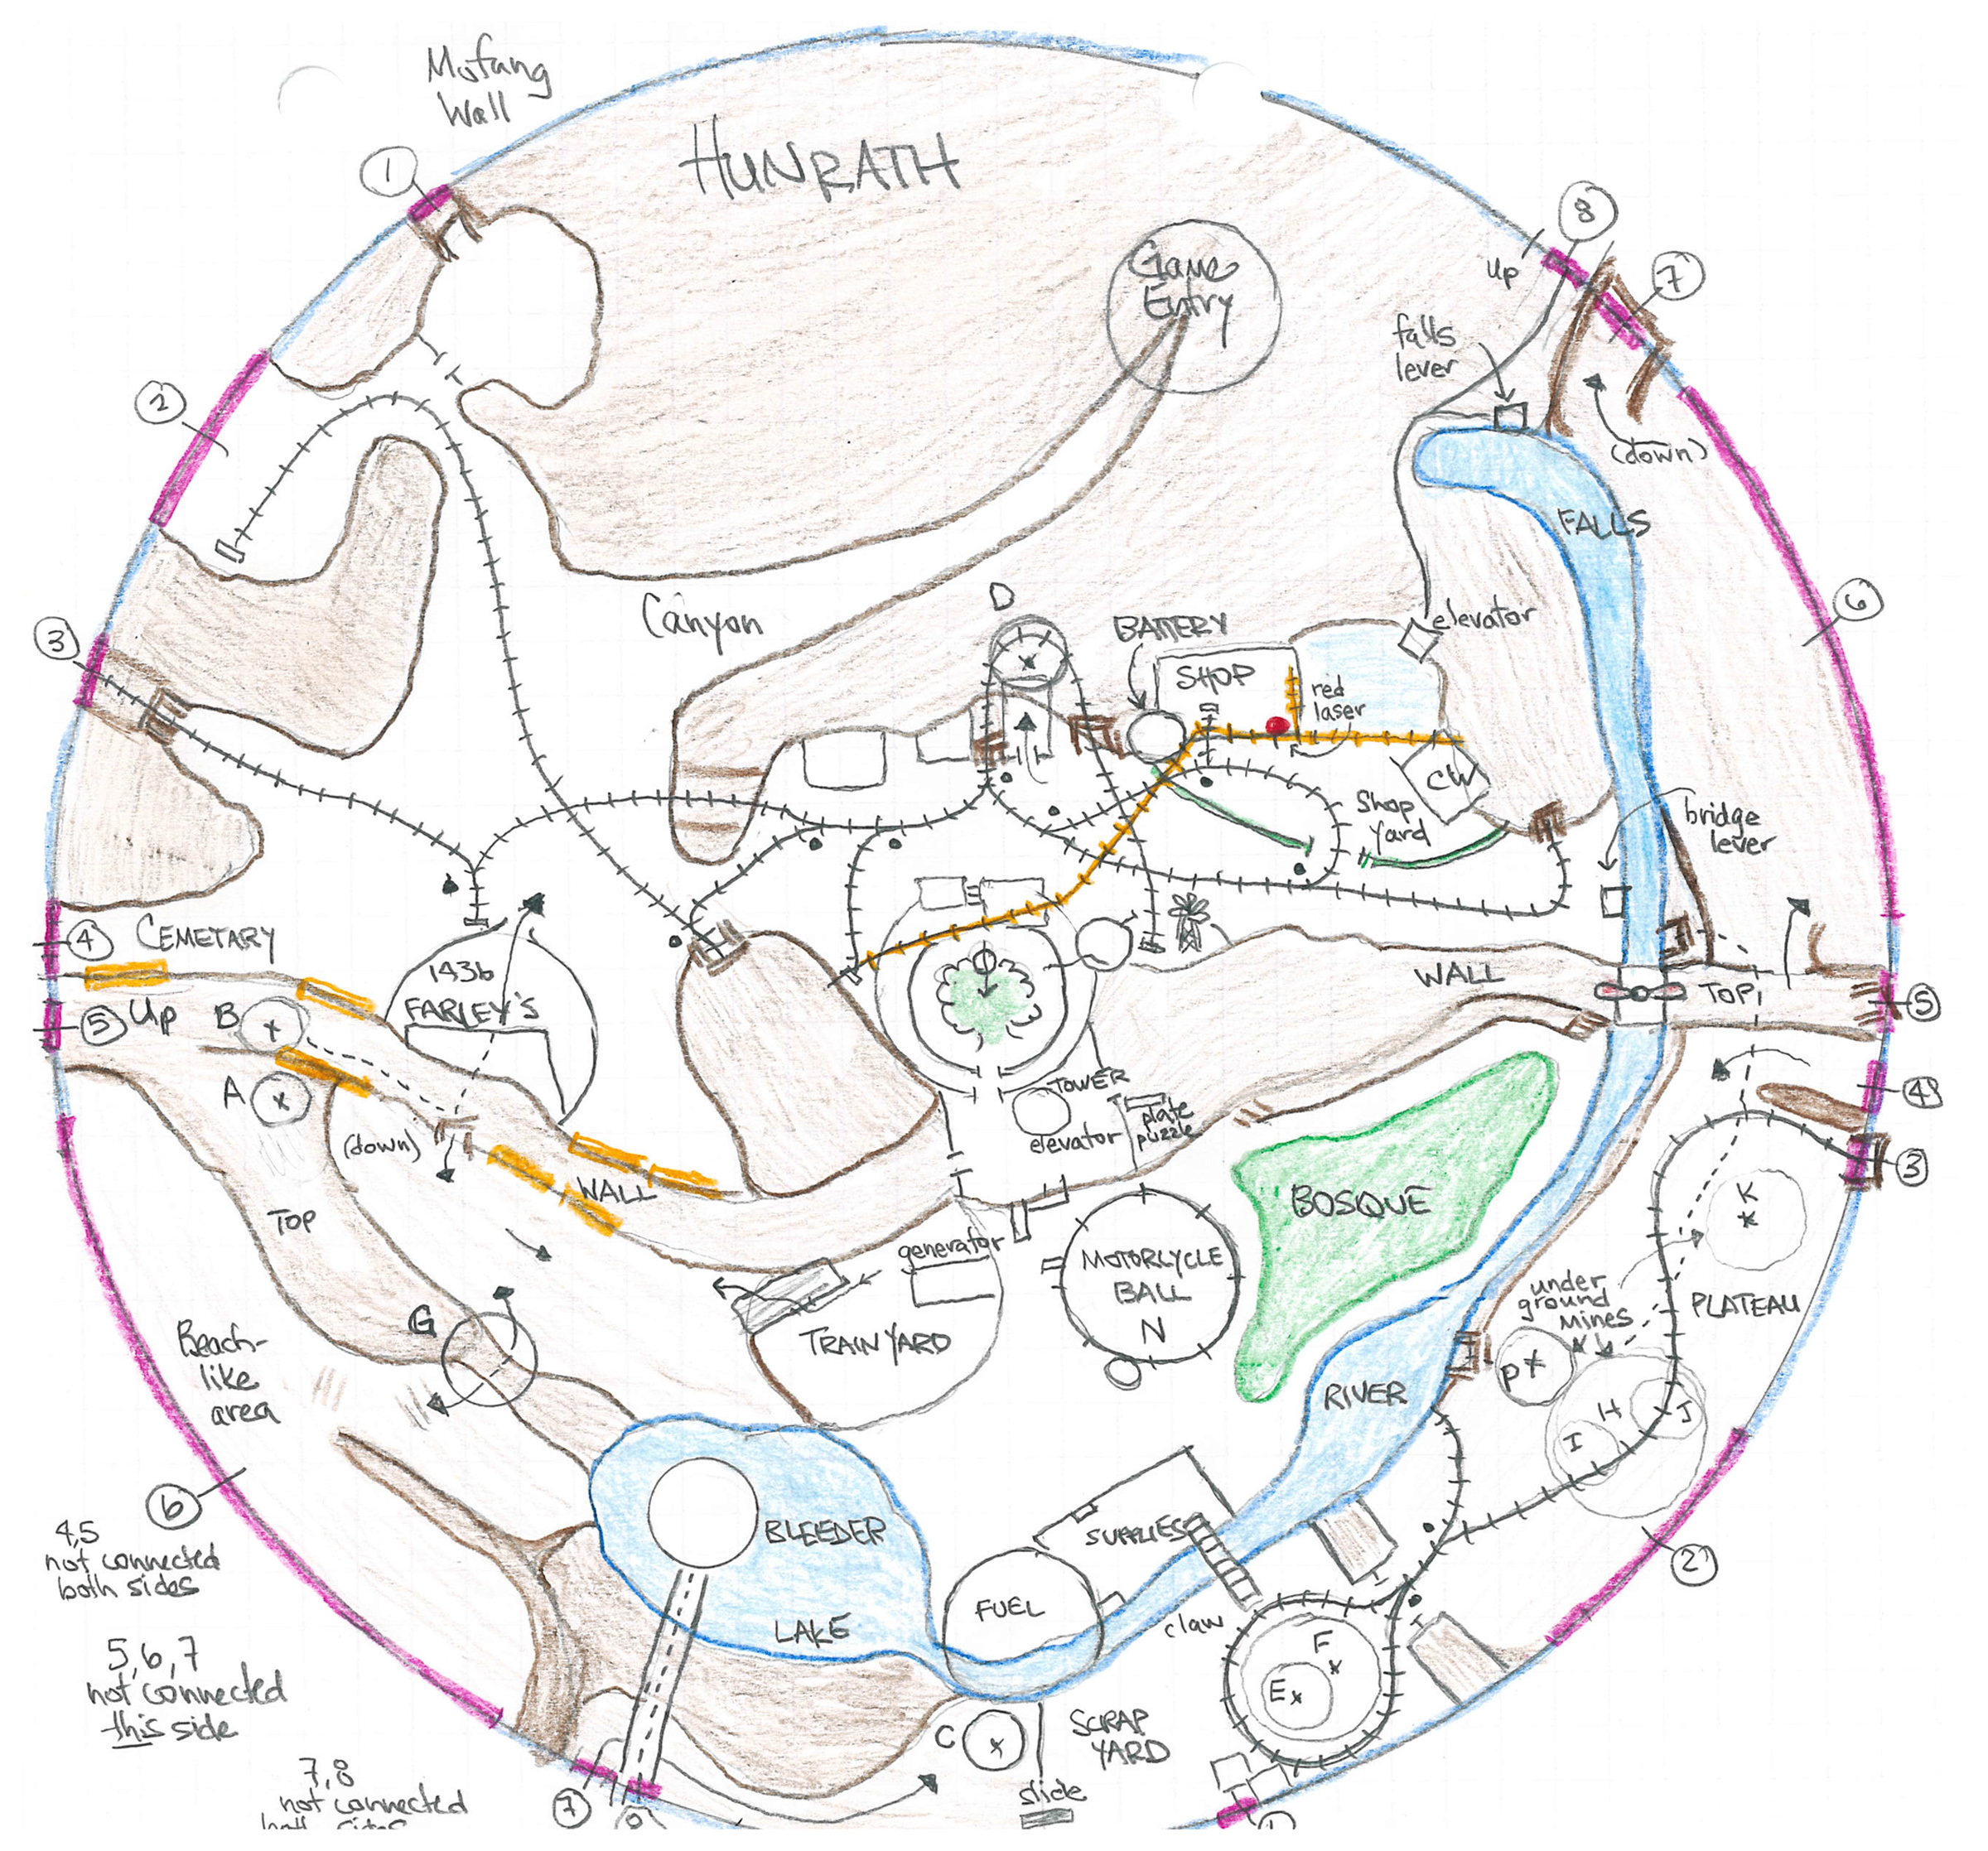
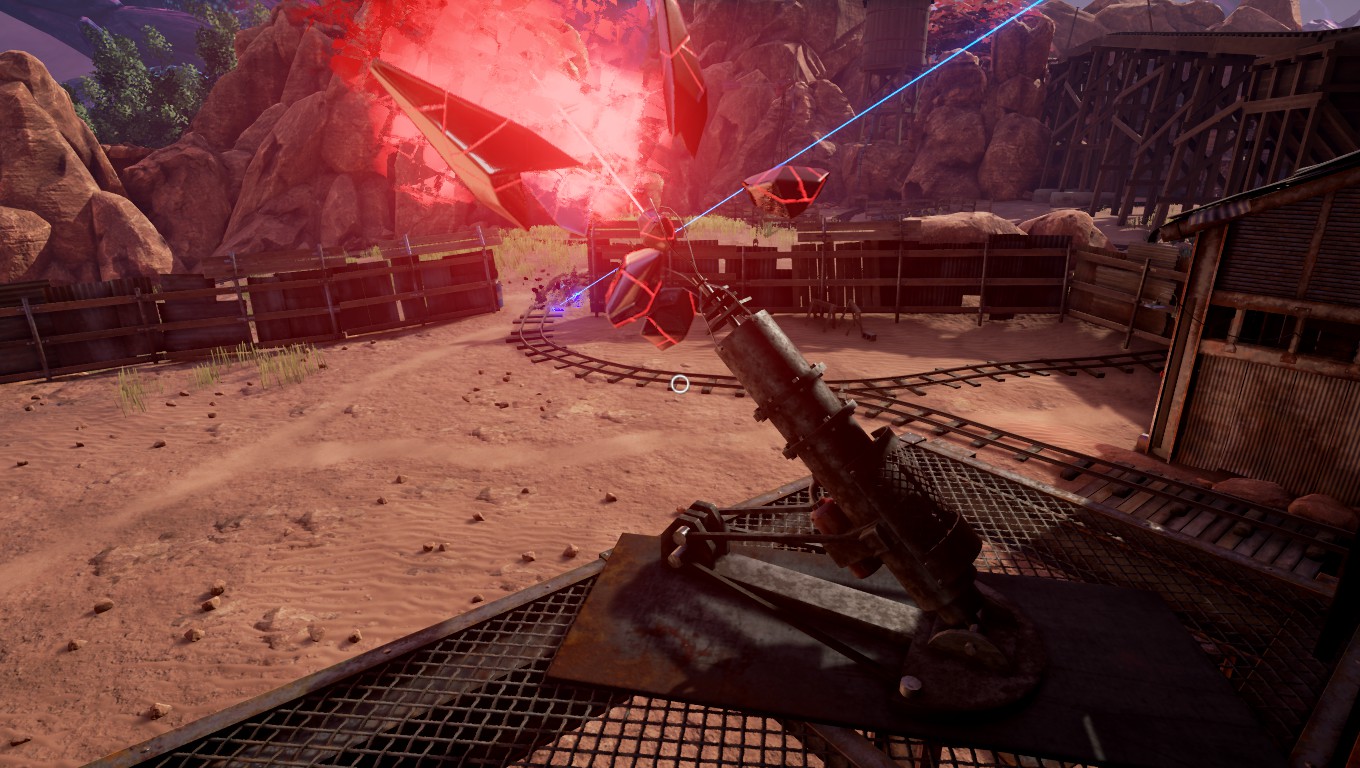
>Where are all those polka-dotted balls? You must be running through them. Maybe this is what Farley mentioned in her diary - about the Mofang not being able to see a sphere? You can't see them in Mofang because they're blue?
Sorry, but you're really wrong here. And this means you've lost a significant part of the story/scenario.
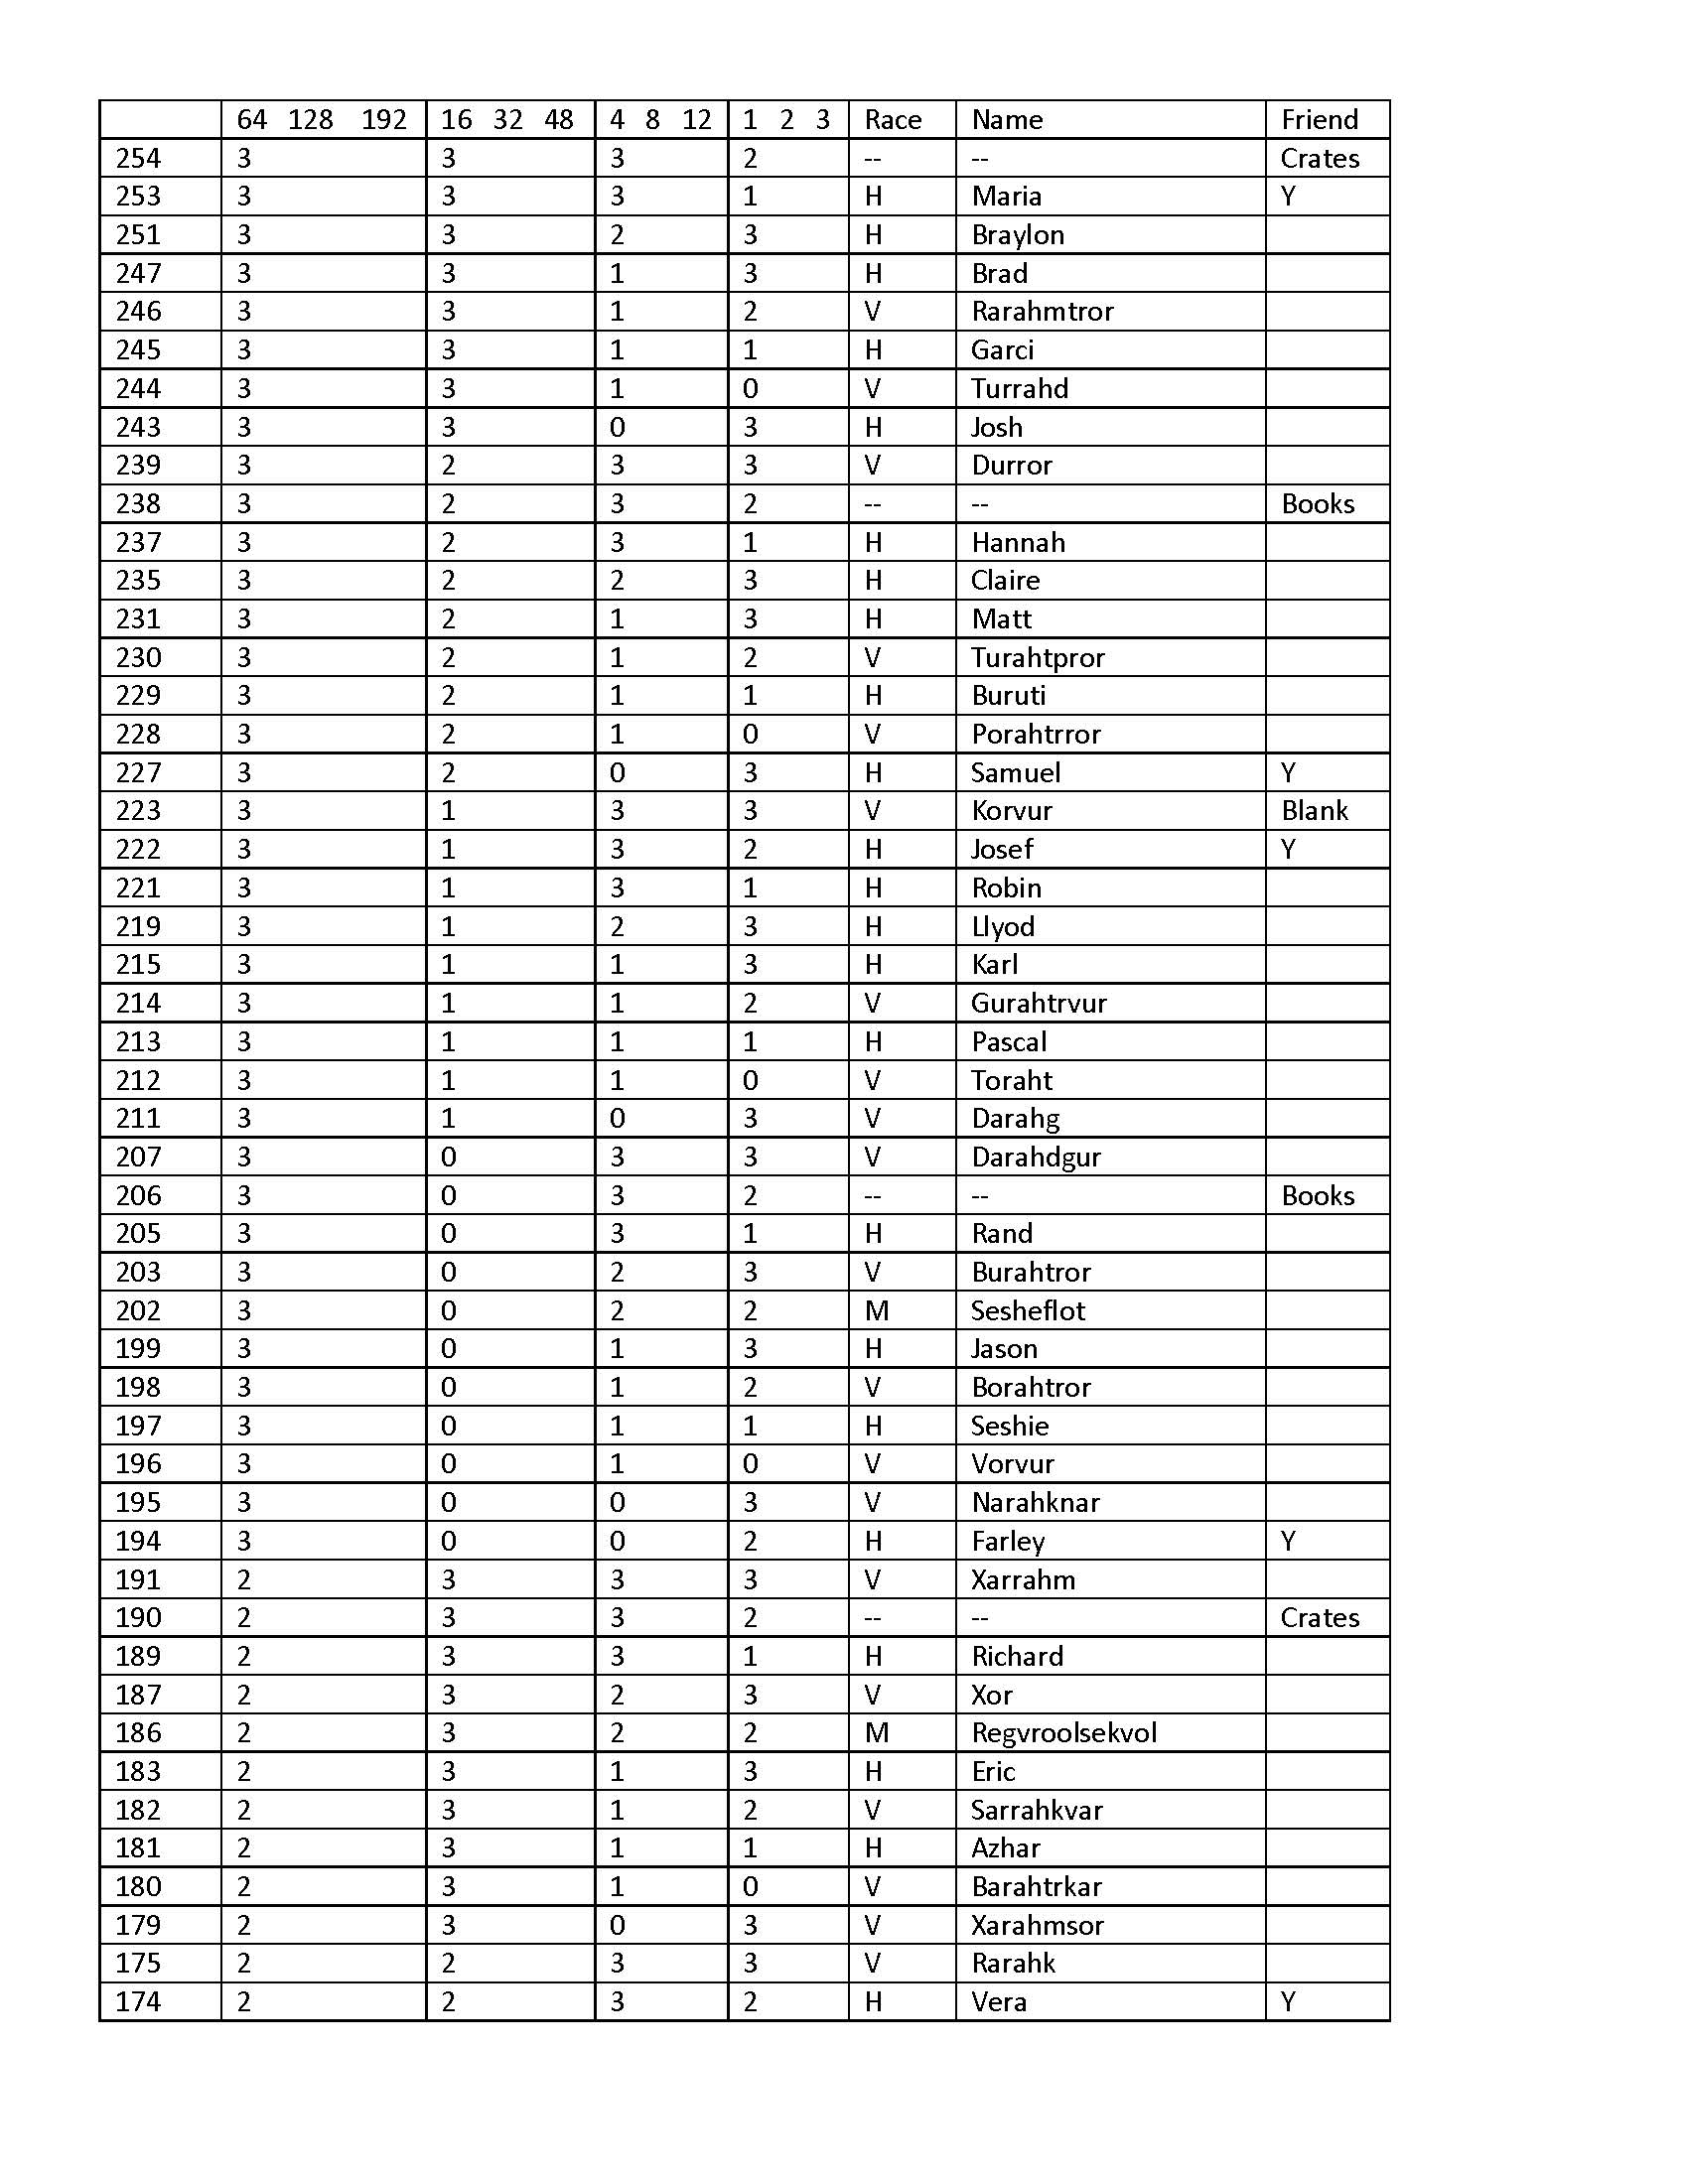
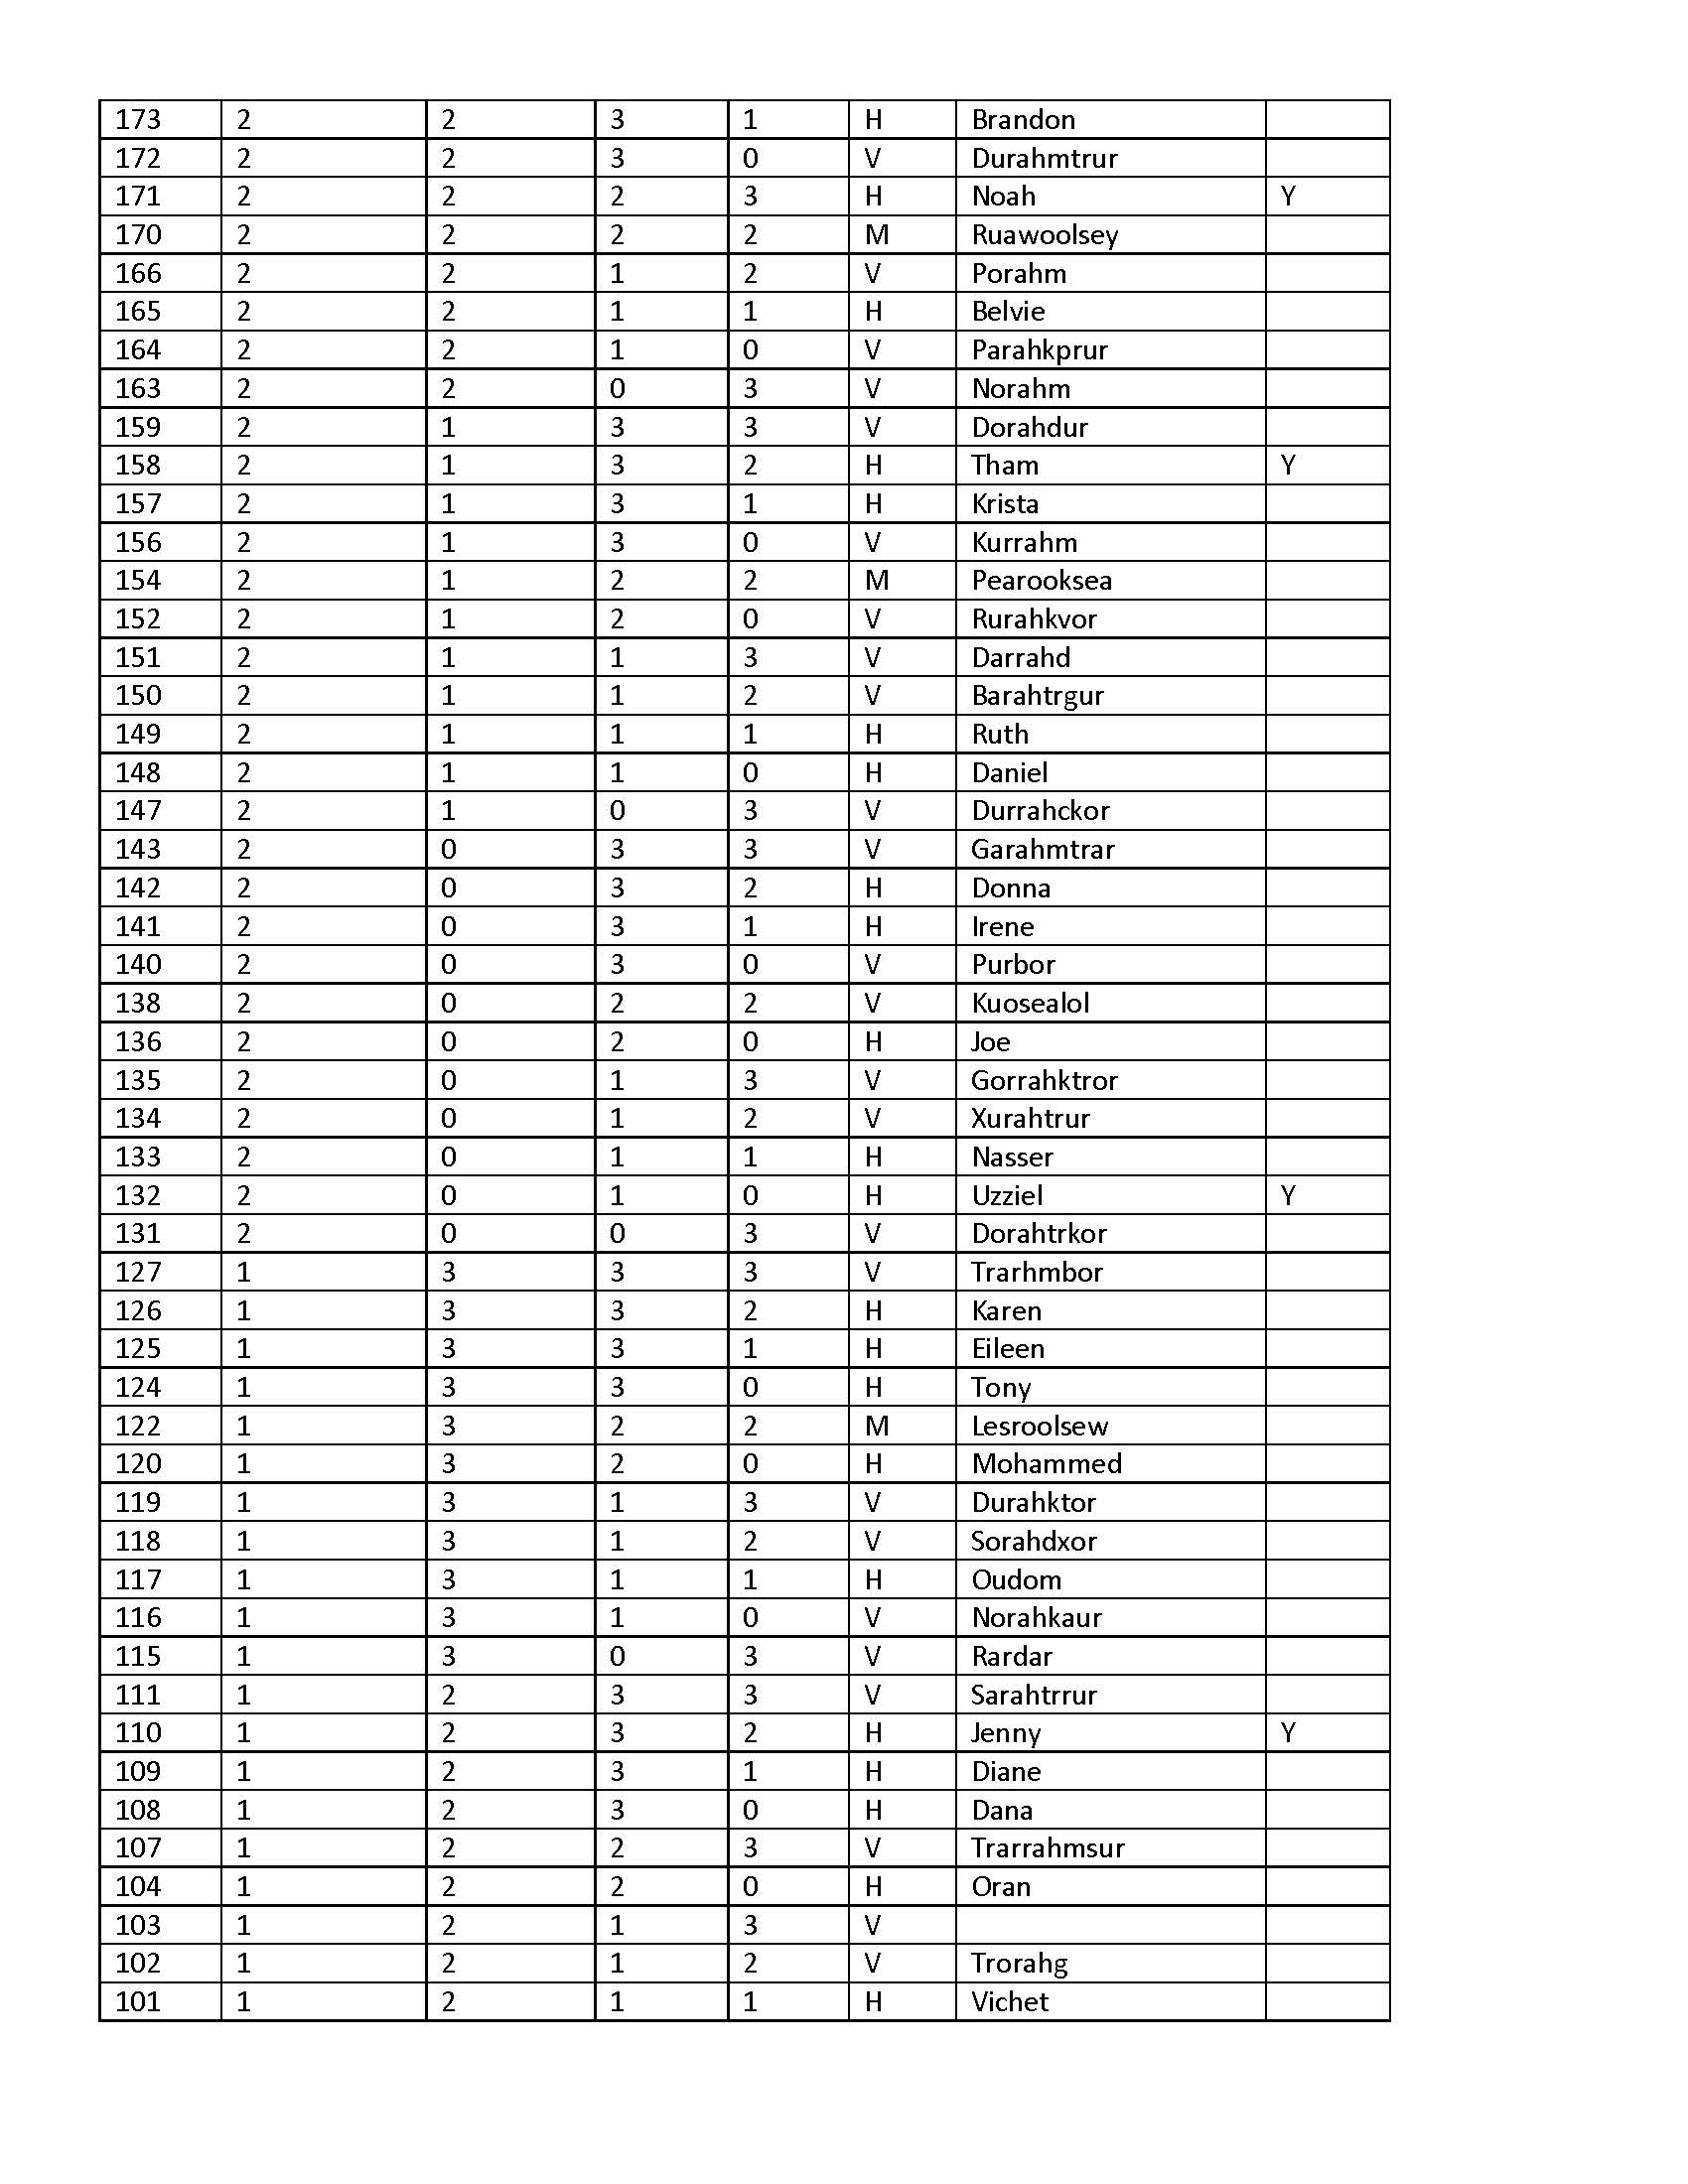
The clue is in the mayor's notes (and many other places):