Haydee
133 ratings
Guide to creating outfits
By Zorba
This guide is intended for modders and for those who know how to draw textures and would love to make mods for the game Haydee, but does not know how to do it.
Это руководство предназначено для модеров и для тех, кто умеет рисовать текстуры, и хотел бы делать моды для игры Haydee, но не знает, как это сделать.
3
   
Award
Favorite
Favorited
Unfavorite
Prepare a folder mod
I know there is already a similar guide from the developers, I also recommend to read it if you are going to do mods for this game. Maybe someone will find new information here. I hope this will help someone.

We assume that we have already created new textures in a third-party app, or at least know how to do it, and want to see them in the game. Of course we can just replace the original textures in the folder Haydee\Outfits. But in this tutorial we will create a new independent outfit so that you can later upload it to the workshop and share them with other players.

Note. However, if you do not know how to do any texture or mesh, you probably got here by accident, then this guide is not for you, read more no sense.

In the example shown Fempyro is a simple but nice retexture Haydee from the author of the Festive Robin-169.
-------------------------------------------------
Это руководство предназначено для модеров и для тех, кто умеет рисовать текстуры, и хотел бы делать моды для игры Haydee, но не знает, как это сделать.

Я знаю, что уже есть подобное руководство от разработчиков, я так же рекомендую обязательно с ним ознакомиться, если вы собираетесь делать моды для этой игры. Возможно, кто-то найдет для себя здесь новую информацию. Надеюсь, это кому-нибудь поможет.

Будем считать, что мы уже создали новые текстуры в стороннем приложении, или, по крайней мере, умеем это делать, и хотим видеть их в игре. Конечно, мы можем просто заменить ими оригинальные текстуры в папке Haydee\Outfits. Но в данном руководстве мы будем создавать новый самостоятельный наряд, чтобы можно было, потом загрузить его в мастерскую и поделиться им с другими игроками.

Примечание. Однако если вы не умеете делать ни текстуры, ни сетки, вероятно, вы попали сюда случайно, то это руководство не для вас, и читать далее нет никакого смысла.

В качестве примера взят Fempyro - простой, но симпатичный ретекстур Haydee от автора Festive Robin-169

1. Create in directory Haydee\Outfits, a new folder with the name of our mod, and put all the necessary files. If the modified files too much, you can separate them into subfolders to avoid confusion.
---------------------------------------------------
Создаем в каталоге Haydee\Outfits, новую папку, с названием нашего мода, и помещаем в неё все необходимые файлы. Если измененных файлов слишком много, то для удобства, можно разделить их на подпапки, чтобы не путаться.
Creating material file
2. Create a new file materials for our model. This can be done either in Edith -> Tool -> Create Material and specify the path to the new textures. Or simply edit in a text editor any other file .mtl.


----------------------------------------------------
Создаем новые файлы материалов для нашей модели. Это можно сделать либо в Edith -> Tool -> Create Material, и указать пути к нашим новым текстурам. Или просто отредактировать в текстовом редакторе, любой другой файл .mtl.

3. If we have several choices of colors textures for a single outfit, each of them create a separate material file, and specify them in the path to the textures - diffuse map, normal map, specular map and, if necessary, emission map, and map censor. More information about textures can be found here Tips for optimization of DDS textures.


------------------------------------------------------
Если у нас несколько вариантов расцветок текстур для одного наряда, то для каждого из них создаем отдельный файл материала, и указываем в них пути к нужным текстурам - diffuse map, normal map, specular map и если необходимо, то emission map и censor map. Подробнее о текстурах, можно прочитать здесь Советы по оптимизации DDS текстур.

4. Save the files under different names or in different subdirectories.


-------------------------------------------------------
Сохраняем файлы либо под разными именами, либо в разных подкаталогах.

Note. If your diffuse texture has transparent areas and is saved in DXT5 format with alpha channel, then in mtl file in Type line write MASK. If you leave the OPAQUE, the transparent areas will be black.

-------------------------------------------------------
Примечание. Если ваша диффузная текстура имеет прозрачные области и сохранена в формате DXT5 с альфа каналом, то в файле mtl в строке Type пишем MASK. Если оставить OPAQUE, то прозрачные области будут черными.
Creating outfit file
5. Create a new text file with the extension .outfit, put it in a folder Haydee\Outfits and open it with any text editor (I recommend Notepad++). Or just copy, rename and edit the original file Haydee.outfit.
--------------------------------------------------------
Создаем новый текстовый файл с расширением .outfit, помещаем его в папку Haydee\Outfits и открываем его любым текстовым редактором (я рекомендую Notepad++). Либо просто копируем, переименовываем и редактируем оригинальный файл Haydee.outfit.

6. In the line name, write the name of your mod (any unique, except for Haydee).


---------------------------------------------------------
В строчке name, в кавычках, пишем имя вашего мода (любое уникальное, кроме Haydee).

7. If you did not change the model and use the standard mesh Haydee, in the lines of the mesh and skin are not changing anything. Otherwise, append the path to our new file .mesh and .skin
---------------------------------------------------------
Если вы не изменяли модель и используете стандартную сетку Haydee, то в строчках mesh и skin ничего не меняем. В противном случае, прописываем пути к нашим новым файлам .mesh и .skin.

8. In the line material, write the path to our newly created files .mtl mentioned at the beginning of this tutorial.
----------------------------------------------------------
В строчке материал, пишем путь к нашим вновь созданным файлам .mtl, о которых говорилось в самом начале данного руководства.

9. To combine different skins in one outfit, you need to add slots in the script .outfit. You can access this file from any other mod with a text editor and see how it is done for an example.


-----------------------------------------------------------
Чтобы объединить разные скины в один наряд, вам нужно добавить слоты в сценарий .outfit. Вы можете открыть такой файл от любого другого мода текстовым редактором и посмотреть, как это сделано для примера.

10. So, slots is something that will switch in the menu of the outfit in the game. For each slot, specify the "slot name" and "item title applies to the slot" (to your taste, what you like) - for example enable, disable, red or blue and so on...
------------------------------------------------------------
Итак, слоты - это то, что будет переключаться в меню наряда в игре. Для каждого слота, в кавычках, указываем "имя слота" и "значение пункта, к которому применяется слот" (на ваш вкус, какое вам понравится). - например вкл. выкл., красный или синий и тд.

11. The attributes: common mask, visor, jacket - true or false - determines whether to display related accessories in the game if you use a mesh for which they are written. Read more about them has been written by developers Outfits explained[cs2bus.com]. For example, using these attributes, you can turn the Vest or Clock if they don't fit to your character model.
------------------------------------------------------------
Атрибуты: common, mask, visor, jacket - true или false - определяют, будут ли отображаться соответствующие аксессуары в игре при использовании сетки, для которой они назначены. Подробнее о них уже было написано разработчиками в руководстве Outfits explained. Например, с помощью этих атрибутов, вы можете выключить жилет или часы, если они не подходят к вашей новой модели персонажа.
The result | Результат
When your mod is completed, after starting the game, do not forget to check the file game.log for no error records (located in the root directory of the game, together with launcher.exe).


------------------------------------------------------
Когда ваш мод будет полностью завершен, после запуска игры, не забывайте проверять файл game.log на отсутствие ошибочных записей (находится в корневом каталоге игры, вместе с launcher.exe).
Optimization tips
Recommendation. For better memory optimization, use only short file names without gap. And don't use textures with resolutions higher than 2048x2048 pixels. Do not save textures with an alpha channel, if it is not required. Save the diffuse, specular and emission texture in DXT1 format. Only use DXT5 for normal map. This will greatly relieve the computer memory and to avoid long loadings during the launch of the game. And not too zealous with modifiers in Blender. Do not overload the game high poly meshes. Remember that often the players have installed not alone mod, but many. Minor shortcomings of the model, you can almost always hide behind textures.

If your mod has images of erotic content, you should read the following topic.
What is the Censor map

Important. Please note that names and file paths, it is ImPorTAnt to obSErve the case of letters. After packing your mod in .pack the file. The files in it will be lost if the paths to them were written in a different letter case.

If something is unclear, don't hesitate to ask questions.

Sorry for my bad English.
I wish you success in the field of modding.
------------------------------------------------------

Совет. Для лучшей оптимизации памяти, используйте только короткие имена файлов без пробелов. И не используйте текстуры разрешением выше, чем 2048х2048 пикселей. Так же не стоит сохранять текстуры с альфа каналом, если он не требуется. Сохраняйте diffuse, specular и emission текстуры в формате DXT1. Используйте DXT5 только для normal map. Это значительно разгрузит память компьютера и поможет избежать долгих загрузок во время запуска игры. И не усердствуйте слишком с модификаторами в Blender. Не перегружайте игру высокополигональными сетками. Помните, что зачастую у игроков установлен не один мод, а множество. Мелкие недостатки модели, почти всегда можно скрыть за текстурами.

Если ваш мод имеет изображения эротического содержания, то вам следует ознакомиться со следующей темой.
What is the Censor map.

Важно. Учтите, что в именах и в путях к файлам, вАЖно сОблюдаТь регистр букв. После упаковки вашего мода в .pack файл. Файлы внутри него потеряются, если пути к ним были написаны в другом буквенном регистре.

Если что-то непонятно, не стесняйтесь задавать вопросы.

Желаю Вам успехов в области моддинга.
24 Comments
Hunterwolf165 14 Nov, 2021 @ 2:03pm 
there not a video to show how to do this precisely? i followed the first few steps and something aint right cause the material no wanna show up after i did the .mtl
ℭℴnŋℴŗᙢαçℓℯℴd 2 Oct, 2020 @ 3:49am 
Спасибо!:ss2heart::cozybethesda::cozyprodman::cozyspaceengineersb:
Zorba  [author] 2 Oct, 2020 @ 3:18am 
Такое руководство есть
https://cs2bus.com/sharedfiles/filedetails/?id=957883858
ℭℴnŋℴŗᙢαçℓℯℴd 2 Oct, 2020 @ 1:00am 
Будет ли руководство по созданию мода с заменой модели? Пока что у меня с этим большие проблемы.
Mnemonic3_0 10 May, 2020 @ 12:02pm 
Спасибо. Разобрался.
Zorba  [author] 30 Aug, 2019 @ 11:51pm 
Где вы это взяли? Это явно не оригинальный файл Haydee.outfit (50 тыс. строк с какими-то параметрами веса).
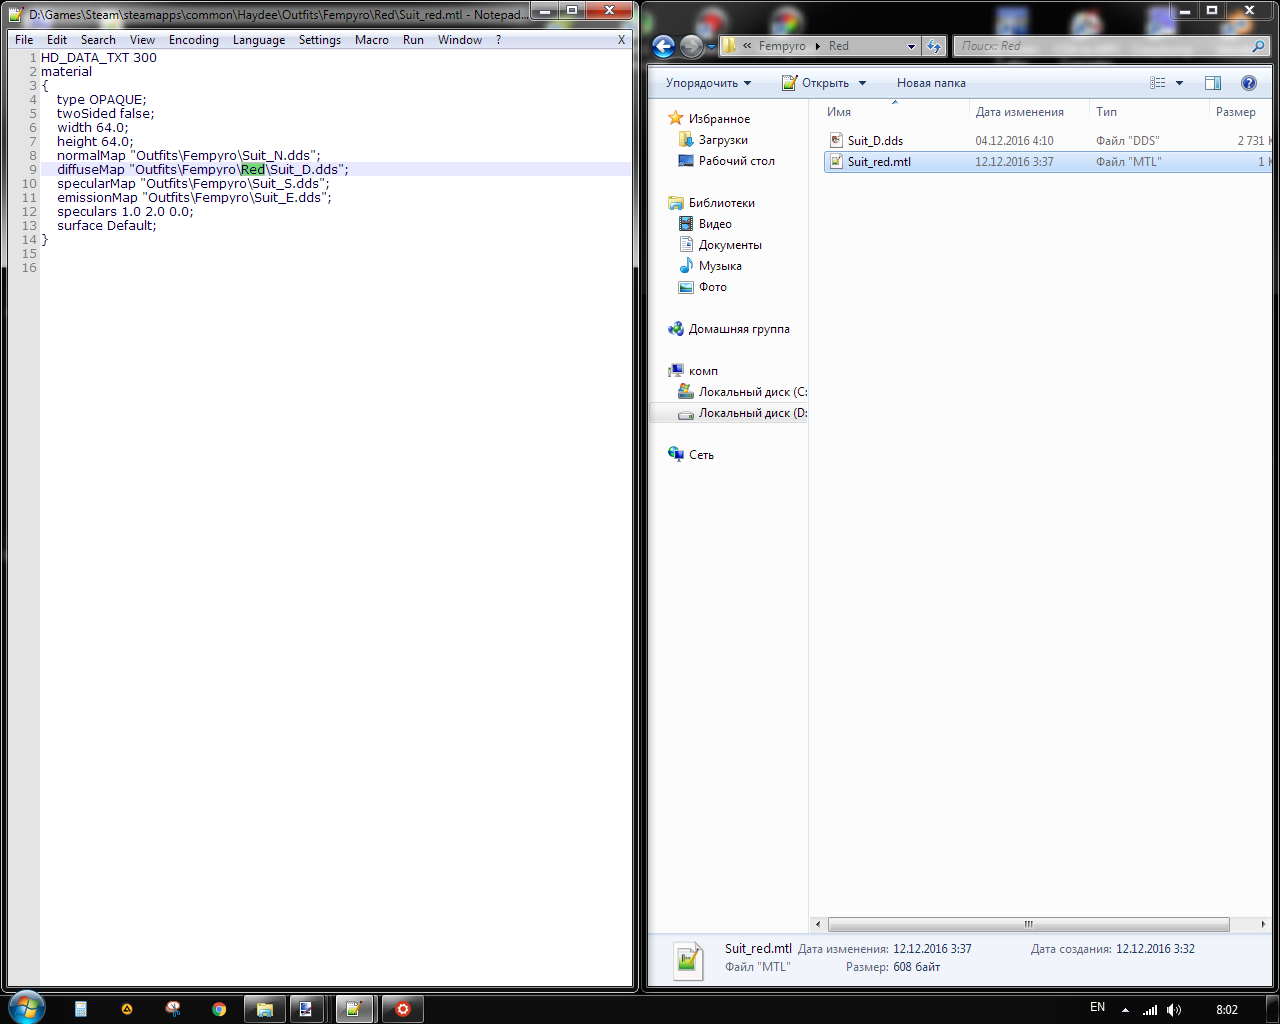
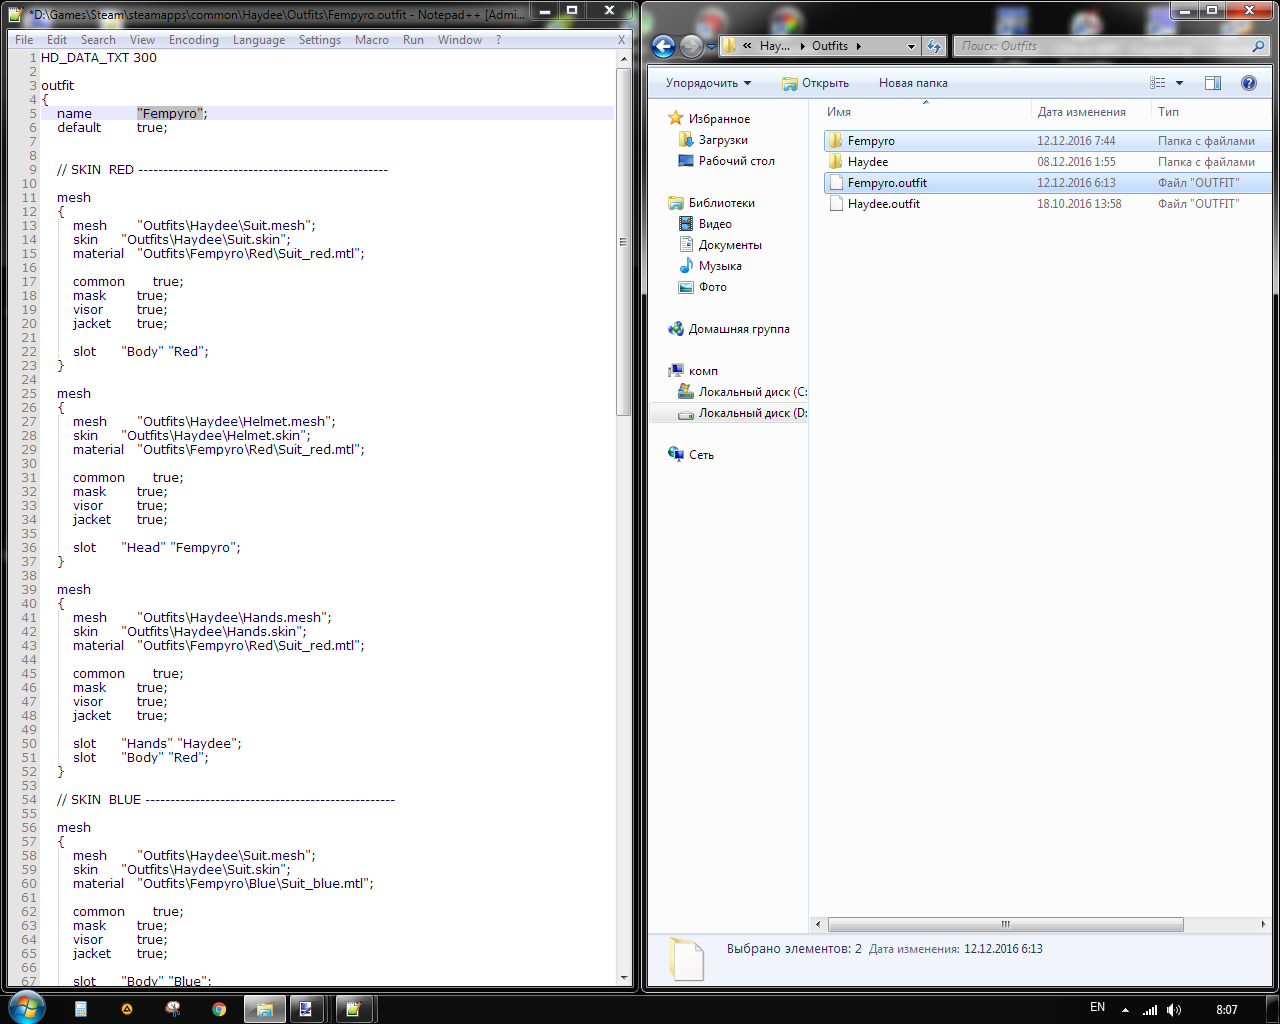
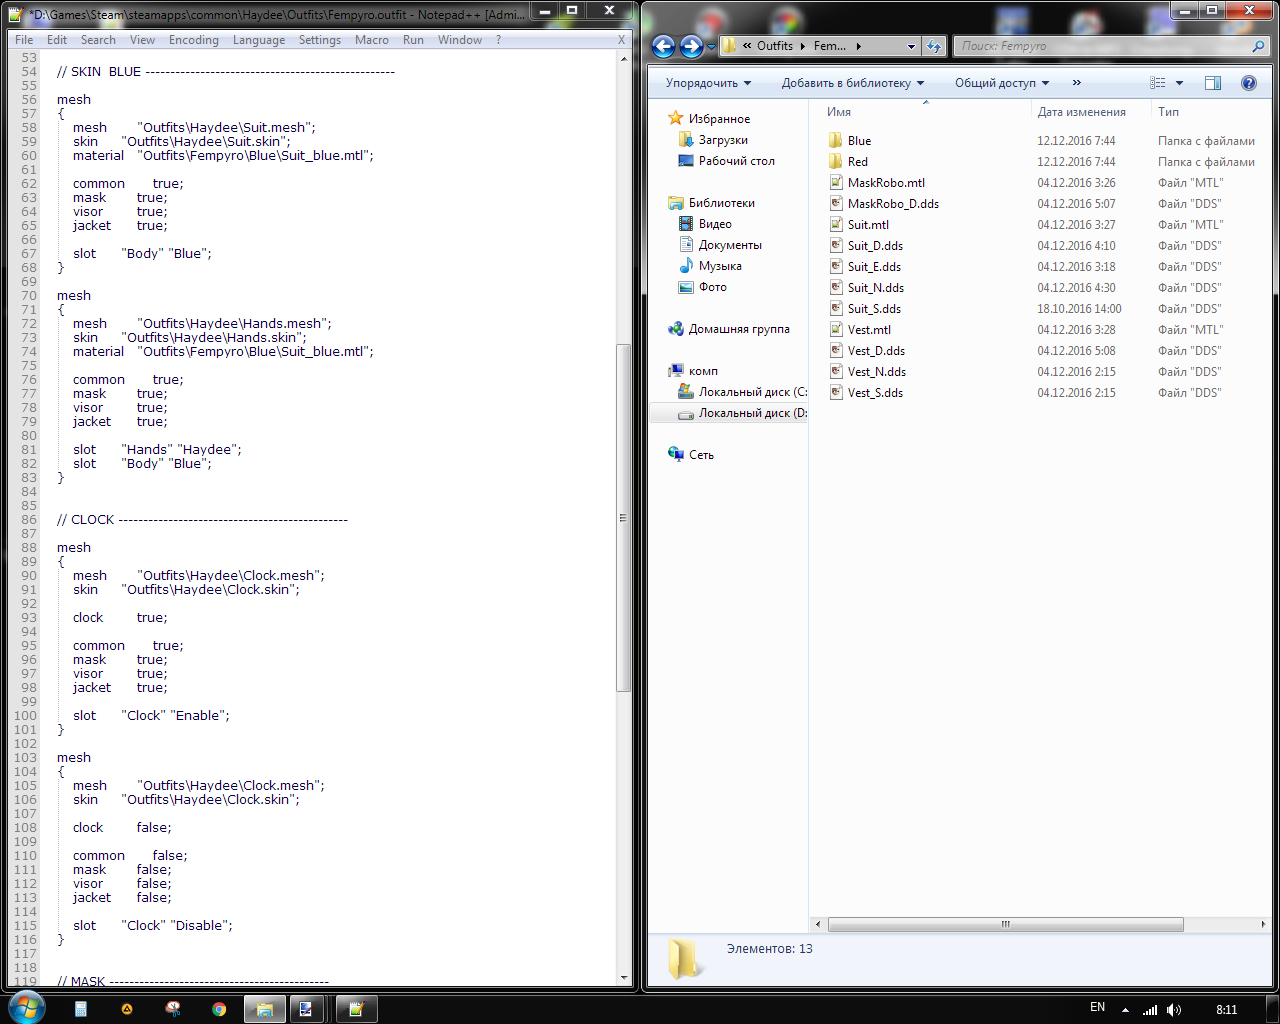
Вот оригинальный файл Haydee.outfit [drive.google.com]
Вот так он выглядит https://i.imgur.com/0Nk21mO.png
Размер файла 1,5 Кб. Он не изменялся с 17-го года и имеет всего 100 строк кода.
Сделайте проверку целостности файлов.
Вы можете так же создать .outfit из чистого .txt файла или взять пример из любого другого мода мастерской, предварительно распаковав его.
Aper in Flumine 30 Aug, 2019 @ 6:31pm 
Zorba  [author] 30 Aug, 2019 @ 3:15am 
@ImSocialist, Можно конкретней, что вы имеете ввиду? Я не вижу никаких изменений в структуре .outfit файлов. Какими они были изначально, такими и остались. Чем вы их открываете? Попробуйте Notepad++.
Aper in Flumine 30 Aug, 2019 @ 1:53am 
Разрабы что-то натворили в .outfit файлах, теперь он выглядит абсолютно непонятно, как теперь вписать модели и скины???
Zorba  [author] 2 Apr, 2018 @ 5:18am 
saulor696 ,
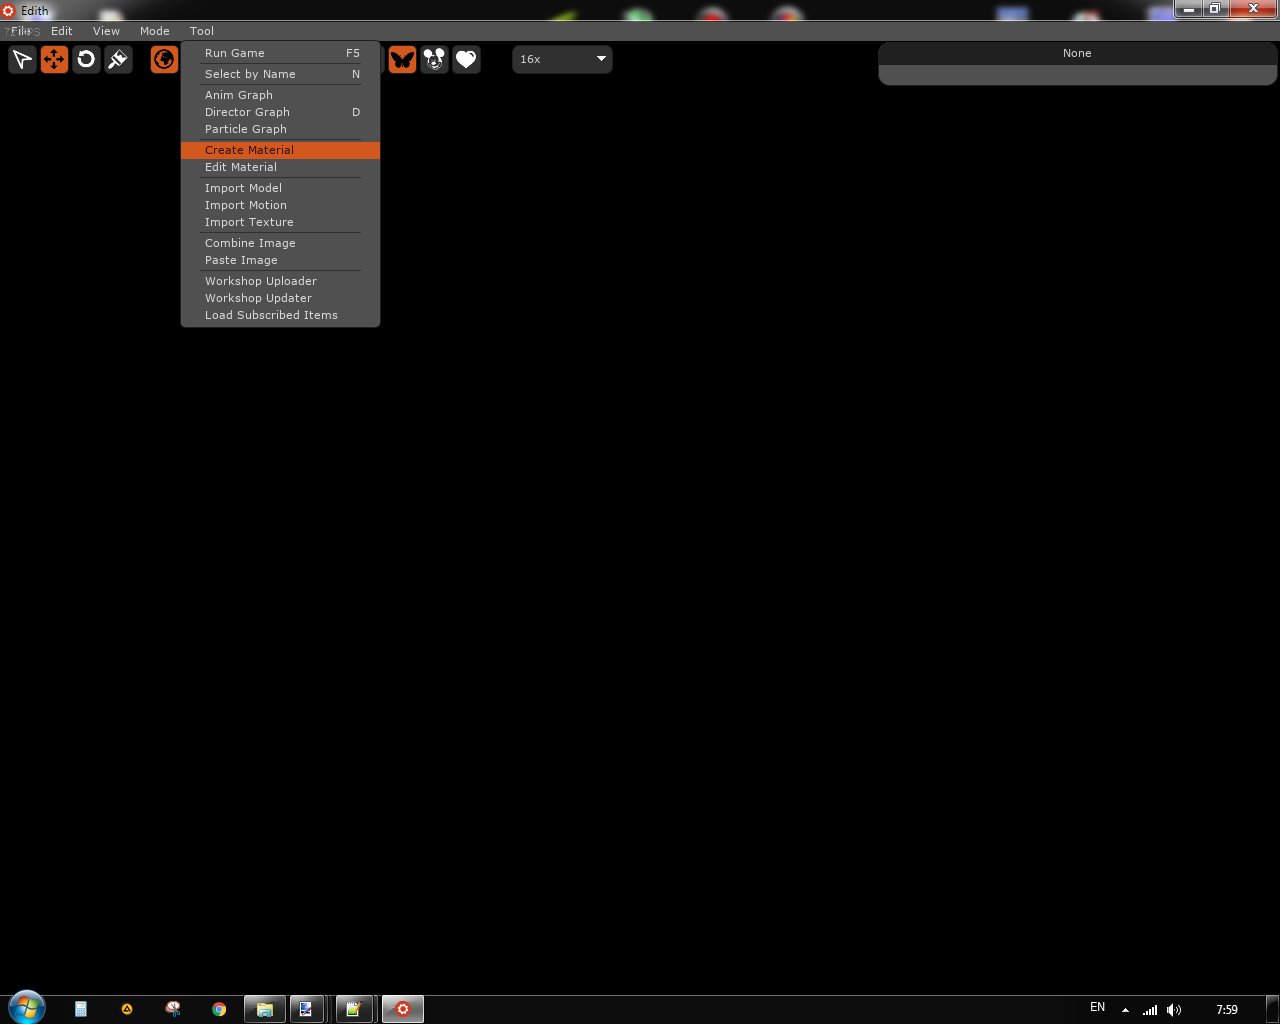
Edith editor is already included with the purchased game. The executable is located in the root directory of the game at \Steam\steamapps\common\Haydee